Tabla de contenido
Publicidad
Enlaces rápidos
INSTALLATION INSTRUCTIONS
GUÍA DE INSTALACIÓN
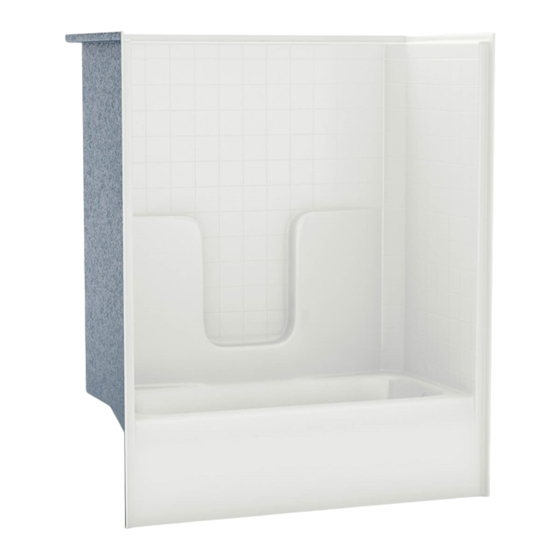
TUB SHOWER MODULES
MODULOS DE BAÑERA DUCHA
CM-60 R/L CMT-60 R/L GB-60 R/L
141000
CM-60 R
CM-60 L (Shown)
141185
CMT-60 R
CMT-60 L
Read all instructions carefully before proceeding.
Leer detenidamente todas las instrucciones antes de comenzar la
instalación
IMPORTANT
IMPORTANTE
MODEL • MODELO
141000 • 141004 • 141185
• Record the serial number
• Registre el número de serie
141004
GB-60 R
GB-60 L (Shown)
SAVE THIS GUIDE FOR FUTURE REFERENCE.
CONSERVAR ESTE MANUAL COMO REFERENCIA.
Serial number • Números de serie
Publicidad
Tabla de contenido

Resumen de contenidos para MAAX Aker CM-60 R
- Página 1 INSTALLATION INSTRUCTIONS GUÍA DE INSTALACIÓN TUB SHOWER MODULES MODULOS DE BAÑERA DUCHA CM-60 R/L CMT-60 R/L GB-60 R/L MODEL • MODELO 141000 • 141004 • 141185 141000 141004 CM-60 R GB-60 R CM-60 L (Shown) GB-60 L (Shown) 141185 CMT-60 R CMT-60 L Read all instructions carefully before proceeding.
-
Página 2: Tabla De Contenido
Table of contents: Page Tools and supplies......................3 General rules........................4 1. Building the structure...................... 6 2. Position the unit in the alcove..................7 3. Securing the unit in place....................8 4. Wall fi nish with fl oor......................9 4. Wall fi nish without fl oor....................10 Unit surface care......................... -
Página 3: Tools And Supplies
TOOLS HERRAMIENTAS REQUIRED NECESARIAS Electric drill Level Pencil Taladro eléctrico Nivel Lápiz Screwdriver Security equipment Square Destornillador Équipamiento de Escuadra seguridad SUPPLIES MATERIALES SOLD SEPARATELY VENDIDOS POR SEPARADO Box of #8x1¾"flathead screws Clear silicone sealant Wood shims Caja de tornillos #8x1¾" Sellador de silicona Cuñas de madera de cabeza plana... -
Página 4: General Rules
Estas directrices son recomendadas por Aker Plastics Company Inc. (hereafter “MAAX”) for the proper installation of their product. Inc. (en lo sucesivo “MAAX”) para la correcta instalación de su A careful review of these procedures (and any referenced producto. Una revisión cuidadosa de estos procedimientos (y... - Página 5 Consulte las publicaciones que se indican para obtener más información antes de continuar. La línea de de productos de baño de Aker por Maax no requiere The Aker by Maax bathware line of products does not require soporte adicional debajo de la unidad (es) durante el proceso additional support under the unit(s) during the installation pro- de instalación.
-
Página 6: Building The Structure
Follow all instructions and check Avg. oper. Max. sump Dry weight Unit surface Sump bottom volume capacity Model unit (1) Superficie Parte inferior Volumen Capacidad them off as you go. Modelo Peso seco de de la unidad del sumidero operacional max. -
Página 7: Position The Unit In The Alcove
Position unit in the alcove; drain alignment STEP Colocar la unidad en el nicho; alineamiento del desagüe ETAPA Place the tub shower unit inside the alcove. Check me! Colocar la unidad de bañera ducha dentro del nicho. Marcarme! If an optional unit cap is used, the cap must be installed on the unit BEFORE it is placed on the alcove. -
Página 8: Securing The Unit In Place
Securing the unit in place STEP Asegurar la unidad en su lugar ETAPA After the unit is confi rmed level and square in the alcove, drill 1/8" holes through the fastening fl ange Check me! at each framing member and every 8" along the front Marcarme! fastening fl... -
Página 9: Wall Fi Nish With Fl Oor
Wall fi nish with roofcap STEP Acabado de la pared con techo ETAPA Finishing panels (plasterboard, ceramic tile, etc.) should completely cover the fastening flange. The joint between the wall panels and the finishing panels can Check me! be covered with a joint compound, a plastic stripe or a Marcarme! tile strip. -
Página 10: Wall Fi Nish Without Fl Oor
Wall fi nish without roofcap STEP Acabado de la pared sin techo ETAPA Finishing panels (plasterboard, ceramic tile, etc.) should completely cover the fastening flange. The joint between the wall panels and the finishing panels can Check me! be covered with a joint compound, a plastic stripe or a Marcarme! tile strip. -
Página 11: Unit Surface Care
Unit Surface Care Cuidado y Limpieza de la Superficie de la Unidad WARNING! ¡ADVERTENCIA! : NEVER USE ABRASIVE MATERIALS OR ABRASIVE NUNCA UTILIZAR MATERIALES NI LIMPIADORES CLEANERS ON THE UNIT SURFACE! ABRASIVOS EN LA SUPERFICIE DE LA UNIDAD. LEER Y RESPETAR TODAS LAS ETIQUETAS E INSTRUCCIONES INCLUIDAS CON EL EMBALAJE READ AND FOLLOW ALL PACKAGE LABELS AND INSTRUCTIONS! -
Página 12: Warranty
En caso de additional limitations apply. uso comercial, se aplican otras restricciones. Maax warrants acrylic units to be free from Maax garantiza las unidades de acrílico defects in workmanship and materials under contra cualquier defecto de material o de normal use and service for a period of fabricación en condiciones normales de...


