Publicidad
Enlaces rápidos
120VAC, 60Hz
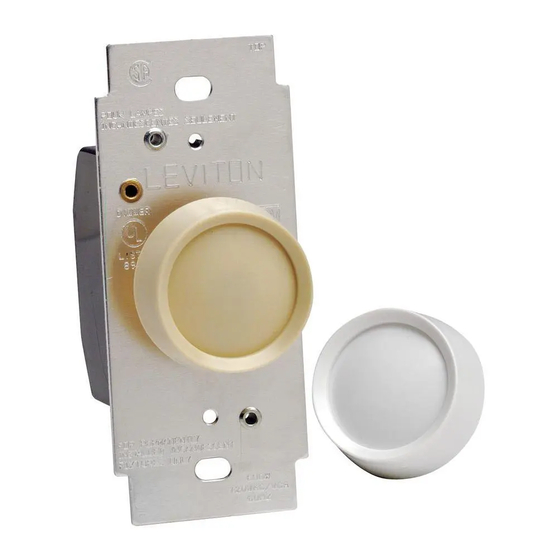
Push On/Off Dimmers
Cat. Nos. 6681 and 6683, 600W
Cat. Nos. 6682 and 6684, 600W (Lighted)
INSTALLATION INSTRUCTIONS
120 V c. a., 60 Hz
Gradateurs à bouton poussoir
Nº de cat. 6681 et 6683, 600 W
Nº de cat. 6682 et 6684, 600 W
(Lumineuse)
DIRECTIVES D'INSTALLATION
120VCA, 60Hz
Atenuadores de Presión
Nos. de Cat. 6681 y 6683, 600W
Nos. de Cat. 6682 y 6684, 600W
(Luminoso)
INSTRUCCIONES DE INSTALACION
PK-92566-10-02-2C
LIMITED 5 YEAR WARRANTY AND EXCLUSIONS
Leviton warrants to the original consumer purchaser and not
for the benefit of anyone else that this product at the time of its
sale by Leviton is free of defects in materials and workmanship
under normal and proper use for five years from the purchase
date. Leviton's only obligation is to correct such defects by repair
or replacement, at its option, if within such five year period the
product is returned prepaid, with proof of purchase date, and a
description of the problem to Leviton Manufacturing Co., Inc.,
Att: Quality Assurance Department, 59-25 Little Neck
Parkway, Little Neck, New York 11362-2591. This warranty
excludes and there is disclaimed liability for labor for removal
of this product or reinstallation. This warranty is void if this
product is installed improperly or in an improper environment,
overloaded, misused, opened, abused, or altered in any
manner, or is not used under normal operating conditions or
not in accordance with any labels or instructions. There are no
other or implied warranties of any kind, including
merchantability and fitness for a particular purpose, but if
any implied warranty is required by the applicable jurisdiction,
the duration of any such implied warranty, including
merchantability and fitness for a particular purpose, is limited
to five years. Leviton is not liable for incidental, indirect,
special, or consequential damages, including without
limitation, damage to, or loss of use of, any equipment,
lost sales or profits or delay or failure to perform this
warranty obligation. The remedies provided herein are the
exclusive remedies under this warranty, whether based on
contract, tort or otherwise.
For Technical Assistance Call:
1-800-824-3005 (U.S.A. Only)
www.leviton.com
PK-92566-10-02-2C
• Controls one load from two locations
RFI filter for radio/TV interference
•
Fits standard wall boxes
•
WARNING: TO BE INSTALLED AND/OR USED IN ACCORDANCE WITH APPROPRIATE ELECTRICAL CODES AND REGULATIONS.
WARNING: IF YOU ARE NOT SURE ABOUT ANY PART OF THESE INSTRUCTIONS, CONSULT A QUALIFIED ELECTRICIAN.
WARNING: TO AVOID OVERHEATING AND POSSIBLE DAMAGE TO THIS DEVICE AND OTHER EQUIPMENT, DO NOT INSTALL TO CONTROL A RECEPTACLE,
FLUORESCENT LIGHTING, A MOTOR- OR A TRANSFORMER-OPERATED APPLIANCE.
OTHER CAUTIONS:
1. USE ONLY ONE (1) DIMMER IN A 3-WAY CIRCUIT. THE REMAINING 3-WAY SWITCH WILL TURN THE LIGHT ON AT THE
BRIGHTNESS LEVEL SELECTED AT THE DIMMER.
2. DISCONNECT POWER WHEN SERVICING FIXTURE.
3. USE THIS DEVICE ONLY WITH COPPER OR COPPER CLAD WIRE. WITH ALUMINUM WIRE USE ONLY DEVICES MARKED CO/ALR OR CU/AL.
GANGING/DERATING:
When two units are ganged together, use no more than 500W load on each device. When three or more units are ganged together, use no more than a 400W load on each
unit.
TO INSTALL:
1. WARNING: TO AVOID FIRE, SHOCK, OR DEATH; TURN OFF POWER AT CIRCUIT BREAKER OR FUSE AND TEST THAT POWER IS OFF BEFORE WIRING!
2. Remove existing wallplate and switch, if applicable.
3. Remove 5/8" (1.6 cm) of insulation from each circuit conductor. Make sure the ends of wires are straight.
4. Connect wires per appropriate WIRING DIAGRAM as follows: Twist strands of each lead tightly together and, with circuit conductors, push firmly into appropriate wire
connector. Screw connectors on clockwise making sure no bare conductors show below the wire connectors. Secure each connector with electrical tape.
5. Installation may now be completed by carefully positioning all wires to provide room in outlet box for dimmer. Mount dimmer into box with mounting screws supplied.
Attach wallplate.
6. Restore power at circuit breaker or fuse. INSTALLATION IS COMPLETE.
• Commande un charge à partir de deux emplacements
• Filtre antibrouillage et électromagnétique
• S'adapte à toute boîte simple standard
AVERTISSEMENT : INSTALLER OU UTILISER CONFORMÉMENT AUX CODES DE L'ÉLECTRICITÉ EN VIGUEUR.
AVERTISSEMENT : À DÉFAUT DE BIEN COMPRENDRE LES DIRECTIVES SUIVANTES, FAIRE APPEL À UN ÉLECTRICIEN QUALIFIÉ.
AVERTISSEMENT : POUR ÉVITER LA SURCHAUFFE OU L'ENDOMMAGEMENT ÉVENTUEL DE CE DISPOSITIF ET D'AUTRES APPAREILS RACCORDÉS, NE PAS
L'INSTALLER POUR COMMANDER UNE PRISE, UN LUMINAIRE FLUORESCENT, OU UN APPAREIL MOTORISÉ OU À TRANSFORMATEUR.
AUTRES MISES EN GARDE :
1. N'INSTALLER QU'UN SEUL GRADATEUR PAR CIRCUIT; L'INTERRUPTEUR À TROIS VOIES SITUÉ À L'AUTRE POINT DE
COMMUTATION ALLUMERA L'ÉCLAIRAGE À L'INTENSITÉ RÉGLÉE AU GRADATEUR.
2. LORS D'UNE VÉRIFICATION D'APPAREILS, COUPER L'ALIMENTATION.
3. UTILISER CE DISPOSITIF SEULEMENT AVEC DU FIL DE CUIVRÉ; POUR LE FIL EN ALUMINIUM, UTILISER SEULEMENT LES DISPOSITIFS PORTANT LA
MARQUE CO/ALR OU CU/AL.
GROUPEMENT/ABAISSEMENT : si deux unités sont combinées, la charge de chacune des unités ne doit pas dépasser 500 W.; si trois unités ou plus sont combinées,
chaque charge ne doit pas dépasser 400 W.
INSTALLATION :
1. AVERTISSEMENT : POUR ÉVITER LES RISQUES D'INCENDIE, DE CHOC ÉLECTRIQUE OU DE BLESSURE MORTELLE, COUPER LE COURANT AU FUSIBLE OU
AU DISJONCTEUR ET S'ASSURER QUE LE CIRCUIT SOIT BIEN COUPÉ AVANT DE PROCÉDER À L'INSTALLATION.
2. Retirer la plaque murale et l'interrupteur existant, le cas échéant.
3. Dénuder l'extrémité de chaque fil du circuit afin d'exposer 1,6 cm (0,625 po) de cuivre; s'assurer que les brins soient bien droits.
4. Raccorder les fils conformément au SCHÉMA DE CÂBLAGE et de la façon suivante : entortiller fermement les brins de chaque fil et les enfoncer, avec le conducteur de
circuit approprié, dans des serre-fils de format convenable; tourner ces derniers vers la droite en s'assurant qu'aucun brin ne dépasse; protéger les raccords au moyen de
ruban isolant.
5. Enfoncer délicatement les fils dans la boîte murale en prévoyant suffisamment d'espace pour le gradateur; installer ce dernier au moyen des vis d'assemblage fournies;
fixer la plaque murale.
6. Rétablir le courant au fusible ou au disjoncteur; L'INSTALLATION EST TERMINÉE.
English
FEATURES
INSTALLATION INSTRUCTIONS
Français
CARACTÉRISTIQUES
DIRECTIVES D'INSTALLATION
Publicidad

Manuales relacionados para Leviton TRIMATRON 6682


Resumen de contenidos para Leviton TRIMATRON 6682
- Página 1 • Commande un charge à partir de deux emplacements for the benefit of anyone else that this product at the time of its sale by Leviton is free of defects in materials and workmanship • Filtre antibrouillage et électromagnétique under normal and proper use for five years from the purchase •...
- Página 2 CARACTERISTICAS que ce produit ne présente ni défauts de fabrication ni défauts de matériaux au moment de sa vente par Leviton, et n’en présentera pas tant qu’il est utilisé de • Controla una carga desde dos ubicaciones façon normale et adéquate, pendant une période de 5 ans suivant la date d’achat.