Capítulos
Tabla de contenido
Solución de problemas

Manuales relacionados para Truper MOTB-2


Resumen de contenidos para Truper MOTB-2
- Página 1 Instructivo de Motobomba Uso agrícola Este instructivo es para: Modelos Códigos MOTB-2 17116 MOTB-3 17117 MOTB-4 17118 Lea este instructivo por completo ATENCIÓN antes de usar la herramienta.
-
Página 2: Tabla De Contenido
Instalación Los gráficos de este instructivo son para referencia, pueden variar del aspecto real de la Combustible y aceite herramienta. Puesta en marcha Mantenimiento Solución de problemas Notas Centros de Servicio Autorizados Sucursales Póliza de Garantía MOTB-2 MOTB-3 MOTB-4 ESPAÑOL... -
Página 3: Especificaciones Técnicas
Especificaciones técnicas MOTB-2 MOTB-3 MOTB-4 Código 17116 17117 17118 Descripción Motobomba Cilindrada del motor 191 cm 267 cm Potencia nominal del motor 4 101 W (5,5 Hp) 4 474 W (6 Hp) 5 965 W (8 Hp) Tipo de motor... -
Página 4: Advertencias Generales De Seguridad Para Uso De Herramientas Motorizadas
Advertencias Generales de Seguridad para uso de herramientas motorizadas Mantenga su área de trabajo limpia, ordenada y bien Utilice equipo adecuado de protección personal. iluminada. ATENCIÓN Usar protección para los ojos, mascarillas antipolvo, ATENCIÓN Áreas desordenadas y obscuras pueden provocar zapatos de seguridad antideslizantes, casco, protección accidentes. -
Página 5: Advertencias De Seguridad Para
Advertencias de Seguridad para uso de bombas de agua Usos adecuados Manejo de combustible • No utilice la motobomba para bombear líquidos • Nunca fume cerca del combustible, ni de la zona en infamables o corrosivos como gasolina, aceites y ácidos, donde se abastezca de la gasolina, ni al operar la tampoco para bombear agua de mar, combustibles y/o motobomba. -
Página 6: Partes
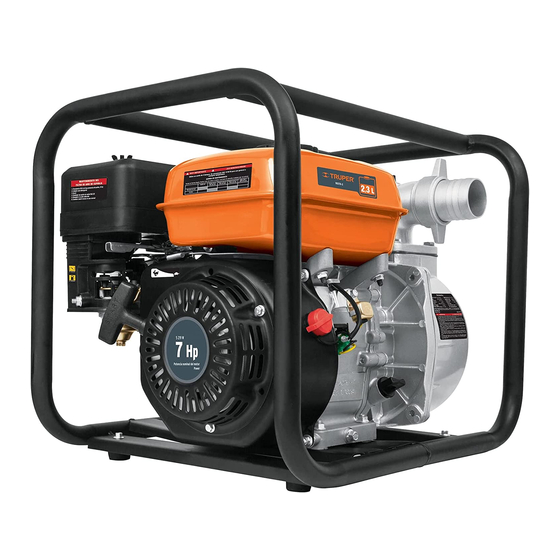
Partes Tapón del tanque de combustible Salida Tapón de de agua purga Escape Filtro de aire Bujía Entrada de agua Tapón de abastecimiento de aceite Tapón para Bomba drenado de agua Chasis tubular Salida de agua Acelerador Palanca del ahogador Entrada de agua Llave de... -
Página 7: Ensamble
Ensamble Montaje de coples • Inserte el cople (A) en la tuerca (B) como se muestra en el gráfico. • Coloque el sello (C) detrás del cople. • Enroscar la tuerca en la entrada y/o salida de la motobomba (D). Cople de entrada Cople de... -
Página 8: Instalación
Instalación • Coloque el equipo en una superficie seca, firme, plana y nivelada. • Conecte un extremo de la manguera de succión (no incluida) a la entrada de agua de la motobomba (A) y el otro extremo de la manguera al filtro (B). •... -
Página 9: Combustible Y Aceite
Combustible y aceite Abastecimiento de aceite (A) Abastecimiento de combustible (B) • Coloque el equipo en una superficie plana y nivelada. • Coloque el equipo en una superficie plana y nivelada. • Gire y retire el tapón de abastecimiento de aceite. •... -
Página 10: Puesta En Marcha
Puesta en marcha Purga • El sistema debe de ser purgado de cualquier burbuja de aire llenando la bomba con agua limpia antes de encenderla. • Retire el tapón de purga (F). Llene de agua hasta que alcance el nivel del orificio y atornille el tapón. Sólo entonces puede encender la motobomba. -
Página 11: Mantenimiento
Mantenimiento ATENCIÓN • El mantenimiento regular y cuidadoso • No altere los dispositivos de seguridad. Verifique su es esencial para mantener los niveles de seguridad y el correcto funcionamiento regularmente. desempeño óptimos del equipo. • Cualquier parte gastada o dañada debe de ser •... -
Página 12: Filtro De Combustible
11. NOTA Estas instrucciones aplican solo para los llave para bujías para comprimir la arandela. modelos MOTB-2 y MOTB-3 ATENCIÓN En caso de instalar una bujía nueva, apriete hasta media vuelta después que la bujía esté en su lugar y se pueda comprimir la arandela. Si va a instalar una bujía usada, apriete hasta 1/8 - 1/4 de vuelta después... -
Página 13: Solución De Problemas
Solución de problemas Problema Causa Solución El motor no arranca. • El interruptor está apagado. • Encienda el interruptor. • No hay suficiente combustible. • Llene el tanque de combustible. • El nivel de aceite es muy bajo o no tiene aceite. •... -
Página 14: Notas
Notas ESPAÑOL... -
Página 15: Centros De Servicio Autorizados
Centros de Servicio Autorizados En caso de tener algún problema para contactar un Centro de Servicio consulte nuestra página www.truper.com donde obtendrá un listado actualizado, o llame al teléfono: 01(800) 690-6990 ó 01(800) 018-7873 donde le informarán cuál es el Centro de Servicio Autorizado más cercano. -
Página 16: Sucursales
Centros de Servicio Autorizados enlistados en este Instructivo, en www.truper.com o en los teléfonos proporcionados: 01800-690-6990 ó 01800-018-7873. - Página 17 Manual Water Pump Agricultural Use Applies for: Models Codes MOTB-2 17116 MOTB-3 17117 MOTB-4 17118 Read the user’s manual thoroughly CAUTION before operating this tool.
- Página 18 Keep this manual for future references. Set Up The illustrations in this manual are for reference Fuel and Oil only. They might be different from the real tool. Start Up Maintenance Troubleshooting Notes Authorized Service Centers Branches Warranty Policy MOTB-2 MOTB-3 MOTB-4 ENGLISH...
-
Página 19: Technical Data
Technical Data MOTB-2 MOTB-3 MOTB-4 Code 17116 17117 17118 Description Water Pump Motor Cylinders 191 cm 267 cm Motor Rated Power 5.5 Hp 6 Hp 8 Hp Motor Type 4-stroke OHV No Load Speed 3 650 RPM - 3 700 RPM... -
Página 20: General Safety Warnings For Motor Tools
General Safety Warnings for Motor Tools Keep your work area clean, tidy and well lit. Wear adequate protective safety accessories. CAUTION CAUTION Cluttered and dark areas may cause accidents. Wear eye protection, dust mask, non-skid safety shoes, helmet and ear plugs. These safety gears reduce the risk Never use the tool in explosive areas or in the presence of injury. -
Página 21: Safety Warnings For Water Pumps
Safety Warnings for Water Pumps Appropriate use Fuel Handling • Do not use the pump to pump flammable or corrosive • Never smoke close to where there is fuel, nor the liquids such as gasoline, oils and acids, neither pumping filling up zone or when operating the pump. -
Página 22: Parts
Parts Fuel Tank Cap Water Purge Outlet Exhaust Filter Spark Plug Water Inlet Oil Supply Water Drain Pump Tubular Chassis Water Outlet Throttle Choke Lever Water Inlet Fuel Key Oil Supply Cap Starter jack-line Start Oil Drain Cap Knob ENGLISH... -
Página 23: Assembly
Assembly Coupling Mounting • Insert the coupling (A) in the nut (B) as shown in figure . • Set the seal (C) in the coupling . • Screw the nut in the inlet / outlet of the pump (D). Inlet Coupling Outlet Coupling... -
Página 24: Set Up
Set Up • Place the equipment on a dry, firm, flat and leveled surface. • Connect one end of the suction hose (not included) to the pump water inlet (A), and the other end of the hose to the filter (B). •... -
Página 25: Fuel And Oil
Fuel and Oil Oil Supply (A) Fuel Supply (B) • Set the equipment onto a flat and leveled surface. • Set the Pressure Washer on a flat and leveled surface. • Turn and remove the oil supply cap. • Clean and dry the area around the fuel cap. •... -
Página 26: Start Up
Start Up Purge • The system shall be purged of any air bubble by filling the pump with clear water before starting. • Remove the purge cap (F). Fill up with water up to the orifice level and screw back the cap. Only then the pump can be started. -
Página 27: Maintenance
Maintenance CAUTION • Regular and careful maintenance is • Any worn or damaged part shall be replaced before essential to maintain the safety levels and the optimal using the equipment. Do not try to repair the parts. It can performance of the equipment. damage the equipment and become a risk to your safety. -
Página 28: Fuel Filter
These instructions apply only for models Insert the spark plug manually to prevent maladjustment. • After setting the spark plug, tighten with a spark plug MOTB-2 and MOTB-3 wrench to compress the washer. CAUTION If installing a new spark plug, tighten half-a-turn until the spark plug is in place and can press the washer. -
Página 29: Troubleshooting
Troubleshooting Problem Cause Solution Motor does not start. • The switch is OFF. • Turn ON the switch. • Not enough fuel. • Fill up fuel tank. • Oil level is too low or there is no oil. • Check oil level as indicated in page 9. •... -
Página 30: Notes
Notes ENGLISH... -
Página 31: Authorized Service Centers
Authorized Service Centers In the event of any problem contacting a Service Center, please see our webpage www.truper.com to get an updated list, or call our toll-free numbers 01(800) 690-6990 or 01 (800) 018-7873 to get information about the nearest Authorized Service Center. -
Página 32: Branches
This warranty shall be effective when presenting the product and the valid Warranty policy duly stamped by the supplier or the proof of purchase. To comply with this warranty, Truper will cover transportation expenses in case consumer’s address is out of range from Authorized Service Centers listed herein or at the website www.truper.com or at our toll-free numbers: 01 (800) 690-6990 or 01(800) 018-7873.