
Manuales relacionados para Faber SYNTHESIS HIP


Resumen de contenidos para Faber SYNTHESIS HIP
- Página 1 Libretto di Istruzioni Instructions Manual Manuel d’Instructions Bedienungsanleitung Gebruiksaanwijzing Manual de instrucciones Manual de Instruções...
-
Página 2: Tabla De Contenido
INDICE INFORMAZIONI SULLA SICUREZZA ............................4 CARATTERISTICHE ................................7 INSTALLAZIONE ................................... 8 USO ...................................... 11 MANUTENZIONE................................. 12 INDEX SAFETY INFORMATION ............................... 14 CHARACTERISTICS ................................17 INSTALLATION ..................................18 USE ...................................... 21 MAINTENANCE ................................... 22 SOMMAIRE CONSIGNES DE SÉCURITÉ ..............................24 CARACTERISTIQUES ................................. - Página 3 ÍNDICE INFORMAÇÕES DE SEGURANÇA ............................64 CARACTERÍSTICAS ................................67 INSTALAÇÃO ..................................68 UTILIZAÇÃO ..................................71 MANUTENÇÃO ..................................72...
-
Página 4: Informazioni Sulla Sicurezza
INFORMAZIONI SULLA SICUREZZA Per la propria sicurezza e per il corretto funzionamento dell’apparecchio, si prega di leggere attentamente questo manuale prima dell’installazione e della messa in funzione. Tenere queste istruzioni sempre insieme all’apparecchio, anche in caso di cessione o trasferimento a terzi. È importante che gli utilizzatori conoscano tutte le caratteristiche di funzionamento e sicurezza dell’apparecchio. - Página 5 • Se la cappa è utilizzata in combinazione con apparecchi non elettrici (per es. apparecchi a gas), deve essere garantito un sufficiente grado di aerazione nel locale per impedire il ritorno di flusso dei gas di scarico. Quando la cappa per cucina è...
- Página 6 • L’apparecchio non deve essere utilizzato da persone (bambini compresi) con ridotte capacità psico-fisico-sensoriali o con esperienza e conoscenze insufficienti, a meno che non siano attentamente sorvegliate e istruite. Le parti accessibili possono diventare molto calde durante l’uso degli apparecchi di cottura. •...
-
Página 7: Caratteristiche
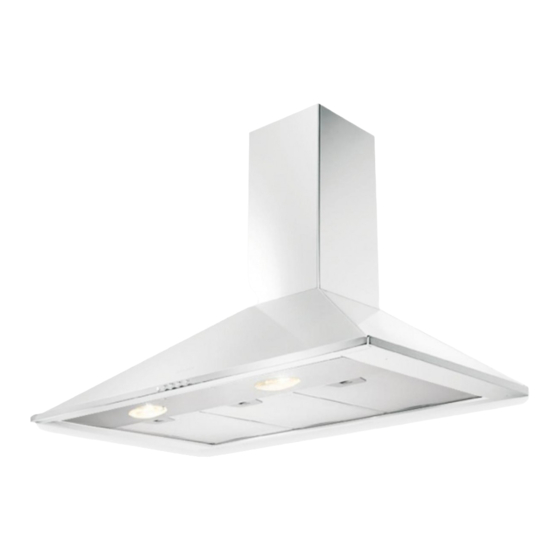
CARATTERISTICHE Ingombro 598 - 698 - 898 7.2.1 Componenti Rif. Q.tà Componenti di Prodotto Corpo Cappa completo di: Comandi, Luce, Filtri Camino Telescopico formato da: Camino Superiore Camino Inferiore Flangia di Riduzione ø 150-120 mm Raccordo Uscita Aria Rif. Q.tà Componenti di Installazione Staffe Fissaggio Corpo Cappa 7.2.1 Staffe Fissaggio Camino Superiore... - Página 8 INSTALLAZIONE Foratura Parete e Fissaggio Staffe 7.2.1 Tracciare sulla Parete: • una linea Verticale fino al soffitto o al limite superiore, al centro della zona prevista per il montaggio della Cappa; • una linea Orizzontale a: 650 mm min. sopra il Piano di Cottura, per installazione senza Fon- dale;...
-
Página 9: Uscita Aria Versione Aspirante
Montaggio Corpo Cappa 12.d • Avvitare sulle Staffe 7.1, le 2 Viti 12d in dotazione. • Agganciare il Corpo Cappa alle Staffe 7.1, centrandolo sulla linea verticale. • Agire sulle Viti 12d, dal sotto della Cappa, per livellare il Cor- po Cappa. -
Página 10: Connessione Elettrica
CONNESSIONE ELETTRICA • Collegare la Cappa all’Alimentazione di Rete interponendo un Interruttore bipolare con apertura dei contatti di almeno 3 mm. • Rimuovere i Filtri antigrasso (vedi par. “Manutenzione”) e as- sicurarsi che il connettore del Cavo di alimentazione sia corret- tamente inserito nella presa dell’Aspiratore Montaggio Camino Camino superiore... - Página 11 Quadro comandi Luci Accende e spegne l’Impianto Luci Accende e spegne l’Impianto di Illuminazione. di Illuminazione. Motore Accende e spegne il motore Led accensione Motore. Aspirazione. V1 Motore Accende e spegne il motore Velocità Determina la velocità di Aspirazione a velocità mini- esercizio: ma, adatta ad un ricambio 1.
- Página 12 MANUTENZIONE Filtri antigrasso PULIZIA FILTRI ANTIGRASSO METALLICI AUTOPORTANTI • Sono lavabili anche in lavastoviglie, e necessitano di essere lavati ogni 2 mesi circa di utilizzo o più frequentemente, per un uso particolarmente intenso. • Togliere i Filtri uno alla volta, spingendoli verso la parte poste- riore del gruppo e tirando contemporaneamente verso il basso.
-
Página 13: Sostituzione Lampade
Illuminazione SOSTITUZIONE LAMPADE • Togliere i Filtri antigrasso metallici. • Svitare le Lampade e sostituirle con nuove di uguali caratteristiche. • Rimontare i Filtri antigrasso metallici. Lampada Assorbimento (W) Attacco Voltaggio (V) Dimensione (mm) Codice ILCOS DRBB/F-4-220-240-E14-35/100 220 – 240 107 x 37 DRPAR-5/840-220/240-GU10-35/36 GU10... -
Página 14: Safety Information
SAFETY INFORMATION For your safety and correct operation of the appliance, read this manual carefully before installation and use. Always keep these instructions with the appliance even if you move or sell it. Users must fully know the operation and safety features of the appliance. The wire connection has to be done by specialized technician. - Página 15 • If the extractor is used in conjunction with non-electrical appliances (e.g. gas burning appliances), a sufficient degree of aeration must be guaranteed in the room in order to prevent the backflow of exhaust gas. When the cooker hood is used in conjunction with appliances supplied with energy other than electric, the negative pressure in the room must not exceed 0,04 mbar to prevent fumes being drawn back into the room by the cooker hood.
- Página 16 • The appliance is not to be used by persons (including children) with re- duced physical, sensory or mental capabilities, or lack of experience and knowledge, unless they have been given supervision or instruction. Accessible parts may become hot when used with cooking appliances. •...
- Página 17 CHARACTERISTICS Dimensions 598 - 698 - 898 7.2.1 Components Ref. Q.ty Product Components Hood Body, complete with: Controls, Light, Blower, Filters Telescopic Chimney comprising: Upper Section Lower Section Reducer Flange ø 150-120 mm Air Outlet Connection Ref. Q.ty Installation Components Hood Body Fixing Brackets 7.2.1 Upper Chimney Section Fixing Brackets...
- Página 18 INSTALLATION Wall drilling and bracket fixing 7.2.1 Wall marking: • Draw a vertical line on the supporting wall up to the ceiling, or as high as practical, at the centre of the area in which the hood will be installed. •...
- Página 19 Mounting the hood body • Screw the two screws 12d supplied onto the brackets 7.1. 12.d • Hook the hood body onto the bracket 7.1, centring it around the vertical line. • Use the adjusting screws 12d underneath the hood to level the hood body.
-
Página 20: Electrical Connection
ELECTRICAL CONNECTION • Connect the hood to the mains through a two-pole switch hav- ing a contact gap of at least 3 mm. • Remove the grease filters (see paragraph Maintenance) being sure that the connector of the feeding cable is correctly inserted in the socket placed on the side of the fan. - Página 21 Control panel Light Switches the lighting system Light Switches the lighting system on and off. on and off. Motor Switches the extractor motor Motor running led. on and off. V1 Motor Switches the extractor motor Speed Sets the operating speed of on and off at low speed.
- Página 22 MAINTENANCE Grease filters CLEANING METAL SELF- SUPPORTING GREASE FILTERS • The filters must be cleaned every 2 months of operation, or more frequently for particularly heavy usage, and can be washed in a dishwasher. • Remove the filters one at a time by pushing them towards the back of the group and pulling down at the same time.
-
Página 23: Light Replacement
Lighting LIGHT REPLACEMENT • Remove the metal grease filters. • Unscrew the bulbs and replace them with new ones having the same characteristics. • Replace the metal grease filters. Lamp Power (W) Socket Voltage (V) Dimension (mm) ILCOS Code 220-240 107 x 37 DRBB/F-4-220-240-E14-35/100 DRPAR-5/840-220/240-GU10-35/36... -
Página 24: Consignes De Sécurité
CONSIGNES DE SÉCURITÉ Pour votre sécurité et pour garantir le fonctionnement correct de l’appareil, veuillez lire attentivement ce manuel avant d’installer et de mettre en fonction l’appareil. Toujours conserver ces instructions avec l’appareil, même en cas de cession ou de transfert à une autre personne. Il est important que les utilisateurs connaissent toutes les caractéristiques de fonctionnement et de sécurité... - Página 25 • Si vous utilisez l’aspirateur en même temps que des appareils non électriques (par ex. fonctionnant au gaz), veillez à ce que la pièce soit adéquatement ventilée, afin d’empêcher le retour du flux des gaz d’évacuation. Si vous utilisez la hotte de cuisine en même temps que des appareils non alimentés à l’électricité, la pression négative dans la pièce ne doit pas dépasser 0,04 mbar, afin d’éviter que les fumées soient réaspirées dans la pièce où...
- Página 26 • Cet appareil n’est pas destiné à être utilisé par des personnes (enfants compris) dont les capacités physiques, sensorielles ou mentales sont diminuées ou ayant une expérience et des connaissances insuffisantes, à moins que celles-ci ne soient attentivement surveillées et instruites. Les parties accessibles peuvent devenir très chaudes durant l’utilisation des appareils de cuisson.
-
Página 27: Caracteristiques
CARACTERISTIQUES Encombrement 598 - 698 - 898 7.2.1 Composants Réf. Q.té Composants de Produit Corps Hotte équipé de: Commandes, Lumière, Groupe Ventilateur, Filtres Cheminée Télescopique formée par : Cheminée Supérieure Cheminée Inférieure Flasque de Réduction ø 150-120 mm Raccord Sortie Air Réf. -
Página 28: Installation
INSTALLATION Perçage Paroi et Fixation Brides 7.2.1 Tracer sur la paroi: • une ligne verticale allant jusqu’au plafond ou à la limite supérieure, au centre de la zone prévue pour le montage de la hotte; • une ligne horizontale à 650 mm min. au-dessus du plan de cuisson pour installation sans embases: à... -
Página 29: Sortie Air Version Aspirante
Montage Corps Hotte • Visser sur les brides 7.1 les 2 vis 12d fournies. 12.d • Accrocher le corps hotte aux brides 7.1, en le centrant sur la ligne verticale. • Agir sur les vis 12d, par le dessous de la hotte pour en niveler le corps. -
Página 30: Branchement Electrique
BRANCHEMENT ELECTRIQUE • Brancher la hotte sur le secteur en interposant un interrupteur bipolaire avec ouverture des contacts d’au moins 3 mm. • Enlever les filtres à graisse (voir § "Entretien") et s'assurer que le connecteur du câble d'alimentation soit bien branché dans la prise du diffuseur. -
Página 31: Utilisation
UTILISATION Tableau de commande Lumières Allume et éteint l’éclairage. Lumières Allume et éteint l’éclairage. Moteur Allume et éteint le moteur Led allumage moteur. aspiration. V1 Moteur Met en marche et à l’arrêt le Vitesses Détermine les vitesses moteur aspiration à vitesse d’exploitation ainsi subdivi- minimale, pour un rechange sées:... -
Página 32: Entretien
ENTRETIEN Filtres anti-graisse NETTOYAGE FILTRES ANTI-GRAISSE METALLIQUES AUTOPORTEURS • Lavables au lave-vaisselle, ils doivent être lavés environ tous les 2 mois d’emploi ou plus fréquemment en cas d’emploi par- ticulièrement intense. • Retirer les filtres l’un aprés l’autre, en les poussant vers la par- tie arrière du groupe et en tirant simultanément vers le bas. - Página 33 Eclairage REMPLACEMENT LAMPES • Retirer les filtres anti-graisse métalliques. • Dévisser les lampes et les remplacer par de nouvelles avec les mêmes caractéristiques. • Remonter les filtres anti-graisse métalliques. Ampoule Absorption (W) Culot Voltage (V) Dimensions (mm) Code ILCOS 220-240 107 x 37 DRBB/F-4-220-240-E14-35/100 DRPAR-5/840-220/240-GU10-35/36...
-
Página 34: Sicherheitsinformationen
SICHERHEITSINFORMATIONEN Zu Ihrer eigenen Sicherheit und für die korrekte Funktion des Gerätes lesen Sie bitte diese Betriebsanleitung aufmerksam durch, bevor Sie das Gerät installieren und benutzen. Verwahren Sie die Bedienungsanleitung stets zusammen mit dem Gerät, auch wenn Sie dieses an Dritte weitergeben oder übertragen. - Página 35 • Falls die Abzugshaube mit Geräten verwendet wird, die nicht elektrisch betrieben sind (z.B. Gasgeräte), muss im Raum für eine ausreichende Belüftung gesorgt werden, damit der Rückfluss der Abgase verhindert wird. Wird die Abzugshaube zusammen mit nicht elektrisch betriebenen Geräten eingesetzt, darf der Unterdruck im Raum 0,04 mbar nicht überschreiten, damit die Abgase nicht wieder angesaugt werden.
- Página 36 • Dieses Gerät darf nicht von Personen (einschließlich Kindern) mit beschränkten geistigen, physischen oder sensorischen Fähigkeiten oder mangels Erfahrung und/oder mangels Wissen benutzt werden, außer sie werden aufmerksam beaufsichtigt und eingewiesen. Die frei zugänglichen Teile können während des Kochens mit Kochgeräten sehr heiß...
-
Página 37: Charakteristiken
CHARAKTERISTIKEN Platzbedarf 598 - 698 - 898 7.2.1 Komponenten Pos. St. Produktkomponenten Haubenkörper mit Schaltern, Beleuchtung, Gebläse- gruppe, Filtern Teleskopkamin bestehend aus: oberer Kaminteil unterer Kaminteil Reduzierflansch ø 150-120 mm Luftaustritt-Anschlussstück Pos. St. Montagekomponenten Befestigungsbügel Haubenkörper 7.2.1 Befestigungsbügel oberer Kaminteil Dübel Schrauben 4,2 x 44,4 12a 11... -
Página 38: Montage
MONTAGE Bohren der Befestigungslöcher und Fixieren der Befestigungsbügel 7.2.1 Nachstehende Linien an die Wand zeichnen: • eine vertikale Linie bis zur Decke oder oberen Begrenzung, und zwar in der Mitte des Be- reiches, in dem die Haube montiert werden soll; •... - Página 39 Montage des Haubenkörpers • Bei den Bügeln 7.1 die 2 mitgelieferten Schrauben 12d ein- 12.d schrauben. • Den Haubenkörper bei den Haltebügeln 7.1 einhängen und auf die vertikale Linie ausrichten. • Mit Hilfe der Schrauben 12d vom Haubenunteren her den Haubenkörper ausrichten.
- Página 40 ELEKTROANSCHLUSS • Bei Anschluss der Haube an das Stromnetz muss ein zweipoli- ger Schalter mit einem Öffnungsweg von mindestens 3 mm zwischengeschaltet werden. • Entfernen Sie die Fettfilter (s. Abschnitt „Wartung“) und versi- chern Sie sich, daß die Kabelverbindung in die Steckdose des Gebläses einwandfrei eingesteckt wird.
-
Página 41: Bedienung
BEDIENUNG Bedienfeld Beleucht. Schaltet die Beleuchtung ein Beleucht. Schaltet die Beleuchtung ein und aus. und aus. Motor Schaltet den Gebläsemotor Betriebsanzeigelampe. ein und aus. V1 Motor Schaltet den Gebläsemotor Geschw. bestimmt die Gebläsegech- mit minimaler Geschwindig- windigkeit und steuert fol- keit ein oder aus. -
Página 42: Wartung
WARTUNG Fettfilter SELBSTTRAGENDER METALLFETTFILTER REINIGUNG • Sie müssen nach 2-monatigem Betrieb bzw. bei starkem Ein- satz auch häufiger gereinigt werden, was im Geschirrspüler möglich ist. • Die Filter nacheinander aushaken, indem sie auf die Rückseite der Gruppe geschoben und gleichzeitig nach unten gezogen werden. -
Página 43: Auswechseln Der Lampen
Beleuchtung AUSWECHSELN DER LAMPEN • Die Metallfettfilter entfernen. • Die Lampen ausschrauben und durch gleichwertige ersetzen. • Die Metallfettfilter wieder montieren. Lampe Leistung (W) Fassung Spannung (V) Größe (mm) ILCOS-Code 220-240 107 x 37 DRBB/F-4-220-240-E14-35/100 DRPAR-5/840-220/240-GU10-35/36 GU10 52 x 50 DRPAR-5/830-220/240-GU10-35/36... -
Página 44: Veiligheidsinformatie
VEILIGHEIDSINFORMATIE Lees voor uw eigen veiligheid en voor een correcte werking van het appa- raat eerst deze handleiding aandachtig door, alvorens het apparaat te ins- talleren en te gebruiken. Bewaar deze instructies altijd bij het apparaat, ook wanneer u het verkoopt of overdraagt aan derden. Gebruikers moe- ten volledig op de hoogte zijn van de werking en de veiligheidsfuncties van het apparaat. - Página 45 • Als de afzuigkap in combinatie met niet-elektrische apparaten wordt gebruikt (bijv. gasapparaten), moet het vertrek voldoende geventileerd zijn om te voorkomen dat de uitgestoten gassen terugstromen. Wanneer de afzuigkap in combinatie met niet-elektrische apparaten wordt gebruikt, mag de onderdruk in het vertrek niet groter zijn dan 0,04 mbar om te voorkomen dat de damp opnieuw door de afzuigkap in het vertrek gezogen wordt.
- Página 46 • Het apparaat mag niet gebruikt worden door personen (waaronder kinderen) met geestelijke, lichamelijke of zintuiglijke beperkingen, of door personen zonder ervaring en kennis, tenzij ze onder toezicht staan of worden geïnstrueerd over het gebruik van het apparaat. Tijdens het gebruik van de kooktoestellen kunnen de toegankelijke delen erg heet worden.
-
Página 47: Eigenschappen
EIGENSCHAPPEN Buitenafmetingen 598 - 698 - 898 7.2.1 Onderdelen Ref. Productonderdelen Wasemkap compleet met: bedieningen, licht, ventilatorgroep, filters Telescopische schouw bestaande uit: Bovenstuk Onderstuk Reductieflens ø 150-120 mm Verbindingsstuk luchtuitlaat Ref. Installatieonderdelen Bevestigingsbeugels wasemkap 7.2.1 Bevestigingsbeugels bovenstuk van de schouw Pluggen Schroeven 4,2 x 44,4 12a 11... -
Página 48: Installatie
INSTALLATIE Boren van gaten in de wand en bevestiging van de draagbeugels 7.2.1 Trek de volgende lijnen op de wand: • een verticale lijn tot aan het plafond of tot aan de bovenlimiet, in het midden van de zone waar u de wasemkap wilt installeren; •... - Página 49 Montage van de Wasemkap • Schroef de 2 bijgeleverde schroeven 12d in de beugels 7.1. 12.d • Haak de wasemkap aan de beugels 7.1 en centreer hem op de verticale lijn. • Draai van onder de kap aan de schroeven 12d om de wasem- kap recht te hangen.
-
Página 50: Elektrische Aansluiting
ELEKTRISCHE AANSLUITING • Sluit de wasemkap aan op de netspanning met een tweepolige schakelaar ertussen met een opening tussen de contacten van tenminste 3 mm. • Verwijder de vetfilters (zie par. "Onderhoud") en verzeker u ervan dat de stekker van de voedingskabel goed in de contactdoos van de afzuigkap is gestoken. -
Página 51: Gebruik
GEBRUIK Bedieningspaneel Lichten Hiermee schakelt u de Lichten Hiermee schakelt u de erlichting aan en uit. verlichting aan en uit. Motor Hiermee schakelt u de Led motorinschakeling. afzuigmotor aan en uit. V1 Motor Inschakeling en Snelheid Instelling van de uitschakeling van de werkingssnelheid: afzuigmotor op 1.Minimumsnelheid, gschikt... -
Página 52: Onderhoud
ONDERHOUD Vetfilters REINIGING VAN DE ZELFDRAGENDE METALEN VETFILTERS • De filters moeten eens in de 2 maanden of, bij bijzonder intensief gebruik, vaker gereinigd worden, en kunnen ook in de vaatwasmachine worden gewassen. • Verwijder de filters één voor één door ze naar de achterkant van de groep te duwen en ze tegelijkertijd omlaag te trekken. - Página 53 Verlichting VERVANGING VAN DE LAMPEN • Verwijder de metalen vetfilters. • Schroef de lampen los en vervang ze door nieuwe lampen met dezelfde eigenschappen. • Plaats de metalen vetfilters terug. Lamp Stroomopname (W) Aansluiting Voltage (V) Afmeting (mm) ILCOS-code 220-240 107 x 37 DRBB/F-4-220-240-E14-35/100 DRPAR-5/840-220/240-GU10-35/36...
-
Página 54: Información De Seguridad
INFORMACIÓN DE SEGURIDAD Por su propia seguridad y para el correcto funcionamiento del aparato, lea atentamente este manual antes de la instalación y puesta en mar- cha. Guarde siempre estas instrucciones con el aparato, incluso si se cede o transfiere a un tercero. Es importante que los usuarios estén familiarizados con todas las características de funcionamiento y segu- ridad del aparato. - Página 55 • Si la campana se utiliza en combinación con equipos no eléctricos (por ejemplo, aparatos de gas), debe asegurarse un grado suficiente de ventilación en el local para evitar el retorno del flujo de gases de escape. Cuando la campana extractora se utiliza en combinación con aparatos no eléctricos, la presión negativa en el local no debe ser superior a 0,04 mbar para evitar que los humos vuelvan al local a través de la campana extractora.
- Página 56 • El aparato no debe ser utilizado por personas (incluyendo niños) con capacidades psico-físico-sensoriales reducidas o con experiencia y conocimientos insuficientes, a menos que sean cuidadosamente supervisados e instruidos. Las piezas accesibles pueden calentarse mucho cuando se utilizan aparatos de cocina. •...
-
Página 57: Características
CARACTERÍSTICAS Dimensiones 598 - 698 - 898 7.2.1 Componentes Ref. Cant. Componentes del Producto Cuerpo campana dotado con: mandos, luz, grupo de ventilación, filtros. Chimenea Telescópica formada por: Chimenea Superior Chimenea Inferior Brida de reducción ø 150-120 mm Racor salida aire Ref. -
Página 58: Instalación
INSTALACIÓN Taladrado pared y fijación de las bridas 7.2.1 Trazar en la pared: • una línea vertical hasta el cielorraso o límite superior, al centro de la zona prevista para el montaje de la campana; • una línea horizontal a 650 mm mín. sobre el plano de cocción, para la instalación sin Fondo; a la cota H (H = altura de la parte del Fondo a la vista), para instalación con Fondo. -
Página 59: Salida Del Aire Versión Aspirante
Montaje del cuerpo de la campana • Atornillar en las bridas 7.1, los 2 tornillos 12d (M4 x 25) su- 12.d ministrados en dotación. • Enganchar el cuerpo de la campana en las bridas 7.1, centrán- dolo en la línea vertical. •... -
Página 60: Conexión Eléctrica
CONEXIÓN ELÉCTRICA • Conectar la campana a la red de alimentación eléctrica insta- lando un interruptor bipolar con apertura de los contactos de 3 mm como mínimo. • Quitar los Filtros antigrasa y asegurase de que el conector del Cable de acometida esté colocado correctamente en el enchufe del Aspirador. -
Página 61: Uso
Tablero de mandos Luces Enciende y apaga la instala- Luces Enciende y apaga la instala- ción de iluminación. ción de iluminación. M Motor Enciende y apaga el motor Led de encendido motor. de aspiración. V1 Motor Enciende y apaga el motor Velocidad Determina las velocidades de aspiración a velocidad de ejercicio:... -
Página 62: Mantenimiento
MANTENIMIENTO Filtros antigrasa LIMPIEZA DE LOS FILTROS ANTIGRASA METÁLICOS • Se pueden lavar en el lavavajillas y requieren un lavado cada 2 meses aproximadamente o más a menudo si su uso es muy in- tenso. • Quitar los filtros uno por vez, operando en los enganches co- rrespondientes. -
Página 63: Sustitución De Las Lámparas
Iluminación SUSTITUCIÓN DE LAS LÁMPARAS • Quitar los filtros antigrasa metálicos, o abrir la rejilla portafiltros. • Destornillar las lámparas y sustituirlas con nuevas que tengan las mismas características. • Montar nuevamente los filtros antigrasa metálicos, o cerrar la rejilla portafiltros. Lámpara Consumo de energía (W) Casquillo... -
Página 64: Informações De Segurança
INFORMAÇÕES DE SEGURANÇA Para sua segurança e funcionamento correto do aparelho, agradecemos que leia este manual com atenção, antes da instalação e colocação em funcionamento do aparelho. Conserve estas instruções sempre junto do aparelho, mesmo em caso de cedência ou transferência a terceiros. É importante que os utilizadores tenham conhecimento de todas as caraterísticas de funcionamento e de segurança do aparelho. - Página 65 • Se o exaustor for utilizado em conjunto com aparelhos não elétricos (por ex. aparelhos alimentados a gás), deve ser tida em devida conta a necessidade de assegurar um grau suficiente de ventilação no aposento, para impedir o retorno dos gases de exaustão. Quando o exaustor é utilizado em conjunto com outros aparelhos não alimentados eletricamente, a pressão negativa no aposento não deve ultrapassar 0,04 mbar, para evitar que os fumos retornem ao aposento através do exaustor.
- Página 66 • O aparelho não deve ser utilizado por pessoas (incluindo crianças) com capacidades psico-físico-sensoriais diminuídas ou com experiência e conhecimentos insuficientes, salvo se vigiadas atentamente e instruídas. As partes acessíveis podem aquecer muito durante a utilização dos aparelhos de cozedura. •...
-
Página 67: Características
CARACTERÍSTICAS Dimensões 598 - 698 - 898 7.2.1 Componentes Ref. Qtd Componentes do produto Corpo do exaustor equipado com: Comandos, iluminação, grupo do ventilador e filtros Chaminé telescópica formada por: Chaminé superior Chaminé inferior Flange de redução ø 150-125 mm Conexão da saída de ar Ref. -
Página 68: Instalação
INSTALAÇÃO Perfuração da parede e fixação dos suportes 7.2.1 Marque na parede: • uma linha vertical até ao tecto ou ao limite superior, no centro da zona prevista para a montagem do exaustor; • uma linha horizontal a: 650 mm, no mínimo, acima da placa do fogão para instalação sem fundo;... -
Página 69: Saída Do Ar Para A Versão Aspirante
Montagem da estrutura do exaustor • Nos suportes 7.1, aperte os 2 parafusos 12d incluídos nos 12.d acessórios. • Fixe a estrutura do exaustor aos suportes 7.1, centrando-a sobre a linha vertical. • Opere com os parafusos 12d, trabalhando por baixo do exaustor, para nivelar a estrutura do exaustor. -
Página 70: Ligação Eléctrica
LIGAÇÃO ELÉCTRICA • Ligue o extractor à alimentação utilizando um interruptor de dois pólos com uma folga de contacto de pelo menos 3 mm. • Retire os filtros contra gordura (ver parágrafo da Manutenção) certificando-se de que o conector do cabo de alimentação está correctamente instalado na tomada existente do lado do ventilador. -
Página 71: Utilização
UTILIZAÇÃO Quadro de comandos Luzes Liga desliga L Luzes Liga e desliga a Iluminação Iluminação S Led Led de ligação do motor. M Motor Liga e desliga o motor de V1 Motor Liga e desliga o motor de exaustão aspiração à... -
Página 72: Manutenção
MANUTENÇÃO Filtros contra gordura LIMPAR OS FILTROS METÁLICOS CONTRA GORDURA • Os filtros deverão ser limpos de 2 em 2 meses de funcionamento, ou mais frequentemente em situações de utilização extrema e podem ser lavados na máquina de lavar louça. •... -
Página 73: Substituição Das Lâmpadas
Iluminação SUBSTITUIÇÃO DAS LÂMPADAS • Tire os filtros metálicos antigordura ou abra a grade porta-filtros. • Desatarraxe as lâmpadas e substitua-as por novas de características iguais. • Reinstale os filtros metálicos antigordura ou feche a grade porta-filtros. Lâmpada Absorção (W) Ligação Tensão (V) Dimensão (mm) - Página 76 991.0536.838_ver2 – 190409 - D000000004418_01...