Publicidad
sauder.com
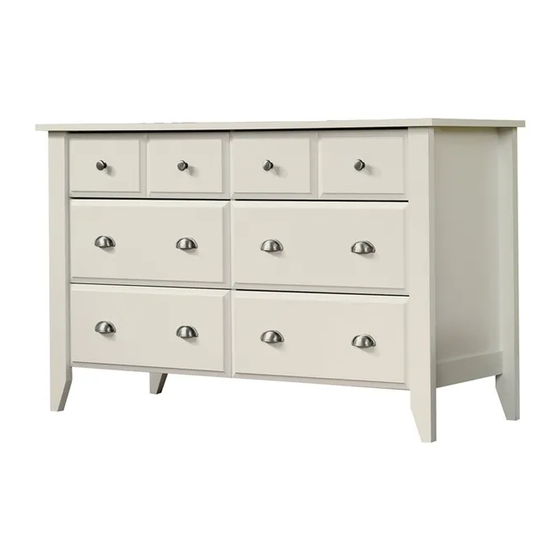
Dresser
Shoal Creek Collection | Model 411201
Need help? Visit Sauder.com to view video assembly tips or chat with a live rep.
Prefer the phone? Call 1-800-523-3987.
Share your journey!
WARNING
CHOKING HAZARD - Small Parts
Not for children under 3 years.
Adult assembly required.
NOTE: THIS INSTRUCTION
BOOKLET CONTAINS IMPORTANT
SAFETY INFORMATION.
PLEASE READ AND KEEP FOR
FUTURE REFERENCE.
English pg 1-22
Français pg 23-25
Español pg 26-28
Lot # 397446
10/31/16
Purchased: __________________
Be sure to give us a ring before
making any returns. 1-800-523-3987
Publicidad
Tabla de contenido

Manuales relacionados para Sauder 411201


Resumen de contenidos para Sauder 411201
- Página 1 Shoal Creek Collection | Model 411201 NOTE: THIS INSTRUCTION BOOKLET CONTAINS IMPORTANT SAFETY INFORMATION. Need help? Visit Sauder.com to view video assembly tips or chat with a live rep. PLEASE READ AND KEEP FOR FUTURE REFERENCE. Prefer the phone? Call 1-800-523-3987.
- Página 2 RIGHT DRAWER FRONT (2) SMALL LEFT DRAWER SIDE (2) RIGHT FRONT LEG (1) LEFT DRAWER FRONT (2) D132 RIGHT DRAWER SIDE (4) LEFT FRONT LEG (1) BRACE (1) D138 LEFT DRAWER SIDE (4) REAR LEG (2) Page 2 411201 www.sauder.com/services...
-
Página 3: Part Identifi Cation
Part Identifi cation D166 D975 D166 D132 D167 D975 D975 D138 D132 D167 D975 D138 www.sauder.com/services 411201 Page 3... - Página 4 This is a permanent label. Do not remove. Cette étiquette est permanente. Ne pas l’enlever. Esta es una etiqueta permanente. No remover. 10/16 395783 (Refer to Step 15 for proper location and application) Page 4 411201 www.sauder.com/services...
- Página 5 BLACK 1-1/4" FLAT HEAD SCREW - 4 SILVER 3/4" MACHINE SCREW - 16 BLACK 1-1/8" MACHINE SCREW - 4 30S BLACK 1-9/16" FLAT HEAD SCREW - 30 BLACK 2-1/4" FLAT HEAD SCREW - 6 BLACK 9/16" FLAT HEAD SCREW - 4 www.sauder.com/services 411201 Page 5...
- Página 6 CAM DOWELS into these edges. Arrow Arrow The arrow in the HIDDEN CAM must point toward the Insert the metal end of the CAM DOWEL into the HIDDEN CAM. hole in the edge of the board. Page 6 411201 www.sauder.com/services...
- Página 7 Step 2 Turn twelve CAM SCREWS (8F) into the FRONT LEGS (G å and H) and DRAWER FRONTS (K2, L2, Q2, and R2). (12 used) www.sauder.com/services 411201 Page 7...
- Página 8 Step 3 Fasten the REAR LEGS (I) to the ENDS (A and B). Use six å BLACK 2-1/4" FLAT HEAD SCREWS (26S). Flat edge BLACK 2-1/4" FLAT HEAD SCREW (6 used in this step) Page 8 411201 www.sauder.com/services...
- Página 9 Shoulder These edges Apply pressure with your hands should be even. as you guide the MOLDINGS over the SCREWS and onto the ENDS. BLACK 9/16" FLAT HEAD SCREW (4 used in this step) www.sauder.com/services 411201 Page 9...
- Página 10 Step 5 Fasten the FRONT LEGS (G and H) to the other surface of å the ENDS (A and B). Tighten six HIDDEN CAMS. Angled edge Page 10 411201 www.sauder.com/services...
- Página 11 LEFTS (40CB) to the ENDS (A and B) and UPRIGHT(C). Use twenty-four GOLD 5/16" FLAT HEAD SCREWS (3S) through holes #1 and #4. Roller end Roller end Finished edge Roller end GOLD 5/16" FLAT HEAD SCREW (24 used in this step) www.sauder.com/services 411201 Page 11...
- Página 12 Tighten Risk of damage or Arrow injury. HIDDEN CAMS must be completely Arrow Maximum tightened. HIDDEN 210 degrees CAMS that are not completely tightened may loosen, and parts may separate. To Minimum completely tighten: 190 degrees Page 12 411201 www.sauder.com/services...
- Página 13 H I D D E N i t h S u r f a c H I D D E N i t h Finished edge BLACK 1-7/8" FLAT HEAD SCREW (4 used) (2 used in this step) www.sauder.com/services 411201 Page 13...
- Página 14 Fasten the RIGHT END (A) to the TOP (D) and å BOTTOMS (E). Tighten four HIDDEN CAMS. Maximum Arrow 210 degrees NOTE: Be sure the METAL PINS in the BOTTOMS å insert into the holes in the RIGHT END. Minimum 190 degrees Page 14 411201 www.sauder.com/services...
- Página 15 NOTE: Turn the screw end of the FOOT completely in. å Adjustments will be made to the FOOT after the unit is standing upright. BLACK 1-1/4" FLAT HEAD SCREW (4 used in this step) Turn completely in. www.sauder.com/services 411201 Page 15...
- Página 16 UPRIGHT (C). NOTE: Perforations have been provided for access å through the BACK. Carefully cut out the holes needed. NAIL (47 used in this step) These holes must line up over the UPRIGHT (C). Cut-out Page 16 411201 www.sauder.com/services...
- Página 17 FLAT HEAD SCREWS (30S). Repeat this step for the other DRAWERS using the DRAWER FRONTS (Q2 and R2). Use the SMALL DRAWER FRONTS (K2 and L2), SMALL DRAWER SIDES (D10 and D11), and SMALL DRAWER BACKS (D166) for the small drawers. www.sauder.com/services 411201 Page 17...
- Página 18 Roller end Screw head - turn CAM to line up holes in the SLIDES with holes in DRAWER SIDES D138 Roller end D132 (4 screws per drawer) GOLD 5/16" FLAT HEAD SCREW (24 used in this step) Page 18 411201 www.sauder.com/services...
- Página 19 Fasten two PULLS (31K) to the RIGHT DRAWER FRONT (Q2). å Use four SILVER 3/4" MACHINE SCREWS (20S). Repeat this on sauder.com. step for the other drawers. BLACK 1-1/8" MACHINE SCREW (4 used for the KNOBS) SILVER 3/4" MACHINE SCREW (16 used for the PULLS) www.sauder.com/services...
- Página 20 Lift the front of the drawer up and slide it into the unit. BLACK 1-7/8" FLAT HEAD SCREW (1 used into a stud in your wall) BLACK 9/16" LARGE HEAD SCREW (1 used into the top of your unit) 40 lbs. 20 lbs. 20 lbs. 35 lbs. each Page 20 411201 www.sauder.com/services...
- Página 21 This is a permanent label. Do not remove. Cette étiquette est permanente. Ne pas l’enlever. Esta es una etiqueta permanente. No remover. 10/16 395783 D975 Floor Turn the ADJUSTABLE FOOT downward until it touches the fl oor. www.sauder.com/services 411201 Page 21...
- Página 22 #4. The higher the screw in the oblong hole, the higher your drawer front will be. The lower the screw, the lower the drawer front. Page 22 411201 www.sauder.com/services...
-
Página 23: Liste De Pièces
Modèle 411201 Commode Utilisez les instructions d’ a ssemblage en français avec les NOUS SOMMES LA POUR VOUS AIDER! schémas étape par étape du manuel d’instruction en anglais. Nous faisons de notre mieux pour nous assurer que votre meuble Chaque étape en français correspond à la même étape arrive dans d’excellentes conditions. - Página 24 Fixer les ÉLÉMENTS DROITES (40CA) et les ÉLÉMENTS que l’unité sera à la verticale. GAUCHES (40CB) aux EXTRÉMITÉS (A et B) et au MONTANT (C). Utiliser vingt-quatre VIS TÊTE PLATE 8 mm DORÉES (3S) à travers les trous nº 1 et nº 4. Page 24 411201 www.sauder.com/services...
- Página 25 REMARQUE : Prière de lire les informations importantes sur la sécurité fi gurant sur les pages arrière du manuel d’instructions. Ceci complète l'assemblage. Nettoyer à l’ a ide d’une encaustique pour meubles ou d’un chiff on humide. Essuyer. www.sauder.com/services 411201 Page 25...
-
Página 26: Lista De Partes
Modelo 411201 Cómoda Use estas instrucciones de ensamblaje en español junto con las ESTAMOS AQUI PARA AYUDAR! fi guras paso-a-paso provistas en el folleto inglés. Cada paso Tratamos de asegurar que su mueble llega en condición excelente. en español corresponde al mismo paso en inglés. Se destacan Nuestros representantes de Servicio al Cliente son amables y las fi... - Página 27 Fije los GABINETES DERECHOS (40CA) y los GABINETES IZQUIERDOS (40CB) a los EXTREMOS (A y B) y al PARAL (C). Utilice veinticuatro TORNILLOS DORADOS DE CABEZA PERDIDA de 8 mm (3S) a través de los agujeros No. 1 y No. 4. www.sauder.com/services 411201 Page 27...
- Página 28 NOTA: Por favor, lea las páginas de atrás del folleto de instrucciones en cuanto a importante información de seguridad. Esto completa el ensamblaje. Limpie con su pulimento para muebles preferido o un paño húmedo. Seque con un paño. Page 28 411201 www.sauder.com/services...
- Página 29 équipé. • Blessure physique. Le mobilier peut • Ne pas pousser le mobilier, surtout sur la être très lourd. moquette. www.sauder.com/services 411201 Page 29...
- Página 30 • No empuje la unidad, especialmente • Lesión física. El mobiliario puede ser sobre un piso alfombrado. muy pesado. Page 30 411201 www.sauder.com/services...
-
Página 31: Garantie Limitée De 5 Ans
à compter de la date d'achat la première fois et qui sont signalés à Sauder dans les limites de couverture de la contre tout défaut de matériaux ou de fabrication des composantes de mobilier Sauder. - Página 32 Dear Valued Customer: So, how did it go? Set a world record for speed? Thanks so much for choosing Sauder® furniture. I hope the Feeling good about yourself? purchase and assembly process was a positive experience Nice. Get social with it on any and you feel good about the furniture you just built.