Publicidad
Enlaces rápidos
sauder.com
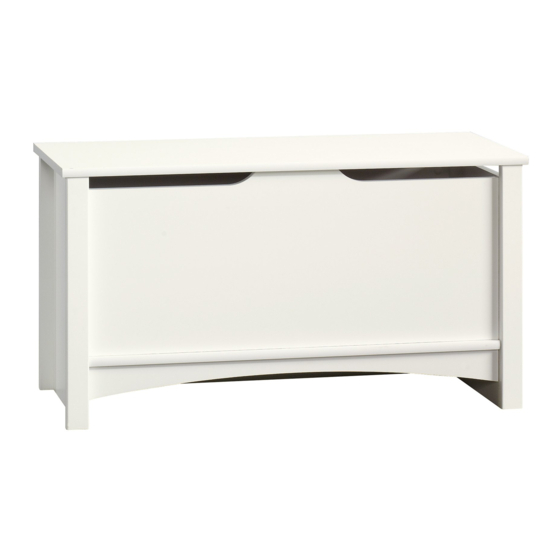
Storage Chest
Shoal Creek Collection | 411203
Need help? Visit Sauder.com to view video assembly tips or chat with a live rep.
Prefer the phone? Call 1-800-523-3987.
Share your journey!
WARNING
CHOKING HAZARD - Small Parts
Not for children under 3 years.
Adult assembly required.
NOTE: THIS INSTRUCTION
BOOKLET CONTAINS IMPORTANT
SAFETY INFORMATION.
PLEASE READ AND KEEP FOR
FUTURE REFERENCE.
English pg 1-15
Français pg 16-18
Español pg 19-21
Lot # 361250
03/24/14
Purchased: __________________
Be sure to give us a ring before
making any returns. 1-800-523-3987
Publicidad

Manuales relacionados para Sauder 411203


Resumen de contenidos para Sauder 411203
- Página 1 Shoal Creek Collection | 411203 NOTE: THIS INSTRUCTION BOOKLET CONTAINS IMPORTANT SAFETY INFORMATION. Need help? Visit Sauder.com to view video assembly tips or chat with a live rep. PLEASE READ AND KEEP FOR FUTURE REFERENCE. Prefer the phone? Call 1-800-523-3987.
- Página 2 Assembly Tools Required Part Identifi cation No. 2 Phillips Screwdriver Tip Shown Actual Size Hardware Identifi cation Assembly Steps 5-15 Hammer Not actual size Français 16-18 Español 19-21 Skip the power trip. Safety This time. Warranty Page 2 411203 www.sauder.com/services...
- Página 3 Use this part identifi cation to help identify similar parts. RIGHT END (1) BOTTOM (1) REAR LEG (2) LEFT END (1) BACK (1) FRONT (1) TOP LID (1) FRONT LEG (2) SKIRT (1) www.sauder.com/services 411203 Page 3...
- Página 4 HIDDEN CAM - 18 CAM SCREW - 18 ANGLE BRACKET - 4 LID SUPPORT - 1 HINGE - 3 WOOD DOWEL - 2 BLACK 1-7/8" FLAT HEAD SCREW - 3 BLACK 9/16" LARGE HEAD SCREW - 24 Page 4 411203 www.sauder.com/services...
- Página 5 fl oor. Push eighteen HIDDEN CAMS (J2) into the å ENDS (A and B), BOTTOM (D), BACK (E), and FRONT (H). Do not tighten the HIDDEN CAMS in this step. Arrow Arrow (18 used) Arrow Arrow Hole www.sauder.com/services 411203 Page 5...
- Página 6 Step 2 Turn eighteen CAM SCREWS (K2) into the å ENDS (A and B) and LEGS (F and G). Remember: Righty tighty. Lefty loosey. (18 used) Page 6 411203 www.sauder.com/services...
- Página 7 Step 3 Fasten the LEGS (F and G) to the ENDS (A and B). Tighten å eight HIDDEN CAMS. These surfaces should be even. These edges should be even. www.sauder.com/services 411203 Page 7...
- Página 8 Fasten the REAR LEG (G) on the LEFT END (B) to the å BACK (E). Tighten two HIDDEN CAMS. NOTE: Be sure the WOOD DOWEL in the BACK inserts å into the hole in the REAR LEG. These edges should be even. These holes must be here. Page 8 411203 www.sauder.com/services...
- Página 9 Fasten the BOTTOM (D) to the LEFT END (B). Tighten two å HIDDEN CAMS. These holes must be here. fi n i s h r f a This is a tracking label. Please do not remove. www.sauder.com/services 411203 Page 9...
- Página 10 NOTE: Be sure the WOOD DOWEL in the BACK inserts å into the hole in the REAR LEG. Fasten the RIGHT END (A) to the FRONT (H) and å BOTTOM (D). Tighten three HIDDEN CAMS. BLACK 1-7/8" FLAT HEAD SCREW (3 used in this step) Page 10 411203 www.sauder.com/services...
- Página 11 å four BLACK 9/16” LARGE HEAD SCREWS (Q). NOTE: Be sure the edges of the ANGLE BRACKETS are å even with the edge of the SKIRT. BLACK 9/16" LARGE HEAD SCREW (4 used in this step) www.sauder.com/services 411203 Page 11...
- Página 12 Step 8 Fasten the SKIRT (I) to the ENDS (A and B) and BOTTOM (D). å Use four BLACK 9/16” LARGE HEAD SCREWS (Q). BLACK 9/16" LARGE HEAD SCREW (4 used in this step) Page 12 411203 www.sauder.com/services...
- Página 13 Fasten the HINGES (O) to the BACK (E) and TOP LID (C). å legs. And, you know, Use twelve BLACK 9/16" LARGE HEAD SCREWS (Q). your arms. BLACK 9/16" LARGE HEAD SCREW (12 used in this step) www.sauder.com/services 411203 Page 13...
- Página 14 Use four BLACK 9/16" LARGE HEAD SCREWS (Q). NOTE: You will need to lift the front long edge of the TOP LID å slightly to fasten the LID SUPPORT. BLACK 9/16" LARGE HEAD SCREW (4 used in this step) Page 14 411203 www.sauder.com/services...
- Página 15 NOTE: Please read the back page of the instruction å booklet for important safety information. This completes assembly. Clean with your favorite å furniture polish or a damp cloth. Wipe dry. And to celebrate, why not share your success story? 70 lbs. 50 lbs. www.sauder.com/services 411203 Page 15...
- Página 16 élément et conserver le livret pour future référence. EXTRÉMITÉ DROITE ..........1 EXCENTRIQUE ESCAMOTABLE ....18 Pour contacter Sauder EXTRÉMITÉ GAUCHE ..........1 VIS D'EXCENTRIQUE ..........18 en ce qui concerne cet COUVERCLE SUPÉRIEUR ........1 CONSOLE À ÉQUERRE .........4 élément, faire référence...
- Página 17 Insérer deux CHEVILLES EN BOIS (R) dans l'ARRIÈRE (E). Fixer le PIED ARRIÈRE (G) sur l'EXTRÉMITÉ GAUCHE (B) à l’ARRIÈRE (E). Serrer deux EXCENTRIQUES ESCAMOTABLES. REMARQUE : S’ a ssurer d’insérer la CHEVILLE EN BOIS dans l'ARRIÈRE dans le PIED ARRIÈRE. www.sauder.com/services 411203 Page 17...
- Página 18 Relever, avec précaution, l'élément dans sa position verticale. pour meubles ou d’un chiff on humide. Essuyer. Fixer les CHARNIÈRES (O) à l’ARRIÈRE (E) et au COUVERCLE SUPÉRIEUR (C). Utiliser douze VIS TÊTE LARGE 14 mm NOIRES (Q). Page 18 411203 www.sauder.com/services...
- Página 19 EXCÉNTRICO ESCONDIDO ......18 et conserver le livret pour future référence. EXTREMO IZQUIERDO ............1 BIELA DE EXCÉNTRICO ........18 Pour contacter Sauder TAPA SUPERIOR ..............1 SOPORTE ANGULAR ..........4 en ce qui concerne cet FONDO .................... 1 SOPORTE DE LA TAPA ...........1 élément, faire référence...
- Página 20 Inserte dos PASADORES DE MADERA (R) dentro del DORSO (E). Fije la PATA POSTERIOR (G) en el EXTREMO IZQUIERDO (B) al DORSO (E). Apriete dos EXCÉNTRICOS ESCONDIDOS. NOTA: Asegúrese de que los PASADORES DE MADERA en el DORSO se insertan entre el PATA POSTERIOR. Page 20 411203 www.sauder.com/services...
- Página 21 Seque con un paño. PASO 9 Cuidadosamente ponga la unidad en posición vertical. Fije las BISAGRAS (O) al DORSO (E) y a la TAPA SUPERIOR (C). Utilice doce TORNILLOS NEGROS DE CABEZA GRANDE de 14 mm (Q). www.sauder.com/services 411203 Page 21...
- Página 22 Llame a nuestro número sin cargo para servicio al cliente o piezas de repuesta. Guarde este folleto de instrucciones para referencia en el futuro. Test position 60 degrees Essayer la position 60 degrés Pruebe su posición 60 grados Closed position 2 inches Position fermée 51 mm Posición cerrada Page 22 411203 www.sauder.com/services...
- Página 23 GARANTIE LIMITÉE DE 5 ANS 1. Sauder Woodworking Co. (Sauder®) off re une couverture de garantie limitée à l’ a cheteur 4. La présente garantie ne s’ a pplique qu’ a ux défauts garantis qui se produisent pour initial du présent produit pendant une période de cinq ans à...
- Página 24 Dear Valued Customer: So, how did it go? Thanks so much for choosing Sauder® furniture. I hope the Set a world record for speed? purchase and assembly process was a positive experience Feeling good about yourself? and you feel good about the furniture you just built. If you Nice.