DURAVIT DuraStyle Serie Instrucciones De Montaje
Ocultar thumbs
Ver también para DuraStyle Serie:
- Manual de uso (220 páginas) ,
- Instrucciones de montaje (69 páginas) ,
- Instrucciones de montaje (40 páginas)

Manuales relacionados para DURAVIT DuraStyle Serie


Resumen de contenidos para DURAVIT DuraStyle Serie
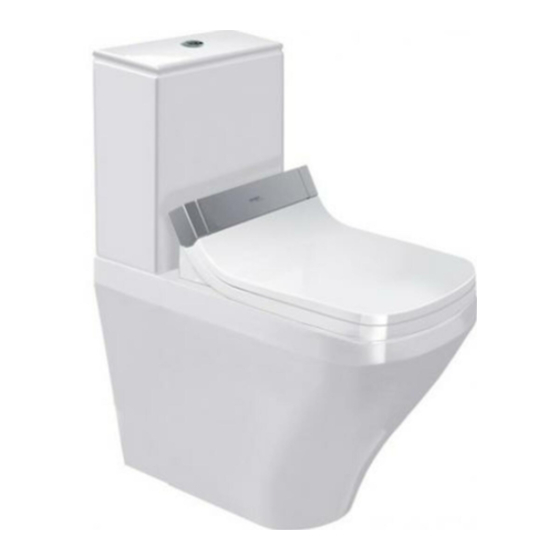
- Página 1 Leben im Bad Living bathrooms DuraStyle Mounting instructions Two-piece water toilet Instrucciones de montaje Inodoro de dos piezas 安装说明 分体座便器 # 2160.10000 # 0935200005...
-
Página 2: Tabla De Contenido
Index 中文 English Español Technical information Información técnica 技术信息 Content of packaging ....3 Contenido de la caja ...... 3 包装内容 ........3 装配尺寸 ........4 Assembly dimensions ....4 Medidas de montaje ...... 4 安装说明书 Mounting instructions Instrucciones de montaje Installation of the toilet .... - Página 3 # 2160.10000 # 0935200005 # 0060510000 # 0060590000 THIS CARTON CONTAINS: ESTE CARTÓN CONTIENE: 箱内包括物品 1. 分体座便器 1. Two-piece water toilet 1. Un inodoro de dos piezas 2. 带进水阀和3英寸双冲活塞式排水 2. Tank supplied with fill valve and 2. La cisterna se suministra con la 阀...
-
Página 4: Before You Start
3/8” 1/2” 5/8” ” 250-290 1/2” 7/8” 3/4” 7/8”- 3/8” BEFORE YOU START: For a safe and efficient operation of requirements of ASME Specification Please take a few minutes to read the two-piece water toilet a water A 112.19.2 - 2008; 112.19.14 - 2006 / the following installation instruc- pressure between minimum 20 psi CSA B 45.1 - 08 GB 6952 - 2005. -
Página 5: Installation Of The Toilet
Shut-off valve Llave de paso "-9" 180° "-11 " 210-230 mm 250-290 mm 305 mm 12" max. / máx. " / 6,5 mm INSTALLATION OF THE TOILET If the floor flange has not been se- Put the toilet upside-down. Place the new wax-ring around the Standard US installation dimen- cured to the building structure af- outlet hole of the toilet. - Página 6 Open the tank cover carefully. Install large rubber gasket over Slip water supply line trough the holes (above and left side of the bowl). Slip threaded outlet on bottom of tank. rubber washers over the two tank bolts. Insert the bolts through the holes Connect the water supply line with in the bottom of the tank.
- Página 7 Position toilet with a rocking motion, Alternately tighten nuts until toilet Connect the water supply line with Turn on the water at the shut-off press bowl down fully on wax-ring is firmly seated on floor. the shut-off valve. valve. and flange. Coloque el inodoro con un movi- Apriete de forma alternativa las Conecte el tubo de alimentación de...
- Página 8 The tank water level is factory set and should rise to the water level mark (1). Flush the tank at least three times It is recommended that the fixture If it is not at this level, adjust the fill valve (2) to set the water line to the and check it for leaks.
-
Página 9: Further Information Safety Instructions
- Water level is too low u Increase water level in tank property damage. DURAVIT shall not be responsible or liable for any tank fitting failure or damage caused by the use of in-tank bowl cleaner. NO FLUSHING - Supply stop is closed... -
Página 10: Instrucciones De Seguridad
20 psi. DURAVIT no se responsabiliza por fallos en las griferías de la cisterna ni por Consulte a su fontanero daños ocasionados por el uso de productos limpiadores de inodoros en el interior de la cisterna. -
Página 11: 安全介绍
故障解答 警告! u 解决办法 - 可能发生故障及原因 - 产品易碎。为了避免产品破损并伤及人身安全,请小心搬动 - 安装前请仔细检查产品有无损坏 充水阀开/关而座便器没冲水 - 过度拧紧螺丝可能导致陶瓷破裂 - 活塞式排水阀脏 u 检查和清洁排水阀 - 为避免渗漏,请勿在安装完毕后摇动或试图搬动座便器。如果密封圈不 小心损坏,必须更新 充水阀连续充水 u 关闭供水阀,打开充水阀帽并清洁 - 充水阀密封脏 拆卸旧的座便器 阀密封。 - 关闭供水及冲水阀,此时座便器内仍然有水 - 拆下供水管及连接件 u 检查、清洁和调整排水阀位置 - 排水阀回复不到位 - 冲净座便器 - 用海绵吸干水箱剩余水份 - 拆卸水箱及座便器 冲水性能差... - Página 12 Duravit AG Duravit USA, Inc. Duravit Shanghai Sales Center Werderstr. 36 2205 Northmont Parkway Suite B-d, 10/F Jiu Shi Tower 78132 Hornberg Suite 200 No. 28 Zhongshan Road South Germany Duluth, GA 30096 Shanghai P.C. 200010 Phone +49 78 33 70 0...