Tabla de contenido
Publicidad
Idiomas disponibles
Idiomas disponibles
Enlaces rápidos
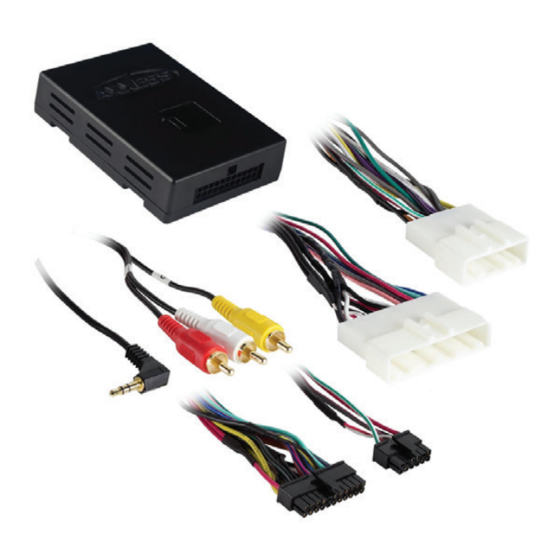
INTERFACE COMPONENTS
• AXTO-NI1 interface
• AXTO-NI1 harness
• 16-pin harness with stripped leads
• AXCSD-6V 12-volt to 6-volt converter
AxxessInterfaces.com
Maxima Amplifier Interface 2016-Up
Nissan
Visit
AxxessInterfaces.com
for more detailed information about the product and up-to-date
vehicle specific applications
INTERFACE FEATURES
• Provides accessory power
• Retains the factory AUX-IN jack
(12-volt 10-amp)
• Used in amplified applications
• Provides NAV outputs (parking
• Adjustable gain control for
brake, reverse, speed sense)
• Pre-wired AXSWC harness
• High level speaker input
(AXSWC sold separately)
• Retains balance
• Retains the factory backup
• Micro-B USB updatable
camera
• Retains the audible parking
sensor warning
© COPYRIGHT 2020 METRA ELECTRONICS CORPORATION
I N S TA L L AT I O N I N S T R U C T I O N S
TABLE OF CONTENTS
Connections ............................................................2
Installation .............................................................3
Programming .........................................................3
Adjustments ...........................................................3
Extra Settings .........................................................4
overall volume
OPTIONAL ACCESSORIES
Steering Wheel Control Interface: AXSWC
TOOLS REQUIRED
• Crimping tool and connectors, or solder gun,
solder, and heat shrink
• Tape • Wire cutter • Zip ties
Attention!
out of the ignition for a few minutes before
removing the factory radio. When testing the
aftermarket equipment, ensure that all factory
equipment is connected before cycling the
key to ignition.
AXTO-NI1
(sold separately)
Let the vehicle sit with the key
REV. 1/23/20 INSTAXTO-NI1
Publicidad
Tabla de contenido

Resumen de contenidos para Axxess AXTO-NI1
-
Página 1: Tabla De Contenido
INTERFACE COMPONENTS Attention! Let the vehicle sit with the key out of the ignition for a few minutes before • AXTO-NI1 interface removing the factory radio. When testing the • AXTO-NI1 harness aftermarket equipment, ensure that all factory • 16-pin harness with stripped leads equipment is connected before cycling the key to ignition. -
Página 2: Connections
Please reference “Reverse camera operation” on page 4 if retaining the camera. Purple, Purple/Black, Light Green, White, White/Black 12-pin AXSWC harness & 3.5mm jack: From the AXTO-NI1 harness to the aftermarket radio: • This 12-pin AXSWC harness & 3.5mm jack are to be used with an AXSWC (sold separately) • Connect the Black wire with a ring terminal to chassis ground. -
Página 3: Installation
• Connect the AXTO-NI1 harness to the wiring harness in the vehicle. • Once at the desired level, audio level adjustment is complete. Note: If using the AXSWC, connect it after you program and test the AXTO-NI1, with the key in the off position. -
Página 4: Extra Settings
The SOURCE button will not function while in this screen. Metra/Axxess Tech Support. Reverse camera operation • While the vehicle in reverse, the backup camera and 360-view will both be displayed on the radio screen. This is generated by the vehicle itself;... -
Página 5: Configuraciones Adicionales
• Mientras el vehículo está en reversa, la cámara de reversa y la vista en 360 se mostrarán en la pantalla de la radio. Esto es generado por el con el soporte técnico de Metra / Axxess. propio vehículo; Un módulo de fábrica independiente controla la vista. -
Página 6: Instalación
• Una vez que haya llegado al nivel deseado, el ajuste del nivel de audio está completo. Nota: Si va a utilizar el AXSWC, conéctelo después de programa y probar el AXTO-NI1 con la llave en la posición de apagado. -
Página 7: Conexiones
• Si se retiene la cámara de reversa de fábrica, conecte el conector RCA amarillo a la entrada de cámara de reversa. Por favor, consulte “Operación de cámara reversa” en la página 4 si Desde el arnés AXTO-NI1 en el radio de mercado secundario: retiene la cámara • Conecte el cable negro con una terminal de aro al chasís. - Página 8 COMPONENTES DE LA INTERFASE ¡Atención! Deje que el vehículo se asiente con la llave fuera del encendido durante unos • Interfase AXTO-NI1 minutos antes de retirar la radio de fábrica. Al • Arnés AXTO-NI1 probar el equipo de posventa, asegúrese de que • Arnés de 16 pins con conectores pelados todo el equipo de fábrica esté...


