Publicidad
Enlaces rápidos
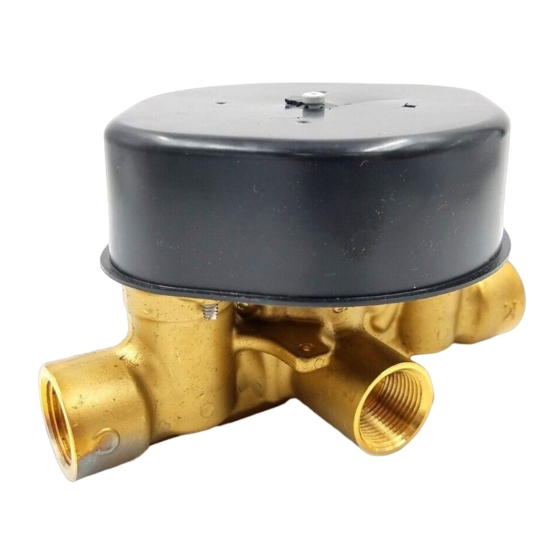
Replacement Parts
Piezas de Repuesto
Pièces de rechange
RP46078
Test Cap
Tapa de Prueba
Capuchon d'essai
RP22734
Bonnet
Capuchón
Chapeau
RP72604
Optional Extension Kit
Kit opcional de la extensión
Kit facultatif de rallonge
77340
Rev. B
RP54910
Stop
Tope
Butée
RP75529
Plasterguard
Protector de yeso
Protecteur
5
Installation reference available
on instruction sheet 75200.
Referencia de la instalación
disponible en la hoja de
instrucción 75200.
Référence d'installation
disponible sur la feuille
d'instruction 75200.
Publicidad

Manuales relacionados para Brizo SENSORI R66000-WS


Resumen de contenidos para Brizo SENSORI R66000-WS
- Página 1 Replacement Parts Piezas de Repuesto Pièces de rechange RP46078 Test Cap Tapa de Prueba Capuchon d’essai RP22734 Bonnet Capuchón Chapeau RP54910 Stop Tope Butée RP75529 Plasterguard Protector de yeso Protecteur RP72604 Optional Extension Kit Kit opcional de la extensión Kit facultatif de rallonge Installation reference available on instruction sheet 75200.
- Página 2 350 South Edgeware Road Componentes electrónicos y pilas (si aplicable) Indianapolis, IN 46280 St. Thomas, Ontario, Canada N5P 4L1 Todas las piezas (salvo las pilas), si hay, de esta llave de agua Brizo ® están garantiza- 1-877-345-BRIZO (2749) 1-877-345-BRIZO (2749) das al consumidor comprador original de estar libres de defectos en materiales y fabri- customerservice@deltafaucet.com...
- Página 3 1-877-345- BRIZO. Deje esta hoja de instrucciones como ref- erencia para el propietario/usuario. AVIS À L’INSTALLATEUR : ATTENTION! – En...
- Página 4 Optional Extension Kit Available - RP72604 Kit opcional de la extensión - RP72604 Kit facultatif de rallonge - RP72604 3 1/4" ± 1/8" 3 1/4 po ± 1/8 po SHUT OFF WATER SUPPLIES. (4) to access mounting holes. Make Consider the type and thickness of your sure the word “UP”...
- Página 5 Connect valve body, 3/4"-14 NPT inlets, If soldering is required for any connection, to water supplies using the proper fittings. remove bonnet (1), test cap (2), screws Make sure rough is level in the horizontal (3) and stops (4) before soldering. and vertical directions.
-
Página 6: Prueba De Presión Y Limpieza De La Instalación
Connect top outlet (1) as shown with PRESSURE TESTIONG & FLUSHING proper fittings. THE INSTALLATION Prior to testing, reinstall cap (1), bonnet (2), stops (3) and screws (4). Tighten securely. Set stops to full open. Plug outlet with proper fittings; and, check for leaks.