Tabla de contenido
Publicidad
Idiomas disponibles
Idiomas disponibles
Enlaces rápidos
Item #1001311056
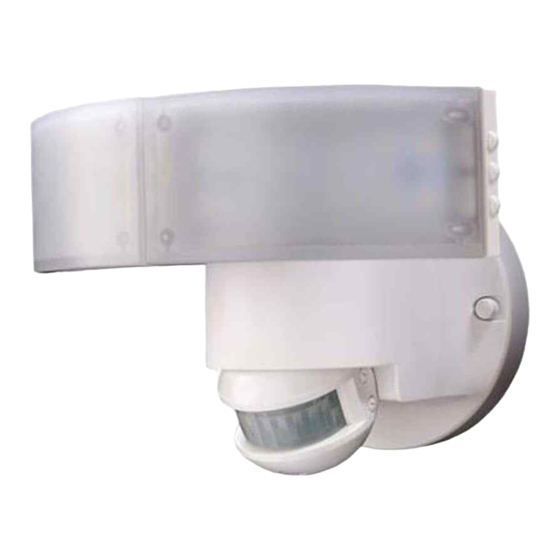
Model #DFI-5982-WH
USE AND CARE GUIDE
MOTION SECURITY LIGHT
Questions, problems, missing parts?
Before returning to the store, call Defiant Customer Service
8 a.m.-7 p.m., EST, Monday-Friday, 9 a.m. - 6 p.m., EST, Saturday
1-866-308-3976
HOMEDEPOT.COM
THANK YOU
We appreciate the trust and confidence you have placed in Defiant through the purchase of this motion security light.
We strive to continually create quality products designed to enhance your home. Visit us online to see our full line of
products available for your home improvement needs. Thank you for choosing Defiant!
Publicidad
Capítulos
Tabla de contenido

Manuales relacionados para Defiant DFI-5982-WH


Resumen de contenidos para Defiant DFI-5982-WH
- Página 1 THANK YOU We appreciate the trust and confidence you have placed in Defiant through the purchase of this motion security light. We strive to continually create quality products designed to enhance your home. Visit us online to see our full line of...
-
Página 2: Tabla De Contenido
Table of Contents Tools Required ........3 Table of Contents ........2 Hardware Included .........4 Safety Information ........2 Package Contents ........4 Warranty ...........2 Installation ..........5 5-Year Limited Warranty ......2 Operation...........7 Pre-Installation .........3 Care and Cleaning ........10 Planning Installation ......3 Troubleshooting ........10 Specifications ........3 Safety Information PRECAUTIONS WARNING: Turn the power off at the circuit breaker or... -
Página 3: Pre-Installation
Pre-Installation PLANNING INSTALLATION Before installing the light fixture, ensure that all parts are present. Compare parts with the Hardware Included and Package Contents sections. If any part is missing or damaged, do not attempt to assemble, install, or operate this light fixture. -
Página 4: Hardware Included
Pre-Installation (continued) HARDWARE INCLUDED NOTE: Hardware shown to actual size. Part Description Quantity Mounting bracket screw Mounting bracket screw Decorative screw (pre-installed) Mounting bolt Wire connector Mounting bracket (not to scale) PACKAGE CONTENTS Part Description Quantity Lamp head Light fixture Motion sensor 1-2- asy Connect™... -
Página 5: Installation
Installation Determining the mounting location NOTE: The light fixture should be mounted approximately 8 ft. (2.4 m) above the ground. If the light fixture is mounted higher than recommended, aiming the sensor down will reduce the coverage area. Wall Mount □... -
Página 6: Making The Electrical Connections
Installation (continued) Installing the 1-2- asy Making the electrical Connect™ connections □ □ Connect the ground wire on the mounting Insert the junction box wires into the side of bracket (FF) to the house ground wire using a the terminal block. Tighten terminal block wire connector (EE). -
Página 7: Operation
Installation (continued) Caulking around the light fixture □ Caulk around the 1-2- asy Connect™ (D) and mounting surface with silicone sealant (not included). Operation Adjusting the lamp heads WARNING: Risk of fire. Keep the lamp heads at least 2 in. (51 mm) from combustible materials. CAUTION: Keep lamp heads 30°... - Página 8 Operation (continued) Adjusting the motion sensor Adjusting the SENS control detection zone □ □ To increase the detection zone, turn the Perform a “walk test”: walk in an arc across “SENS” control counterclockwise. the front of the motion sensor (C). □...
-
Página 9: Using Manual Mode
Operation (continued) Adjusting the TIME control Using manual mode NOTE: The “TIME” control determines the amount of NOTE: Manual mode overrides the motion sensor (C) and time the light will stay on full bright after all motion has “TIME” control so the light will operate full bright. This stopped. -
Página 10: Care And Cleaning
Care and Cleaning □ To prolong the original appearance, clean the light fixture with clear water and a soft, damp cloth only. □ Do not use paints, solvents, or other chemicals on this light fixture. They could cause a premature deterioration of the finish. - Página 11 Troubleshooting (continued) Problem Possible Cause Solution □ □ The lights stay on continuously. The motion sensor may be picking up a Decrease the “SENS” heat source, such as an air vent, dryer setting or reposition the vent, or brightly painted, heat-reflective motion sensor.
- Página 12 Questions, problems, missing parts? Before returning to the store, call Defiant Customer Service 8 a.m.-7 p.m., EST, Monday-Friday, 9 a.m. - 6 p.m., EST, Saturday 1-866-308-3976 HOMEDEPOT.COM Retain this manual for future use. 207908-03A...
-
Página 13: Guía Para El Uso Y Cuidado
HOMEDEPOT.COM GRACIAS Agradecemos la fe y la confianza que usted ha depositado en Defiant al comprar esta luz de seguridad por movimiento. Procuramos crear continuamente productos de calidad diseñados para mejorar su hogar. Visítenos en internet para ver nuestra línea completa de productos disponibles que necesita para el mejoramiento de su hogar. -
Página 14: Contenido
Contenido Herramientas Requeridas ....15 Contenido ..........14 Ferretería Incluida ........16 Información de seguridad ......14 Contenido del Paquete ......16 Garantía...........14 Instalación ..........17 5 años de garantía limitada ....14 Operación ..........19 Antes de la instalación ......15 Cuidado y limpieza .........22 Planificación de la Instalación .....15 Análisis de averías .........22 Especificaciones ........15 Información de seguridad... -
Página 15: Antes De La Instalación
Antes de la instalación PLANIFICACIÓN DE LA INSTALACIÓN Antes de instalar el aparato de luz, esté seguro que estén todas las piezas. Compare las piezas con la Ferretería incluida y las secciones de Contenidos del paquete. Si cualquier pieza falta o está dañada, no intente ensamblar, instalar ni operar este aparato de luz. -
Página 16: Ferretería Incluida
Antes de la instalación (continuación) FERRETERÍA INCLUIDA NOTA: La ferretería se muestra en su tamaño real Pieza Descripción Cantidad Tornillo del soporte de montaje Tornillo del soporte de montaje Tornillo decorativo (pre-instalado) Tornillo de montaje Capuchón para cable Soporte de montaje (no está a escala) CONTENIDO DEL PAQUETE Pieza Descripción... -
Página 17: Instalación
Instalación Determinación del sitio de montaje NOTA: Esta lámpara debe ser instalada aproximadamente a 8 pies (2,4 m) por encima del suelo. Si se la instala a una altura más alta de la recomendada, se reducirá la zona de cobertura si apunta el detector hacia abajo. Montaje en pared □... -
Página 18: Cómo Hacer Las Conexiones Eléctricas
Instalación (continuación) Instalación del 1-2- asy Cómo hacer las conexiones Connect™ eléctricas □ □ Conecte el cable de a tierra del soporte de Inserte los cables de la caja de conexiones montaje (FF) con el cable de a tierra de la casa en el lado del bloque de terminales. -
Página 19: Calafatee Alrededor Del Aparato De Luz
Instalación (continuación) Calafatee alrededor del aparato de luz □ Calafatee alrededor del 1-2- asy Connect™ (D) y de la superficie de montaje con un sellador de silicona contra la intemperie (no incluido). Operación Ajuste de los cabezales de la lámpara ADVERTENCIA: Riesgo de incendio. -
Página 20: Regulación De La Zona De Detección Del Detector De Movimiento
Operación (continuación) Regulación de la zona de Ajuste del control SENS detección del detector de movimiento □ Para aumentar la zona de detección, gire el “SENS” control hacia la izquierda. □ Haga una “prueba caminando”: camine □ Para disminuir la zona de detección, gire el transversalmente a la parte frontal del detector de control “SENS”... -
Página 21: Ajuste Del Control De Tiempo (Time)
Operación (continuación) Ajuste del control de TIEMPO Uso del la fase manual (TIME) NOTA: La modalidad manual anula el sensor de NOTA: El control de TIEMPO (TIME) determina la cantidad de movimiento (C) y el control “TIME” para que la luz funcione tiempo que la luz permanecerá... -
Página 22: Cuidado Y Limpieza
Cuidado y limpieza □ Para prolongar la apariencia original, limpie la lámpara solo con agua limpia y un paño suave y húmedo. □ No use pinturas, solventes ni otros químicos en este aparato de luz. Podrían ser la causa de una prematura deterioración del acabado. - Página 23 Análisis de averías (continuación) Problema Causa Probable Solución □ □ Las luces permanecen en- El detector de movimiento puede estar Reduzca la calibración del cendidas constantemente. absorbiendo calor de una fuente de calor alcance (“SENS”) o vuelva a co- como una ventosa de aire, una secadora locar el detector de movimiento.
- Página 24 ¿Tiene preguntas, problemas o piezas faltantes? Antes de devolverlo a la tienda, llame a Servicio al Cliente de Defiant de 08 a.m.-7 p.m., EST, Lunes - Viernes, 09 a.m.-6 p.m., EST, sábado. 1-866-308-3976 HOMEDEPOT.COM Guarde este manual para uso futuro.