Tabla de contenido
Publicidad
Idiomas disponibles
Idiomas disponibles
Enlaces rápidos
Publicidad
Tabla de contenido

Resumen de contenidos para Steren MUL-105
-
Página 2: Main Characteristics
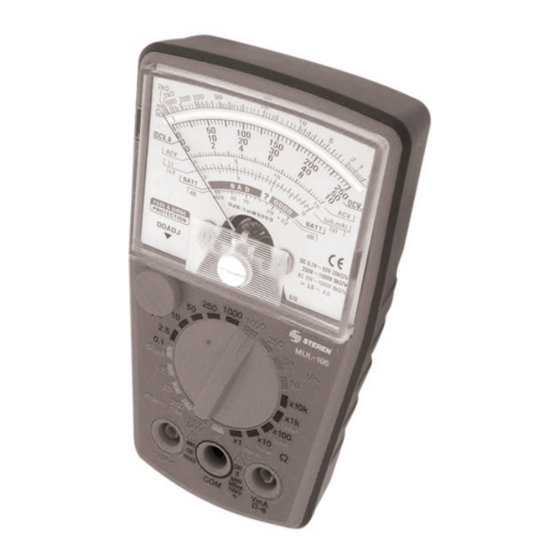
INSTRUCTIONS Checking the tester circuit, voltage meter, current meter, resistance meter, etc. The multimeter with part number MUL-105 it’s –for many reasons- a high quality device, lightweight, and portable. Can be use it for professionals or amateurs. - Página 3 SPECIFICATIONS DC VOLTAGE Ranges: 25,10, 50, 250 and 1000V Full-range accuracy: ±3% Sensitivity: 10KΩ/V CD 25-50V AC VOLTAGE Ranges: 10, 50, 250, 1000V Full-range accuracy: ±4% Sensitivity: 4KΩ/V DECIBEL METER -10 to + 22dB 0dB = 1mW/600Ω DC CURRENT Ranges: 50μA/ 2,5mA/25mA/250mA/10A Full-range accuracy: ±3%...
-
Página 4: Measuring Ac Voltage
4.- Make sure that there is no voltage in the circuit before measuring resistance. 5.- Read the ohms in the range, please refers to next table: Test Position Factor Resistance X100 X100 X1000 X10K X10000 MEASURING DC VOLTAGE 1.- Connect the red testing point to the jack signaled +VmA Ω.))) and the black testing point to the jack signaled “COM”. -
Página 5: Measuring Dc Current
MEASURING DC CURRENT 1.- Connect the red testing point to the jack signaled “+VmA Ω” and the black testing point to the jack signaled “COM”. 2.- Set the dial to the VAC setting. 3.- Connect the red testing point to positive polarity and black testing point to negative polarity, in the circuit to be measured. -
Página 6: Replacing The Fuse
REPLACING THE FUSE Caution: Before removing the cover from your multimeter, make sure the testing points are disconnected to avoid the risk of electrical shock. 1.- To replace the fuse (0,5A / 250V and 10A / 250V respectively), remove the cover from the multimeter removing the three screws on the back of the multimeter. -
Página 8: Instrucciones
INSTRUCCIONES Revisión del circuito probador medidor de voltaje, corriente, resistencia, etc. El MUL-105 es por varias razones un gran equipo en su construcción pero es a la vez un dispositivo ligero y manejable por su tamaño, se puede usar en servicio de campo, recomendado para usuarios ya sean afi... -
Página 9: Resistencia
de lado izquierdo lateral, inserte las puntas negro con (-) y rojo con (+), junte las puntas de los banana y en la escala Rx10 notará que la aguja se va al extremo derecho por medio de la perilla izquierda lateral usted podrá ajustar a cero del lado derecho en la primer escala superior correspondiente a ohms (Ω). -
Página 10: Operacion Prueba De Resistencia Ω
OPERACION PRUEBA DE RESISTENCIA Ω 1. Inserte las puntas de prueba dentro de los bornes - COM y + VmAΩ.))) 2. Coloque el selector en el rango Ω 3. Junte las puntas de prueba y ajuste a 0 Ω con la perilla de ajuste. -
Página 11: Prueba De Corriente Cd
Prueba Posición Multiplicador Voltaje AC 250V 1000V X100 PRUEBA DE CORRIENTE CD 1. Inserte la punta roja dentro del borne +VmA Ω. y la negra dentro del borne - COM. 2. Coloque el selector en el rango de A CD 3. -
Página 12: Prueba De Continuidad
4. Lea el valor en la escala BATT, sólo verá buena o mala. PRUEBA DE CONTINUIDAD 1. Coloque el selector en la posición zumbador ))) 2. Conecte las puntas al circuito a probar. 3. El zumbador sonará si el circuito es conductor. Dimensiones: 160X88X40 mm Peso... - Página 13 3.- The repairing time will not exceed 30 natural days, from the day the claim was received. 4.- Steren sell parts, components, consumables and accesories to costumer, as well as warranty service, at any of the addresses mentioned later. THIS WARRANTY IS VOID IN THE NEXT CASES:...
-
Página 14: Póliza De Garantía
1.- Para hacer efectiva la garantía, presente ésta póliza y el producto, en donde fue adquirido o en Electrónica Steren S.A. de C.V. 2.- Electrónica Steren S.A de C.V. se compromete a reparar el producto en caso de estar defectuoso sin ningún cargo al consumidor. Los gastos de transportación serán cubiertos por el proveedor.


