Tabla de contenido
Publicidad
Idiomas disponibles
Idiomas disponibles
Enlaces rápidos
HOT SPOT CRYSTAL
SPOTLESS SMART
Infrarot-Heizung
Infrared Heater
Radiador infrarrojo
Radiateur Infrarouge
Radiatore a infrarossi
Infrarood verwarming
10035064 10035065
www.klarstein.com
Hinweis: Dieses Produkt ist nur für gut isolierte Räume
oder für den gelegentlichen Gebrauch geeignet.
Note: This product is only suitable for well insulated
spaces or occasional use.
Nota: Este producto está indicado únicamente en
lugares abrigados o para una utilización punctual.
Remarque : Ce produit ne peut être utilisé que dans
des locaux bien isolés ou de manière occasionnelle.
Advertencia: Questo prodotto è adatto solo per spazi
ben isolati o uso occasionale.
Opmerking: Dit product is alleen geschikt voor goed
geïsoleerde ruimten of voor incidenteel gebruik.
Publicidad
Capítulos
Tabla de contenido

Manuales relacionados para Klarstein 10035064


Resumen de contenidos para Klarstein 10035064
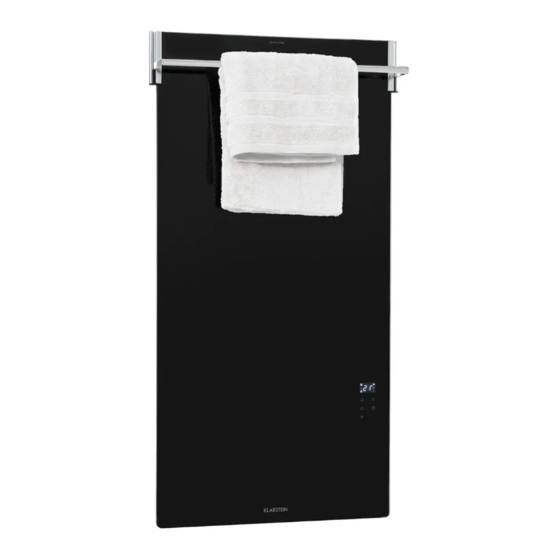
- Página 1 Infrared Heater Radiador infrarrojo Radiateur Infrarouge Radiatore a infrarossi Infrarood verwarming 10035064 10035065 www.klarstein.com Hinweis: Dieses Produkt ist nur für gut isolierte Räume oder für den gelegentlichen Gebrauch geeignet. Note: This product is only suitable for well insulated spaces or occasional use.
-
Página 3: Tabla De Contenido
Français 39 Installation 6 Italiano 51 Anzeigen und Funktionstasten 8 Nederlands 63 Inbetriebnahme und Bedienung 9 Gerätesteuerung per Smartphone 1 1 Reinigung und Pflege 12 Hinweise zur Entsorgung 13 Konformitätserklärung 13 TECHNISCHE DATEN Artikelnummer 10035064, 10035065 Spannung 220 – 240 V Frequenz 50/ 60 Hz Leistung 750 W... -
Página 4: Sicherheitshinweise
SICHERHEITSHINWEISE • Prüfen Sie vor der Benutzung die Spannung auf der Geräteplakette und schließen Sie das Gerät nur an Steckdosen an, die der Spannung des Geräts entsprechen. • Falls das Netzkabel beschädigt ist, lassen Sie es von einer ausgebildeten Fachkraft ersetzen. •... -
Página 5: Produkdatenblatt
PRODUKDATENBLATT Modellkennung(en) 10035064 Angabe Symbol Wert Einheit Angabe Einheit Wärmeleistung Nur bei elektrischen Speicher-Einzelraumheizgeräten: Art der Regelung der Wärmezufuhr Nennwärmeleistung Manuelle Regelung der Wärmezufuhr mit k.A. integriertem Thermostat Mindestwärmeleistung k.A. Manuelle Regelung der Wärmezufuhr k.A. (Richtwert) mit Rückmeldung der Raum- und/oder Außentemperatur... -
Página 6: Installation
INSTALLATION Installationsanleitung Wenn Sie über ein Werkzeug verfügen, können sie das Gerät gemäß der in der Bedienungsanleitung beschriebenen Vorgehensweise installieren. Es besteht ebenfalls die Möglichkeit, den Verkäufer, seinen Kundendienst oder eine in ähnlicher Weise qualifizierte Elektroinstallationsfirma mit der Installation des Geräts zu beauftragen. Schritt 1 Verwenden Sie vor der Installation des Geräts, wie in der Abbildung unten gezeigt, die Installationspositionierungskartonage A1 mit Löchern, um eine Markierung der... - Página 7 Der Abstand zwischen den Löchern sollte wie unten dargestellt sein: WARNUNG Verletzungsgefahr! Dieses Gerät sollte zur Gefahrenvermeidung für kleine Kinder so installiert werden, dass sich die unterste beheizte Schiene 550 mm oberhalb des Bodens befi ndet.
-
Página 8: Anzeigen Und Funktionstasten
Fixieren Sie die 4 Halterungen mit der Expansionsschraube an der Wand. Die fixierten Halterungen können bewegt werden, um die Position anzupassen, damit das Glaspaneel fixiert werden kann. Schritt 2 Entfernen Sie zunächst due Schutzfolie an der Rückseite des Glases. Fixieren Sie anschließend das Glaspaneel an der bereits befestigten Wandhalterung. -
Página 9: Inbetriebnahme Und Bedienung
Fernbedienung 1 Ein/Aus 2 Modustaste 3 Temperaturtaste 4 Timer 5 Kindersicherung INBETRIEBNAHME UND BEDIENUNG Stellen Sie vor der Verwendung des Geräts sicher, dass sich das Gerät und dessen Zubehör in gutem Zustand befinden. Da beim Versand aus dem Werk einige der Elemente zur Verpackung demontiert werden, werden diese speziellen Elemente bei der Entnahme aus dem Verpackungskarton getrennt voneinander entnommen. - Página 10 Einschalten Bringen Sie zunächst den Netzschalter des Geräts, welcher sich an der Seite des Geräts befindet, in die Position „I“. Drücken Sie zur Funktionseinstellung die Taste . Im oberen Teil des Bedienfelds wird die Raumtemperatur angezeigt. Das Gerät läuft nun auf niedriger Leistungsstufe.
-
Página 11: Gerätesteuerung Per Smartphone
GERÄTESTEUERUNG PER SMARTPHONE Wenn Sie Ihr Klarstein-Gerät in Ihr heimisches WLAN einbinden, können Sie es ganz bequem über die dazugehörige Klarstein-App bedienen. Die App ermöglicht es Ihnen, nicht nur das Gerät über Ihr Smartphone fernzusteuern, sondern bietet Ihnen zudem Zugang zu Rezepten und weiterführenden Informationen. -
Página 12: Reinigung Und Pflege
Fehlerbehebung bei Verbindungsproblemen Wenn Ihr Klarstein-Gerät im WLAN nicht gefunden werden kann, überprüfen Sie Folgendes: • Ist das Gerät eingesteckt? • Ist die WLAN-Funktion des Smartphones aktiviert? • Ist die WLAN-Funktion des Klarstein-Gerätes aktiviert? (Befolgen Sie die Anweisungen in der App.) •... -
Página 13: Hinweise Zur Entsorgung
Ihrem Hausmüllentsorgungsdienst. KONFORMITÄTSERKLÄRUNG Hersteller: Chal-Tec GmbH, Wallstraße 16, 10179 Berlin, Deutschland. Importeur für Großbritannien: Chal-Tec UK limited Unit 6 Riverside Business Centre Brighton Road Shoreham-by-Sea BN43 6RE United Kingdom Die vollständige Konformitätserklärung des Herstellers fi nden Sie unter folgendem Link: use.berlin/10035064... -
Página 15: Technical Data
Displays and Function Keys 20 Commissioning and Operation 21 Device Control by Smartphone 23 Cleaning and Care 24 Disposal Considerations 25 Declaration of Conformity 25 TECHNICAL DATA Item number 10035064, 10035065 Voltage 220 – 240 V Frequency 50/ 60 Hz Performance 750 W WiFi standard 802.1 1 b/g/n... -
Página 16: Safety Instructions
SAFETY INSTRUCTIONS • Do not use the appliance until it is securely fi xed as described in this manual. • Check that the voltage indicates on the data plate corresponds with that of the local network before connecting the appliance to the mains power supply. •... -
Página 17: Product Data Sheet
PRODUCT DATA SHEET Model identifier(s): 10035064 Item Symbol Value Unit Item Unit Heat output Type of heat input, for electric storage local space heaters only Nominal heat output manual heat charge control, with integrated thermostat Minimum heat output manual heat charge control with room and/or... -
Página 18: Installation
INSTALLATION Installation instructions If you have a tool, you can install the device according to the procedure described in the operating instructions. It is also possible to ask the seller, his service department or a similarly qualified electrical installation company to install the equipment. Step 1 Before installing the unit as shown in the figure below, use the installation positioning cardboard box A1 with holes to mark the installation position on the wall (the wall must... - Página 19 The distance between the holes should be as shown below: WARNING Danger of injury! To avoid danger for small children, this unit should be installed so that the lowest heated rail is 550 mm above the fl oor.
-
Página 20: Displays And Function Keys
Fix the 4 brackets to the wall with the expansion screw. The fixed brackets can be moved to adjust the position to fix the glass panel. Step 2 First remove the protective film on the back of the glass. Then fix the glass panel to the already attached wall bracket. -
Página 21: Commissioning And Operation
Remote control 1 On/Off 2 Mode button 3 Temperature button 4 timer 5 Child lock COMMISSIONING AND OPERATION Before using the device, make sure that the device and its accessories are in good condition. Since some of the elements are disassembled for packing when shipped from the factory, these special elements are removed separately when you take them out of the packing box. - Página 22 Switch on First, set the power switch of the device, which is located on the side of the device, to the „I“ position. Press the button to set the function. The upper part of the control panel displays the room temperature. The unit will now run at a low power level. Mode Press the Mode button to adjust the power.
-
Página 23: Device Control By Smartphone
Make sure your smartphone is connected to the same WiFi network that your Klarstein device is to be connected to. Open the Klarstein app. Sign in to your account. If you do not have an account, sign up in the Klarstein app. Follow the instructions from the app. App Download Use the scan function of your smartphone to scan the QR code and save the app on your smartphone. -
Página 24: Cleaning And Care
If your Klarstein device cannot be found in the WLAN, check the following: • Is the device plugged in? • Is the WiFi feature of my phone enabled? • Is the WiFi function of the Klarstein device activated? (Follow the instructions in the app) • Has the WLAN password been entered correctly? •... -
Página 25: Disposal Considerations
Chal-Tec GmbH, Wallstrasse 16, 10179 Berlin, Germany. Importer for Great Britain: Chal-Tec UK limited Unit 6 Riverside Business Centre Brighton Road Shoreham-by-Sea BN43 6RE United Kingdom The complete declaration of conformity of the manufacturer can be found at the following link: use.berlin/10035064... -
Página 27: Datos Técnicos
Indicadores y teclas de función 32 Puesta en funcionamiento 33 Control del dispositivo por smartphone 35 Limpieza y cuidado 36 Retirada del aparato 37 Declaración de conformidad 37 DATOS TÉCNICOS Número de artículo 10035064, 10035065 Frecuencia 220 – 240 V Tensión 50/ 60 Hz Potencia 750 W WiFi estándar 802.1 1 b/g/n... -
Página 28: Indicaciones De Seguridad
INDICACIONES DE SEGURIDAD • Antes de utilizar el aparato, compruebe la tensión en la placa técnica del mismo y conecte el aparato solamente a tomas de corriente que se adecuen a dicha tensión. • Si el cable de alimentación está dañado, deberá ser sustituido por un servicio técnico. •... -
Página 29: Hoja De Datos Del Producto
HOJA DE DATOS DEL PRODUCTO Denominación del modelo 10035064 Dato Símbolo Valor Unidad Dato Unidad Potencia térmica Solo con disposítivos de acumulación de calor eléctricos para abastecimiento local: Tipo de regulación del abastecimiento de calor Potencia térmica nominal Regulación manual del abastecimiento de calor con termostato integrado: Potencia térmica mínima... -
Página 30: Instalación
INSTALACIÓN Instrucciones de instalación Si dispone de herramientas, puede instalar el aparato siguiendo el proceso indicado en el manual de instrucciones. No obstante, también existe la posibilidad de solicitar al vendedor, a su servicio de atención al cliente o a una empresa instaladora cualificada que instale el aparato. - Página 31 La distancia entre los orifi cios debe ser la siguiente: ADVERTENCIA Riesgo de lesiones. Para evitar riesgos para los niños pequeños, el aparato debe instalarse de modo que el riel calefactor inferior se sitúe a 550 mm del suelo.
-
Página 32: Indicadores Y Teclas De Función
Fije los 4 soportes a la pared con los tornillos de expansión. Los soportes fijados pueden desplazarse para ajustar la posición para que el panel acristalado se pueda fijar. Paso 2 Primero, retire la lámina protectora de la parte trasera del aparato. A continuación, fije el panel acristalado en el soporte de pared ya instalado. -
Página 33: Puesta En Funcionamiento
Mando a distancia 1 On/off 2 Tecla de modo 3 Tecla de temperatura 4 Temporizador 5 Bloqueo para niños PUESTA EN FUNCIONAMIENTO Antes de utilizar el aparato, asegúrese de que tanto el aparato como los accesorios se encuentren en buen estado. Puesto que durante el envío desde fábrica se desmontan algunos elementos para su embalaje, estos elementos especiales se retiran por separado al sacarlos de la caja de cartón. -
Página 34: Temporizador
Encender Primero coloque el interruptor principal del aparato, situado en uno de los lados, en la posición „I“. Para seleccionar una función, pulse la tecla . En la parte superior del panel de control aparecerá la temperatura ambiente. El aparato funcionará con el nivel de potencia más bajo. -
Página 35: Control Del Dispositivo Por Smartphone
Si conecta el aparato a su red WLAN doméstica, podrá controlarlo cómodamente mediante la App correspondiente de Klarstein. La App le permite no solo controlar el aparato mediante su smartphone, sino que también le ofrece acceso a recetas y otra información adicional. -
Página 36: Limpieza Y Cuidado
Solución de problemas de conexión Si su dispositivo Klarstein no se encuentra en la WLAN, compruebe lo siguiente: • ¿Está enchufado el dispositivo? • ¿Está activada la función WiFi de mi teléfono? • ¿Está activada la función WiFi del dispositivo Klarstein? (Sigue las instrucciones de la aplicación) -
Página 37: Retirada Del Aparato
Chal-Tec GmbH, Wallstraße 16, 10179 Berlín, Alemania. Importador para Gran Bretaña: Chal-Tec UK limited Unit 6 Riverside Business Centre Brighton Road Shoreham-by-Sea BN43 6RE United Kingdom Puede descargar la declaración de conformidad completa del fabricante en el siguiente enlace: use.berlin/10035064... -
Página 39: Fiche Technique
Mise en marche et utilisation 45 Contrôle de l‘appareil par smartphone 47 Nettoyage et entretien 48 Conseils pour le recyclage 49 Déclaration de conformité 49 FICHE TECHNIQUE Numéro d'article 10035064, 10035065 Tension 220 – 240 V Fréquence 50/ 60 Hz Puissance 750 W WiFi standard 802.1 1 b/g/n... -
Página 40: Consignes De Sécurité
CONSIGNES DE SÉCURITÉ • Avant utilisation, vérifi ez la tension sur l‘étiquette de l‘appareil et ne branchez l‘appareil que sur des prises correspondant à la tension de l‘appareil. • Si le câble d‘alimentation est endommagé, faites-le remplacer par un professionnel qualifi é. -
Página 41: Fiche De Données Produit
FICHE DE DONNÉES PRODUIT Référence (s) du produit 10035064 Donnée Symbole Valeur Unité Donnée Unité Puissance calorifique Uniquement pour les radiateurs électriques à accumulation : Type de régulation de l'apport de chaleur Puissance calorifique Régulation manuelle de l'apport de chaleur... -
Página 42: Installation
INSTALLATION Guide d‘installation Si vous disposez d‘un outil, vous pouvez installer l‘appareil en suivant la procédure décrite dans le mode d‘emploi. Vous avez également la possibilité de demander au vendeur, au service client ou à une entreprise d‘électricité de qualification similaire d‘installer l‘appareil. - Página 43 La distance entre les trous doit être celle qui est indiquée ci-dessous : MISE EN GARDE Risque de blessure ! Pour éviter de présenter un danger pour les jeunes enfants, cet appareil doit être installé de manière à ce que le rail chauffant le plus bas soit à...
-
Página 44: Affichages Et Touches De Fonction
Fixez les 4 supports au mur avec la vis d‘expansion. Vous pouvez déplacer les supports fixes pour ajuster la position afin de pouvoir fixer le panneau de verre. Étape 2 Retirez d‘abord le film protecteur au dos de la vitre. Fixez ensuite le panneau de verre au support mural déjà... -
Página 45: Mise En Marche Et Utilisation
Télécommande 1 Marche /Arrêt 2 Touche de mode 3 Touche de température 4 Minuterie 5 Verrouillage parental MISE EN MARCHE ET UTILISATION Avant d‘utiliser l‘appareil, assurez-vous qu‘il est en bon état ainsi que ses accessoires. Étant donné que certains des éléments sont démontés au moment de l‘emballage au départ de l‘usine, ces éléments spéciaux se retirent séparément de l‘emballage. -
Página 46: Verrouillage Parental
Pour allumer l‘appareil Mettez d‘abord l‘interrupteur d‘alimentation de l‘appareil situé sur le côté en position „I“. Appuyez sur le bouton bouton pour régler la fonction. La température ambiante s‘affiche dans la partie supérieure du panneau de commande. L‘appareil fonctionne maintenant à faible puissance. Mode Appuyez sur la touche Mode pour régler la puissance. -
Página 47: Contrôle De L'appareil Par Smartphone
à distance l‘appareil via votre smartphone, mais vous donne également accès à des recettes et à des informations supplémentaires. Procédez comme suit pour connecter votre smartphone avec votre appareil Klarstein : Téléchargez d‘abord l‘application Klarstein en scannant le code QR avec votre smartphone (voir ci-dessous) ou téléchargez-le directement depuis l‘App Store ou... -
Página 48: Nettoyage Et Entretien
Dépannage des problèmes de connexion Si votre appareil Klarstein ne se trouve pas dans le WLAN, vérifiez les points suivants : • L‘appareil est-il branché ? • La fonction WiFi de mon téléphone est-elle activée ? • La fonction WiFi de l‘appareil Klarstein est-elle activée ? (Suivez les instructions dans l‘application) -
Página 49: Conseils Pour Le Recyclage
Chal-Tec GmbH, Wallstraße 16, 10179 Berlin, Allemagne. Importateur pour la Grande Bretagne : Chal-Tec UK limited Unit 6 Riverside Business Centre Brighton Road Shoreham-by-Sea BN43 6RE United Kingdom La déclaration complète de conformité du fabricant est accessible par le lien suivant : use.berlin/10035064... - Página 51 Spie e tasti funzione 56 Messa in funzione e utilizzo 57 Gestione tramite smartphone 59 Pulizia e manutenzione 60 Smaltimento 61 Dichiarazione di conformità 61 DATI TECNICI Codice articolo 10035064, 10035065 Alimentazione 220 – 240 V Frequenza 50/ 60 Hz Potenza 750 W WiFi standard 802.1 1 b/g/n...
-
Página 52: Avvertenze Di Sicurezza
AVVERTENZE DI SICUREZZA • Prima dell‘uso, controllare la tensione sulla targhetta del dispositivo e collegare il dispositivo solo ad una presa che corrisponde alla tensione indicata. • Se il cavo di alimentazione è danneggiato, farlo sostituire da un tecnico qualifi cato. •... -
Página 53: Scheda Informativa Del Producto
SCHEDA INFORMATIVA DEL PRODUCTO Identificazione del modello (i) 10035064 Indicazione Simbolo Valore Unità Indicazione Unità Potenza termica Solo per gli apparecchi per il riscaldamento d'ambiente locale elettrici ad accumulo: Tipo di controllo dell´apporto termico Potenza termica nominale Controllo manuale del carico termico con N.D. -
Página 54: Installazione
INSTALLAZIONE Istruzioni per l’installazione Se si ha a disposizione un attrezzo, si può installare il dispositivo seguendo le istruzioni riportate nel manuale utente. Si può anche contattare il rivenditore, il suo servizio d’assistenza o un’azienda elettrotecnica qualificata per far montare il dispositivo. Primo passo Prima di installare il dispositivo, munirsi di un cartonato sagomato A1 con fori come mostrato nella figura sottostante, per segnare la posizione di montaggio alla parete (la... - Página 55 La distanza tra i fori deve essere uguale a quella indicata nella fi gura sottostante: AVVERTENZA Pericolo di lesioni! Per evitare pericoli per bambini piccoli, il dispositivo deve essere installato in modo tale che la guida riscaldata inferiore si trovi a 550 mm dal pavimento.
-
Página 56: Spie E Tasti Funzione
Fissare i 4 supporti alla parete per mezzo delle viti a espansione. Muovere i supporti per regolare la posizione in modo tale da fissare il pannello di vetro. Secondo passo Rimuovere prima di tutto la pellicola protettiva sul retro del vetro. Dopodiché fissare il pannello di vetro al supporto a parete appena sistemato. -
Página 57: Messa In Funzione E Utilizzo
Telecomando 1 On/Off 2 Tasto modalità 3 Tasto temperatura 4 Timer 5 Blocco di sicurezza bambini MESSA IN FUNZIONE E UTILIZZO Prima dell’utilizzo verificare che il dispositivo e i suoi accessori non siano danneggiati. Quando si apre il cartone si troveranno dei pezzi separati, dato che per spedire il dispositivo alcuni elementi sono stati smontati. - Página 58 Accensione Posizionare innanzitutto l’interruttore a lato del dispositivo su “I” e premere il tasto per impostare la funzione. Sul lato superiore del pannello di controllo viene visualizzata la temperatura della stanza. Il dispositivo funziona sul livello minimo di potenza. Modalità Premere il tasto modalità...
-
Página 59: Gestione Tramite Smartphone
Per collegare il telefono al dispositivo Klarstein, procedere come segue: Per prima cosa scaricare l‘app Klarstein scansionando il codice QR con lo smartphone (vedere sotto) o scaricarla direttamente dall‘App Store o da Google Play. -
Página 60: Pulizia E Manutenzione
• Il dispositivo è collegato? • La funzione WiFi del telefono è abilitata? • La funzione WiFi del dispositivo Klarstein è attivata? (Seguire le istruzioni nell‘app) • La password WLAN è stata immessa correttamente? • Il router, il dispositivo Klarstein e lo smartphone sono nelle immediate vicinanze durante il tentativo di connessione? (Idealmente a non più... -
Página 61: Smaltimento
Chal-Tec GmbH, Wallstraße 16, 10179 Berlino, Germania. Importatore per la Gran Bretagna: Chal-Tec UK limited Unit 6 Riverside Business Centre Brighton Road Shoreham-by-Sea BN43 6RE United Kingdom La dichiarazione di conformità completa del produttore è disponibile al seguente link: use.berlin/10035064... -
Página 63: Technische Gegevens
Productgegevens 65 Installatie 66 Display en functietoetsen 68 Ingebruikname en bediening 69 Bediening per smartphone 71 Reiniging en onderhoud 72 Instructies voor afvoer 73 Conformiteitsverklaring 73 TECHNISCHE GEGEVENS Artikelnummer 10035064, 10035065 Stroomvoorziening 220 – 240 V Frequentie 50/ 60 Hz Vermogen 750 W WiFi-norm 802.1 1 b/g/n WiFi-frequentie 2,4 GHz WiFi zendvermogen (max.) -
Página 64: Veiligheidsinstructies
VEILIGHEIDSINSTRUCTIES • Controleer voor de ingebruikname of de spanning op het stopcontact overeenkomt met het vermogen van het apparaat en sluit het apparaat alleen aan als dit het geval is. • Wanneer de stroomkabel of de stekker beschadigd is laat u deze door een gekwalifi ceerde kracht vervangen. -
Página 65: Productgegevens
PRODUCTGEGEVENS Artikelidentificatie 10035064 Aanduiding Symbol Waarde Eenheid Aanduiding Eenheid Warmtevermogen Alleen voor individuele elektrische ruimteverwarmers: regulering van de warmtetoevoer Nominaal warmtevermogen Handmatige regeling van de warmtetoevoer n.v.t. met ingebouwde thermostaat Minimaal warmtevermogen k.A. Handmatige regeling van de warmtetoevoer n.v.t. (richtwaarde) -
Página 66: Installatie
INSTALLATIE Installatiehandleiding Wanneer u gereedschap tot uw beschikking heeft kunt u het apparaat installeren volgens de in deze gebruikershandleiding genoemde procedure. Het is daarnaast ook mogelijk om de verkoper, diens klantenservice of een gelijkwaardig gekwalificeerde elektrotechnische installateur opdracht te geven het toestel te installeren. Stap 1 Gebruik voor de installatie van het apparaat de positioneringskaart A1 (zie afbeelding hieronder) met gaatjes om de markering van de installatie op de muur te tekenen... - Página 67 De afstand tussen de gaten moet zijn zoals hier onder aangegeven: LET OP Verwondingsgevaar! Om gevaarlijke situaties voor kleine kinderen te vermijden, moet het apparaat zo worden geïnstalleerd dat de onderste verwarmde rail zich 550 mm boven de vloer bevindt.
-
Página 68: Display En Functietoetsen
Fixer de vier houders met de expansieschroef in de muur. De gefixeerde houders kunnen bewogen worden om de positie aan te passen zodat het glazen paneel kan worden gefixeerd. Stap 2 Verwijder vervolgens het beschermende folie aan de achterkant van het glas. Fixeer daarna het glazen paneel aan de reeds bevestigde wandhouders. -
Página 69: Afstandsbediening
Afstandsbediening 1 Aan / Uit 2 Modus 3 Temperatuur 4 Timer 5 Kinderslot INGEBRUIKNAME EN BEDIENING Controleer voor het gebruik of het apparaat en de bijbehorende accessoires in goede toestand verkeren. Daar sommige elementen voor verzending in de fabriek worden gedemonteerd, worden deze speciale elementen afzonderlijk van elkaar uit de verpakking gehaald. -
Página 70: Aanzetten
Aanzetten Zet, om te beginnen, de netschakelaar van het apparaat, aan de zijkant van het toestel, in positie “I”. Druk voor het instellen van de functie op de knop. In het bovenste deel van het controlepanel wordt de kamertemperatuur weergegeven. Het apparaat is nu actief op de laagste stand. -
Página 71: Bediening Per Smartphone
BEDIENING PER SMARTPHONE Wanneer u uw Klarstein toestel met uw wifi netwerk thuis verbindt, kunt u het heel eenvoudig via de daarbij horende Klarstein app bedienen. De app maakt het u niet alleen mogelijk het apparaat via uw smartphone te bedienen maar biedt daarnaast toegang tot, bijvoorbeeld, recepten en andere uitgebreide informatie. -
Página 72: Reiniging En Onderhoud
• Is het apparaat aangesloten? • Is de wifi functie van de smartphone geactiveerd? • Is de wifi functie van het Klarstein apparaat geactiveerd? (volg de aanwijzingen in de app) • Is het wifi wachtwoord correct ingevoerd? • Zijn de router, het Klarstein apparaat en de smartphone tijdens de... -
Página 73: Instructies Voor Afvoer
Fabrikant: Chal-Tec GmbH, Wallstraße 16, 10179 Berlijn, Duitsland. Importeur voor Groot-Brittannië: Chal-Tec UK limited Unit 6 Riverside Business Centre Brighton Road Shoreham-by-Sea BN43 6RE United Kingdom De volledige conformiteitsverklaring van de fabrikant is te vinden onder de volgende link: use.berlin/10035064...