NORTH STATES 4940 Manual De Instrucciones
Ocultar thumbs
Ver también para 4940:
- Manual de instrucciones (14 páginas) ,
- Instrucciones (14 páginas)
Tabla de contenido
Publicidad
Enlaces rápidos
®
Quality Products
for the way you live
INSTRUCTIONS FOR MODEL 4940
IMPORTANT: PLEASE KEEP FOR FUTURE REFERENCE!
For helpful tips and instructions, please visit our website: www.northstatesind.com or
contact our Customer Care department via email: CustomerService@northstatesind.com
Phone: (763) 486-1754 or Toll Free: (800) 848-8421
Intended for use with children 6-24 months
Publicidad
Tabla de contenido

Manuales relacionados para NORTH STATES 4940


Resumen de contenidos para NORTH STATES 4940
- Página 1 ® Quality Products for the way you live INSTRUCTIONS FOR MODEL 4940 IMPORTANT: PLEASE KEEP FOR FUTURE REFERENCE! For helpful tips and instructions, please visit our website: www.northstatesind.com or contact our Customer Care department via email: CustomerService@northstatesind.com Phone: (763) 486-1754 or Toll Free: (800) 848-8421...
- Página 2 Floor Spacer D Template To ensure safe op on, add onal or replacement parts should be obtained only from North States or its authorized distributors. Contact inform on appears on the cover of these in ons. Replacement parts can be ordered at www.northstatesind.com...
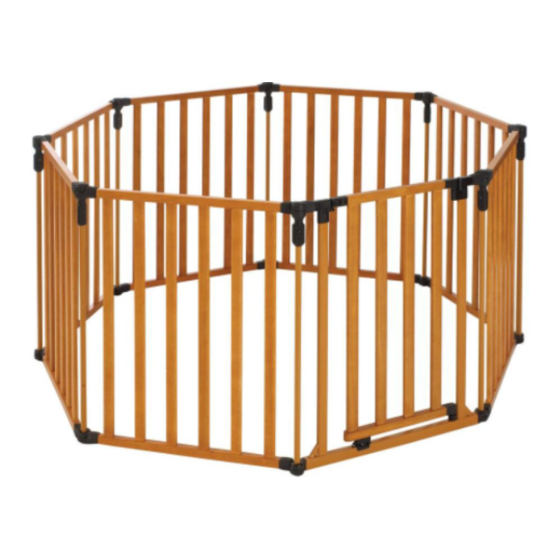
- Página 3 Page 3 Figure 1 Figure 2 Step 1: Unfold the 3-in-1 Superyard. Step 2: Pos on and adjust the se ons to a hexagon. Turn se ons to align hexagonal mark with arrow on opposite hinge (see Figure 2). Note: The Superyard should be placed on a flat surface.
- Página 4 Page 4 Figure 5B Figure 5A Step 6: Insert the al bar into recess of lower hinge mount. Press “A” down and slide it into upper hinge, as shown in Figure Note: When set up as an enclosure, you will have one extra ve bar.
- Página 5 Page 5 Figure 7 Step 3: On the end panels, remove the ve bars. Turn clockwise to loosen the ve al bar, then pull down to remove. Note: To repos on the panel with the door, simply follow the dire ons to set up the Superyard as an enclosure.
- Página 6 Page 6 Figure 10A Step 8: Insert the ve al bars in the upper hinge housing and upper hinge holder, rota ng the hand grips un they are hand- ht. Step 9: To secure gate as a barrier, ten each ve al bar counter-clockwise (hand- ht).
- Página 7 Clean the Superyard using warm water and a mild detergent. Use a so cloth or sponge to avoid scratches. Never use solvents or chemicals to clean the Superyard. DISCLAIMER: Distributed exclusively in the United States by North States Industries, Inc. 5455 Highway 169 N Plymouth, MN 55442 www.northstatesind.com...
-
Página 8: Instrucciones Para El Modelo 4940
® Productos de calidad para su estilo de vida INSTRUCCIONES PARA EL MODELO 4940 IMPORTANTE: ¡CONSERVE COMO REFERENCIA FUTURA! Para obtener consejos útiles e instrucciones, visite nuestro sitio web: www.northstatesind.com, o Comuníquese con nuestro Departamento de Atención al Cliente por correo electrónico: CustomerService@northstatesind.com... - Página 9 Espaciador para piso D Para asegurar el funcionamiento seguro, las piezas adicionales o de repuesto deben obtenerse únicamente de North States o de sus distribuidores autorizados. La información de contacto aparece en la portada de estas instrucciones. Se pueden pedir piezas de repuesto en www.northstatesind.com Cualquier daño a la propiedad durante la instalación de su puerta de seguridad es exclusiva responsabilidad...
-
Página 10: Montaje Como Un Cercado
Page 3 Página 10 Montaje como un cercado Figura 1 Figure 1 Figura 2 Figure 2 Paso 2: Ubique y ajuste las secciones para Paso 1: Despliegue la Superyard 3 en 1. Step 1: Unfold the 3-in-1 Superyard. Step 2: Pos on and adjust the se ons to a formar un hexágono. -
Página 11: Instalación Como Puerta Barrera
Page 4 Página 11 Figure 5B Figura 5A Figura 5B Figure 5A Paso 6: Introduzca Step 6: Insert the la barra ver�cal al bar into en la cavidad del recess of lower montaje de la hinge mount. bisagra inferior. Presione “A” hacia Press “A”... - Página 12 Page 5 Página 12 Figura 7 Figure 7 Paso 3: En los paneles de los extremos, quite las barras Step 3: On the end panels, remove the ve bars. ver�cales. Gírelas en sen�do horario para aflojar la barra ver�cal, Turn clockwise to loosen the ve al bar, then luego �re de ella hacia abajo para quitarla.
- Página 13 Page 6 Página 13 Acoplamientos de pared: lado A Acoplamientos de pared: lado B Figura 10A Paso 8: Introduzca las barras Figure 10A Step 8: Insert the ve al bars ver�cales en el alojamiento de la in the upper hinge housing and bisagra superior y en el soporte upper hinge holder, rota ng de la bisagra superior, girando las...
-
Página 14: Solución De Problemas
Any damage to property during installa n of your safety gate is the sole responsibility of the end user. Distributed exclusively in the United States by Distribuido exclusivamente en los Estados Unidos por North States Industries, Inc. 5455 Highway 169 N Plymouth, MN 55442 www.northstatesind.com...