Tabla de contenido
Publicidad
Idiomas disponibles
Idiomas disponibles
Enlaces rápidos
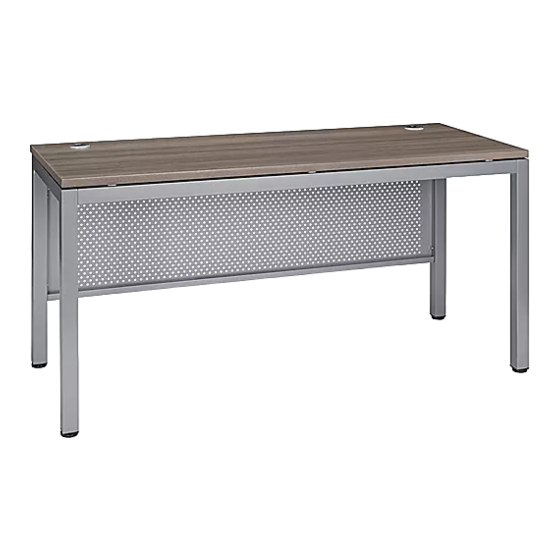
DOWNTOWN COLLECTION
TOOLS NEEDED
Phillips
Allen Wrench
Screwdriver
(included)
Modesty Panel Bolt x 4
For Privacy Workstation assembly, refer to
instructions included with Panels.
NOTE: Assemble unit on a smooth, non-marring
surface to prevent scratching. Check that you
have all parts listed.
1.
Slide support frame over leg connector and attach
using four M6 x 12 mm bolts. Repeat for remaining
three leg connectors. (See Figure 1)
PAGE 1 OF 24
DESK AND TABLE ASSEMBLY PARTS LIST
(8 for H-8948 and H-8999)
Adhesive Cover x 4
DESK AND TABLE ASSEMBLY
1-800-295-5510
uline.com
Two Person Assembly
Recommended
(optional)
Figure 1
Para Español, vea páginas 9-16.
Pour le français, consulter les pages 17-24.
Silver Grommet x 2
M6 x 15 mm Bolt x 4
(optional)
Follow hole patterns
on frame as shown.
M6 x 12 mm Bolt
Allen Wrench
(optional)
0421 IH-7741
Publicidad
Tabla de contenido

Manuales relacionados para Uline H-7741


Resumen de contenidos para Uline H-7741
-
Página 1: Tabla De Contenido
Para Español, vea páginas 9-16. Pour le français, consulter les pages 17-24. 1-800-295-5510 uline.com DOWNTOWN COLLECTION TOOLS NEEDED Two Person Assembly Phillips Allen Wrench Recommended Screwdriver (included) DESK AND TABLE ASSEMBLY PARTS LIST Silver Grommet x 2 M6 x 12 mm Bolt x 16... - Página 2 DESK AND TABLE ASSEMBLY CONTINUED 2. Insert adjustable glide into foot of each leg. 4. Place top on ground with underside facing up and (See Figure 2) flip over assembled frame. Align holes on top with holes on frame and attach using 10 M6 x 60 mm bolts.
- Página 3 DESK AND TABLE ASSEMBLY CONTINUED 6. Desk/table is now fully assembled. Using two people, Figure 6 carefully flip the assembled desk/table onto the feet. Insert black or silver grommets depending on preference. Adhesive Cover Grommet Completed Assembly without Modesty Panel Grommet Completed Assembly with Modesty Panel...
-
Página 4: M6 X 12 Mm Bolt X 8
L-DESK RETURN ASSEMBLY PARTS LIST M6 x 12 mm Bolt x 8 Adjustable Glide x 2 M6 x 60 mm Bolt x 6 Black Grommet x 1 Acrylic Panel x 1 Dual Bracket with Holder x 2 M6 x 15 mm Bolt x 4 Silver Grommet x 1 (optional) (optional) -
Página 5: Figure 10
L-DESK RETURN ASSEMBLY CONTINUED 4. (Optional) If privacy panels were purchased, align 6. Align holes on modesty panel with holes on legs and dual bracket with holes on top of support frame attach using four M6 x 15 mm bolts. (See Figure 12) and attach using two M6 x 15 mm bolts. - Página 6 BACK-TO-BACK WORKSTATION PARTS LIST Acrylic Panel x 1 Dual Bracket with Holder x 2 Dual Bracket x 2 M6 x 15 mm Bolt x 16 BACK-TO-BACK WORKSTATION ASSEMBLY Place desk frames together. Align dual bracket 2. Place tops over frames. Align holes on tops with with holder with holes on top of support frames and holes on frames and attach using M6 x 60 mm bolts.
- Página 7 BACK-TO-BACK WORKSTATION ASSEMBLY CONTINUED 4. Workstation is now fully assembled. Completed Completed Assembly Assembly 2-person Set 4-person Set L-DESK WORKSTATION PARTS LIST Acrylic Panel x 1 Dual Bracket with Holder x 2 Dual Bracket x 2 M6 x 15 mm Bolt x 16 L-DESK WORKSTATION ASSEMBLY Place desk frames together.
- Página 8 3. Attach using four M6 x 15 mm bolts. Insert black or 4. Workstation is now fully assembled. silver grommets depending on preference. (See Figures 18-19) Completed Assembly Figure 18 2-person Set Figure 19 4-person Set 1-800-295-5510 uline.com PAGE 8 OF 24 0421 IH-7741...
- Página 9 800-295-5510 uline.mx COLECCIÓN URBANA HERRAMIENTAS NECESARIAS Se Recomienda Armar Desarmador Llave Allen Entre Dos Personas de Cruz (incluida) LISTA DE PARTES PARA ENSAMBLE DEL ESCRITORIO Y MESA 2 Ojales Plateados 16 Pernos M6 x 12 mm 4 Tapas Niveladoras 10 Pernos M6 x 60 mm...
-
Página 10: Continuación Del Ensamble Del Escritorio Y La Mesa
CONTINUACIÓN DEL ENSAMBLE DEL ESCRITORIO Y LA MESA 2. Inserte la tapa niveladora en cada pata. 4. Coloque la cubierta en el piso con la parte inferior (Vea Diagrama 2) hacia arriba y voltee el armazón ensamblado. Alinee los orificios de la cubierta con los orificios del armazón y fíjelos utilizando 10 pernos M6 x 60 mm. - Página 11 CONTINUACIÓN DEL ENSAMBLE DEL ESCRITORIO Y LA MESA 6. El escritorio o mesa quedaron ensamblados por Diagrama 6 completo. Entre dos personas, volteen con cuidado el ensamble del escritorio o mesa sobre las patas. Inserte los ojales negros o plateados según prefiera. Cubierta Adhesiva Ojal...
- Página 12 LISTA DE PARTES PARA ENSAMBLE DEL ESCRITORIO EN L 8 Pernos M6 x 12 mm 2 Tapas Niveladoras 6 Pernos M6 x 60 mm 1 Ojal Negro 1 Panel de Acrílico 2 Soportes Duales con Asa 4 Pernos M6 x 15 mm 1 Ojal Plateado (opcional) (opcionales)
-
Página 13: Continuación Del Ensamble Del Retorno Para Escritorio En L
CONTINUACIÓN DEL ENSAMBLE DEL RETORNO PARA ESCRITORIO EN L 4. (Opcional) Si ya adquirió los paneles de privacidad, 6. Alinee los orificios del recato con los orificios de las alinee el soporte dual con los orificios en la parte patas y fije utilizando cuatro pernos M6 x 15 mm. superior del armazón de soporte y fíjelo utilizando (Vea Diagrama 12) dos pernos M6 x 15 mm. -
Página 14: Ensamble De La Estación De Trabajo Tipo Bancada
LISTA DE PARTES PARA ESTACIÓN DE TRABAJO TIPO BANCADA 1 Panel de Acrílico 2 Soportes Duales con Asa 2 Soportes Duales 16 Pernos M6 x 15 mm ENSAMBLE DE LA ESTACIÓN DE TRABAJO TIPO BANCADA 1. Junte los armazones del escritorio. Alinee el soporte 2. -
Página 15: Continuación Del Ensamble De La Estación De Trabajo Tipo Bancada
CONTINUACIÓN DEL ENSAMBLE DE LA ESTACIÓN DE TRABAJO TIPO BANCADA 4. La Estación de Trabajo quedó ensamblada por completo. Ensamble Ensamble Completo Completo Set para 2 Set para 4 personas personas LISTA DE PARTES DE LA ESTACIÓN DE TRABAJO CON ESCRITORIO EN L 1 Panel de Acrílico 2 Soportes Duales con Asa 2 Soportes Duales... - Página 16 4. La Estación de Trabajo quedó ensamblada por ojales negros o plateados según prefiera. completo. (Vea Diagramas 18-19) Ensamble Completo Diagrama 18 Set para 2 personas Diagrama 19 Set para 4 personas 800-295-5510 uline.mx PAGE 16 OF 24 0421 IH-7741...
-
Página 17: Outils Requis
1-800-295-5510 uline.ca COLLECTION « DOWNTOWN » OUTILS REQUIS Montage à deux personnes Tournevis Clé Allen recommandé cruciforme (inclus) LISTE DES PIÈCES POUR LE MONTAGE DE LA TABLE ET DU BUREAU Passe-fil argenté x 2 Boulon M6 x 12 mm x 16... - Página 18 MONTAGE DE LA TABLE ET DU BUREAU SUITE 2. Insérez les patins ajustables dans l'extrémité des 4. Placez la surface de table au sol, face inférieure pieds. (Voir Figure 2) vers le haut, et posez-y le cadre assemblé en le tournant à...
- Página 19 MONTAGE DE LA TABLE ET DU BUREAU SUITE 6. Le montage du bureau ou de la table est Figure 6 maintenant complété. À deux, placez avec soin le bureau ou la table sur ses pieds. Insérez les passe-fils noirs ou argentés selon votre gré. Protection adhésive Passe-fil...
- Página 20 LISTE DES PIÈCES POUR LE MONTAGE DU RETOUR DE BUREAU EN L Boulon M6 x 12 mm x 8 Patin ajustable x 2 Boulon M6 x 60 mm x 6 Passe-fil noir x 1 Panneau en acrylique x 1 Support double avec Boulon M6 x 15 mm x 4 Passe-fil argenté...
- Página 21 MONTAGE DU RETOUR DE BUREAU EN L SUITE 4. (Optionnel) Si vous avez fait l'achat de panneaux de 6. Alignez les trous du panneau cache-jambes sur les séparation, alignez les supports doubles sur les trous trous des pieds et fixez à l'aide de quatre boulons situés sur le cadre de support et fixez-les à...
- Página 22 LISTE DES PIÈCES POUR LE POSTE DE TRAVAIL DOS À DOS Panneau en acrylique x 1 Support double avec point d'appui x 2 Support double x 2 Boulon M6 x 15 mm x 16 MONTAGE DU POSTE DE TRAVAIL DOS À DOS Placez les cadres de bureau ensemble.
- Página 23 MONTAGE DU POSTE DE TRAVAIL DOS À DOS SUITE Le montage du poste de travail est maintenant complété. Montage Montage complété complété Ensemble pour Ensemble pour deux personnes quatre personnes LISTE DES PIÈCES POUR LE POSTE DE TRAVAIL AVEC BUREAU EN L Panneau en acrylique x 1 Support double avec point d'appui x 2 Support double x 2...
- Página 24 4. Le montage du poste de travail est maintenant passe-fils noirs ou argentés selon votre gré. complété. (Voir Figures 18 et 19) Montage complété Figure 18 Ensemble pour deux personnes Ensemble pour Figure 19 quatre personnes 1-800-295-5510 uline.ca PAGE 24 OF 24 0421 IH-7741...