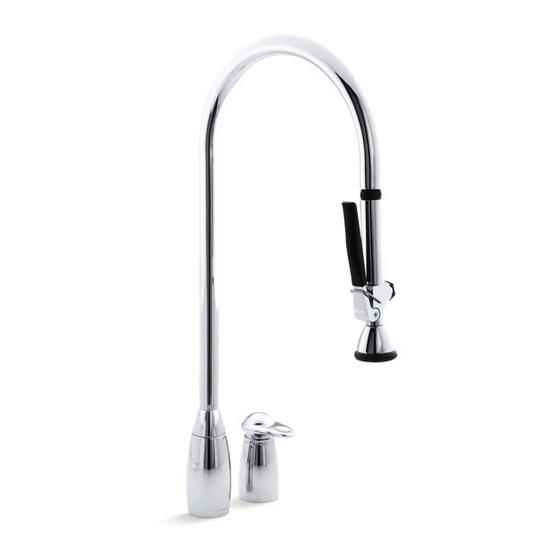
Kohler K-6330 Guia De Instalacion
Ocultar thumbs
Ver también para K-6330:
- Manual del usuario (25 páginas) ,
- Instrucciones de montaje (33 páginas)

Manuales relacionados para Kohler K-6330


Resumen de contenidos para Kohler K-6330
- Página 1 Installation Guide Kitchen Faucet K-6330 Français, Page 9 Español, Página 16 1025493-2-...
-
Página 2: Before You Begin
- Do not remove the faucet ground joints, as they contain important back-siphonage protection. - Do not attach a dishwasher to the faucet spray outlet. - Kohler Co. reserves the right to make revisions in the design of faucets without notice, as specified in the Price Book. 1025493-2-... - Página 3 - Turn the threaded ring as needed so the screws are to the front and back of the valve. - Securely tighten the screws. Kohler Co. 1025493-2-...
- Página 4 - Install the rubber gasket to the underside of the spout. Fit the spout through the sink hole. Position the spout so it faces forward, with the Kohler logo facing the user. - Fit the fiber washer and metal washer on the spout shank, and install the threaded ring to the spout shank until the threaded ring is just touching the sink.
- Página 5 - When installing to any sink, adjust the height of the angle bracket so it rests on the cabinet floor. - Secure the angle bracket to the cabinet floor with two screws suitable for the material. - Securely wrench tighten the angle bracket hex nut. Kohler Co. 1025493-2-...
- Página 6 - Turn on the water and check for leaks. - Water should slowly flow from the sprayhead. Slowly squeeze the spray control, and the water flow should increase. Squeeze the control all the way, and the water flow should stop. - Turn off the water. 1025493-2- Kohler Co.
-
Página 7: Complete The Installation
- Install a plastic cover to each side of the channel, and secure with square-head bolts, washers, and wing nuts. Securely handtighten the wing nuts. Do not overtighten. - Pull the sprayhead out of the spout several times to verify smooth, unrestricted spray hose movement. Kohler Co. 1025493-2-... - Página 8 - Turn off the water by pulling the valve stem down. Reinstall the bonnet, handle, and setscrew. 1025493-2- Kohler Co.
-
Página 9: Avant De Commencer
à rebours. - Ne connectez pas un lave vaisselle au flexible de la douchette. - La Société KOHLER se réserve le droit d’apporter toutes modifications sur le design des robinets et ceci sans préavis, comme spécifié dans le Catalogue des Prix. - Página 10 à la tige de la valve jusqu’à ce que la bague touche l’évier. - Tournez la bague filetée de façon à ce que les vis se trouvent à l’avant et à l’arrière du robinet. - Serrez fermement les écrous. 1025493-2- Kohler Co.
- Página 11 - Installez le joint en caoutchouc à la partie inférieure de la valve. Passez le robinet à travers le trou de l’évier. Disposez le bec de façon à ce qu’il fasse face, avec le logo de KOHLER faisant face à l’utilisateur.
- Página 12 à ce qu’ils reposent sur le meuble. - Fixez les supports au meuble avec deux vis faîtes pour ce type de fixation. - Fixez avec la clé les supports avec les vis hexagonales. 1025493-2- Kohler Co.
- Página 13 - Ouvrez les robinets d’arrivée d’eau principale et vérifiez s’il y a des fuites. - L’eau devrait couler doucement par la douchette. Pressez doucement le contrôle et le débit augmentera. Pressez complètement sur contrôle et le débit devra s’arrêter. - Arrêter l’eau. Kohler Co. 1025493-2-...
-
Página 14: Compléter L'installation
écrou à tête carrée, rondelles et écrou papillon. Serrez soigneusement à la main les écrous papillons. Ne pas trop serrer. - Sortez la douchette hors de son logement à plusieurs reprises, et vérifiez le coulissement et le mouvement du va- et- vient. 1025493-2- Kohler Co. -
Página 15: Réglage De La Température
- Arrêtez l’écoulement de l’eau en tirant vers vous le levier du mitigeur. Réinstallez la rosace, le levier et la vis. Kohler Co. 1025493-2-... -
Página 16: Antes De Comenzar
- No conecte el lavaplatos a la salida del rociador de la grifería. - Kohler Co. se reserva el derecho de modificar el diseño de la grifería sin previo aviso, tal como se especifica en la lista de precios. -
Página 17: Instale Los Suministros
- Gire el anillo roscado cuanto sea necesario para que los tornillos estén orientados hacia el frente y hacia atrás de la válvula. - Apriete bien los tornillos. Kohler Co. 1025493-2-... -
Página 18: Instale El Surtidor
- Instale la arandela de goma en la parte inferior del surtidor. Encaje el surtidor por el orificio del fregadero. Coloque el surtidor orientado hacia el frente con el logotipo de Kohler de cara al usuario. - Inserte la arandela de fibra y metal en el vástago del surtidor e instale el anillo roscado en el vástago hasta que el anillo roscado esté... -
Página 19: Instale El Soporte Angular
- Fije el soporte angular sobre el suelo del gabinete con dos tornillos indicados para el material. - Asegure bien la tuerca hexagonal del soporte angular con una llave. Kohler Co. 1025493-2-... -
Página 20: Instale La Manguera Del Rociador
- El agua debería fluir lentamente de la cabeza del rociador. Apriete lentamente el mando del rociador, el flujo de agua debería aumentar. Apriete totalmente el mando y el flujo de agua debería detenerse. - Cierre el agua. 1025493-2- Kohler Co. -
Página 21: Complete La Instalación
Apriete las tuercas de mariposa con la mano. No apriete en exceso. - Tire de la cabeza del rociador varias veces para comprobar el movimiento sin restricciones de la manguera del rociador. Kohler Co. 1025493-2-... -
Página 22: Ajuste La Temperatura
- Presione el vástago de la válvula hacia abajo para cerrar el agua. Reinstale la base, la manija y el tornillo de fijación. 1025493-2- Kohler Co. - Página 23 Kohler Co. 1025493-2-...
- Página 24 USA : 1-800-4-KOHLER Canada : 1-800-964-5590 Mexico : 001-877-680-1310 kohler.com E2003 Kohler Co. 1025493-2- Kohler Co. 1025493-2-...