Brizo SOLNA 64221LF Manual De Instrucciones
Ocultar thumbs
Ver también para SOLNA 64221LF:
- Instrucciones de instalación (16 páginas) ,
- Instrucciones de montaje (16 páginas) ,
- Instrucciones de instalación (12 páginas)
Publicidad
Models/Modelos/Modèles
64221LFs
Series/Series/Seria
SOLNA
®
Write purchased model number here.
Escriba aquí el número del modelo comprado.
Inscrivez le numéro de modèle ici.
sSpecify Finish / Especifíque el Acabado / Précisez le Fini
You may need/Usted puede necesitar/Articles dont vous pouvez avoir besoin:
For easy installation of your
Brizo
faucet you will need:
®
• To READ ALL the instructions completely
before beginning.
• To READ ALL warnings, care, and maintenance
information.
Para instalación fácil de su llave
Brizo
usted necesitará:
®
• LEER TODAS las instrucciones completamente
antes de empezar.
• LEER TODOS los avisos, cuidados, e
información de mantenimiento.
Pour installer votre robinet
Brizo
facilement, vous devez:
®
• LIRE TOUTES les instructions avant de débuter;
• LIRE TOUS les avertissements ainsi que toutes
les instructions de nettoyage et d'entretien;
www.brizo.com
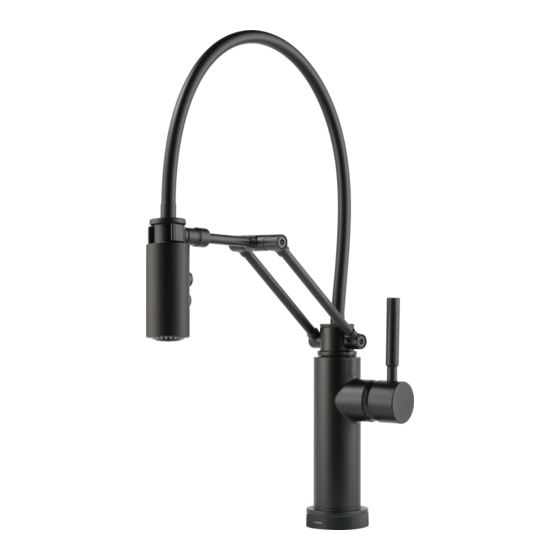
ARTICULATING KITCHEN FAUCET
90405
WITH SMARTTOUCH
LLAVE DE AGUA/GRIFO ARTICULADO PARA
COCINAS CON TECNOLOGÍA SMARTTOUCH
ROBINET ARTICULÉ POUR ÉVIER DE CUISINE
AVEC TECHNOLOGIE SMARTTOUCH
90405
1
TECHNOLOGY
®
With Optional Escutcheon RP71451s
Con la opción de Chapetón RP71451s
Avec plaque de finition en option RP71451s
®
MC
4/7/16
Rev. A
Publicidad
Tabla de contenido

Manuales relacionados para Brizo SOLNA 64221LF


Resumen de contenidos para Brizo SOLNA 64221LF
- Página 1 Con la opción de Chapetón RP71451s Avec plaque de finition en option RP71451s You may need/Usted puede necesitar/Articles dont vous pouvez avoir besoin: For easy installation of your Brizo faucet you will need: ® • To READ ALL the instructions completely before beginning.
- Página 2 Top Mount Sinks / Instalación por Encima / Bâti supérieur 1 1/4" Min. From Center Line To Sink Bowl. 1 1/4" Mínimo. De la línea de centro para hundir el tazón de fuente. 1 1/4" ; Minimal. De la ligne centrale pour descendre la cuvette.
- Página 3 Under Mount Sinks / Instalación por Debajo / Sous le bâti 1 1/4" Min. From Center Line To Sink Bowl. 1 1/4" Mínimo. De la línea de centro para hundir el tazón de fuente. 1 1/4" ; Minimal. De la ligne centrale pour descendre la cuvette.
- Página 4 OPTIONAL / OPCIONAL / FACULTATIVE Water Line Connections For this step, use the parts shown above. Important: To ensure proper operation of your plumbing it is essential to install these check valve assemblies onto your supply stops. Insert ferrule (1) into cold water stop. Thread on check valve (2) and tighten.
- Página 5 Problemas Potenciales y Soluciones finales estén libres de residuos. Los accesorios (1) son Brizo no se responsabiliza por las tuberías que se l La tubería no está cortada perpendicular al eje del de compresión de 3/8”, con los extremos de color rojo...
- Página 6 Correct method Incorrect Installation Método Correcto Instalación Incorrecta Bonne méthode Installation Incorrecte Custom Fit Connections - Plastic Sleeve Installation Instructions 1. Identify desired length of tube (1). Leave 1" - 2" of extra length to allow for easier installation and cut tube. Ensure cut is straight and burr free. 2.
- Página 7 Flush Supply Lines Solenoid Installation Place a bucket below the outlet fitting and move the For this step, use the parts shown above valve handle (1) to the open mixed position.Then, while holding the outlet tube (2) over the bucket, slowly open Slide tube (1) into the top solenoid nipple (2).
-
Página 8: Wire Connections
Push hose end (1) onto solenoid assembly outlet (2). Attach clip (3) over hoses as shown. Pull down moderately to ensure connection has been made. Notice Property damage and water leak possible. Incorrectly installed or unapproved clip and hose may cause water leaks and property damage. - Página 9 "AA" Batteries / Pilas “AA” / Piles « AA » "C" Batteries (For Longer Battery Life) Pilas "C" (Para una mayor duración de la batería) Piles « C » (Pour plus longue vie de la batterie) Wire extension (4) is shipped with a protective plastic cap Load 6 "AA"...
- Página 10 With the battery box lid (1), find a location under Install lid to battery box. Be sure to align the +/- on the cap with the +/- on the box. the counter where the cable reaches and is convenient to change the batteries. Place battery box on the cabinet floor or hang on the cabinet wall (steps 1-4).
- Página 11 Turn on cold and hot water supplies (3) and move faucet handle (2) to the ON position. Check all connections at arrows for leaks. Re-tighten if necessary, but do not overtighten. Sprayer (1) will dock into position when brought into proximity of the arm magnet.
-
Página 12: Mantenimiento
Maintenance If faucet exhibits very low flow – TURN OFF WATER NOTE: Exterior arm screws are decorative and will may be stiff due to O-ring, but should rotate by hand. SUPPLIES. Unscrew adapter (1) & knurled knob (4) Remove bonnet nut (9) by rotating counterclockwise with NOT need to be tightened during the lifetime of the from spray head and clean debris from sprayer inlet a wrench. - Página 13 Solenoid Troubleshooting 1. If your LED (8) flashes a red light on then off and then keeps repeating this, 3. If your LED (8) base indicator is not displaying any lights, replace the batteries. a. Check to make sure the spout connector is attached to the spout and the wire If the LED (8) still flashes a red light, please replace solenoid and electronics from the solenoid / electronics kit.
- Página 14 NOTE: Exterior arm screws are decorative and will NOT need to be tightened during the lifetime of the faucet. Turning or removing RP80637s screws may hinder arm functionality and Hose & Sprayer Assembly Juego de Manguera y Rociador will void the faucet warranty. Tuyau souple et douchette NOTA: Los tornillos en los brazos exteriores son decorativos y NO requerirán ser...
- Página 15 3/8”-24 UNEF a 1/2”-20 UN & Sistema de protección contra el contraflujo 3/8”-24 UNEF a 1/2”-14 NPSM Adapteurs Su llave de agua tipo deslizable Brizo tiene un sistema de protección ® 3/8 po-24 UNEF à 1/2 po-20 UN et para el contraflujo, incorpora, que ha sido probado para cumplir con los 3/8 po-24 UNEF à...
- Página 16 Hose and Sprayer Removal Hose and Sprayer Installation TURN OFF WATER SUPPLIES. Place bucket below outlet fitting under sink. Slide hose (1) through top of faucet hub (2). Screw decorative nut (3) clockwise into Remove clip (1) from outlet (2) and disconnect hose (3). A small amount of water top of faucet hub.
- Página 17 90405 Rev. A...
-
Página 18: Cleaning And Care
Esta es la garantía exclusiva por escrito de Brizo Kitchen & Bath Company y la garantía no es transferible. incorrecta, incluyendo el no seguir los cuidados aplicables y las instrucciones de limpieza.