Tabla de contenido
Publicidad
Idiomas disponibles
Idiomas disponibles
Enlaces rápidos
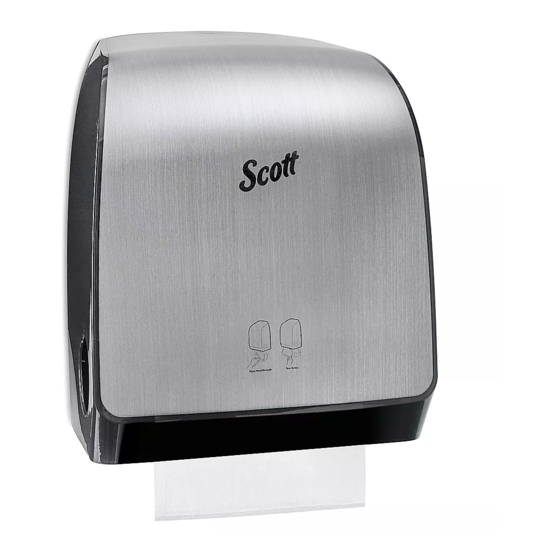
H-9550, H-9551
SCOTT
PRO™ AUTOMATIC
®
PAPER TOWEL DISPENSER
TOOLS NEEDED
Drill
1/4" Drill Bit
Dispenser x 1
NOTE: Recommended mounting height is 48"
from the floor to bottom of dispenser.
NOTE: Ensure that proper mounting hardware
is used for appropriate wall composition as
enclosed hardware may not be compatible
with wall surface.
1.
Hold mounting template up to wall at desired
dispenser location. Make four marks where holes
will be drilled. (See Figure 1)
Figure 1
PAGE 1 OF 15
1-800-295-5510
uline.com
Phillips Screwdriver
Tape Measure
PARTS
Dispenser Key x 1
MOUNTING
Level
Anchor x 4
Screw x 4
2. Remove template from wall. Drill holes at previously
marked locations. Insert wall anchors if necessary.
(See Figure 2)
Figure 2
Para Español, vea páginas 6-10.
Pour le français, consulter les pages 11-15.
D-Cell Battery x 4
0921 IH-9550
Publicidad
Tabla de contenido

Resumen de contenidos para Uline SCOTT PRO H-9550
- Página 1 Para Español, vea páginas 6-10. Pour le français, consulter les pages 11-15. H-9550, H-9551 1-800-295-5510 uline.com SCOTT PRO™ AUTOMATIC ® PAPER TOWEL DISPENSER TOOLS NEEDED Drill 1/4" Drill Bit Phillips Screwdriver Tape Measure Level PARTS Anchor x 4 Dispenser x 1...
- Página 2 MOUNTING CONTINUED 3. Align dispenser on wall with previously drilled holes. Figure 3 Insert four screws. (See Figure 3) LOADING LOADING THE DISPENSER WITHOUT A STUB ROLL 2. Without disengaging sheet from drive mechanism, remove stub roll from upper roll holders and Load towel roll into the upper roll holders.
-
Página 3: Loading Batteries
LOADING CONTINUED LOADING BATTERIES 5. Slowly lower the gray bar until it is seated on the paper. Do not slam bar down. (See Figure 7) When battery power is low, the red "Low Battery" light will flash. Figure 7 2. Grasp battery box tab and pull upward. (See Figure 9) Figure 9 6. -
Página 4: Indicator Lights
OPERATION ADJUSTING THE ACTIVATION SENSITIVITY JAM ALERT To adjust the activation sensitivity, set the switch to the In the event of a paper jam, the "Low Battery" and "Low upper (low sensitivity) or lower (high sensitivity) position. Product" lights will flash red and yellow alternately. While Do not set the switch in the middle position as the unit it may be possible to clear a jam from outside, the will turn off. - Página 5 OPERATING ISSUE RECOMMENDATIONS Unit will not dispense. Ensure cover is closed and securely latched. Replace batteries if LED indicator light is flashing. Ensure batteries are installed and oriented properly. Remove and re-install batteries. 1-800-295-5510 uline.com PAGE 5 OF 15 0921 IH-9550...
-
Página 6: Scott ® Pro™ Despachador Automático De Toallas De Papel
H-9550, H-9551 800-295-5510 uline.mx SCOTT PRO™ DESPACHADOR ® AUTOMÁTICO DE TOALLAS DE PAPEL HERRAMIENTAS NECESARIAS Taladro Broca de 1/4" Desarmador Cinta de Medir Nivel de Cruz PARTES 4 Anclajes 1 Despachador 1 Llave del Despachador 4 Tornillos 4 Baterías D-Celll INSTALACIÓN... -
Página 7: Continuación De Instalación
CONTINUACIÓN DE INSTALACIÓN 3. Alinee el despachador en la pared con los orificios Diagrama 3 anteriormente perforados. Inserte cuatro tornillos. (Vea Diagrama 3) CARGA CARGA DEL DESPACHADOR SIN ROLLO AUXILIAR 2. Sin desenganchar la hoja el mecanismo de transmisión, retire el rollo auxiliar de los soportes 1. -
Página 8: Continuación De Carga
CONTINUACIÓN DE CARGA CARGA DE LAS BATERÍAS 5. Baje lentamente la barra gris hasta que se asiente en el papel. No baje la barra de golpe. 1. Cuando la batería esté baja, la luz roja de (Vea Diagrama 7) "Batería Baja" parpadeará. Diagrama 7 2. -
Página 9: Funcionamiento
FUNCIONAMIENTO AJUSTE DE LA SENSIBILIDAD DE ACTIVACIÓN ALERTA DE ATASCAMIENTO. Para ajustar la sensibilidad de activación, configure En caso de un atascamiento de papel, las luces el interruptor a la posición superior (baja sensibilidad) de "Batería Baja" y "Producto Bajo" parpadearán o posición inferior (alta sensibilidad). -
Página 10: Solución De Problemas
Asegúrese de que la cubierta esté cerrada y bien asegurada. Cambie las baterías si la luz indicadora LED está parpadeando. Asegúrese de que las baterías estén instaladas y orientadas correctamente. Quite y vuelva a colocar las baterías. 800-295-5510 uline.mx PAGE 10 OF 15 0921 IH-9550... -
Página 11: Outils Requis
H-9550, H-9551 1-800 295-5510 uline.ca SCOTT DISTRIBUTEUR DE SERVIETTES EN PAPIER AUTOMATIQUE OUTILS REQUIS Perceuse Mèche de Tournevis Ruban à mesurer Niveau à bulles perceuse de 1/4 po cruciforme PIÈCES Ancrage x 4 Pile de type « D » x 4 Distributeur x 1 Clé... - Página 12 FIXATION SUITE 3. Alignez le distributeur au mur au niveau des trous Figure 3 prépercés. Insérez quatre vis. (Voir Figure 3) CHARGEMENT CHARGEMENT DU DISTRIBUTEUR SANS ROULEAU 2. Sans enlever la serviette du mécanisme d'entraînement, retirez le rouleau auxiliaire des AUXILIAIRE supports de rouleau supérieurs et positionnez-le 1.
-
Página 13: Chargement Des Piles
CHARGEMENT SUITE CHARGEMENT DES PILES 5. Abaissez lentement la barre grise jusqu'à ce qu'elle repose sur le papier. N'abaissez pas la barre avec Lorsque les piles sont faibles, le voyant rouge force. (Voir Figure 7) « piles faibles » clignote. 2. -
Página 14: Réglage Du Mode De Fonctionnement
FONCTIONNEMENT RÉGLAGE DE LA SENSIBILITÉ D'ACTIVATION ALERTE DE BOURRAGE Pour régler la sensibilité d'activation, placez le En cas de bourrage de papier, les voyants commutateur en position haute (faible sensibilité) ou « piles faibles » et « faible quantité de produit » basse (forte sensibilité). - Página 15 Vérifiez que le couvercle est fermé et bien verrouillé. pas le papier. Remplacez les piles si le voyant lumineux clignote. Assurez-vous que les piles sont installées et orientées correctement. Retirez et réinsérez les piles. 1-800-295-5510 uline.ca PAGE 15 OF 15 0921 IH-9550...


