Tabla de contenido
Publicidad
Idiomas disponibles
Idiomas disponibles
Enlaces rápidos
Publicidad
Capítulos
Tabla de contenido
Solución de problemas

Manuales relacionados para Haier QNE27J Serie


Resumen de contenidos para Haier QNE27J Serie
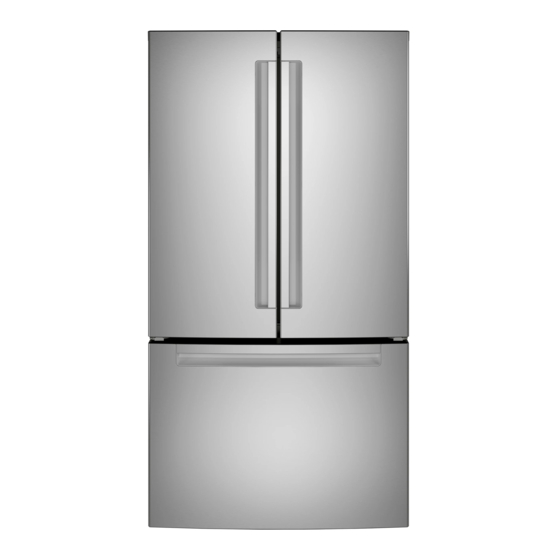
- Página 1 Installation and User Manual Instructions d’installation et Guide de l’utilisateur Instrucciones de instalación y Manual del usuario QNE27J Bottom Freezer Refrigerator Réfrigérateur à congélateur inférieur Refrigerador congelador inferior 238C5676P001 49-60806 02-19 GEA...
- Página 2 ENGLISH 49-60806...
-
Página 3: Tabla De Contenido
LIMITED WARRANTY ................... . 30 RECORD KEEPING Thank you for purchasing this Haier product. This user manual will help _______________________________________ you get the best performance from your new refrigerator. -
Página 4: Refrigerator Safety
REFRIGERATOR SAFETY To reduce the risk of fire, explosion, electric shock, or injury when using your refrigerator, follow these WARNING basic safety precautions: This refrigerator must be properly installed and located Children and persons with reduced physical, sensory or in accordance with the Installation Instructions before it mental capabilities or lack of experience and knowledge is used. -
Página 5: Connecting Electricity
REFRIGERATOR SAFETY CONNECTING ELECTRICITY WARNING ELECTRICAL SHOCK HAZARD Plug into a grounded 3-prong outlet Do not remove the ground prong Do not use an adapter Do not use an extension cord. Failure to follow these instructions can result in death, fire, or electrical shock. Do not, under any circumstances, cut or remove the third (ground) prong from the power cord. -
Página 6: Parts And Features
PARTS AND FEATURES LED lighting Removable/adjustable door bins LED lights in the fresh food compartment are located Can be moved up or down to accommodate your at the top center and on the left and right sides needs. climate zone pans. LED lights are also located in the freezer;... -
Página 7: Installation Requirements
INSTALLATION REQUIREMENTS LOCATION REQUIREMENTS CLEARANCES IMPORTANT: This refrigerator is designed for indoor, Allow the following clearances for ease of installation, proper household use only. air circulation and plumbing and electrical connections. Do not install the refrigerator where the temperature will Sides 1/8”... -
Página 8: Installation Instructions
INSTALLATION INSTRUCTIONS BEFORE YOU BEGIN TOOLS YOU MAY NEED Read these instructions completely and carefully. IMPORTANT • — Observe all governing codes and ordinances. Save these instructions for local inspector’s use. Socket Adjustable Wrench Ratchet/Driver • Note to Installer – Be sure to leave these instructions with the Consumer. -
Página 9: Appliance Dimensions
INSTALLATION INSTRUCTIONS APPLIANCE DIMENSIONS * 69-7/8” (177.5 cm) 36-5/16” 50-3/16” 33-13/16” (92.2 cm) (127.5 cm) (85.9 cm) 48-3/4” (123.8 cm) 43-23/32” (111.1 cm) 43-3/8” 54-13/16” 36” (110.2 cm) (139.2 cm) (91.4 cm) NOTE: * The height of the refrigerator to the top of the door. Baseboard MEASURE THE CABINET OPENING ACCORDING Back Wall... -
Página 10: Installing The Water Line
INSTALLATION INSTRUCTIONS INSTALLING THE WATER LINE WARNING BEFORE YOU BEGIN Connect to potable water supply only. A cold water supply is required for automatic icemaker Recommended copper water supply kits are WX8X2, WX8X3 operation. The water pressure must be between 40 and or WX8X4, depending on the amount of tubing you need. - Página 11 INSTALLATION INSTRUCTIONS INSTALLING THE WATER LINE (Cont.) Install the shutoff valve on the nearest frequently used 6. ROUTE THE TUBING drinking water line. Route the tubing between the cold water line and the refrigerator. 1. SHUT OFF THE MAIN WATER SUPPLY Turn on the nearest faucet long enough to clear the line of (behind the refrigerator or adjacent base cabinet) as close water.
-
Página 12: Installing The Refrigerator
INSTALLATION INSTRUCTIONS INSTALLING THE REFRIGERATOR - FRENCH DOORS 1. REMOVING DOORS (Right) A. Remove the hinge cover on • Do not install the refrigerator where the temperature top of the right fresh food will go below 60°F (16°C) because it will not run often door by removing the screw enough to maintain proper temperatures. - Página 13 INSTALLATION INSTRUCTIONS INSTALLING THE REFRIGERATOR - FRENCH DOORS REINSTALLING DOORS 1. REMOVING DOORS (Cont.) D. Lift the hinge straight up to WARNING Follow all steps. Failure to follow these free the hinge pin from the instructions, leaving off parts, or overtightening screws, socket in the top of the door can lead to the door falling off and result in injury and and pass the wire through the...
- Página 14 INSTALLATION INSTRUCTIONS INSTALLING THE REFRIGERATOR - FRENCH DOORS (Cont.) C. Make sure the door is aligned with the cabinet. Attach 2. REHANGING THE RIGHT DOOR the hinge to the top of the cabinet loosely with bolts A. Lower the refrigerator door onto the right hinge pin. removed earlier.
- Página 15 INSTALLATION INSTRUCTIONS INSTALLING THE REFRIGERATOR- FREEZER DRAWER 2. REMOVE THE DRAWER FRONT When removing freezer drawer: A. Remove the screw on each side of the railing. • Read the instructions all the way through before starting. • Provide a non-scratching work surface for the doors. Screw 1.
- Página 16 INSTALLATION INSTRUCTIONS INSTALLING THE REFRIGERATOR - FREEZER DRAWER (Cont.) (on some models) E. Replace the safety screws in both sides of the slide 3. REINSTALL FREEZER DRAWER FRONT assemblies. A. Pull the rail assemblies to the maximum extension. F. Replace lower and upper baskets (see Freezer Drawer). B.
-
Página 17: Completing Installation
INSTALLATION INSTRUCTIONS CONNECTING TO THE HOUSE WATER LINE (house water supply) and check for any A cold water supply is required for automatic icemaker leaks. operation. If there is not a cold water supply, you will need to provide one. See Installing the Water Line section. NOTES: PLUG IN THE REFRIGERATOR •... -
Página 18: Record Keeping
REFRIGERATOR USE CONTROLS NOTE: The refrigerator temperature cannot be Freezer Compartment Temperature Control changed during TurboCool™. The freezer temperature Adjust freezer compartment temperature. The freezer is not affected during Turbo Cool. When opening the temperature is preset in the factory at 0°F (-17.8°C). refrigerator door during TurboCool™, the fans will Allow 24 hours for temperature to stabilize to the preset continue to run if they have cycled on. -
Página 19: Water Filter Cartridgexwf
GE Appliances-branded filters in Haier refrigerators provides optimal performance and reliability. GE Appliances filters meet rigorous industry standards for safety and quality that are important for products that are filtering your water. Haier has not qualified non-GE Appliances-branded filters for use in Haier refrigerators and there is no assurance that non-GE Appliances- branded filters meet Haier standards for quality, performance and reliability. -
Página 20: Shelves And Bins
REFRIGERATOR USE SHELVES AND BINS PANS Not all features are on all models. Not all features are on all models. REARRANGING THE REFRIGERATOR CLIMATE ZONE PANS SHELVES Keep fruits and vegetables organized in separate Shelves in the refrigerator compartment are adjustable. compartments for easy access. -
Página 21: Freezer Drawer
REFRIGERATOR USE FLOATING SNACK PAN This pan can be moved to the most useful location for your family’s needs. To remove, slide the pan out to the stop position, lift the pan up and past the stop position and lift it out. FREEZER DRAWER Not all features are on all models. -
Página 22: Automatic Icemaker
REFRIGERATOR USE BOTTOM BASKET REMOVAL To remove the bottom full-width basket on freezer drawer models: 1. Open the bottom freezer drawer until it stops. 2. Remove the top freezer basket. 3. The bottom freezer basket rests on the inside tabs on the drawer slides. -
Página 23: Refrigerator Care
REFRIGERATOR CARE STAINLESS STEEL - Outside surfaces, door handles, and trim DO USE DO NOT USE Soft, clean cloth or sponge GEApplianceparts.com or call 877.959.8688 NOTE: DO NOT allow stainless steel cleaner to come in contact with any plastic parts such as trim pieces, handle hardware and liners. -
Página 24: Cleaning
REFRIGERATOR CARE CLEANING THE INSIDE PREPARING FOR VACATION Unplug the refrigerator before cleaning. For long vacations or absences, remove food and unplug the refrigerator. Clean the interior with a baking soda solution of If this is not practical, wring excess moisture out of sponge or one tablespoon (15 ml) of baking soda to one quart (1 liter) of cloth when cleaning around switches, lights or controls. -
Página 25: Troubleshooting
TROUBLESHOOTING First try the solutions suggested here to possibly avoid the cost of a service call. PROBLEM POSSIBLE CAUSE(S) SOLUTION Refrigerator does not operate Refrigerator in defrost cycle. Wait about 30 minutes for defrost cycle to end. Controls set to OFF. Set the controls to a lower temperature setting. - Página 26 TROUBLESHOOTING First try the solutions suggested here to possibly avoid the cost of a service call. PROBLEM POSSIBLE CAUSE(S) SOLUTION Water has poor taste/odor Water dispenser has not been used for a long Dispense water until all water in system is replenished. time.
-
Página 27: Normal Operating Conditions
TROUBLESHOOTING First try the solutions suggested here to possibly avoid the cost of a service call. PROBLEM POSSIBLE CAUSE(S) SOLUTION Food freezing in the refrigerator Food too close to the air vent at the back of Move the food away from the air vent. the refrigerator. -
Página 28: Xwf Water Filter Cartridge
Date * If your Haier part fails because of a manufacturing defect within thirty days from the date of original purchase for use, we will give you a new or, at our option, a rebuilt part without charge. Return the defective part to the parts supplier from whom it was purchased together with a copy of the “proof of purchase”... -
Página 29: Performance Data Sheet
PERFORMANCE DATA SHEET MODEL: GE APPLIANCES XWF WATER FILTER • System certified by IAPMO R&T against NSF/ANSI Standards 42, 53, 401 for the reduction of claims specified on the performance data sheet and at iapmort.org. • Actual performance may vary with local water conditions. Application Guidelines/Water Supply Parameters Influent challenge Maximum permissible... -
Página 30: Limited Warranty
To know what your legal rights are, consult your Warrantor US: GE Appliances, a Haier company Louisville, KY 40225 For Customers in Canada: This warranty is extended to the original purchaser and any succeeding owner for products purchased in Canada for home use within Canada. -
Página 31: Documents À Conserver
GARANTIE LIMITÉE ....................58 DOCUMENTS À CONSERVER Merci d’avoir acheté ce produit Haier. Ce manuel d’utilisation vous _______________________________________ aidera à... -
Página 32: Sécurité Du Réfrigérateur
SÉCURITÉ DU RÉFRIGÉRATEUR Pour réduire le risque d’incendie, d’explosion, de choc électrique ou de blessures lorsque vous utilisez votre AVERTISSEMENT réfrigérateur, veuillez suivre ces consignes de sécurité : • Ce réfrigérateur doit être correctement installé conformément • Afin de prévenir les accidents graves ou la mort, les enfants ne aux instructions d'installation avant toute utilisation. -
Página 33: Branchements Électriques
SÉCURITÉ DU RÉFRIGÉRATEUR BRANCHEMENTS ÉLECTRIQUES AVERTISSEMENT RISQUE DE CHOC ÉLECTRIQUE Branchez l’appareil dans une prise triple avec terre. Ne retirez pas la broche de terre. N’utilisez pas d’adaptateur. N’utilisez pas un cordon de rallonge. Le non-respect de ces instructions peut entraîner des risques d’incendies, des chocs électriques ou la mort. Ne coupez pas ou n’enlevez pas, sous aucun prétexte, la troisième broche de mise à... -
Página 34: Pièces Et Caractéristiques
CARACTÉRISTIQUES Éclairage DEL Balconnets amovibles/réglables Les lampes DEL du compartiment réfrigérateur sont situées On peut les déplacer vers le haut ou le bas pour répondre à dans le centre supérieur et sur les côtés gauche et droit des vos besoins. bacs climatisés. -
Página 35: Exigences D'installation
EXIGENCES D’INSTALLATION EMPLACEMENT DÉGAGEMENTS DU RÉFRIGÉRATEUR Prévoyez les dégagements suivants pour faciliter l’installation, la bonne circulation d’air et les raccordements de plomberie et IMPORTANT : Ce réfrigérateur est conçu pour un usage d’électricité : domestique, à l’intérieur uniquement. Côtés 3 mm (1/8 po) •... -
Página 36: Instructions D'installation
INSTRUCTIONS D’INSTALLATION AVANT DE COMMENCER OUTILS DONT VOUS POUVEZ AVOIR BESOIN Veuillez lire toutes les directives attentivement IMPORTANT • — Conservez ces instructions pour l’inspecteur local. Respectez toutes les ordonnances et les codes locaux. • Note à l’installateur – Assurez-vous de laisser ces instructions Clé... -
Página 37: Dimensions De L'électroménager
INSTRUCTIONS D’INSTALLATION DIMENSIONS DE L’ÉLECTROMÉNAGER * 69-7/8” (177.5 cm) 36-5/16” 50-3/16” 33-13/16” (92.2 cm) (127.5 cm) (85.9 cm) 48-3/4” (123.8 cm) 43-23/32” (111.1 cm) 43-3/8” 54-13/16” 36” (110.2 cm) (139.2 cm) (91.4 cm) REMARQUE : * Hauteur du réfrigérateur depuis le dessus de la porte. Épaisseur de la MESUREZ L’OUVERTURE DANS L’ARMOIRE Mur arrière... -
Página 38: Installation De La Conduite D'eau Avant De Commencer
INSTRUCTIONS D’INSTALLATION INSTALLATION DE LA CONDUITE D’EAU AVERTISSEMENT AVANT DE COMMENCER Raccordez l’appareil à une alimentation d’eau potable seulement. Une alimentation d’eau Nous recommandons les trousses de tuyauterie en cuivre WX8X2, froide est requise pour faire fonctionner la machine à glaçons et WX8X3, WX8X4, selon la longueur dont vous avez besoin. - Página 39 INSTRUCTIONS D’INSTALLATION INSTALLATION DE LA CONDUITE D’EAU (Suite) IInstallez le robinet de sectionnement sur la conduite d’eau potable 6. ACHEMINER LE TUYAU la plus utilisée. Acheminez le tuyau entre la conduite d’eau froide et le réfrigérateur. 1. FERMER L’ALIMENTATION D’EAU Faites passer le tuyau par un trou percé...
-
Página 40: Installation Du Réfrigérateur
INSTRUCTIONS D’INSTALLATION INSTALLATION DU RÉFRIGÉRATEUR - PORTES FRANÇAISES 1. POUR RETIRER LES PORTES (droite) EMPLACEMENT DU RÉFRIGÉRATEUR A. Enlevez le couvercle de charnière dans le haut de la porte du • N’installez pas votre réfrigérateur dans un emplacement où la compartiment réfrigérateur température ambiante sera inférieure à... - Página 41 INSTRUCTIONS D’INSTALLATION INSTALLATION DU RÉFRIGÉRATEUR - PORTES FRANÇAISES 2. POUR RETIRER LES PORTES (gauche) (Suite) RÉINSTALLATION DES PORTES D. Soulevez la charnière en ligne AVERTISSEMENT droite pour dégager l’axe de Suivez toutes les étapes. La porte charnière de la douille dans le haut risque de tomber en plus de causer des blessures ou des dommages si vous ne respectez pas ces instructions, oubliez la fente de la charnière.
-
Página 42: Raccrochage De La Porte Droite
INSTRUCTIONS D’INSTALLATION INSTALLATION DU RÉFRIGÉRATEUR - PORTES FRANÇAISES (Suite) C. Assurez-vous que la porte est alignée sur la carrosserie. Fixez 2. RACCROCHAGE DE LA PORTE DROITE lâchement la charnière sur le haut de la carrosserie à l’aide des A. Abaissez la porte dans l’axe de la charnière droite. boulons retirés précédemment. - Página 43 INSTRUCTIONS D’INSTALLATION INSTALLATION DU RÉFRIGÉRATEUR- TIROIR DU CONGÉLATEUR REMARQUES IMPORTANTES 2. ENLEVER LE DEVANT DU TIROIR Avant d’enlever le tiroir du congélateur : A. Retirez la vis des glissières de chaque côté. • Lisez les instructions jusqu’au bout avant de commencer. •...
- Página 44 INSTRUCTIONS D’INSTALLATION INSTALLATION DU RÉFRIGÉRATEUR- TIROIR DU CONGÉLATEUR (Suite) (certains modèles) D. Abaissez l’extrémité avant du tiroir de façon que les languettes 3. RÉINSTALLER LE DEVANT DU TIROIR DU latérales s’insèrent dans les fentes avant des rails. CONGÉLATEUR E. Replacez les vis de sécurité dans les deux côtés des glissières A.
-
Página 45: Compléter L'installation
INSTRUCTIONS D’INSTALLATION RACCORDEMENT DU RÉFRIGÉRATEUR À OUVRIR L’ALIMENTATION D’EAU Ouvrez l’alimentation d’eau au robinet de LA CONDUITE D’EAU DE LA MAISON sectionnement (alimentation de la maison) Une alimentation en eau froide est nécessaire pour le fonctionnement de la machine à glaçons. Si elle est absente, vous devez en installer une. -
Página 46: Utilisation Du Réfrigérateur
UTILISATION DU RÉFRIGÉRATEUR Commandes Commande de température du compartiment congélateur Alarme de Porte Cette commande sert à régler la température du congélateur. Pressez la touche Door Alarm (alarme de porte) pour activer La température est préréglée à l’usine à la valeur 0 °F cette fonction. -
Página 47: Filtre D'eau À Cartouche - Xwf
GE Appliances satisfont les normes NSF rigoureuses de l’industrie relative à la sécurité et la qualité, facteur important pour les produits qui filtrent votre eau. Haier n’a pas évalué le rendement des filtres d’autres marques dans les réfrigérateurs Haier et il n’existe aucune assurance qu’ils satisferont les normes de qualité, de rendement et de fiabilité... -
Página 48: Tablettes Et Balconnets
UTILISATION DU RÉFRIGÉRATEUR TABLETTES ET BALCONNETS BACS Toutes les caractéristiques ne sont pas disponibles sur tous les Toutes les caractéristiques ne sont pas disponibles sur tous les modèles. modèles. DISPOSITION DES TABLETTES DU BACS CLIMATISÉS RÉFRIGÉRATEUR Conservez les fruits et les légumes dans des compartiments Les tablettes du compartiment réfrigérateur sont réglables. -
Página 49: Tiroir Du Congélateur
UTILISATION DU RÉFRIGÉRATEUR BAC À COLLATION MOBILE Ce bac peut se déplacer pour répondre à vos besoins. Pour le retirer, glissez le bac vers l’extérieur jusqu’à la position d’arrêt, soulevez-le en dépassant la position d’arrêt, puis de nouveau pour le sortir. TIROIR DU CONGÉLATEUR Toutes les caractéristiques ne sont pas disponibles sur tous les modèles. -
Página 50: Machine À Glaçons Automatique
UTILISATION DU RÉFRIGÉRATEUR RETRAIT DU PANIER INFÉRIEUR Pour retirer le panier pleine largeur inférieur sur les modèles à tiroir de congélateur : 1. Tirez le panier vers l’extérieur jusqu’à ce qu’il s’arrête. 2. Retirez le panier de congélateur supérieur. 3. Le panier de congélateur inférieur repose sur les languettes intérieures des glissières du tiroir. -
Página 51: Entretien Du Réfrigérateur
ENTRETIEN DU RÉFRIGÉRATEUR ACIER INOXYDABLE - Directives pour nettoyer les surfaces extérieures, les poignées de porte et les garnitures UTILISER NE PAS UTILISER Linge ou éponge doux et propres Linges abrasifs, éponges à récurer, tampons à récurer ou en laine d’acier. -
Página 52: Nettoyage
ENTRETIEN DU RÉFRIGÉRATEUR Nettoyage de l’intérieur DÉPART EN VACANCES Lorsque vous vous absentez durant une longue période, retirez les Débranchez le réfrigérateur avant le nettoyage aliments et débranchez le réfrigérateur. Nettoyez l’intérieur avec une Si cela n’est pas commode, essorez le surplus d’humidité de l’éponge solution d’une cuillère à... -
Página 53: Dépannage
DÉPANNAGE Consultez d’abord les tableaux qui suivent et vous pourrez peut- être éviter de faire appel à un réparateur. PROBLÈME CAUSE(S) POSSIBLE(S) SOLUTION Le réfrigérateur ne fonctionne pas Le cycle de dégivrage est en cours. Attendez environ 30 minutes afin que le cycle de dégivrage se termine. - Página 54 DÉPANNAGE Consultez d’abord les tableaux qui suivent et vous pourrez peut- être éviter de faire appel à un réparateur. PROBLÈME CAUSE(S) POSSIBLE(S) SOLUTION Mauvais goût/odeur de Le distributeur d’eau n’a pas été utilisé depuis Faites couler l’eau jusqu’à ce que l’eau du système soit l’eau longtemps.
-
Página 55: Bruits De Fonctionnement Normaux
DÉPANNAGE Consultez d’abord les tableaux qui suivent et vous pourrez peut- être éviter de faire appel à un réparateur. PROBLÈME CAUSE(S) POSSIBLE(S) SOLUTION Les aliments gèlent dans le Les aliments sont trop près de l’ouverture de Éloignez les aliments de l’ouverture de circulation d’air. compartiment réfrigération circulation d’air à... -
Página 56: Cartouche Xwf Du Filtre À Eau
Date * Si votre pièce Haier s’avère défectueuse en raison d'un défaut de fabrication dans les trente jours à compter de la date d'achat initiale, nous vous fournirons gratuitement une nouvelle pièce, ou, à notre gré, une pièce reconstruite. Renvoyez la pièce défectueuse au fournisseur de pièces auprès duquel cette pièce a été... -
Página 57: Fiche Technique De Performance
FICHE TECHNIQUE DE PERFORMANCE MODÈLE : GE APPLIANCES XWF • Système certifié par l’IAPMO R&T en vertu des normes 42, 53, 401 de la NSF/ANSI relatives à la réduction des allégations spécifiées sur la fiche technique de rendement et le site iapmort.org. •... -
Página 58: Garantie Limitée
Pour connaître vos droits Garant US: GE Appliances, a Haier company Louisville, KY 40225 Pour les clients des Canada : Cette garantie est étendue à l’acheteur d’origine et aux propriétaires suivants pour tout produit acheté aux Canada pour une utilisation domestique aux Canada. -
Página 59: Información A Tener En Cuenta
GARANTÍA LIMITADA ................... . 86 INFORMACIÓN A TENER EN CUENTA Le agradecemos la compra de este producto de marca Haier. Este _______________________________________ manual para el usuario lo ayudará... -
Página 60: Seguridad Del Refrigerador
SEGURIDAD DEL REFRIGERADOR A fin de reducir el riesgo de incendio, explosión, descargas eléctricas o lesiones al usar su refrigerador, siga ADVERTENCIA estas precauciones básicas de seguridad: Este refrigerador se deberá instalar y ubicar adecuadamente Los niños y las personas con capacidad física, sensorial o de acuerdo con las Instrucciones de Instalación antes de ser mental reducida o con falta de experiencia y conocimiento usado. -
Página 61: Conexión De La Electricidad
SEGURIDAD DEL REFRIGERADOR CONEXIÓN DE LA ELECTRICIDAD ADVERTENCIA RIESGO DE DESCARGA ELÉCTRICA Enchufe en un tomacorriente con conexión a tierra de 3 cables. No elimine el cable de conexión a tierra. No use un adaptador. No use extensión eléctrica. Si no se siguen estas instrucciones se podrá producir a muerte, incendios o descargas eléctricas. Nunca, bajo ninguna circunstancia, corte o elimine el tercer cable (tierra) del cable de corriente. -
Página 62: Piezas Y Características
PIEZAS Y CARACTERÍSTICAS Iluminación LED Anaqueles para puertas desmontables/ ajustables Las luces LED del compartimiento de refrigerador están ubicadas en la parte central superior y los costados izquierdo Se puede mover hacia arriba o abajo de acuerdo a sus y derecho sobre las cajones del área con clima regulado. necesidades. -
Página 63: Requisitos De Instalación
REQUISITOS DE INSTALACIÓN REQUISITOS DE UBICACIÓN ESPACIO NECESARIO IMPORTANTE: Este refrigerador ha sido diseñado únicamente Deje el siguiente espacio para facilitar la instalación, una adecuada para usarse dentro del hogar. circulación de aire y plomería y conexiones eléctricas. Costados 1/8” (3 mm) No instale el refrigerador donde la temperatura llegue a ser inferior Parte superior 1”... -
Página 64: Instrucciones De Instalación
INSTRUCCIONES DE INSTALACIÓN ANTES DE COMENZAR HERRAMIENTAS QUE PUEDE NECESITAR Lea estas instrucciones en su totalidad y atentamente IMPORTANTE • — Cumpla con todos los códigos y ordenanzas gubernamentales. Guarde estas instrucciones para uso del inspector local. • Nota para el Instalador – Asegúrese de que el Comprador Llave de Tubo / Llave Ajustable Destornillador de 3/8”... -
Página 65: Dimensiones Del Electrodoméstico
INSTRUCCIONES DE INSTALACIÓN DIMENSIONES DEL ELECTRODOMÉSTICO * 69-7/8” (177.5 cm) 36-5/16” 50-3/16” 33-13/16” (92.2 cm) (127.5 cm) (85.9 cm) 48-3/4” (123.8 cm) 43-23/32” (111.1 cm) 43-3/8” 54-13/16” 36” (110.2 cm) (139.2 cm) (91.4 cm) NOTA: *La altura del refrigerador hasta la parte superior de la puerta El Grosor MIDA LA ABERTURA DEL GABINETE DE Pared Trasera... -
Página 66: Instalación De La Tubería De Agua
INSTRUCCIONES DE INSTALACIÓN INSTALACIÓN DE LA TUBERÍA DE AGUA ADVERTENCIA ANTES DE COMENZAR Realice la conexión a un suministro de agua potable únicamente. Se requiere un suministro de agua fría para el funcionamiento de la máquina de hielos automática. La presión del agua deberá estar entre 40 y 120 Las tuberías de suministro de agua de plástico aprobadas son las psi (275-827 kilopascales). - Página 67 INSTRUCCIONES DE INSTALACIÓN INSTALACIÓN DE LA TUBERÍA DE AGUA (Cont.) Instale la válvula de cierre en la tubería de agua potable de uso 6. ENRUTE LA TUBERÍA frecuente más cercana. Conduzca la tubería entre la entrada de agua fría y el refrigerador. Conduzca la tubería a través de un agujero perforado en la 1.
-
Página 68: Instalación Del Refrigerador
INSTRUCCIONES DE INSTALACIÓN INSTALACIÓN DEL REFRIGERADOR - PUERTAS FRANCESAS 1. RETIRO DE LA PUERTA (Derecha) UBICACIÓN DEL REFRIGERADOR A. Retire la tapa de la bisagra en • No instale el refrigerador donde la temperatura llegue a la parte superior de la puerta ser inferior a los 60ºF (16ºC), ya que no se activará... -
Página 69: Reinstalación De Las Puertas
INSTRUCCIONES DE INSTALACIÓN INSTALACIÓN DEL REFRIGERADOR - PUERTAS FRANCESAS (Cont.) REINSTALACIÓN DE LAS PUERTAS 2. RETIRO DE LA PUERTA (Izquierda) (Cont.) D. Levante la bisagra de forma recta ADVERTENCIA hacia arriba para liberar el perno Siga todos los pasos. Si no se de la bisagra desde el anclaje en la siguen estas instrucciones, dejando piezas sin uso o ajustando parte superior de la puerta, y pase... -
Página 70: Recolocación De La Puerta Derecha
INSTRUCCIONES DE INSTALACIÓN INSTALACIÓN DEL REFRIGERADOR - PUERTAS FRANCESAS (Cont.) B. Baje la puerta del refrigerador sobre el perno de la bisagra 2. RECOLOCACIÓN DE LA PUERTA DERECHA izquierda. A. Baje la puerta del refrigerador sobre el perno de la bisagra C. -
Página 71: Instalación Del Refrigerador - Cajón Del Congelador
INSTRUCCIONES DE INSTALACIÓN INSTALACIÓN DEL REFRIGERADOR - CAJÓN DEL CONGELADOR NOTAS IMPORTANTES 2. RETIRE EL FRENTE DEL CAJÓN Al retirar el cajón del congelador: A. Retire el tornillo que está a cada lado de los rieles. • Lea las instrucciones completamente antes de comenzar. rayen. -
Página 72: Reinstalación Del Frente Del Cajón Del Congeladot
INSTRUCCIONES DE INSTALACIÓN INSTALACIÓN DEL REFRIGERADOR - CAJÓN DEL CONGELADOR (Cont.) (en algunos modelos) E. Reemplace los tornillos de seguridad a ambos lados de los 3. REINSTALACIÓN DEL FRENTE DEL CAJÓN ensambles de las correderas. DEL CONGELADOT A. Empuje los ensambles de los rieles hasta la extensión máxima. B. -
Página 73: Conexión Del Refrigerador Al Suministro De Agua Del Hogar
INSTRUCCIONES DE INSTALACIÓN CONEXIÓN DEL REFRIGERADOR AL ABRA EL SUMINISTRO DE AGUA SUMINISTRO DE AGUA DEL HOGAR Abra el suministro de agua usando la válvula de cierre (suministro de agua hogareño) y Se requiere un suministro de agua fría para el funcionamiento de la controle que no haya pérdidas. -
Página 74: Uso Del Refrigerador
USO DEL REFRIGERADOR CONTROLES NOTA: La temperatura del refrigerador no podrá ser Control de Temperatura del Compartimiento del Congelador modificada durante el uso de TurboCool™. La temperatura Ajuste la temperatura del compartimiento del congelador. La del congelador no se verá afectada al usar la función temperatura del congelador está... -
Página 75: Cuándo Reemplazar El Filtro
GE Appliances cumplen con rigurosos estándares NSF de la industria sobre seguridad y calidad, que son importantes para los productos que están filtrando su agua. Haier no posee filtros de la marca GE Appliances que no estén calificados para su uso en refrigeradores Haier , y no existe seguridad de que los filtros que no son de la marca GE Appliances cumplan con los estándares de... -
Página 76: Estantes Y Recipientes
USO DEL REFRIGERADOR ESTANTES Y RECIPIENTES CAJONES No todas las funciones corresponden a todos los modelos. No todas las funciones corresponden a todos los modelos. REORGANIZACIÓN DE LOS ESTANTES DEL CAJONES CON CLIMA REGULADO REFRIGERADOR Mantenga las frutas y verduras organizadas en compartimientos Los estantes del compartimiento del refrigerador son ajustables. -
Página 77: Cajón De Refrigerios Flotante
USO DEL REFRIGERADOR CAJÓN DE REFRIGERIOS FLOTANTE Esta cajón se podrá mover a la ubicación más útil para las necesidades de su familia. Para retirar el cajón, deslice la misma hacia fuera hasta la posición de detención, levante la misma hasta la posición de detención y retírela. -
Página 78: Retiro De La Canasta Inferior
USO DEL REFRIGERADOR RETIRO DE LA CANASTA INFERIOR Para retirar la canasta inferior en los modelos con cajón de congelador: 1. Abra el cajón inferior del congelador hasta que se detenga. 2. Retire la canasta superior del congelador. 3. La canasta inferior del congelador se apoya sobre las lengüetas internas de las correderas del cajón. -
Página 79: Cuidado Del Refrigerador
CUIDADO DEL REFRIGERADOR ACERO INOXIDABLE - Instrucciones para la Limpieza de Superficies Exteriores, Manijas de Puertas y Bordes NO USE Telas suaves y limpias o esponjas Telas abrasivas, esponjas de fregar, almohadillas de estropajo o de lana de acero Detergente suave mezclado con agua caliente Polvos o rociadores abrasivos Limpiadores de acero inoxidable aprobados. -
Página 80: Detrás Del Refrigerador
CUIDADO DEL REFRIGERADOR LIMPIEZA DE LA PARTE INTERNA PREPARACIÓN PARA LAS VACACIONES Desenchufe el refrigerador antes de limpiar. Si esto no resulta práctico, estruje el exceso de humedad Si estará de vacaciones o ausente por tiempo prolongado, retire la para eliminarlo de la esponja o tela al limpiar alrededor de los comida y desenchufe el refrigerador. -
Página 81: Solución De Problemas
SOLUCIÓN DE PROBLEMAS Pruebe las soluciones sugeridas aquí y posiblemente se evite el gasto de una visita de servicio técnico. Problema Posibles causas Qué hacer El refrigerador no funciona El refrigerador se encuentra en el ciclo de descongelamiento Espere unos 30 minutos hasta que el ciclo de descongelamiento finalice. - Página 82 SOLUCIÓN DE PROBLEMAS Pruebe las soluciones sugeridas aquí y posiblemente se evite el gasto de una visita de servicio técnico. Problema Posibles causas Qué hacer “Sonido de zumbido” frecuente El interruptor de la máquina de hielos se encuentra Configure el interruptor en la posición 0 (Apagado). en la posición I (Encendido), pero el suministro de Mantenerlo en la posición I (Encendido) dañará...
-
Página 83: Condiciones De Funcionamiento Normal
SOLUCIÓN DE PROBLEMAS Pruebe las soluciones sugeridas aquí y posiblemente se evite el gasto de una visita de servicio técnico. Problema Posibles causas Qué hacer La gaveta no se cierra sola Las patas niveladoras necesitan ajuste. Consulte la Bivele el refrigerador La gaveta del congelador se abre Esto es normal si después de abrirse, la gaveta del Esto indica que hay un buen sellante en la gaveta del... -
Página 84: Filtro De Agua Xwf
Date * Si su pieza de Haier falla debido a un defecto en la fabricación dentro de los treinta días desde la fecha de compra original, le entregaremos una pieza nueva o, a su elección, una pieza reconstruida sin cargo. Devuelva la pieza defectuosa al proveedor de piezas a quien le realizó la compra, junto con una copia de la “prueba de compra”... -
Página 85: Ficha Técnica De Funcionamiento Del Modelo: Ge Appliances Xwf
FICHA TÉCNICA DE FUNCIONAMIENTO DEL MODELO: GE APPLIANCES XWF • Sistema certificado por IAPMO R&T contra los Estándares 42, 53, 401 de NSF/ANSI para la reducción de demandas especificadas en la ficha técnica de rendimiento y en iapmort.org. • El rendimiento real podrá variar en relación a las condiciones locales del agua. Concentración del Concentración de aguas Pautas de Aplicación/ Parámetros de Suministro de Agua... -
Página 86: Garantía Limitada
Para conocer cuáles son sus derechos legales, consulte a la Garanter US: GE Appliances, a Haier company Louisville, KY 40225 Para Clientes en Canadá: Esta garantía se extiende al comprador original y a cualquier dueño subsiguiente de productos comprados para uso hogareño dentro de Canadá. - Página 87 NOTES ESPAÑOL 49-60806...
- Página 88 IMPORTANT Do Not Return This Product To The Store If you have a problem with this product, please call 1-877-337-3639 for the name and telephone number of the nearest authorized service center. DATED PROOF OF PURCHASE REQUIRED FOR WARRANTY SERVICE IMPORTANT Ne pas Réexpédier ce Produit au Magasin En cas de problème avec ce produit, veuillez composer le 1-877-470-9174 pour connaître le...