Tabla de contenido
Publicidad
Enlaces rápidos
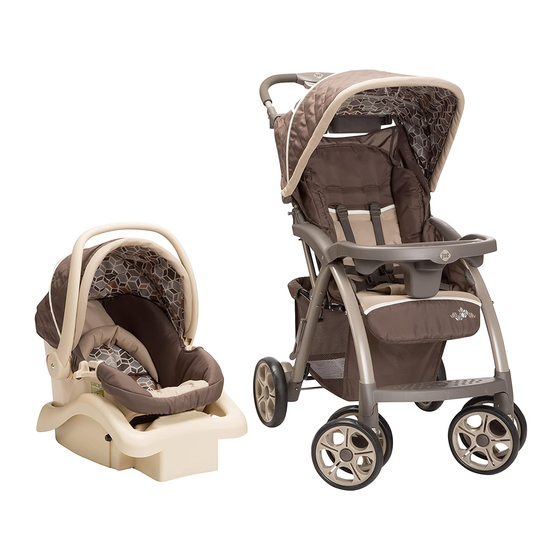
Saunter Luxe LC-22 Travel System/
Sistema de Viaje Saunter Luxe LC-22
TR294
User Guide / Guía del Usuario
Weight: up to 50 lbs (22.7-kg)
Peso: hasta 50 libras (22.7-kg)
©2013 Cosco Management, Inc.
All Rights Reserved.
Todos derechos reservados.
www.djgusa.com
(800) 544-1108
www.safety1st.com
Made in CHINA. Hecho en CHINA.
Styles and colors may vary.
Los estilos y los colores pueden variar.
Distributed by (distribuido por) Dorel Juvenile Group, Inc.,
2525 State St. Columbus, IN 47201-7494
Dorel Distribution Canada, 873 Hodge, St. Laurent, QC H4N 2B1
10/24/13 4358-6435A
Publicidad
Tabla de contenido

Manuales relacionados para Safety 1st Saunter Luxe LC-22


Resumen de contenidos para Safety 1st Saunter Luxe LC-22
- Página 1 Saunter Luxe LC-22 Travel System/ Sistema de Viaje Saunter Luxe LC-22 TR294 User Guide / Guía del Usuario Weight: up to 50 lbs (22.7-kg) Peso: hasta 50 libras (22.7-kg) ©2013 Cosco Management, Inc. All Rights Reserved. Todos derechos reservados. www.djgusa.com (800) 544-1108 www.safety1st.com...
- Página 2 WARNING: For the safety of your child, please read the following warnings and assembly instructions and keep for future reference. • Adult assembly required. • CAUTION: Keep small parts away from children during assembly. • N EVER LEAVE CHILD UNATTENDED. ALWAYS keep child in view when in stroller.
- Página 3 ADVERTENCIA: Por la seguridad de su hijo, por favor lea las siguientes advertencias e instrucciones de ensamble, y guárdelas para consulta futura. • El montaje debe realizarlo un adulto. • PRECAUCIÓN: Durante el armado, mantenga las piezas pequeñas fuera del alcance de los niños.
-
Página 4: Parts / Lista De Piezas
Parts / Lista de piezas parent tray charola para los padres canopy capota car seat with base (not shown) autoasiento con base child tray (no se muestra) charola para el niño transport lock traba de transporte 1 rear axle 1 eje trasero 2 rear wheels 2 ruedas traseras 2 cotter pins... -
Página 5: Front Wheels
Assembly / Armado Unfold Stroller Unlatch the transport lock on the side (Figure 1). Slide and squeeze the button on handlebar. Stroller will “click” when completely open and locked (Figure 1a). Abra la carriola Libere la traba de transporteen la parte lateral (Figura 1). Agarre y suba el asa del manubrio. -
Página 6: Rear Wheels
Assembly / Armado Rear Wheels NOTE: Hardware for rear wheel assembly is located on axle. Helpful Hint: For ease of removal and assembly of cotter pin use needle nose pliers. Remove cotter pin and one washer from axle leaving one washer on the axle. - Página 7 Assembly / Armado Parent Tray Open canopy (Figure 4). Align posts with holes on parent tray. Snap parent tray onto handlebar tubes (Figure 4a). Charola para los padres Abra la capota (Figura 4). Alinee los puntales con los orificios en la charola para los padres. Encaje la charola para los padres en los tubos del asa del manubrio (Figura 4a).
-
Página 8: Charola Para El Niño
To Use / Para Uso Tip: Child tray can be opened and closed without removing. Child Tray To assemble: Align tray pin with notch on stroller and slide post into hole until it “clicks” into place (Figure 5). To close: Rotate tray into slot Bottom of tray near release lever and press Parte inferior de la bandeja... -
Página 9: Enganche Locks Delanteras Giratorias
To Use / Para Uso Brakes Lock Brakes: Step down onto brake levers on both rear wheels (Figure 6). To park stroller, BOTH BRAKES MUST BE LOCKED. Unlock Brakes: Lift up levers to unlock brakes. Engage Front Swivel Locks Press down on levers to keep dual wheels from swiveling. -
Página 10: Cinturón De Retención
To Use / Para Uso Restraint System Place your child in the stroller, with the crotch strap between the child’s legs. Fasten both buckles (Figure 8). Tighten straps snugly around your child (Figure 8a). To tighten strap, lift tab and pull down strap end (A) (Figure 8b). -
Página 11: Para Ajustar La Altura Del Sistema De Retención
To Use / Para Uso To Adjust Restraint Height Anchors Push each anchor through seat Anclajes back and into the desired slot (Figure 9). Be sure anchors lay flat against seat back. Para ajustar la altura del sistema de retención Haga pasar los anclajes a través del respaldo del asiento, a través de la ranura deseada... - Página 12 • SIEMPRE instale el autoasiento mirando hacia atrás de la carriola. • SIEMPRE use el sistema de cinturones del autoasiento. NOTE: Infant car seat is included with Saunter Luxe LC-22 Travel System. Recline seat back to lowest position (Figure 11). Close canopy.
- Página 13 To Use / Para Uso (continued) (continuación) El autoasiento debe quedar Car seat must be positioned colocado de modo que el niño so child faces the stroller mire hacia la manija del carriola. handle. Coloque el autoasiento sobre la carriola Position car seat over the stroller, touch de manera que la superficie plana vertical rear flat vertical surface of car seat...
- Página 14 To Use / Para Uso To Remove Infant Car Seat To remove the car seat, pull the release lever as shown (Figure 12). Lift car seat. Para quitar el autoasiento Para quitar el autoasiento, tire de la palanca de liberación, como se muestra (Figura 12).
-
Página 15: Replaceable Parts
Replaceable Parts To order parts call (800) 544-1108. Include the model number and manufacture date (found on the stroller) and a brief description of the part. • Dual wheels • Single wheels • Axle • Hardware bag for rear wheel assembly •... -
Página 16: Garantía Limitada De Un Año
Dorel Juvenile Group, Inc. garantiza al comprador original que este producto (Sistema de Viaje Saunter Luxe LC-22) estará libre de defectos de material y mano de obra cuando se utilice bajo condiciones normales durante un periodo de un (1) año a partir de la fecha de compra. Si el producto tuviese defectos de material o mano de obra, Dorel Juvenile Group, Inc.