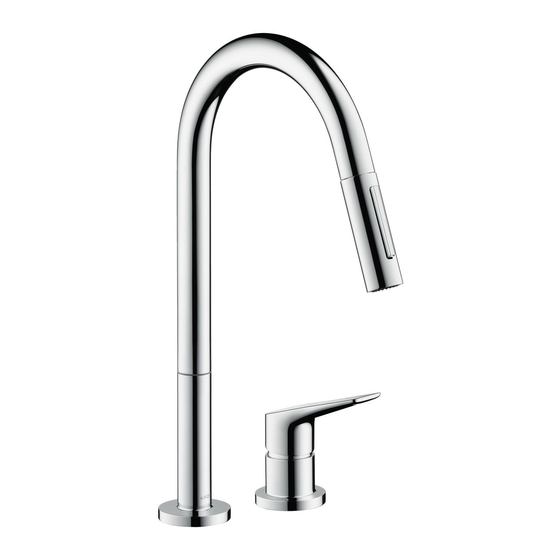
Hansgrohe AXOR Citterio M 34822 1 Serie Instrucciones De Montaje
Ocultar thumbs
Ver también para AXOR Citterio M 34822 1 Serie:
- Instrucciones de montaje / manejo / garantía (28 páginas)

Manuales relacionados para Hansgrohe AXOR Citterio M 34822 1 Serie


Resumen de contenidos para Hansgrohe AXOR Citterio M 34822 1 Serie
- Página 1 EN Installation / User Instructions / Warranty FR Instructions de montage / Mode d'emploi / Garantie ES Instrucciones de montaje / Manejo / Garantía Citterio M 34822xx1...
-
Página 2: Technical Information
1½ po Max. depth of mounting surface 2⅜" Profondeur maximale de la surface 2⅜ po de montage *Please know and follow all applicable local plumbing * Vous devez connaître et respecter tous les codes de plom- codes when setting the temperature on the water heater. berie locaux applicables pour le réglage de la température du chauffe-eau. Installation Considerations À prendre en considération pour l’installation • For best results, Hansgrohe recommends that this unit be installed by a licensed, professional • Pour de meilleurs résultats, Hansgrohe recom- plumber. mande que ce produit soit installé par un plom- bier professionnel licencié. • Please read over these instructions thoroughly be- fore beginning installation. Make sure that you • Veuillez lire attentivement ces instructions avant have all tools and supplies needed to complete de procéder à l’installation. Assurez-vous de dis- the installation. poser de tous les outils et du matériel nécessaires pour l’installation. • Protection against backflow is provided by a double check valve in the sprayhead. -
Página 3: Datos Tecnicos
Español Datos tecnicos Tools Required / Outiles Utiles / Herramientas Útiles Presión recomendada en servicio 15 - 75 PSI Presión en servicio max. 145 PSI Temperatura recomendada del 120° - 140° F* agua caliente Temperatura del agua caliente max. 176°F* 4 mm Caudal máximo 1.75 GPM Tamaño del orificio en la superficie de montaje surtidor 1½" válvula 1½" Profundidad máxima de la superficie de montaje 2⅜" 9 mm *Debe conocer y cumplir todos los códigos locales apli- 16 mm cables para ajustar la temperatura del calentador de agua. Consideraciones para la This unit meets or exceeds the following: instalación •... - Página 4 8¾" 1⅝" 1⅛" 2⅜" 2⅜" 1⅜" 1⅜" ⅜...
- Página 5 Replacement Parts / Pièces détachées / Repuestos 98127000 (11x2) 95562xx0 95902xx0 96762000 97735000 M6x8 97350000 98231000 96763xx0 (18x1,5) 97209000 92730000 95008000 98140000 (20x1) 97825000 95910000 97825000 97523000 97523000 97548000 97548000 95561000 96316001 95049000 95049000 98551000 xx = Colors / Couleurs / Acabados 88624000 00 = Chrome...
- Página 6 Installation / Installation / Instalación Adjust the spout rotation With the spout cam in place, the spout will rotate 75° to the right, and 75° to the left of center. Reposition the cam to change the rotation. Remove the spout. Remove the handspray and hose. Repositioning the cam one "tooth" results in a 15° change. Install the 110° cam if a 110° rotation is desired. Remove the cam completely if a 360° rotation is desired. 24 x 15°...
-
Página 7: Ajuste La Rotación Del Surtidor
Ajustez la Rotation du Bec Ajuste la Rotación del Surtidor Avec la came de bec installée, le bec pivotera de Con la leva del surtidor en su lugar, el surtidor rotará 75° vers la droite, et 75° vers la gauche. 75º hacia la derecha y 75º a la izquierda. Repositionnez la came pour changer la rotation. Reposicione la leva para cambiar la rotación. Retirez le bec. Retire el surtidor. Retirez le gicleur et le tuyau. Retire la ducha y el flexo. Le fait de repositionner la came d’une dent permet Reposicionar la leva un diente resulta en un cambio d’obtenir un changement de 15°. de 15º. Installez la came de 110°, si désiré. Instale la leva de 110°, si deseado. Retirez la came de bec si l’utilisateur souhaite obtenir Quite la leva del surtidor si el usuario desea una une rotation complète de 360°. rotación completa de 360º. 24 x 15°... - Página 8 English Français Español Install the handspray hose and Installez le tuyau et le gicleur. Instale el flexo y la ducha handspray. extraible. Lubrifiez légèrement les anneaux Lightly lubricate the glide rings. de glisse. Lubrique levemente los anillos deslizantes. Push the spout back into place. Poussez le bec sur le corps. Instale el surtidor. Place the faucet and sealing ring Placez l'anneau d'étanchéite et le Coloque el oro de sellado y el on the mounting surface. bec sur la surface de montage. surtidor sobre la superficie de montaje. Install the plastic washer, friction Installez la rondelle de plastique, washer, metal washer, and mount- la rondelle en fibre, la rondelle de Instale la arandela plástica, la ing nut. friction, et l'écrou de montage. arandela de fibra, la arandela de fricción y la tuerca de fijación. If the mounting surface is greater S l'épaisseur du comptoir dépasse than 1⅝", or if there is insufficient 1¾ po, ou si l'espace disponible Si el espesor de la mesada es space, omit the plastic washer. est insuffisant, omettez la rondelle superior a 1¾ pulg. o si no hay de plastique.
- Página 9 English Français Español Tighten the mounting nut. Apriete la tuerca de fijación y los Serrez l'écrou de montage et les tornillos. vis de serrage. Tighten the screws. Place the valve and sealing ring Placez l'anneau d'étanchéite et le Coloque el oro de sellado y on the mounting surface. robinet sur la surface de montage. el grifo sobre la superficie de montaje. Install the plastic washer, friction Installez la rondelle de plastique, washer, metal washer, and mount- la rondelle en fibre, la rondelle de Instale la arandela plástica, la ing nut. friction, et l'écrou de montage. arandela de fibra, la arandela de fricción y la tuerca de fijación. If the mounting surface is greater S l'épaisseur du comptoir dépasse than 1⅝", or if there is insufficient 1¾ po, ou si l'espace disponible Si el espesor de la mesada es space, omit the plastic washer. est insuffisant, omettez la rondelle superior a 1¾ pulg. o si no hay de plastique. suficiente espacio, puede omitirse la arandela plástica.
- Página 10 English Français Español Tighten the mounting nut. Serrez l'écrou de montage et les Apriete la tuerca de fijación y los vis de serrage. tornillos. Tighten the screws. Connect the hot and cold supply Connectez les tuyaux d'arrivée Conecte las mangueras de suminis- hoses to the stops. d'eau chaude et d'eau froide aux tro de agua caliente y fría a las tuyau d'alimentation. alimentaciones de la red. Use two wrenches. Servez-vous de deux Use dos llaves, como Do not allow the sup- clés, tel qu'illustre se illustra en el ply hoses to twist. dans le schema.
- Página 11 CLICK English Français Español Connect the handspray hose to the Raccordez le tuyau de le gicleur Conecte la manguera de rocia- connection hose. au tuyau d'arrivée de le gicleur. dor de mano a la manguera de suministro. Install the hose weight. Installez le contrepoids sur le Instale el contrapeso. tuyau. Test the handspray hose. If it does Tire del rociador de mano. Debe not retract smoothly, reposition the Tirez sur le gicleur. Elle devrait moverse con facilidad y retraerse weight. coulisser facilement et se rétracter suavemente. Reposicione el con- sans à-coups. Modifiez la position trapeso según sea necesario. du contrepoids au besoin.
- Página 12 English Français Español Retire la ducha extraible. Remove the handspray. Retirez le gicleur. Retire el filtro. Remove the filter from the hose. Retirez le filtre. Lave el filtro. Rinse any debris from the filter. Rincez le filtre.
- Página 13 > 2 min English Français Español Flush the faucet for at least two Rincez le robinet pendant au Lave el grifo durante al menos 2 minutes. moins 2 minutes. minutos. Instale el filtro. Place the filter in the hose. Installez le filtre. Install the handspray. Installez le gicleur. Instale la ducha extraible.
- Página 14 English Français Español Install the aerator service key on Installez la clé de service Instale la llave de servicio de one of the supply hoses. d'aérateur. aireador.
- Página 15 Set the high temperature limit stop / Réglage de la butée limite d’eau chaude / Ajuste el tope de límite de alta temperatura 140 °F 50 °F 44 PSI...
- Página 16 User Instructions / Instructions de service / Manejo open / ouvert / abierto close / fermé / cerrado hot / chaud / caliente cold / froid / frío open / ouvert / abierto...
- Página 17 Cleaning / Nettoyage / Limpieza...
- Página 18 Cleaning / Nettoyage / Limpieza...
- Página 19 • Damage to the product caused by improper care or the use of improper cleaning agents is not covered by the warranty. • If a component of the product is damaged, replace it, as there is risk of injury. Conseil de nettoyage pour les produits Hansgrohe Les robinets pour les salles de bains et les cuisines modernes ainsi que les produits récents pour les douches se composent de matériaux différents afin de satisfaire aux besoins du marché en termes de conception et de fonctionnalité. Afin d'éviter d'endommager le produit, il est nécessaire d'en prendre soin.
-
Página 20: Recomendación De Limpieza Para Los Productos De Hansgrohe
Les dommages au produit causés par un mauvais entretien ou par l'utilisation de produits de net- toyage inadéquats ne sont pas couverts par la garantie. • Si un composant du produit est endommagé, remplacez-le, car il existe un risque de blessure. Recomendación de limpieza para los productos de Hansgrohe Hoy en día, las griferías de baño y de cocina así como duchas modernas se componen de materiales muy distintos para satisfacer las exigencias del mercado respecto al diseño y la funcionalidad. Para evitar daños y reclamaciones hay que tener en cuenta ciertos aspectos tanto en el uso como en su limpieza. - Página 21 WHAT IS COVERED BY THE WARRANTY The warranty covers only your Hansgrohe manufactured product. Hansgrohe warrants this product against defects in material or workmanship as follows: Hansgrohe will replace at no charge for parts only or, at its option, replace any product or part of the product that proves defective because of improper workmanship and/or material, under normal installation, use, service and maintenance. If Hansgrohe is unable to provide a replacement and repair is not practical or cannot be made in timely fashion, Hansgrohe may elect to refund the purchase price in exchange for the return of the product. LENGTH OF WARRANTY Replacement or repaired parts of products will be covered for the term of this warranty, as stated in the following two sentences. If you are a consumer who purchased the product for use primarily for personal, family or household purposes, this warranty extends for as long as you own the product and the home in which the product is originally installed. If you purchased the product for use primarily for any other purpose, including, without limitation, a commercial purpose, this warranty extends only (i) for 1 year, with respect to Hansgrohe & Commercial products, and (ii) for 5 years, with respect to Axor products. THIS WARRANTY DOES NOT COVER, AND HANSGROHE WILL NOT PAY FOR: A. Conditions, malfunctions or damage not resulting from defects in material or workmanship. B. Conditions, malfunctions or damage resulting from (1) normal wear and tear, improper installation, improper maintenance, misuse, abuse, negligence, accident or alteration; (2) the use of abrasive or caustic cleaning agents or “no- rinse” cleaning products, or the use of the product in any manner contrary to the product instructions; or (3) conditions in the home such as excessive water pressure or corrosion. C.Labor and other expenses for disconnection, deinstallation, or return of the product for warranty service (including but not limited to proper packaging and shipping costs), or for installation or reinstallation of the product. D. Accessories, connected materials and products, or related products not manufactured by Hansgrohe. E. Any Hansgrohe or Axor product sold for display purposes. F. Rubbed Bronze finish is subject to a 3-year limited warranty. Chrome and all PVD finishes are covered by the limited lifetime warranty. G. Hansgrohe Water Filtration System is subject to a 1-year limited warranty. Warranty does not include replacement filters.
-
Página 22: Exclusions And Limitations
NEITHER ASSUMES NOR AUTHORIZES ANY PERSON TO CREATE FOR IT ANY OTHER OBLIGATION OR LIABILITY IN CONNECTION WITH THIS PRODUCT. HANSGROHE SHALL NOT BE LIABLE TO PURCHASER OR ANY OTHER PERSON FOR ANY INCIDENTAL, SPECIAL OR CONSEQUENTIAL DAMAGES, ARISING OUT OF BREACH OF THIS WARRANTY OR ANY IMPLIED WARRANTY (INCLUDING BUT NOT LIMITED TO ANY IMPLIED WARRANTY OF MERCHANTABILITY). - Página 24 Hansgrohe, Inc. • 1490 Bluegrass Lakes Parkway • Alpharetta, GA 30004 Tel. 800-334-0455 • Fax 770-889-1783 www.hansgrohe-usa.com...