Tabla de contenido
Publicidad
Idiomas disponibles
Idiomas disponibles
Enlaces rápidos
MODEL / MODELO / MODÈLE :
DSR118
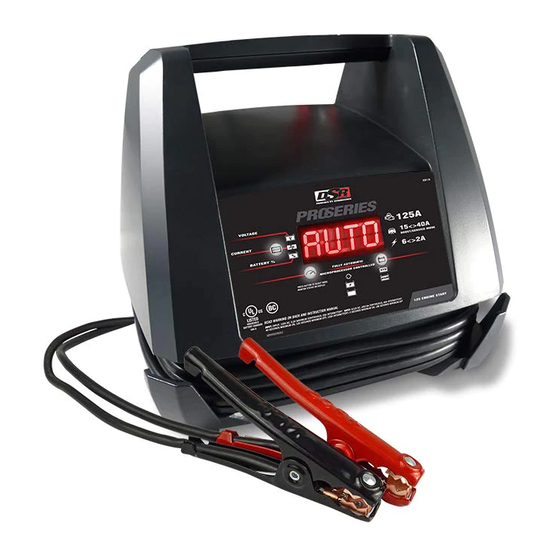
Battery Charger & Engine Starter
Cargador de baterías y arrancador
Chargeur de batterie et aide de démarrage
OWNERS MANUAL / MANUAL DEL USUARIO / MANUEL D'UTILISATION
PLEASE SAVE THIS OWNERS MANUAL AND READ BEFORE EACH USE.
This manual will explain how to use the battery charger safely and effectively.
Please read and follow these instructions and precautions carefully.
POR FAVOR CONSERVE ESTE MANUAL DEL USUARIO Y LEALO ANTES
DE CADA USO. En este manual le explica cómo utilizar el cargador de batería
de manera segura y confiable. Por favor, lea y siga las siguientes instrucciones
y precauciones.
GARDER LE MANUEL D'INSTRUCTION ET LISEZ LE AVANT CHAQUE
UTILISATION. Ce manuel explique comment utiliser le chargeur de batterie
d'une façon securitaire et efficace. S'il vous plaît lisez et suivez ces instructions
et precautions.
0099001793-02
Publicidad
Tabla de contenido
Solución de problemas

Manuales relacionados para Schumacher DSR PRO Serie


Resumen de contenidos para Schumacher DSR PRO Serie
- Página 1 MODEL / MODELO / MODÈLE : DSR118 Battery Charger & Engine Starter Cargador de baterías y arrancador Chargeur de batterie et aide de démarrage OWNERS MANUAL / MANUAL DEL USUARIO / MANUEL D’UTILISATION PLEASE SAVE THIS OWNERS MANUAL AND READ BEFORE EACH USE. This manual will explain how to use the battery charger safely and effectively.
-
Página 2: Important Safety Instructions
1. IMPORTANT SAFETY INSTRUCTIONS SAVE THESE INSTRUCTIONS. 1.1 SAVE THESE INSTRUCTIONS – 1.8 Do not operate charger if it has received This manual contains important safety a sharp blow, been dropped, or otherwise and operating instructions. damaged in any way; take it to a qualified serviceman. -
Página 3: Preparing To Charge
3. PREPARING TO CHARGE 3.1 If necessary to remove battery from battery without removable cell caps, such vehicle to charge, always remove as valve regulated lead acid batteries, grounded terminal from battery first. Make carefully follow manufacturer’s recharging sure all accessories in the vehicle are off, instructions. -
Página 4: Follow These Steps When Battery Is Outside Vehicle
7. FOLLOW THESE STEPS WHEN BATTERY IS OUTSIDE VEHICLE WARNING: A SPARK NEAR THE connect NEGATIVE (BLACK) charger clip BATTERY MAY CAUSE A BATTERY to free end of cable. EXPLOSION. TO REDUCE THE RISK OF 7.5 Do not face battery when making final A SPARK NEAR THE BATTERY: connection. - Página 5 MODE SELECTION BUTTON NOTE: See Operating Instructions for a Use this button to select one of the complete description of the charger modes. following modes: BATTERY TYPE BUTTON • 6<>2A CHARGE/MAINTAIN – Use this button to select the battery type. For charging small and large batteries.
- Página 6 CHARGING A BATTERY after the battery is desulfated. Desulfation OUTSIDE OF THE VEHICLE could take up to 10 hours. If desulfation fails, charging will abort and the display 1. Place battery in a well-ventilated area. will show CHARGE ABORTED - BAD 2.
- Página 7 1. With the charger unplugged from the USING THE BATTERY VOLTAGE TESTER AC outlet, connect the charger to the 1. With the charger unplugged from the battery, following the instructions given AC outlet, connect the charger to the in sections 6 and 7. battery following the instructions given in previous sections.
-
Página 8: Display Messages
12. DISPLAY MESSAGES 0.0V – No battery is detected. • The battery is too large or there is a bank of batteries and it doesn’t reach full CONNECT CLAMPS – Plugged into the charge within a set time period. AC outlet without the clamps connected to a 6 or 12V battery. -
Página 9: Troubleshooting
14. TROUBLESHOOTING PROBLEM POSSIBLE CAUSE SOLUTION The charger will not turn on AC outlet is dead. Check for open fuse or circuit when properly connected. breaker supplying AC outlet. Poor electrical connection. Check power cord and extension cord for loose fitting plug. Battery is defective. -
Página 10: Before Returning For Repairs
For REPAIR OR RETURN, contact Customer Service at 1-800-621-5485. DO NOT SHIP UNIT until you receive a RETURN MERCHANDISE AUTHORIZATION (RMA) number from Customer Service at Schumacher Electric Corporation. 16. SPECIFICATIONS Input Voltage........120V AC @ 60Hz, 5.2A max. continous, 25A intermittent Output Voltage ..............6V or 12V, with Auto Voltage Detection... - Página 11 Manufacturer does not provide any warranty for any accessories used with this product that are not manufactured by Schumacher Electric Corporation and approved for use with this product. This Limited Warranty is void if the product is misused, subjected to careless handling, repaired, or modified by anyone other than Manufacturer or if this unit is resold through an unauthorized retailer.
-
Página 12: Instrucciones Importantes De Seguridad
1. INSTRUCCIONES IMPORTANTES DE SEGURIDAD GUARDE ESTAS INSTRUCCIONES. 1.1 GUARDE ESTAS INSTRUCCIONES – 1.8 No utilice el cargador si el mismo recibió Este manual contiene instrucciones un golpe fuerte, si se cayó o si sufrió operativas y de seguridad de importancia. daños de cualquier otra forma;... -
Página 13: Preparación Para La Carga
una corriente de cortocircuito lo aplicación de un motor de arranque. No suficientemente elevada como para utilice este cargador de batería para cargar soldar un anillo o provocar efectos baterías de pila seca que por lo general similares sobre el metal, causando una se utilizan con artefactos domésticos. - Página 14 6. SIGA ESTOS PASOS CUANDO LA BATERÍA ESTÉ COLOCADA EN EL VEHÍCULO ADVERTENCIA: batería al borne POSITIVO (POS, P, +) sin UNA CHISPA PROVOCADA CERCA descarga a tierra de la batería. Conecte DE LA BATERÍA PUEDE CAUSAR LA el gancho NEGATIVO (NEGRO) al chasis EXPLOSIÓN DE LA BATERÍA.
-
Página 15: Conexiones A Tierra Y Energía De Ca
8. CONEXIONES A TIERRA Y ENERGÍA DE CA 8.1 Este cargador de batería está destinado a 8.3 USO DE UN CABLE DE EXTENSIÓN un uso en un circuito con tensión nominal El uso de una extensión no se de 120 V. El enchufe se debe conectar recomienda. -
Página 16: Indicador De Conexión De La Batería
INDICADORES LED y a menudo se las clasifica como de “bajo mantenimiento” o “libre de mantenimiento”. LED REVERSED (pinzas invertido) Este tipo de baterías está diseñado para [rojo] parpadea: Las conexiones están suministrar rápidas ráfagas de energía (tales inversas. como los arranques de motores) y poseen LED CHARGING (carga) un mayor recuento en placa. -
Página 17: Desulfatación
5. Seleccione el tipo de batería y el modo normalmente, la carga se anulará. Cuando de carga. Consulte la sección 12 para la carga se interrumpe, la salida del mostrar los detalles del mensaje. cargador se apaga y la pantalla mostrará CHARGE ABORTED - BAD BATTERY. -
Página 18: Utilizar El Probador De Tensión De Batería
1. Con el cargador desenchufado • Enfriar – Después de la puesta en del tomacorriente de CA, conecte marcha, el cargador entra en un estado el cargador a la batería siguiendo de enfriamiento obligatorio de 3 minutos las instrucciones que figuran en la (180 segundos). -
Página 19: Muestra De Mensajes
PROBAR DESPUÉS DE CARGAR FUNCIONAMIENTO DEL VENTILADOR Después de que la unidad ha sido El cargador está equipado con un cambiada de probador a cargador ventilador. Es normal que el ventilador (seleccionando un modo) permanece como funcione mientras el cargador está cargador. -
Página 20: Mantenimiento Y Cuidado
ENGINE START ON – Se muestra COOL DOWN xxx SECONDS durante los primeros 2 minutos del modo REMAINING – El cargador ha entrado en Engine Start. un 3 minutos obligatoria (180 segundos) estado de enfriamiento. READY – Se muestra después de permanecer 2 minutos en el modo Engine Start. -
Página 21: Antes De Devolver A Reparaciones
Lunes-viernes 7:00 to 5:00 Para REPARACIÓN O DEVOLUCIÓN, comuníquese con Servicios al Cliente al 1-800-621-5485. NO ENVÍE LA UNIDAD hasta que usted reciba AUTORIZACIÓN DE DEVOLUCIÓN DE MERCANCÍA (RMA) de Servicios al Cliente de Schumacher Electric Corporation. • 21 •... -
Página 22: Especificaciones
El Fabricante no presta garantía por lo accesorios utilizados con este producto que no sean los fabricados por Schumacher Electric Corporation y que no estén aprobados para su uso con este producto. La presente Garantía Limitada será nula si el producto se utiliza en forma errónea, se trata de manera inadecuada, es reparado o modificado... -
Página 23: Consignes De Sécurité Importantes
1. CONSIGNES DE SÉCURITÉ IMPORTANTES CONSERVER CES INSTRUCTIONS. 1.1 CONSERVER CES INSTRUCTIONS – 1.7 Ne pas faire fonctionner le chargeur avec Ce manuel contient des instructions un cordon ou une prise endommagé – importantes concernant la sécurité et le remplacer immédiatement. fonctionnement. -
Página 24: Préparation Pour Le Chargement
pour alimenter un système électrique 2.9 NE JAMAIS charger une batterie gelée. à basse tension autre que dans une 2.10 AVERTISSEMENT : Ce produit contient application d’un démarreur. Ne pas utiliser un ou plusieurs produits chimiques ce chargeur de batterie pour recharger reconnus par l’État de Californie pour des piles sèches qui sont utilisées en causer cancer, des malformations... -
Página 25: Étapes À Suivre Quand La Batterie Est Installée Hors Du Véhicule
du chargeur à la borne POSITIVE (POS, châssis du véhicule ou au moteur, loin de P, +) non mise à la masse de la batterie. la batterie. Ne pas raccorder la pince au Raccorder la pince NÉGATIVE (NOIRE) carburateur, aux canalisations d’essence au châssis du véhicule ou au moteur, ni aux pièces de la carrosserie en tôle. -
Página 26: Directives D'assemblage
9. DIRECTIVES D’ASSEMBLAGE 9.1 Enlever tous les cordons dérouler sur les câbles avant d’utiliser le chargeur de batterie. 10. PANNEAU DE CONTRÔLE AFFICHAGE NUMÉRIQUE 125A AIDE-DÉMARRAGE – Fournit des L’écran numérique indique l’état de la amplis supplémentaires pour démarrer batterie et du chargeur. Consultez la le moteur qui ont une batterie faible partie Messages d’Affichage pour une ou déchargée. -
Página 27: Consignes D'utilisation
11. CONSIGNES D’UTILISATION AVERTISSEMENT : Une étincelle près de CHARGE D’UNE BATTERIE la batterie peut provoquer une explosion. A L’EXTÉRIEUR DU VÉHICULE 1. Mettez la batterie dans un endroit IMPORTANT : Ne pas démarrer le bien ventilé. véhicule avec le chargeur branché à la prise (sauf pendant le démarrage 2. - Página 28 DÉSULFATATION avec les problèmes électriques, batteries Si la batterie demeure déchargée pour une dans le véhicule, une mauvaise connexion longue période de temps, celle-ci pourrait ou d’autres conditions supplémentaires devenir sulfatée et ne pas permettre le pourraient provoquer un courant excessif. chargement normal.
- Página 29 NOTE : Si le moteur tourne, mais ne 6 V Tension 12 V Tension État de la démarre pas, ce n’est pas la batterie ni le de la batterie de la batterie batterie système de démarrage qui est défectueux; 6,4 ou plus 12,8 ou plus Chargé...
-
Página 30: Messages D'affichage
12. MESSAGES D’AFFICHAGE 0.0V – Aucune batterie n’est détectée. CHARGE ABORTED - BAD BATTERY – Circonstances qui pourraient entraîner une CONNECT CLAMPS – Branchement situation d’abandon pendant la charge : effectué à la prise de courant alternatif sans que les pinces soient raccordées à •... -
Página 31: Maintenance Et Entretien
13. MAINTENANCE ET ENTRETIEN Un minimum d’entretien peut garder • Mettez les cordons proprement lors du le chargeur de batterie fonctionne stockage du chargeur. Cela aidera à correctement pendant des années. prévenir les dommages accidentels aux cordons et du chargeur. •... -
Página 32: Avant De Retourner Pour Les Réparations
1-800-621-5485, du lundi au Vendredi 07h00-17h00 CST Pour RÉPARATION OU RETOUR, contactez le service téchnique au 1-800-621-5485. NE PAS ENVOYER L’UNITÉ jusqu’à ce que vous receviez une AUTORISATION DE RETOUR DE MARCHANDISE (RMA) auprès du service clientèle au Schumacher Electric Corporation. • 32 •... -
Página 33: Garantie Limitée
ACHETEUR DE CE PRODUIT. CETTE GARANTIE LIMITÉE N’EST PAS TRANSFÉRABLES NI CESSIBLES. Schumacher Electric Corporation (le « Fabricant ») garantit ce unité pour deux (2) ans à compter de la date d’achat au détail contre les défauts de matériaux ou de fabrication qui peuvent se produire dans des conditions normales d’utilisation et de soins. - Página 34 • 34 •...
-
Página 35: Warranty Card / Tarjeta De Garantía
ORIGINAL receipt because it will be required for any warranty claims. This warranty is not transferable. Send warranty card only. DO NOT SEND UNIT TO THIS ADDRESS FOR REPAIR. Mail this card to: Schumacher Electric Corporation 801 Business Center Drive Mount Prospect, IL 60056-2179 Name ______________________________________________________________... -
Página 36: Carte De Garantie
éventuelle réclamation au titre de la garantie. Cette garantie n’est pas transférable. Envoyer la carte de garantie seulement. NE PAS ENVOYER L’UNITÉ À CETTE ADRESSE POUR RÉPARATION. Envoyer cette carte à : Schumacher Electric Corporation 801 Business Center Drive Mount Prospect, IL 60056-2179 (É.-U ) Nom _______________________________________________________________...