Tabla de contenido
Publicidad
Idiomas disponibles
Idiomas disponibles
Enlaces rápidos
Publicidad
Tabla de contenido

Manuales relacionados para Phonocar VM188


Resumen de contenidos para Phonocar VM188
- Página 1 VM188 MONITOR DA TETTO 21.5” LED/LCD FULL HD FULL HD 21.5” LED/LCD ROOF MONITOR Manuale istruzioni Instructions manual Notice de montage et d’emploi Gebrauchsanweisungen Manual de instrucciones 07/2019...
-
Página 2: Specifiche Tecniche
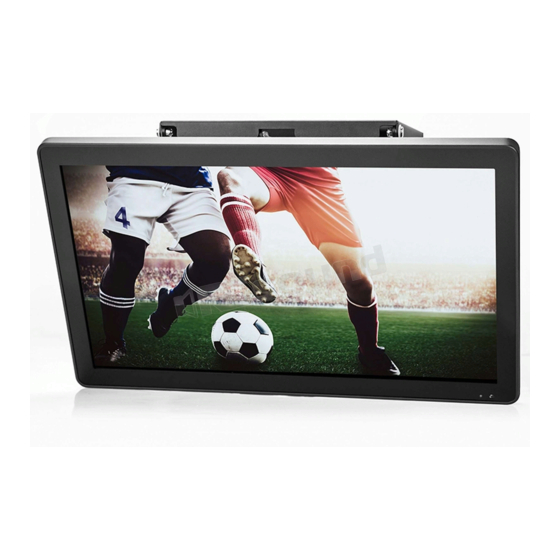
VM188 Monitor da tetto Modello progettato appositamente per l’intrattenimento su autobus, minivan, treni. Al fine di garantire un corretto utilizzo del prodotto, vi invitiamo a leggere con attenzione il presente manuale prima dell’installazione, specialmente nella parte relativa alla sicurezza. Si prega di conservare il presente manuale d’uso per poterlo consultare in qualsiasi momento. -
Página 3: Collegamenti E Installazione
Collegamenti e installazione 1) Collegamento: Il dispositivo deve essere alimentato con una tensione compresa tra 9 V e 33 V. 2) Connessione del segnale video: Collegare l’uscita del segnale video all’ingresso video del dispositivo AV1/AV2/HDMI. FUSE BOX RED + 9V --> 33V BLACK - Ground AV1 INPUT (YELLOW) AV2 INPUT (YELLOW) -
Página 4: Funzioni Telecomando
Funzioni telecomando Seleziona le sorgenti AV1/AV2 Spostamento verso l’alto nel menù Tasto di accensione Non attivo Non attivo Non attivo Conferma selezione Spostamento verso Spostamento verso sinistra nel menù destra nel menù Spostamento verso il basso nel menù Non attivo Non attivo Tasto per Uscita dal menu... -
Página 5: Technical Specifications
VM188 Roof monitor This type is specially designed for Bus, Marine, MPV, Train entertainment. In order to ensure that you will use the monitor correctly, please read this manual carefully before installation. Moreover, the safety items are supposed to be paid more attention to. Please do keep this user manual for later review. -
Página 6: Connections And Installation
Connections and installation 1) Connection: The device must be supplied with a voltage between 9 V and 33 V. 2) Video signal connection Connect the video signal output to the video input of the AV1/AV2/HDMI device. FUSE BOX RED + 9V --> 33V BLACK - Ground AV1 INPUT (YELLOW) AV2 INPUT (YELLOW) - Página 7 Remote controls functions Select source AV1/ AV2 Not active Power Not active Not active Left Right Down Not active Not active Mute Exit Volume + Volume - Menu Play/Pause...
-
Página 8: Avertissements
VM188 Écran de toit Modèle réalisé pour le divertissement dans les bus, les minibus, les trains. Pour une utilisation correcte de l’appareil, lire attentivement cette notice avant l’installation, surtout la partie dédiée à la sécurité. Il est conseillé de garder cette notice d’utilisation pour une consultation future. - Página 9 Branchements et installation 1) Branchement : La tension d’alimentation de l’appareil doit etre entre 9 V et 33 V. 2) Connexion du signal vidéo : Brancher la sortie du signal vidéo à l’entrée vidéo de l’appareil AV1/AV2/HDMI FUSE BOX RED + 9V --> 33V BLACK - Ground AV1 INPUT (YELLOW) AV2 INPUT (YELLOW)
- Página 10 Fonctions télécommande Séléction des sources AV1/AV2 Parcourir le menu vers le haut Touche d’allumage Pas active Pas active Pas active Confirmer la sélection Parcour vers la gauche Pour aller vers droite dans le menu dans le menu Descendre dans le menu Pas active Pas active Touche pour...
-
Página 11: Technische Daten
VM188 Dachmonitor Ein Modell, das speziell für die Unterhaltung in Bussen, Minivans und Zügen entwickelt wurde. Bevor Sie das Produkt installieren, lesen Sie bitte diese Anleitung besonders im Sicherheitsbereich sorgfältig durch. Bewahren Sie diese Bedienungsanleitung auf, um sie jederzeit nachschlagen zu können. -
Página 12: Anschluss Und Installation
Anschluss und Installation 1) Anschluss: Das Gerät ist mit einer Spannung zwischen 9 V und 33 V zu versorgen 2) Anschluss des Videosignals: Schließen Sie den Videosignalausgang an den Videoeingang des Gerätes. AV1/AV2/HDMI. FUSE BOX RED + 9V --> 33V BLACK - Ground AV1 INPUT (YELLOW) AV2 INPUT (YELLOW) - Página 13 FERNBEDIENUNG-FUNKTIONEN Auswahl der Quellen AV1/AV2 Nach oben im Menü Nicht aktiviert Einschalttaste Nicht aktiviert Nicht aktiviert Nach links im Menü Nach recht im Menü Nach unten im Menü Nicht aktiviert Nicht aktiviert Taste zum Stummschalten EXIT des Audios Vol + Vol - Taste zum Aufrufen des Taste zu Play/Pause...
-
Página 14: Vm188 Monitor De Techo
VM188 Monitor de techo Modelo proyectado específicamente para el entretenimiento en autobús, mini bus, trenes etc.. Con el fin de garantizar el correcto funcionamiento del dispositivo, os invitamos a leer con atención el presente manual de usuario antes de la instalacion, en especial modo la parte referente a la seguridad. Os rogamos de guardar este manual para poderlo consultar en cualquier momento. -
Página 15: Conexiones E Instalación
Conexiones e instalación 1) Conexión El aparato debe alimentarse con una tensión entre 9 y 33 Voltios. 2) Conexión señal vídeo Conecte la salida de vídeo a la entrada vídeo del aparato AV1/AV2/HDMI. FUSE BOX RED + 9V --> 33V BLACK - Ground AV1 INPUT (YELLOW) AV2 INPUT (YELLOW) -
Página 16: Funciones Mando A Distancia
Salida del menú o de la el audio ventana Volumen- Volumen + Tecla para entrar Tecla función en el menú PLAY/PAUSA Phonocar S.p.A. Via F.lli Cervi, 167/C • 42124 Reggio Emilia (Italy) • Tel. +39 0522 941621 e-mail: info@phonocar.it • www.phonocar.com...