Publicidad
Idiomas disponibles
Idiomas disponibles
H-3381
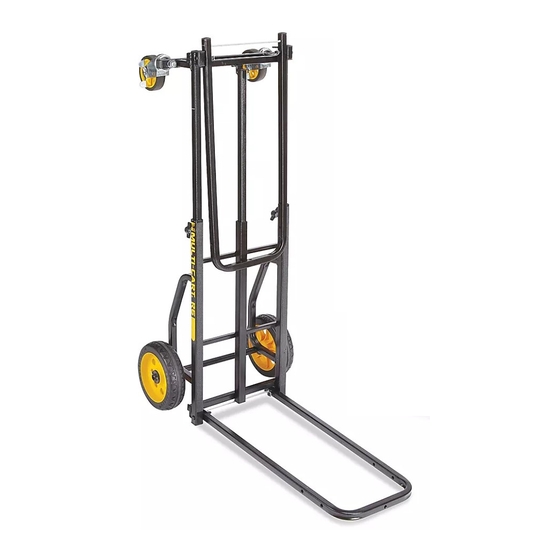
8-IN-1 MULTI-CART
TOOLS NEEDED
3/4" Wrench
Channel Lock Pliers
INSTALLING REAR WHEELS
Figure 1
NOTE: It is recommended that axles be
lubricated with light grease before installing.
1.
Slide a flat washer over the end of the axle. Gently
slide a wheel over the end of the axle. (See Figure 1)
2. Insert a cotter pin through the holes in the end of
the axle. (See Figure 1A) Bend the cotter pin ends
outward.
3. Repeat steps 1 and 2 for the other wheel.
PAGE 1 OF 6
1-800-295-5510
uline.com
®
ASSEMBLY
Figure 1A
INSTALLING FRONT SWIVEL CASTERS
Figure 2
1.
Insert caster stem through the holes in the cart frame.
Slide a lock washer over the caster stem. Secure
caster with locknut. (See Figure 2)
2. Grip hex shaped plate just below caster stem with
channel lock pliers. Using a 3/4" wrench, tighten the
locknut. (See Figure 2)
3. Repeat steps 1 and 2 for the other caster.
Para Español, vea páginas 3-4.
Pour le français, consulter les pages 5-6.
0521 IH-3381
Publicidad
Tabla de contenido

Resumen de contenidos para Uline MULTI-CART H-3381
- Página 1 Para Español, vea páginas 3-4. Pour le français, consulter les pages 5-6. H-3381 1-800-295-5510 uline.com 8-IN-1 MULTI-CART ® TOOLS NEEDED 3/4" Wrench Channel Lock Pliers ASSEMBLY INSTALLING REAR WHEELS INSTALLING FRONT SWIVEL CASTERS Figure 1 Figure 1A Figure 2 Insert caster stem through the holes in the cart frame.
- Página 2 Tighten wing bolts. Tighten wing bolts. Place cart on all four wheels. Fold down sides following the order in configuration 1. Stand cart on end for storage. 1-800-295-5510 uline.com PAGE 2 OF 6 0521 IH-3381...
-
Página 3: Herramientas Necesarias
H-3381 800-295-5510 uline.mx MULTI-CART 8-EN-1 ® HERRAMIENTAS NECESARIAS Llave Combinada de 3/4” Pinzas de Extensión ENSAMBLE COLOCACIÓN DE LAS LLANTAS TRASERAS COLOCACIÓN DE LAS RUEDAS GIRATORIAS DELANTERAS Diagrama 1 Diagrama 1A Diagrama 2 NOTA: Se recomienda lubricar los ejes con una grasa ligera antes de llevar a cabo la Inserte el vástago de la rueda a través de los... -
Página 4: Configuraciones
Pliegue los lados por orden siguiendo las indicaciones Extienda el armazón hasta que de la configuración 1. el botón para fijar se active. Para almacenar el carrito, apóyelo sobre el extremo. Apriete las tuercas mariposas. 800-295-5510 uline.mx PAGE 4 OF 6 0521 IH-3381... -
Página 5: Outils Requis
H-3381 1-800-295-5510 uline.ca MULTI-CART 8 EN 1 OUTILS REQUIS Clé de 3/4 po Pince multiprise à crémaillère MONTAGE INSTALLATION DES ROUES ARRIÈRE INSTALLATION DES ROULETTES PIVOTANTES AVANT Figure 1 Figure 1A Figure 2 REMARQUE : Nous recommandons de graisser Insérez la tige de la roulette dans les trous du cadre du chariot. - Página 6 Allongez le cadre jusqu'à ce Rabattez les côtés en suivant les étapes au point nº 1. que le bouton d'arrêt s'actionne. Placez le chariot sur le côté pour le ranger. Serrez les boulons à oreilles. 1-800-295-5510 uline.ca PAGE 6 OF 6 0521 IH-3381...


