Publicidad
sauder.com
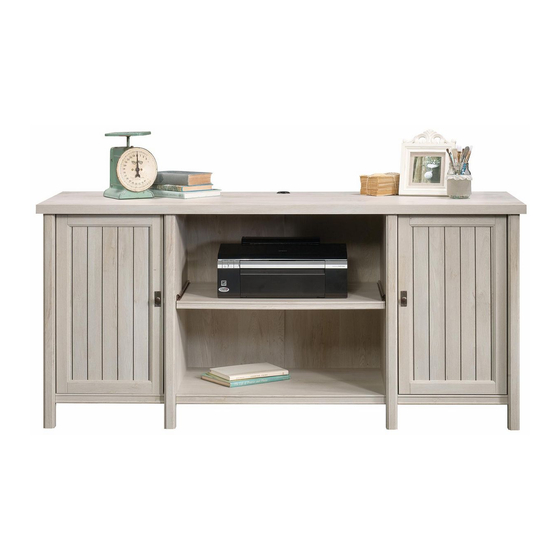
Credenza
Costa Collection | Model 419959
Need help? Visit Sauder.com to view video assembly tips or chat with a live rep.
Prefer the phone? Call 1-800-523-3987.
Share your journey!
Sit and surf.
NOTE: THIS INSTRUCTION
BOOKLET CONTAINS IMPORTANT
SAFETY INFORMATION.
PLEASE READ AND KEEP FOR
FUTURE REFERENCE.
English pg 1-28
Français pg 29-32
Español pg 33-36
Lot # 394437
09/22/16
Purchased: __________________
Be sure to give us a ring before
making any returns. 1-800-523-3987
Publicidad
Tabla de contenido

Manuales relacionados para Sauder Costa 419959


Resumen de contenidos para Sauder Costa 419959
- Página 1 Costa Collection | Model 419959 NOTE: THIS INSTRUCTION BOOKLET CONTAINS IMPORTANT SAFETY INFORMATION. Need help? Visit Sauder.com to view video assembly tips or chat with a live rep. PLEASE READ AND KEEP FOR FUTURE REFERENCE. Prefer the phone? Call 1-800-523-3987.
- Página 2 CENTER BACK (1) W LEFT DOOR (1) RIGHT BOTTOM (1) LEFT REAR LEG (1) RIGHT DOOR (1) BOTTOM (1) LEFT FRONT LEG (2) RIGHT FRONT LEG (2) LEFT CENTER LEG (1) BOTTOM MOLDING (1) LEFT BOTTOM (1) Page 2 419959 www.sauder.com/services...
-
Página 3: Part Identifi Cation
Part Identifi cation www.sauder.com/services 419959 Page 3... - Página 4 3S GOLD 5/16" FLAT HEAD SCREW - 4 BLACK 9/16" LARGE HEAD SCREW - 1 BLACK 1/2" FLAT HEAD SCREW - 8 18S BROWN 1" FLAT HEAD SCREW - 4 BLACK 1-1/8" MACHINE SCREW - 2 BLACK 9/16" FLAT HEAD SCREW - 4 Page 4 419959 www.sauder.com/services...
- Página 5 Assemble your unit on a carpeted fl oor or on the empty å carton to avoid scratching your unit or the fl oor. STOP To begin assembly, push a SAUDER TWIST-LOCK® å FASTENER (12F) into the large holes in the ENDS (A If you purchased and B).
- Página 6 B), PRINTER SHELF (D), and UPRIGHTS (L and M). Some assembly (and snacks) required. (27 used) Arrow Arrow Arrow Hole The arrow in the HIDDEN CAM must point toward the hole in the edge of the board. Page 6 419959 www.sauder.com/services...
- Página 7 Step 3 Turn twenty-seven CAM SCREWS (8F) into the PRINTER å SHELF MOLDING (K) and LEGS (H, O, P, Q, S, and T). (27 used) www.sauder.com/services 419959 Page 7...
- Página 8 NOTE: If the MOLDING comes up off of the SCREWS, å remove it and slide it on again. The MOLDINGS should be even on both edges of the ENDS. Shoulder BLACK 9/16" FLAT HEAD SCREW (4 used in this step) Page 8 419959 www.sauder.com/services...
- Página 9 Fill the holes 1/4 to 1/2 full with GLUE. These surfaces should be even. Edge without hole Edge with TWIST-LOCK® FASTENERS S u r f a c H I D D E N i t h These surfaces should be even. Edge without hole www.sauder.com/services 419959 Page 9...
- Página 10 Fill the holes 1/4 to 1/2 full with GLUE. These surfaces should be even. Edge with hole S u r f a c H I D D E N i t h Edge with TWIST-LOCK® FASTENERS These surfaces should be even. Edge with hole Page 10 419959 www.sauder.com/services...
- Página 11 These surfaces should be even. Edge without hole Edge with TWIST-LOCK® FASTENERS S u r f a c H I D D E N i t h o These surfaces should be even. Edge without hole www.sauder.com/services 419959 Page 11...
- Página 12 These surfaces should be even. Edge with hole S u r f a c H I D D E N i t h o Edge with TWIST-LOCK® FASTENERS These surfaces should be even. Edge with hole Page 12 419959 www.sauder.com/services...
- Página 13 M). Use four GOLD 5/16" FLAT HEAD SCREWS (3S). NOTE: The CABINET RAILS are marked "CABINET å RIGHT" and "CABINET LEFT" for easy identifi cation. Roller end GOLD 5/16" FLAT HEAD SCREW (4 used in this step) Roller end www.sauder.com/services 419959 Page 13...
- Página 14 Slide the BOTTOM MOLDING (I) onto the notched edge å of the BOTTOM (G). Now might be a good time to refresh *U.S. Patent No. 5,499,886 å your drink. Notched edge Slide the BOTTOM MOLDING (I) onto the notched edge. Page 14 419959 www.sauder.com/services...
- Página 15 M). Tighten four TWIST-LOCK® FASTENERS. Do not stand the unit upright without the BACK fastened. The unit may collapse. How to use the SAUDER TWIST-LOCK ® FASTENER 1. Insert the dowel end of the FASTENER into the hole of the adjoining part.
- Página 16 Meet Part (V). This component has been engineered to be lighter, stronger, faster… well ok. Not technically faster. But defi nitely makes for a sturdier Credenza that’ s easier to assemble and friendlier to the environment. Page 16 419959 www.sauder.com/services...
- Página 17 BOTTOM MOLDING (E) onto the notched edge. *U.S. Patent No. 5,499,886 å Notched edge These edges should be even. Notched edge These edges should be even. Slide the SHORT BOTTOM MOLDING (E) onto the notched edge. www.sauder.com/services 419959 Page 17...
- Página 18 Step 14 Fasten the BOTTOMS (F and R) to the UPRIGHTS (L å and M). Tighten four TWIST-LOCK® FASTENERS. Page 18 419959 www.sauder.com/services...
- Página 19 Fasten the ENDS (A and B) to the BOTTOMS (F and R) and TOP (V). Tighten å eight TWIST-LOCK® FASTENERS. NOTE: Be sure the WOOD DOWELS in the LEGS insert into the TOP. Wipe å away the excess GLUE. Fill the holes 1/4 to 1/2 full with GLUE. www.sauder.com/services 419959 Page 19...
- Página 20 TOP (V). Fasten the BACKS (U) to your unit using the NAILS (1N). å Edge without holes NAIL BLACK 9/16" LARGE HEAD SCREW (1 used for the METAL BRACKET) (36 used in this step) Edge without holes Page 20 419959 www.sauder.com/services...
- Página 21 Remove the Nail Holder from the NAIL and completely tap the NAIL in with your hammer. off set edge 5" nail slot Nail Holder 2" bead bead NAIL (16 used in this step) 5" 2" off set edge www.sauder.com/services 419959 Page 21...
- Página 22 Step 18 Fasten two HINGES (14H) to each DOOR (W and X). Use å eight BLACK 1/2" FLAT HEAD SCREWS (11S). BLACK 1/2” FLAT HEAD SCREW (8 used in this step) Page 22 419959 www.sauder.com/services...
- Página 23 Fasten a KNOB SET (136K) to the LEFT DOOR (W). Use a å BLACK 1-1/8" MACHINE SCREW (21S). Hinge Repeat this step for the RIGHT DOOR (X). å See the next step for DOOR adjustments. å 136K BLACK 1-1/8" MACHINE SCREW (2 used in this step) www.sauder.com/services 419959 Page 23...
- Página 24 To adjust the DOORS in or out (depth), loosen the mounting å screw one turn and move the DOORS in or out, as needed. Tighten the mounting screw after making adjustments. Mounting screw (depth) Adjusting screw (horizontal) (vertical adjustment) Page 24 419959 www.sauder.com/services...
- Página 25 Fasten the PRINTER SHELF MOLDING (K) to the å PRINTER SHELF (D). Tighten three HIDDEN CAMS. NOTE: Be sure to position the PRINTER SHELF MOLDING å exactly as shown. The CAM SCREWS should be closer to this edge. www.sauder.com/services 419959 Page 25...
- Página 26 Push a CORD CLIP (4P) into the hole in the KEYBOARD å SHELF (D). NOTE: The CORD CLIP is used to hold your keyboard å cord against the KEYBOARD SHELF. Roller end Roller end BROWN 1" FLAT HEAD SCREW (4 used in this step) Page 26 419959 www.sauder.com/services...
- Página 27 SHELF behind the rollers on the unit. Lift the front of the SHELF up and slide it into the unit. Insert the GROMMET (10P) and GROMMET CAP (1P) into å the large hole in the TOP (V). www.sauder.com/services 419959 Page 27...
- Página 28 This completes assembly. Clean with your favorite furniture å polish or a damp cloth. Wipe dry. And to celebrate, why not share your success story? 25 lbs. 50 lbs. 20 lbs. 25 lbs. 25 lbs. 30 lbs. (8 used) 25 lbs. Page 28 419959 www.sauder.com/services...
-
Página 29: Liste De Pièces
EXTRÉMITÉ DROITE ..........1 GLISSIÈRE DROITE D'ÉLÉMENT .....1 pour future référence. EXTRÉMITÉ GAUCHE ..........1 GLISSIÈRE GAUCHE D'ÉLÉMENT ....1 Pour contacter Sauder MOULURE D’EXTRÉMITÉ ........2 COULISSE DROITE DE TIROIR ......1 en ce qui concerne cet élément, faire référence TABLETTE POUR IMPRIMANTE.......1 COULISSE GAUCHE DE TIROIR ......1... - Página 30 Pour commencer l'assemblage, enfoncer une FIXATION TWIST-LOCK® Insérer ensuite deux CHEVILLES EN BOIS (15F) dans les trous. SAUDER (12F) dans les gros trous des EXTRÉMITÉS (A et B). Répéter Nettoyer l'excès de COLLE. cette étape pour les DESSOUS (F, G et R) et les MONTANTS (L et M).
-
Página 31: Important
FIXATIONS TWIST-LOCK®. Attention: Ne pas relever l'élément dans sa position verticale Utilisation de la FIXATION TWIST-LOCK® SAUDER: avant d'avoir fi xé l’ARRIÈRE. L'élément risque de s'eff ondrer. 1. Insérer l'extrémité fi letée de la FIXATION dans le trou de la pièce attenante. - Página 32 ÉTAPE 21 Fixer la MOULURE DE TABLETTE POUR IMPRIMANTE (K) à la TABLETTE POUR IMPRIMANTE (D). Serrer trois EXCENTRIQUES ESCAMOTABLES. REMARQUE : S’ a ssurer de positionner la MOULURE DE TABLETTE POUR IMPRIMANTE comme l'indique le schéma. Page 32 419959 www.sauder.com/services...
-
Página 33: Lista De Partes
RIEL IZQUIERDO DE GABINETE ......1 pour future référence. MOLDURA DE EXTREMO ........2 CORREDERA DERECHA DE CAJÓN ....1 Pour contacter Sauder ESTANTE DE LA IMPRESORA ......1 CORREDERA IZQUIERDA DE CAJÓN ..1 en ce qui concerne cet MOLDURA DE FONDO CORTA .......2 EXCÉNTRICO ESCONDIDO ......27... - Página 34 Para comenzar el ensamblaje, empuje un SUJETADOR TWIST-LOCK® A continuación, inserte dos PASADORES DE MADERA (15F) dentro SAUDER (12F) dentro de los agujeros grandes de los EXTREMOS (A y B). de los agujeros. Quite el exceso de PEGAMENTO. Repita este paso para los FONDOS (F, G y R) y los PARALES (L y M).
-
Página 35: Importante
Fije el FONDO (G) a los PARALES (L y M). Apriete cuatro PASO 16 SUJETADORES TWIST-LOCK®. Cómo utilizar el SUJETADOR TWIST-LOCK® SAUDER: Precaución: No coloque la unidad en posición vertical hasta que se 1. Inserte el extremo con cabilla del SUJETADOR en el agujero de la parte adjunta. -
Página 36: Ajuste De La Puerta
Apriete el tornillo de montaje después de hacer los ajustes. PASO 21 Fije la MOLDURA DE ESTANTE DE IMPRESORA (K) al ESTANTE DE LA IMPRESORA (D). Apriete tres EXCÉNTRICOS ESCONDIDOS. NOTA: Asegúrese de colocar la MOLDURA DE ESTANTE DE LA IMPRESORA exactamente como se muestra. Page 36 419959 www.sauder.com/services... - Página 37 à Les téléviseurs peuvent être particulièrement un téléviseur. cet eff et. lourds. De plus, le poids et l’emplacement du tube image ont tendance à rendre les téléviseurs instables et enclins à tomber vers l’ a vant. www.sauder.com/services 419959 Page 37...
- Página 38 Además, el peso y la ubicación del tubo de imagen tienden a causar la inestabilidad de televisores y propensa a volcarse hacia adelante. Page 38 419959 www.sauder.com/services...
-
Página 39: Garantie Limitée De 5 Ans
à compter de la date d'achat la première fois et qui sont signalés à Sauder dans les limites de couverture de la contre tout défaut de matériaux ou de fabrication des composantes de mobilier Sauder. - Página 40 Dear Valued Customer: So, how did it go? Thanks so much for choosing Sauder® furniture. I hope the Set a world record for speed? purchase and assembly process was a positive experience Feeling good about yourself? and you feel good about the furniture you just built. If you Nice.