Tabla de contenido
Publicidad
Enlaces rápidos
sauder.com
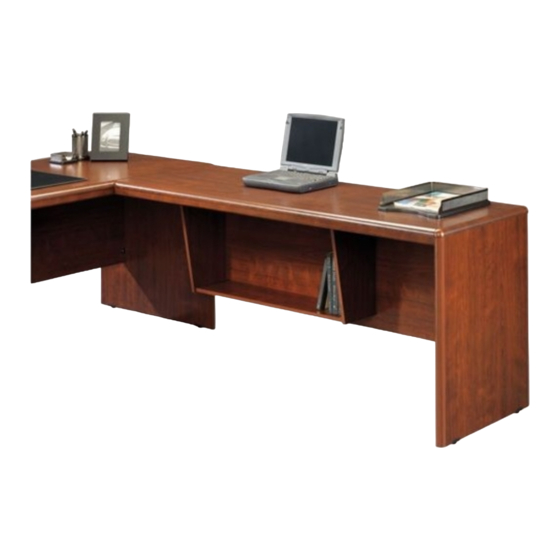
65" Desk Return
Cornerstone Collection | 404380
Need help? Visit Sauder.com to view video assembly tips or chat with a live rep.
Prefer the phone? Call 1-800-523-3987.
Share your journey!
We're in your corner.
NOTE: THIS INSTRUCTION
BOOKLET CONTAINS IMPORTANT
SAFETY INFORMATION.
PLEASE READ AND KEEP FOR
FUTURE REFERENCE.
English pg 1-26
Français pg 27-29
Español pg 30-32
Lot # 365485
10/02/14
Purchased: __________________
Be sure to give us a ring before
making any returns. 1-800-523-3987
Publicidad
Tabla de contenido

Manuales relacionados para Sauder Cornerstone Serie


Resumen de contenidos para Sauder Cornerstone Serie
- Página 1 Cornerstone Collection | 404380 NOTE: THIS INSTRUCTION BOOKLET CONTAINS IMPORTANT SAFETY INFORMATION. Need help? Visit Sauder.com to view video assembly tips or chat with a live rep. PLEASE READ AND KEEP FOR FUTURE REFERENCE. Prefer the phone? Call 1-800-523-3987. English pg 1-26 Français pg 27-29...
- Página 2 Assembly Tools Required Part Identifi cation No. 2 Phillips Screwdriver Tip Shown Actual Size Hardware Identifi cation Assembly Steps 5-26 Hammer Not actual size Français 27-29 Español 30-32 Skip the power trip. Safety 33-34 This time. Warranty Page 2 404380 www.sauder.com/services...
-
Página 3: Part Identifi Cation
While not all parts are labeled, some of the parts will have a label or an inked letter on the edge to help distinguish similar parts from each other. Use this part identifi cation to help identify similar parts. END (1) UPRIGHT (2) TOP (1) MODESTY PANEL (1) PURSE SHELF (1) MOLDING (1) OPTION MOLDING (1) www.sauder.com/services 404380 Page 3... - Página 4 PROPEL NUT - 2 HOLE PLUG - 5 SPACER - 1 TOUCH-UP PEN - 1 BLACK 1-7/8" FLAT HEAD SCREW - 4 BROWN 1-1/2" FLAT HEAD SCREW - 3 BLACK 9/16" LARGE HEAD SCREW - 16 Page 4 404380 www.sauder.com/services...
- Página 5 Assemble your unit on a carpeted fl oor or on the empty å carton to avoid scratching your unit or the fl oor. To begin assembly, push a SAUDER TWIST-LOCK® å FASTENER (J) into the large holes in the END (A).
- Página 6 Step 2 Fasten the CORNER BLOCKS (H) to the TOP (C). Tighten å ® How to use the SAUDER TWIST-LOCK FASTENER two TWIST-LOCK® FASTENERS. 1. Insert the dowel end of the FASTENER into the hole of the adjoining part. NOTE: The dowel end of the FASTENER must remain fully inserted in the hole of the adjoining part while locking the FASTENER.
- Página 7 404972 Executive Desk, follow steps 12-22. Return on the RIGHT Continue with Steps 4-11 (then go to Step 21) 404972 404972 404380 404380 404379 Return on the LEFT Continue with Steps 12-22 404972 404972 404380 404380 404379 www.sauder.com/services 404380 Page 7...
-
Página 8: Important
NOTE: Be sure to hold the Bottom with your free hand to prevent it from falling. å Extension Rail h t E R i g 404972 Executive Desk p r i g h t U R i g Support Rod Turnbuckle Page 8 404380 www.sauder.com/services... - Página 9 Slide the SPACER (O) under the short Support Rod as å close to the fastened end of the Support Rod as possible. Now, tighten the Turnbuckle. Remove these Metal Brackets 404972 Executive Desk 404972 Executive Desk Molding Support Rod Turnbuckle Return Molding Flat edge www.sauder.com/services 404380 Page 9...
- Página 10 NOTE: The Extension Rails and hardware used in this step å are from the 404972 Executive Desk. Fasten the Extension Rails to the END (A). Use four Gold å 5/16" Flat Head Screws. Extension Rail Open end Short Rail Long Rail Page 10 404380 www.sauder.com/services...
- Página 11 TWIST-LOCK® FASTENERS. Fasten the Right Upright to the TOP (C) and Bottom. å Tighten four TWIST-LOCK® FASTENERS. Surface with TWIST-LOCK® FASTENERS Finished edge p r i g h t U R i g Open end Finished edge www.sauder.com/services 404380 Page 11...
- Página 12 E R S T E N F A S i t h K ® f a c L O C S u r I S T - E R S T E N F A S Page 12 404380 www.sauder.com/services...
- Página 13 å four BLACK 1-7/8" FLAT HEAD SCREWS (R). BLACK 1-7/8" FLAT HEAD SCREW Surface with (4 used in this step) TWIST-LOCK® FASTENERS Finished edge p r i g h t U R i g Finished edge www.sauder.com/services 404380 Page 13...
- Página 14 MOLDING (F). Use eight BLACK 9/16" LARGE HEAD SCREWS (T). NOTE: There are no pre-drilled holes in the MOLDING. å The SCREWS will tighten into the grooves. Flat edge BLACK 9/16" LARGE HEAD SCREW (8 used in this step) Page 14 404380 www.sauder.com/services...
- Página 15 Fasten the CONNECTOR PLATE (I) to the TOP (C). Use å four BLACK 9/16" LARGE HEAD SCREWS (T). Go to step 21 and continue assembly. å BLACK 9/16" LARGE HEAD SCREW (4 used for the CONNECTOR PLATE) www.sauder.com/services 404380 Page 15...
- Página 16 NOTE: Be sure to hold the Bottom and Fixed Shelf with your free hand to prevent å them from falling. Extension Rail L e f t E n 404972 Executive Desk L e f t U p r i g h Long Support Rod Turnbuckle Page 16 404380 www.sauder.com/services...
- Página 17 Slide the SPACER (O) under the Long Support Rod as close å to the fastened end of the Long Support Rod as possible. Now, tighten the Turnbuckle. Remove these Metal Brackets 404972 Executive Desk 404972 Executive Desk Long Support Rod Turnbuckle Molding Return Molding Flat edge www.sauder.com/services 404380 Page 17...
- Página 18 NOTE: The Extension Rails and hardware used in this step å are from the 404972 Executive Desk. Fasten the Extension Rails to the END (A). Use four Gold å 5/16" Flat Head ScrewS. Extension Rail Long Rail Short Rail Open end Page 18 404380 www.sauder.com/services...
- Página 19 Insert the Metal Pins back into the Fixed Shelf. å Then, insert the Metal Pins in one end of the Fixed Shelf into the holes in the END (A). Surface with TWIST-LOCK® FASTENERS Finished edge Open end www.sauder.com/services 404380 Page 19...
- Página 20 å Tighten four Twist-Lock Fasteners. NOTE: Be sure the Metal Pins in the Fixed Shelf insert into å the holes in the Left Upright. L e f t U p r i g h Finished edge Page 20 404380 www.sauder.com/services...
- Página 21 T E N K ® E R S S u r f a c i t h o I S T - F A S L O C T E N K ® E R S www.sauder.com/services 404380 Page 21...
- Página 22 å four BLACK 1-7/8" FLAT HEAD SCREWS (R). Surface with TWIST-LOCK® FASTENERS BLACK 1-7/8" FLAT HEAD SCREW (4 used in this step) Finished edge L e f t U p r i g h Finished edge Page 22 404380 www.sauder.com/services...
- Página 23 MOLDING (F). Use eight BLACK 9/16" LARGE HEAD SCREWS (T). NOTE: There are no pre-drilled holes in the MOLDING. å The SCREWS will tighten into the grooves. Flat edge BLACK 9/16" LARGE HEAD SCREW (8 used in this step) www.sauder.com/services 404380 Page 23...
- Página 24 LEVELER (L) into each of the PROPEL NUTS. Fasten the CONNECTOR PLATE (I) to the TOP (C). Use å four BLACK 9/16" LARGE HEAD SCREWS (T). BLACK 9/16" LARGE HEAD SCREW (4 used for the CONNECTOR PLATE) Page 24 404380 www.sauder.com/services...
- Página 25 Now, fasten the CONNECTOR PLATE (I) to the Desk Top. Use å four BLACK 9/16" LARGE HEAD SCREWS (T). BLACK 9/16" LARGE HEAD SCREW (4 used for the CONNECTOR PLATE) f t E BROWN 1-1/2" FLAT HEAD SCREW (3 used for the MODESTY PANEL) www.sauder.com/services 404380 Page 25...
- Página 26 NOTE: Please read the back pages of the instruction booklet for important safety information. å This completes assembly. Clean with your favorite furniture polish or a damp cloth. Wipe dry. å And to celebrate, why not share your success story? 50 lbs. (5 used) Page 26 404380 www.sauder.com/services...
-
Página 27: Tabla De Contenido
élément et conserver le livret pour future référence. EXTRÉMITÉ .................. 1 CALE DE COIN ................. 2 Pour contacter Sauder MONTANT..................2 PLAQUE DE CONNECTEUR ........... 1 en ce qui concerne cet DESSUS ..................1 FIXATION TWIST–LOCK® ..........15 élément, faire référence... -
Página 28: Extrémité
Fixer les Glissières d’extension sur l’EXTRÉMITÉ (A). Utiliser quatre Vis Dorées Tête Plate 8 mm. Pour commencer l’ a ssemblage, enfoncer une FIXATION TWIST-LOCK® SAUDER (J) dans les gros trous de l’EXTRÉMITÉ (A). Répéter cette étape pour les MONTANTS (B), le DESSUS (C) et le VOILE DE FOND (D). -
Página 29: Feutre De Retouche
Ceci complète l’ a ssemblage. Pour nettoyer, utiliser l’encaustique pour meubles Tablette Fixe dans les trous du Montant Gauche. préférée ou un chiff on humide. Essuyer. ÉTAPE 17 Fixer les MONTANTS (B) au DESSUS (C). Serrer quatre FIXATIONS TWIST-LOCK®. www.sauder.com/services 404380 Page 29... -
Página 30: Lista De Partes
PARAL ..................... 2 PLACA DE CONEXIÓN ............1 pour future référence. PANEL SUPERIOR ..............1 Pour contacter Sauder SUJETADOR TWIST–LOCK® ........15 VELO DE FONDO ..............1 en ce qui concerne cet SOPORTE DEMETAL ............4 ESTANTE PARA BOLSAS ..........1 élément, faire référence... -
Página 31: Importante
PASO 6 NOTA: No apriete los SUJETADORES TWIST-LOCK® por ahora. Para comenzar el ensamblaje, empuje un SUJETADOR TWIST-LOCK® SAUDER (J) NOTA: Asegúrese de utilizar los agujeros correspondientes indicados. dentro de los agujeros grandes del EXTREMO (A). -
Página 32: Panel Superior
NOTA: Asegúrese que las Espigas de Metal sujetadas al Estante Inmóvil se un paño húmedo. Seque con un paño. inserten dentro de los agujeros del Paral Izquierdo. PASO 17 Fije los PARALES (B) al PANEL SUPERIOR (C). Apriete cuatro SUJETADORES TWIST-LOCK®. Page 32 404380 www.sauder.com/services... - Página 33 à Les téléviseurs peuvent être particulièrement un téléviseur. cet eff et. lourds. De plus, le poids et l’emplacement du tube image ont tendance à rendre les téléviseurs instables et enclins à tomber vers l’ a vant. www.sauder.com/services 404380 Page 33...
- Página 34 Además, el peso y la ubicación del tubo de imagen tienden a causar la inestabilidad de televisores y propensa a volcarse hacia adelante. Page 34 404380 www.sauder.com/services...
-
Página 35: Garantie Limitée De 5 Ans
GARANTIE LIMITÉE DE 5 ANS 1. Sauder Woodworking Co. (Sauder®) off re une couverture de garantie limitée à l’ a cheteur 4. La présente garantie ne s’ a pplique qu’ a ux défauts garantis qui se produisent pour initial du présent produit pendant une période de cinq ans à... - Página 36 Dear Valued Customer: So, how did it go? Thanks so much for choosing Sauder® furniture. I hope the Set a world record for speed? purchase and assembly process was a positive experience Feeling good about yourself? and you feel good about the furniture you just built. If you Nice.