Tabla de contenido
Publicidad
Enlaces rápidos
sauder.com
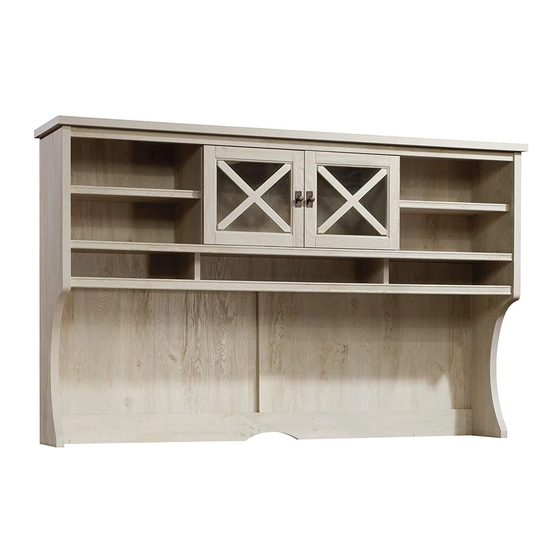
Hutch
Costa Collection | Model 419958
Need help? Visit Sauder.com to view video assembly tips or chat with a live rep.
Prefer the phone? Call 1-800-523-3987.
Share your journey!
Knick-knack
paddywhack,
give your stuff a home.
NOTE: THIS INSTRUCTION
BOOKLET CONTAINS IMPORTANT
SAFETY INFORMATION.
PLEASE READ AND KEEP FOR
FUTURE REFERENCE.
English pg 1-33
Français pg 34-37
Español pg 38-41
Lot # 393894
09/26/16
Purchased: __________________
Be sure to give us a ring before
making any returns. 1-800-523-3987
Publicidad
Tabla de contenido

Manuales relacionados para Sauder Costa 419958


Resumen de contenidos para Sauder Costa 419958
- Página 1 Costa Collection | Model 419958 NOTE: THIS INSTRUCTION BOOKLET CONTAINS IMPORTANT SAFETY INFORMATION. Need help? Visit Sauder.com to view video assembly tips or chat with a live rep. PLEASE READ AND KEEP FOR FUTURE REFERENCE. Prefer the phone? Call 1-800-523-3987.
- Página 2 SMALL NARROW BACK (2) RIGHT UPRIGHT (1) SHELF MOLDING (1) TOP (1) LEFT UPRIGHT (1) ADJUSTABLE SHELF MOLDING (2) DOOR (2) BRACE (1) VERTICAL BRACE (1) GRILLE (2) SMALL UPRIGHT (2) CENTER BACK (1) SHELF (1) BACK (2) Page 2 419958 www.sauder.com/services...
-
Página 3: Part Identifi Cation
While not all parts are labeled, some of the parts will have a label or an inked letter on the edge to help distinguish similar parts from each other. Use this part identifi cation to help identify similar parts. www.sauder.com/services 419958... -
Página 4: Tabla De Contenido
BLACK 9/16" LARGE HEAD SCREW - 23 BLACK 1/2" FLAT HEAD SCREW - 8 16S BLACK 1-7/8" PAN HEAD SCREW - 1 BLACK 1-1/8" MACHINE SCREW - 2 113S BLACK 1-15/16" FLAT HEAD SCREW - 8 Page 4 419958 www.sauder.com/services... - Página 5 Assemble your unit on a carpeted fl oor or on the empty å carton to avoid scratching your unit or the fl oor. To begin assembly, push a SAUDER TWIST-LOCK® å FASTENER (12F) into the large holes in the BOTTOM (C).
- Página 6 ADJUSTABLE SHELVES (I). Then, insert the metal end of a CAM DOWEL (2F) into each HIDDEN CAM. Do not tighten the HIDDEN CAMS in this step. Arrow Arrow (10 used) Insert the metal end of the CAM DOWEL into the HIDDEN CAM. Arrow Page 6 419958 www.sauder.com/services...
- Página 7 Push four HIDDEN CAMS (1F) into the edges of the å ENDS (A and B). Arrow (4 used) Arrow Hole The arrow in the HIDDEN CAMS must point toward the hole in the edge of the board. www.sauder.com/services 419958 Page 7...
- Página 8 Slide the CENTER BACK (O) into the grooves of the å you do something else. UPRIGHTS (D and E). ® How to use the SAUDER TWIST-LOCK FASTENER Caution 1. Insert the dowel end of the FASTENER into the hole of the adjoining part.
- Página 9 Tighten Risk of damage or Arrow injury. HIDDEN CAMS must be completely Arrow Maximum tightened. HIDDEN 210 degrees CAMS that are not completely tightened may loosen, and parts may separate. To Minimum completely tighten: 190 degrees www.sauder.com/services 419958 Page 9...
- Página 10 Step 6 Fasten the SMALL UPRIGHTS (G) to the SHELF (H). å Tighten four TWIST-LOCK® FASTENERS. Surface with TWIST-LOCK® FASTENERS Finished edge Page 10 419958 www.sauder.com/services...
- Página 11 Insert six METAL PINS (1R) into the long edges of the å BACKS (R and S). (12 used) F i n i s h r f a F i n i s h r f a F i n i s h r f a www.sauder.com/services 419958 Page 11...
- Página 12 Use four BLACK 1-15/16" FLAT HEAD SCREWS (113S). NOTE: Be sure the METAL PINS in the BACKS (R and S) å insert into the holes in the BOTTOM. 113S BLACK 1-15/16" FLAT HEAD SCREW (4 used in this step) Notched edge Page 12 419958 www.sauder.com/services...
- Página 13 Step 9 Slide the BOTTOM MOLDING* (J) onto the notched edge å of the BOTTOM (C). *U.S. Patent No. 5,499,886 å Notched edge Slide the BOTTOM MOLDING (J) onto the notched edge. www.sauder.com/services 419958 Page 13...
- Página 14 TWIST-LOCK® FASTENERS. Then, fasten the LEFT Minimum END (B) to the SHELF (H) and BOTTOM (C). Tighten two 190 degrees TWIST-LOCK® FASTENERS. NOTE: Be sure the WOOD DOWELS insert into the holes å in the END. Page 14 419958 www.sauder.com/services...
- Página 15 Insert two METAL PINS (1R) into the BOTTOM (C). å Place the VERTICAL BRACE (N) onto the METAL PINS (1R). å Insert two METAL PINS (1R) into the short edge of the å VERTICAL BRACE (N). (4 used) Finished surface www.sauder.com/services 419958 Page 15...
-
Página 16: Hidden Cam
NOTE: Be sure the METAL PINS in the VERTICAL BRACE (N) å insert into the holes in the BRACE (F). D E N H I D i t h f a c S u r Maximum Arrow 210 degrees Minimum 190 degrees Page 16 419958 www.sauder.com/services... - Página 17 SHELF (H), BOTTOM (C) and BRACE (F). Tighten two TWIST-LOCK® FASTENERS and one HIDDEN CAM. NOTE: Be sure the WOOD DOWELS in the SHELF (H) å and BRACE (F) insert into the holes in the END. Maximum Arrow 210 degrees Minimum 190 degrees www.sauder.com/services 419958 Page 17...
-
Página 18: Black 9/16" Large Head Screw
Use six BLACK 9/16" LARGE HEAD SCREWS (1S). NOTE: Be sure the BRACKETS are even with the edges of å the TOP MOLDING. BLACK 9/16" LARGE HEAD SCREW (8 used in this step) These two holes must be closer to the front edge. Page 18 419958 www.sauder.com/services... - Página 19 NOTE: Start each screw a few turns before tighten any of them. å recommended.) Caution Do not lift on the BRACE (F) until the BACKS are fastened. The posts on the PIVOT HINGES should be pointing up. BLACK 9/16" LARGE HEAD SCREW (6 used in this step) www.sauder.com/services 419958 Page 19...
- Página 20 1-1/2" Bead Place packing material under the BRACE (F) 1-1/2" Off set edge for suppport. Bead Lower edge Caution Off set edge Do not stand the unit upright without the BACK fastened. The unit may collapse. Page 20 419958 www.sauder.com/services...
- Página 21 The NAILS should be placed 1" from the fold line and approximately 2" from the corners. Off set edge Bead Lower edge Off set edge NAIL (12 used in this step) Lower edge Bead BLACK 9/16" LARGE HEAD SCREW (8 used in this step) www.sauder.com/services 419958 Page 21...
-
Página 22: Black 1-15/16" Flat Head Screw
Step 18 Fasten two HINGES (13H) to each DOOR (U). Use eight å BLACK 1/2" FLAT HEAD SCREWS (11S). BLACK 1/2" FLAT HEAD SCREW (8 used in this step) Page 22 419958 www.sauder.com/services... - Página 23 TAPE CARD (4M) and stick one onto each wing of a GRILLE (V). Flip the GRILLE (V) over and place it into each corner of å the DOOR (U) applying minimal force so the tape holds. Repeat this step for the remaining DOOR. å Flat surface www.sauder.com/services 419958 Page 23...
-
Página 24: Black 1-1/8" Machine Screw
Stop BLACK 1-1/8" MACHINE SCREW (21S). Repeat this step for the other DOOR. å Mounting screw See the next step for DOOR adjustments. å Hinge 136K BLACK 1-1/8" MACHINE SCREW (2 used for the KNOB SETS) Page 24 419958 www.sauder.com/services... - Página 25 To adjust the DOORS in or out (depth), loosen the mounting å screw one turn and move the DOORS in or out, as needed. Tighten the mounting screw after making adjustments. Mounting screw (depth) Adjusting screw (horizontal) (vertical adjustment) www.sauder.com/services 419958 Page 25...
- Página 26 Go to step 23 if your 419959 Credenza or 419956 L-Desk å is assembled. Go to step 24 if your 419959 Credenza or 419956 L-Desk å is not assembled. Diagram 1 Diagram 2 Page 26 419958 www.sauder.com/services...
- Página 27 419959 Credenza or 419956 L-Desk BACK EDGE OF TOP BACK EDGE OF TOP is assembled. Cut out the two templates å along the dashed lines and go to step 25. LEFT TEMPLATE RIGHT TEMPLATE www.sauder.com/services 419958 Page 27...
- Página 28 This page was intentionally left blank. Cette page a été intentionnellement laissée vierge. Esta página fue dejada en blanco intencionalmente. Page 28 419958 www.sauder.com/services...
- Página 29 These eight away material holes must underneath the be here. tops near the drill area. Drill through these two small holes for Diagram 1 confi guration. Drill through these two small holes for Diagram 2 confi guration. www.sauder.com/services 419958 Page 29...
- Página 30 Use an electric drill with a 3/16" drill bit to drill through the four å circles in the templates and through the top of the 419956 L-Desk or 419959 Credenza. RIGHT TEMPLATE LEFT TEMPLATE LEFT TEMPLATE RIGHT TEMPLATE Page 30 419958 www.sauder.com/services...
- Página 31 Turn four CAM SCREWS (8F) into the holes in the top of å legs. And, you know, your Credenza or L-Desk. your arms. With the help of another person, carefully lift your HUTCH å and place it over the CAM SCREWS (8F). Tighten four HIDDEN CAMS. www.sauder.com/services 419958 Page 31...
- Página 32 PAN HEAD SCREW (16S) into a stud in your wall. BLACK 1-7/8" PAN HEAD SCREW (1 used into a stud in your wall) BLACK 9/16" LARGE HEAD SCREW (1 used into the top of your unit) Page 32 419958 www.sauder.com/services...
- Página 33 This completes assembly. Clean with a damp cloth. Wipe dry. å And to celebrate, why not share your success story? The holes in the MOLDING should be closer to this edge. 15 lbs. (8 used) (12 used) To cover HIDDEN CAMS www.sauder.com/services 419958 Page 33...
-
Página 34: Liste De Pièces
QUANTITÉ d’ a chat de cet élément et conserver le livret pour future référence. EXTRÉMITÉ DROITE ..........1 EXCENTRIQUE ESCAMOTABLE ....14 Pour contacter Sauder EXTRÉMITÉ GAUCHE ..........1 CHEVILLE D'EXCENTRIQUE ......10 en ce qui concerne cet DESSOUS ................1 VIS D'EXCENTRIQUE ..........4 élément, faire référence au numéro de lot et... - Página 35 ÉTAPE 7 Pour commencer l'assemblage, enfoncer une FIXATION TWIST-LOCK® SAUDER (12F) dans les gros trous du DESSOUS (C). Répéter cette étape Insérer six GOUPILLES EN MÉTAL (1R) dans la TABLETTE (H). pour les EXTRÉMITÉS (A et B) et les MONTANTS (D, E et G).
- Página 36 à 14 cm d’écart. schéma inférieur. Utiliser les vis fournies avec les CHARNIÈRES. Il est préférable de donner quelques tours de tournevis à chaque VIS avant de les serrer toutes à bloc. Page 36 419958 www.sauder.com/services...
- Página 37 à plat sur le sol comme il l’est indiqué. À l'aide d'une perceuse et d'un foret de 5 mm, fi nir de percer complètement les quatre trous indiqués en fonction de schéma 1 ou 2 de votre préférence à l’étape 22. www.sauder.com/services 419958 Page 37...
-
Página 38: Lista De Partes
EXTREMO DERECHO ..........1 EXCÉNTRICO ESCONDIDO ......14 et conserver le livret pour future référence. EXTREMO IZQUIERDO ..........1 PASADOR DE EXCÉNTRICO ......10 Pour contacter Sauder FONDO .................1 BIELA DE EXCÉNTRICO ........4 en ce qui concerne cet PARAL DERECHO ............1 12F SUJETADOR TWIST-LOCK®......16 élément, faire référence... - Página 39 Para comenzar el ensamblaje, empuje un SUJETADOR TWIST-LOCK® PASO 7 SAUDER (12F) dentro de los agujeros grandes del FONDO (C). Repita este paso para los EXTREMOS (A y B) y los PARALES (D, E y G). Inserte seis ESPIGAS DE METAL (1R) en el ESTANTE (H).
- Página 40 EXTREMO IZQUIERDO. Remueva el sostenedor de clavos del clavo y golpeé completamente el clavo con su martillo. Termine de sujetar el DORSO al EXTREMO IZQUIERDO con el martillo y el sostenedor de clavos posicionando los clavos con aproximadamente 14 cm de separación. Page 40 419958 www.sauder.com/services...
- Página 41 Esto completa el ensamblaje. Limpiar con un trapo húmedo. Seque con Con un taladro y una broca de 5 mm, termine de taladrar completamente un paño. los cuatro agujeros que se muestran. www.sauder.com/services 419958 Page 41...
- Página 42 El soportar un televisor. diseñadas para soportar un televisor. peso y la ubicación del tubo de imagen tienden a causar la inestabilidad de televisores y por eso tendrán la tendencia a inclinarse hacia adelante. Page 42 419958 www.sauder.com/services...
-
Página 43: Garantie Limitée De 5 Ans
à compter de la date d'achat la première fois et qui sont signalés à Sauder dans les limites de couverture de la contre tout défaut de matériaux ou de fabrication des composantes de mobilier Sauder. - Página 44 Dear Valued Customer: So, how did it go? Thanks so much for choosing Sauder® furniture. I hope the Set a world record for speed? purchase and assembly process was a positive experience Feeling good about yourself? and you feel good about the furniture you just built. If you Nice.