
Manuales relacionados para Ramon Soler 1502 Serie


Resumen de contenidos para Ramon Soler 1502 Serie
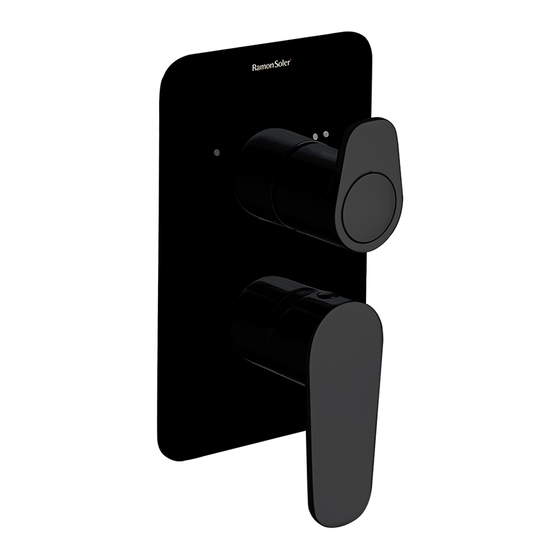
- Página 1 Instrucciones de Montaje Assembly Instructions Instructions de Montage Montageanleitung Instruções de Montagem XX1502 XX1503...
- Página 3 2 Y 3 VÍAS /2 AND 3 WAYS / 2 ET 3 VOIES / 2 UND 3 WEGE / 2 E 3 VIAS Exigencias sanitarias Ahorro de agua Health requirements Water saving Économie d’eau Exigences sanitaires Wasserersparnis Gesundheitsanforderungen Poupança de água Exigências sanitárias Sensibilidad Ergonomía...
- Página 4 2 VÍAS / 2 WAYS / 2 VOIES / 2 WEGE / 2 VIAS 3 PLACAS METÁLICAS / 3 METAL PLATE 3 PLAQUES MÉTALLIQUES / 3 METALLBLENDEN / 3 PLACAS METÁLICAS Placa redondeada / Round plate Plaque ronde / Runde Blende / Placa redonda 50-80 G1/2"...
- Página 5 Placa cuadrada / Square plate Plaque carrée / Eckige Blende / Placa quadrada 50-80 G1/2" G1/2" G1/2" 20-50 G1/2"...
- Página 6 3 VÍAS / 3 WAYS / 3 VOIES / 3 WEGE / 3 VIAS 2 PLACAS METÁLICAS / 2 METAL PLATE 2 PLAQUES MÉTALLIQUES / 2 METALLBLENDEN / 2 PLACAS METÁLICAS Placa cantos redondos / Rounded edge plate Plaque à bords ronds / Blende mit abgerundeten Ecken / Placa de cantos redondos 50-80 G1/2"...
- Página 7 ESPAÑOL 3 vías Antes de instalar su nuevo grifo es esencial que Con el objetivo de obtener el máximo rendimiento en duración y maniobrabilidad limpie la instalación para eliminar impurezas que se sugiere seguir las siguientes indicaciones queden en el sistema y que puede causar daños en técnicas: el rociador.
- Página 8 Instalación superficial en pared de obra Max.80 Min.50 Instalación empotrada en pared de obra Max.80 Min.50 Instalación en pared ligera Max.80 Min.50...
- Página 9 3 vías Posicionar el cuerpo del empotrado y marcar Realizar las regatas necesarias y el hueco la ubicación de las conexiones para su de alojamiento del cuerpo en el caso de la instalación. instalación en pared de obra empotrada. Prestar atención a la marca que indica a que distancia debe ir enrasada la placa embellecedora (Fig.3).
- Página 10 2 y 3 vías Cortar el Porex a ras del revestimiento y sellar el Colocar el revestimiento elegido teniendo especial atención a la marca del nivel máximo. perímetro si fuera necesario, también tiene la opción de retirar la parte exterior del Porex por completo. Aplica agua con jabón si es caso necesario Colocar la placa escogida, según modelo y fijar mediante la cinta adhesiva.
- Página 11 2 vías 3 vías Posteriormente montar la manecilla y el volante correspondiente. Para instalar el volante correctamente colocarlo y girar en sentido horario hasta hacer tope. Sacar el volante y volver a colocarlo con un angulo de 45º, fijar posteriormente con el tornillo .
- Página 12 ENGLISH 3 ways Before installing your new tap, it is essential to For maximum performance in terms of duration and manoeuvrability, we suggest following clean the installation to eliminate any impurities these technical guidelines: left in the system that could damage it. We recommend installing filters in the supply Recommended working temperature <55 °...
- Página 13 Surface installation in a brick wall Max.80 Min.50 Embedded installation in a brick wall Max.80 Min.50 Installation in a light weight wall Max.80 Min.50...
- Página 14 3 ways Position the body of the concealed set Make the necessary channels and the space and mark where the connections are to be for the housing if the set is to be embedded in installed. a brick wall. Pay attention to the mark that indicates the distance at which the covering plate must be flush fitted (Fig 3).
- Página 15 2 and 3 ways Cut the Porex flush to the cladding and seal the Position the chosen cladding, paying particular attention to the maximum level mark. perimeter, if necessary. Another option is to completely remove the exterior part of the Porex. Apply soapy water if is necessary.
- Página 16 2 ways 3 ways Then assemble handle corresponding wheel. To install the wheel correctly, position it and turn clockwise until it will go no further. Remove the wheel and put it back at an angle of 45º. Then secure it with the screw.
- Página 17 FRANÇAIS 3 vías Avant d’installer votre nouveau robinet , il est Pour obtenir un rendement optimal, prolonger la durée de vie et augmenter la manœuvrabilité, indispensable de nettoyer l’installation afin nous recommandons de suivre les indications ci- d’éliminer tout corps étranger qui pourrait se trouver dessous : à...
- Página 18 Installation en surface sur mur en brique ou ciment Max.80 Min.50 Installation encastrée sur mur en brique ou ciment Max.80 Min.50 Installation sur mur de cloison Max.80 Min.50...
- Página 19 3 voies Placer le corps de l’encastrable et marquer Réaliser les saignées nécessaires et le trou où l’emplacement des raccordements en vue de sera logé le corps, en cas d’encastrement dans son installation. un mur en brique ou béton. Faire attention à la marque qui indique à quelle distance doit se trouver la plaque (Fig.
- Página 20 2 et 3 voies Couper le Porex au ras du revêtement et sceller le Mettre le revêtement choisi en faisant très attention à la marque de niveau maximum. périmètre si nécessaire. Il est également possible de retirer entièrement la partie externe du Porex. Appliquer l’eau savonneuse si nécéssaire.
- Página 21 2 voies 3 voies Monter ensuite la poignée et la molette correspondante. Pour installer la molette correctement, la mettre en place et la faire pivoter à fond dans le sens des aiguilles d’une montre. Retirer la molette et la remettre dans un angle à 45°, puis serrer la vis.
- Página 22 DEUTSCH 3 wege Bevor Sie Ihre neue Armatur installieren, müssen überprüfen Sie diese auf eventuelle Beschädigungen Sie die Kalt- und Warmwasserleitungen gründlich durch den Transport. Bei Nichtbefolgung spülen, um jegliche Reste von Lötmaterial, Spänen Montageanleitung , verfällt der Garantieanspruch und Fremdstoffen aus den Zulaufleitungen zu für das Produkt.
- Página 23 Montage auf die Rohbau-Wand Max.80 Min.50 Montage in die Rohbau-Wand Max.80 Min.50 Vorwand-Montage Max.80 Min.50...
- Página 24 3 wege Den Unterputzkörper ausrichten und die Legen Sie die nötigen Kanäle und die Position der Anschlüsse markieren. Wandaussparung für den Körper im Falle der Unterputzmontage. Dabei ist die Markierung zu beachten, die anzeigt in welcher Entfernung die Blende anzubringen ist (Abb. 3). weiteren Stärke Wandverkleidung zu berücksichtigen.
- Página 25 2 und 3 wege Das Styropor bündig zur Wandverkleidung Nun die gewählte Wandverkleidung anbringen, dabei muss unbedingt die Maximalmarkierung abschneiden und falls nötig rundum abdichten. beachtet werden. Es besteht auch die Möglichkeit, die äußere Styroporabdeckung komplett zu entfernen.` Falls notwendig, Seifenwasser auftragen. Die je nach Modell gewählte Blende anlegen und mit Klebeband befestigen.
- Página 26 2 wege 3 wege Danach den entsprechenden Hebel und Griff befestigen. Für die korrekte Installation des Griffes, diesen in Position bringen und bis zum Anschlag im Uhrzeigersinn drehen. Nun den Griff in einem Winkel von 45° positionieren und mit der Schraube befestigen.
- Página 27 PORTUGUÊS 3 vias Antes de instalar a sua torneira nova, é Com o objetivo de obter o máximo rendimento em duração e manobrabilidade, sugere-se o fundamental limpar a instalação para eliminar cumprimento das seguintes indicações técnicas: impurezas que permaneçam no sistema, o que pode danificá-lo.
- Página 28 Instalação à superfície de uma parede de tijolo Max.80 Min.50 Instalação embutida numa parede de tijolo Max.80 Min.50 Instalação numa parede divisória Max.80 Min.50...
- Página 29 3 vias Posicionar a estrutura embutida e marcar o Realizar as ranhuras necessárias e o buraco para local das ligações para a respetiva instalação. o alojamento da estrutura no caso da instalação embutida numa parede divisória. Prestar a devida atenção à marca que indica a que distância o espelho de acabamento deve estar nivelado (Fig.3).
- Página 30 2 e 3 vias Cortar o Porex rente ao revestimento e vedar Colocar o revestimento escolhido, prestando especial atenção à marca do nível máximo. o perímetro, se necessário. Também existe a opção de retirar completamente a parte exterior do Porex. Aplicar água com sabão se for necessário.
- Página 31 2 vias 3 vias Posteriormente, montar o comando e o manípulo correspondente. Para instalar corretamente o manípulo, colocá-lo na posição e rodar no sentido horário até ao fim do curso. Retirar o manípulo e voltar a colocá-lo com um ângulo de 45°, fixar posteriormente com o parafuso.
- Página 32 PKIS0014.07...