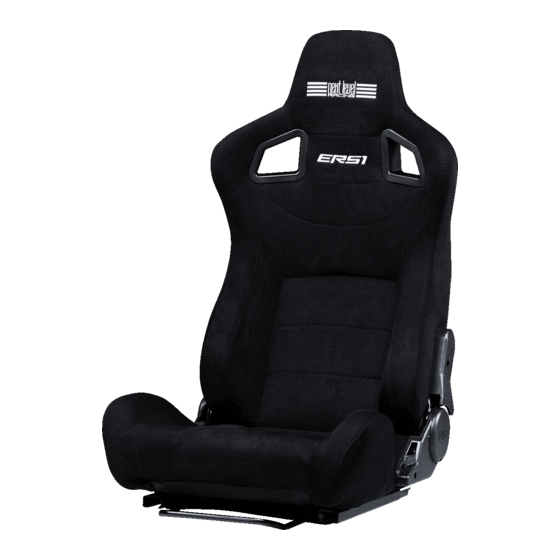
Resumen de contenidos para Next Level Racing ERS1 SEAT
- Página 1 T A K E R A C I N G T O T H E N E X T L E V E L® Video Instruction: bit.ly/nlrbuild ERS1 SEAT INSTRUCTION MANUAL...
- Página 2 T O T H E N E X T L E V E L® instruction booklet to fully optimize your product. N E X T L E V E L R A C I N G . C O M ASSEMBLY VIDEO bit.ly/nlrbuild @next_level_racing @nextlevelracingOfficial @nextlvlracing Next Level Racing support@nextlevelracing.com...
- Página 3 Video Instruction: bit.ly/nlrbuild support@nextlevelracing.com PRE-RACE IN THE CHECKS *NOT TO SCALE WARNING • Please do not use power tools for assembly as over tightening can damage parts. • If in doubt consult the installation video or contact us on support@nextlevelracing.com •...
- Página 4 Video Instruction: bit.ly/nlrbuild support@nextlevelracing.com ERS1 SEAT TABLE OF CONTENTS ASSEMBLY ERS1 SEAT ASSEMBLY: PARTS: • • 1 x Seat Back PAGES: 07 - 09 ELITE COCKPIT SEAT INSTALLATION: PAGES: 09 - 11 Uninstall the M8 Dome Shaped Bolts and Washers pre-installed on the Seat Back.
- Página 5 Video Instruction: bit.ly/nlrbuild support@nextlevelracing.com PARTS: PARTS: SEAT RECLINER ADJUSTMENT Note: Peel off warning labels • • NIL • • NIL from the seat recliners. Lift both Seat Recliner Levers and adjust the Seat Back to the desired angle. Release the levers to lock Bolt through and secure with Dome Shaped Bolts and Washers previously uninstalled in Step 01.
- Página 6 Video Instruction: bit.ly/nlrbuild support@nextlevelracing.com PARTS: PARTS: SEAT RECLINER ADJUSTMENT • • NIL • • NIL Lift the Seat Slider Lever up and slide the seat all the way forward to access the rear mounting holes Lift both Seat Recliner Levers and adjust the Seat Back to the desired angle. Release the levers to lock on the Seat Sliders.
- Página 7 • • 2 x M8 20mm Low Profile Bolts Slide the ERS1 Seat all the way forward to access the rear holes on the Seat Sliders. Bolt through the Uninstall the rear Bolts securing the Seat Sliders to the frame.
- Página 8 If in doubt consult the installation video or contact us on support@nextlevelracing.com Slide the ERS1 Seat all the way back to access the front holes on the Seat Sliders. Make sure all mounting points are aligned correctly to avoid twisting your seat or fame.
- Página 9 Étape 05 - Reportez-vous à l’image. Retirez l’assemblage du siège GTtrack. Stap 06 – Zie afbeelding. Lijn de montagegaten van de ERS1 Seat Slider uit met de schroefdraadinzetstukken op het GTTrack-frame. Onderdelen: 1 x ERS1 zadelmontage. Étape 06 - Reportez-vous à l’image. Alignez les trous de montage du curseur de siège ERS1 avec les inserts filetés sur le cadre GTTrack. Pièces : 1 x Assemblage de siège ERS1.
- Página 10 Paso 05: consulte la imagen. Retire el conjunto del asiento GTTrack. Passaggio 06: fare riferimento all’immagine. Allineare i fori di montaggio dell’ERS1 Seat Slider con gli inserti filettati sul telaio GTTrack. Parti: 1 x gruppo sedile ERS1. Paso 06: consulte la imagen. Alinee los orificios de montaje del deslizador del asiento ERS1 con las inserciones roscadas en el marco GTTrack. Piezas: 1 conjunto de asiento ERS1.
- Página 11 Schritt 05 – Siehe Bild. Entfernen Sie die GTTrack-Sitzbaugruppe. ステップ08–画像を参照してください。 ERS1シートを最後までスライドさせて、 シートスライダーの前面の穴にアクセスします。 Schritt 06 – Siehe Bild. Richten Sie die Befestigungslöcher des ERS1 Seat Slider mit den Gewindeeinsätzen am GTTrack-Rahmen aus. Teile: 1 x ERS1 Sitzeinheit. ステップ09–画像を参照してください。 2 xM8ロープロファイルボルトを使用してボルトで固定します。 部品:2 x M820mmロープロファイルボルト。...
- Página 12 Video Instruction: bit.ly/nlrbuild support@nextlevelracing.com NEXT LEVEL RACING® ASSENTO ERS1 - MANUAL DE INSTRUÇÕES NEXT LEVEL RACING® СИДЕНЬЕ ERS1 - РУКОВОДСТВО ПО ЭКСПЛУАТАЦИИ A jornada de seu Sim Racing começa aqui. Sabemos que você está ansioso para começar a correr! Leve o seu tempo com as instruções e siga este guia para montar o seu produto. Você estará se preparando para o sucesso seguindo o Ваше...
- Página 13 Adım 07 – Resme bakın. Koltuk Sürgülerindeki arka deliklere erişmek için ERS1 Koltuğunu sonuna kadar kaydırın. Arka deliklerden cıvatalayın ve 2 x M8 Düşük Profilli Cıvata kullanarak sabitleyin. Parçalar: 2 x M8 20mm Düşük Profilli Cıvata. Krok 06 – viz obrázek. Zarovnejte montážní otvory ERS1 Seat Slider se závitovými vložkami na rámu GTTrack. Díly: 1 x sestava sedadla ERS1.
- Página 14 Video Instruction: bit.ly/nlrbuild support@nextlevelracing.com NEXT LEVEL RACING® FOTELE ERS1 – INSTRUKCJA OBSŁUGI NEXT LEVEL RACING® دعقمERS1 - تاميلعتلا ليلد Twoja przygoda z wyścigami Sim zaczyna się tutaj. Wiemy, że chcesz zacząć się ścigać! Nie spiesz się z instrukcjami i postępuj zgodnie z tym przewodnikiem, aby złożyć swój produkt. Postępujesz zgodnie z instrukcją obsługi, aby w pełni ...
- Página 15 Video Instruction: bit.ly/nlrbuild support@nextlevelracing.com NOTES Next Level Racing® ERS1 座椅 – 使用说明书 您的模拟赛车之旅从这里开始。我们知道您渴望开始比赛!花点时间阅读说明并按照本指南组装您的产品。遵循说明手册以全面优化您的产品,您将为成功做好准备。对于装配视频,扫描二维码。 bit.ly/nlrbuild。 警告 • 请不要使用电动工具进行组装,因为过度拧紧会损坏零件。 • 如有疑问,请参阅安装视频或通过 support@nextlevelracing.com 联系我们 • 确保所有安装点正确对齐,以避免扭曲您的座椅或名声。 • 调整座椅躺椅时要小心,以免受伤。 • 在水平表面上布置和建造。 • 不要强行将零件放在一起。 • 避免交叉螺纹螺栓 如果您需要任何产品支持,请联系我们友好的团队:support@nextlevelracing.com 警告 窒息危险 小零件不适合 3 岁以下儿童或任何倾向于将不可食用的物体放入口中的人。 目录 ERS1 座椅总成:第 07-09 页...
- Página 16 support@nextlevelracing.com support@nextlevelracing.com...


