Tabla de contenido
Publicidad
Idiomas disponibles
Idiomas disponibles
Enlaces rápidos
Publicidad
Tabla de contenido

Resumen de contenidos para TECshow NAVIGATOR 3
-
Página 14: Descripción
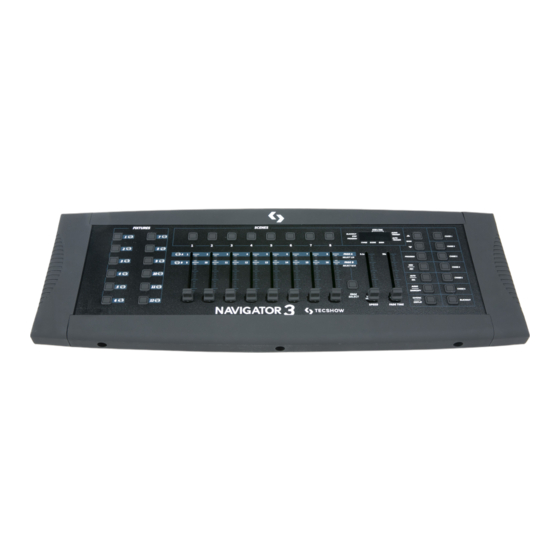
/5,25x19x2,5 pulg. • Peso: 2.25 kg. / 5 lbs. Navigator 3 es un controlador DMX con 192 canales capaz de controlar hasta 12 unidades de 16 canales DMX cada una. El equipo cuenta con un total de 30 bancos con 8 escenas programables (240 escenas máximo) e incluye, a su vez, 6 chases de 240 esce-... -
Página 15: Instrucciones De Seguridad
C. Ha sido expuesto a la lluvia o al agua. D. No funciona normalmente o exhibe cam- bios drásticos en su funcionamiento. E. Ha sufrido manipulación brusca y/o se ha caído al suelo. P. 15 | Tecshow Navigator 3 Versión Español... -
Página 16: Descripción Del Panel
3. DESCRIPCIÓN DEL PANEL P. 16 Tecshow Navigator 3 | Versión Español... -
Página 17: Conexiones
El tiempo de fade es la cantidad de tiem- 4. BOTONES BANK (arriba/abajo) - Seleccionan un po que le lleva al Navigator 3 la transición de banco de escenas que el usuario desea contro- una escena a la otra.Por ejemplo: Si el desliza- lar. -
Página 18: Dirección Dmx
Si desea añadir más luces a su del equipo, presione nuevamente el botón Fix- show, puede copiar la configuración de un ture seleccionado. Presione otro botón Fixture botón en otro. Simplemente mantenga pre- P. 18 Tecshow Navigator 3 | Versión Español... -
Página 19: Editar Una Escena
Program por tres segun- 9. Utilice los botones Bank arriba/abajo para gra- dos. Cuando se encienda el indicador LED bar más bancos de escenas. Navigator 3 tiene Blackout, el controlador habrá abandonado el 30 bancos disponibles. Es posible almacenar modo programación. - Página 20 El indicador LED Blackout titilará en la añadir. pantalla para indicar que el modo Blackout 5. Presione el botón Midi/Rec. La pantalla P. 20 Tecshow Navigator 3 | Versión Español...
-
Página 21: Eliminar Un Paso
4. Presione el botón Scene 1-8 que se corresponda 2. Presione un botón Chase 1-6 para ejecutar un con la escena que desea ejecutar. chase. 3. Presione el botón Tap/sync. P. 21 Versión Español | Tecshow Navigator 3... -
Página 22: Ejecutar Escenas En Modo Audiorítmico
4. El chase seleccionado se ejecutará en modo controlador MIDI para cambiar las escenas (ver audiorítmico. Funciones MIDI). Regular la sensibilidad del sonido 3. Presione el botón Audio/Bank Copy para salir. 1. Presione el botón Audio/Bank Copy para en- P. 22 Tecshow Navigator 3 | Versión Español... - Página 23 FAT16 o FAT32 en una computadora que cuente con la última versión del firmware Revisar los archivos de respaldo en del Navigator 3. Abra la memoria USB en la una computadora computadora y cree una nueva carpeta con el 1.
-
Página 24: Funciones Midi
7. Por último, presione cualquier botón del controlador para cargar el archivo del nuevo firmware a su Navigator 3. 11. FUNCIONES MIDI Para activar las funciones MIDI siga los pasos a continuación: 1. Mantenga presionado el botón Midi/Rec por tres segundos, los últimos dos dígitos de la pantalla titilarán para indicar que se activó... -
Página 25: Resolución De Problemas
Navigator 3 solo recibe notas MIDI. Es posible que tenga que transponer su teclado para encontrar la notas correctas. 12. RESOLUCIÓN DE PROBLEMAS Esta guía le permitirá al usuario resolver problemas simples. • Verifique que la dirección DMX sea la correcta. - Página 26 Observación: El proveedor no asumirá responsabilidad por los errores u omisiones del manual. La información de este manual está sujeta a cambios sin previo aviso. P. 26 Tecshow Navigator 3 | Versión Español...
- Página 27 FOR MORE INFO ON THIS PRODUCT PLEASE CHECK TECSHOW.AMPROWEB.COM / PARA MAS INFORMACION SOBRE ESTE PRODUCTO VISITE TECSHOW.AMPROWEB.COM P. 27 Versión Español | Tecshow Navigator 3...


