Tabla de contenido
Publicidad
Idiomas disponibles
Idiomas disponibles
Enlaces rápidos
KOBALT and logo design are trademarks
or registered trademarks of LF, LLC.
All rights reserved.
ATTACH YOUR RECEIPT HERE
Serial Number
Questions, problems, missing parts? Before returning to your retailer, call our customer
service department at 888-3KOBALT (888-356-2258), 8 a.m.-8 p.m., EST,
Monday-Sunday. You could also contact us at partsplus@lowes.com.
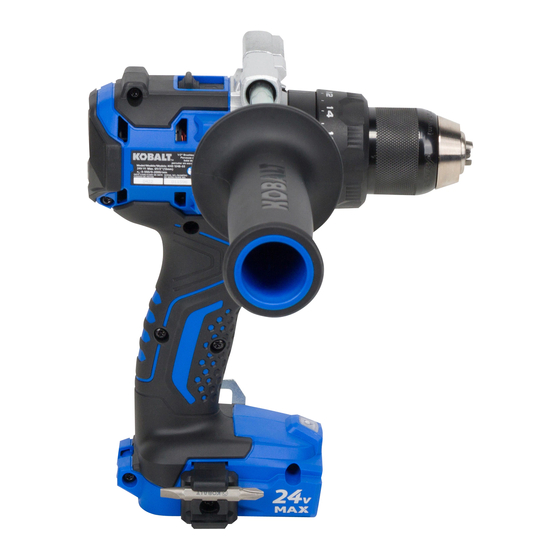
AS22027
BRUSHLESS
HAMMER DRILL
Purchase Date
ITEM #4913879
MODEL #KHD 124B-03
Español p. 19
Publicidad
Tabla de contenido
Solución de problemas

Manuales relacionados para Kobalt KHD 124B-03


Resumen de contenidos para Kobalt KHD 124B-03
- Página 1 ITEM #4913879 BRUSHLESS HAMMER DRILL MODEL #KHD 124B-03 KOBALT and logo design are trademarks or registered trademarks of LF, LLC. Español p. 19 All rights reserved. ATTACH YOUR RECEIPT HERE Serial Number Purchase Date Questions, problems, missing parts? Before returning to your retailer, call our customer service department at 888-3KOBALT (888-356-2258), 8 a.m.-8 p.m., EST,...
-
Página 2: Tabla De Contenido
TABLE OF CONTENTS Product Specifications ..................2 Packaging Contents ..................3 Safety Information .................... 4 Preparation ....................... 8 Operating Instructions ..................9 Care and Maintenance ................... 16 Troubleshooting....................16 Warranty ......................17 PRODUCT SPECIFICATIONS COMPONENT SPECIFICATION Rated voltage No-load speed (n 0-550 / 0-2000 /min (RPM) Impact rate 0-8800/0-32000 /min (BPM) -
Página 3: Package Contents
PACKAGE CONTENTS PART DESCRIPTION PART DESCRIPTION Keyless chuck LED work light Torque adjustment ring Auxiliary handle Mode selector Belt clip (with screw) Gear selector Bit holder (with screw) Direction-of-rotation selector Double ended bit (forward/center-lock/reverse) Variable-speed trigger switch Handle WARNING • Remove the tool from the package and examine it carefully. Do not discard the carton or any packaging material until all parts have been examined. -
Página 4: Safety Information
SAFETY INFORMATION Please read and understand this entire manual before attempting to assemble or operate this product. If you have any questions regarding the product, please call customer service at 888-3KOBALT (888-356-2258) , 8 a.m. - 8 p.m., EST, Monday - Sunday. You could also contact us at partsplus@lowes.com. - Página 5 SAFETY INFORMATION Some of the following symbols may be used on this tool. Please study them and their meaning. Proper interpretation of these symbols will allow you to operate the tool better and more safely. SYMBOL DEFINITION SYMBOL DEFINITION Volts No-load Speed Revolutions per Minute Beats per Minute...
- Página 6 SAFETY INFORMATION • Do not expose power tools to rain or wet conditions. Water entering a power tool will increase risk of electric shock. • Do not abuse the cord. Never use the cord for carrying, pulling or unplugging the power tool.
- Página 7 SAFETY INFORMATION • Keep cutting tools sharp and clean. Properly maintained cutting tools with sharp cutting edges are less likely to bind and are easier to control. • Use the power tool, accessories and tool bits etc. in accordance with these instructions, taking into account the working conditions and the work to be performed.
-
Página 8: Battery Pack
SAFETY INFORMATION Safety Instructions When Using Long Drill Bits • Never operate at higher speed than the maximum speed rating of the drill bit. At higher speeds, the bit is likely to bend if allowed to rotate freely without contacting the workpiece, resulting in personal injury. -
Página 9: Operating Instructions
OPERATING INSTRUCTIONS 1. To Attach Battery Pack a. Align the raised portion on the battery pack with the grooves on the bottom of the tool, and then slide the battery pack onto the tool as shown. b. Make sure that the latch on the battery pack snaps into place and the battery pack is secured to the tool before beginning operation. - Página 10 OPERATING INSTRUCTIONS 3. Variable-speed Trigger Switch a. Position the direction-of-rotation selector (E) to the left or right of the tool as needed to unlock the trigger switch (F). b. To turn the hammer drill ON, depress the trigger switch (F). c.
- Página 11 OPERATING INSTRUCTIONS 5. LED Work Light The LED work light (G), located on the base of the hammer drill, will illuminate when the trigger switch is depressed. This provides additional light on the surface of the work piece for operation in lower- light areas.
- Página 12 OPERATING INSTRUCTIONS 8. Adjustable Torque Clutch The torque adjustment ring (B) can be set any of 24 torque settings when the tool is in the driving mode Adjust the torque by rotating the torque adjustment ring (B). The higher the torque setting number, the more force the hammer drill produces to turn an object.
- Página 13 OPERATING INSTRUCTIONS 11. Auxiliary Handle This hammer drill is equipped with an auxiliary handle (H). For ease of operation, you can use the handle with either the left or the right hand. The handle can be locked in the two positions shown in Fig.11.
- Página 14 OPERATING INSTRUCTIONS Removing Bits a. Place the direction-of-rotation selector (E) in the center lock position. b. Open the chuck jaws. c. Remove the drill bit. WARNING • Do not hold the chuck body with one hand and use the power of the hammer drill to tighten or loosen the chuck jaws on the drill bit.
- Página 15 OPERATING INSTRUCTIONS Drilling Wood a. For maximum performance, use high-speed steel or brad-point bits for drilling wood. b. Set the mode selector (C) to drilling mode for best performance. c. Begin drilling at a very low speed to prevent the bit from slipping off the starting point. d.
- Página 16 OPERATING INSTRUCTIONS 14. Driving Screws Try to use standard-type screws for easy driving and improved grip. a. Install the correct driver bit. b. Set the mode selector (C) to driving mode for best performance. c. Ensure that the torque-adjustment ring is set to the most suitable setting.
-
Página 17: Care And Maintenance
CARE AND MAINTENANCE All maintenance should only be carried out by a qualified service technician. Cleaning Before cleaning or performing any maintenance, remove the battery pack from the tool. For safe and proper operation, always keep the tool and its ventilation slots clean. Always use only a soft, dry cloth to clean your hammer drill;... -
Página 18: Troubleshooting
TROUBLESHOOTING WARNING Place the direction-of-rotation selector (E) in the center lock position and detach the battery pack from the hammer drill before performing troubleshooting procedures. PROBLEM POSSIBLE CAUSE CORRECTIVE ACTION The hammer drill Battery pack is depleted. Charge the battery pack. does not work. - Página 19 ARTÍCULO #4913879 TALADRO PERCUTOR KOBALT y el diseño del logotipo son marcas comerciales o marcas SIN ESCOBILLAS registradas de LF, LLC. Todos los derechos reservados. MODELO #KHD 124B-03 ADJUNTE SU RECIBO AQUÍ Número de serie Fecha de compra ¿Preguntas, problemas, piezas faltantes? Antes de volver a la tienda, llame a nuestro Departamento de Servicio al Cliente al 888-3KOBALT (888-356-2258), de lunes a domingo de 8 a.m.
-
Página 20: Especificaciones Del Producto
ÍNDICE Especificaciones del producto ................ 20 Contenido del paquete ................... 21 Información de seguridad ................22 Preparación ....................27 Instrucciones de funcionamiento ..............28 Cuidado y mantenimiento ................36 Solución de problemas ................... 37 Garantía ......................37 ESPECIFICACIONES DEL PRODUCTO COMPONENTE ESPECIFICACIONES Voltaje nominal... -
Página 21: Contenido Del Paquete
CONTENIDO DEL PAQUETE PIEZA DESCRIPCIÓN PIEZA DESCRIPCIÓN Mandril sin llave Luz de trabajo LED Anillo de ajuste de torsión Manija auxiliar Presilla para cinturón Selector de modo (con tornillo) Soporte para brocas Selector de engranajes (con tornillo) Selector de dirección de rotación Broca doble (adelante, bloqueo central o reversa) Interruptor tipo gatillo de velocidad... -
Página 22: Información De Seguridad
INFORMACIÓN DE SEGURIDAD Lea y comprenda completamente este manual antes de intentar ensamblar u operar este producto. Si tiene preguntas relacionadas con el producto, comuníquese con Servicio al Cliente al 888-3KOBALT (888-356-2258), de lunes a domingo, de 8 a. m. a 8 p. m., hora estándar del Este. -
Página 23: Definición
INFORMACIÓN DE SEGURIDAD Algunos de los siguientes símbolos pueden aparecer en esta herramienta. Obsérvelos y aprenda su significado. La interpretación correcta de estos símbolos le permitirá utilizar la herramienta de manera más eficaz y segura. SÍMBOLO DEFINICIÓN SÍMBOLO DEFINICIÓN Voltios Velocidad sin carga Revoluciones por minuto Golpes por minuto... - Página 24 INFORMACIÓN DE SEGURIDAD Seguridad eléctrica • Los enchufes de las herramientas eléctricas deben encajar en el tomacorriente. No modifique el enchufe de ninguna manera. No utilice ningún enchufe adaptador con herramientas eléctricas con puesta a tierra. Los enchufes originales y que encajan adecuadamente en los tomacorrientes reducen el riesgo de descarga eléctrica.
- Página 25 INFORMACIÓN DE SEGURIDAD Uso y cuidado de las herramientas eléctricas • No fuerce la herramienta eléctrica. Use la herramienta eléctrica adecuada para la tarea. La herramienta eléctrica adecuada realizará un trabajo de mejor calidad y más seguro, al ritmo para el cual se diseñó. •...
-
Página 26: Paquete De Baterías
INFORMACIÓN DE SEGURIDAD • No exponga el paquete de baterías ni la herramienta al fuego o a una temperatura excesiva. La exposición al fuego o a temperaturas por encima de los 130 °C (265 °F) podría causar una explosión. • Siga todas las instrucciones de carga y no cargue el paquete de baterías ni la herramienta fuera del rango de temperatura especificado en las instrucciones. -
Página 27: Preparación
PREPARACIÓN Información acerca del taladro percutor Antes de intentar usar el taladro percutor, familiarícese con todas sus características de operación y requisitos de seguridad. ADVERTENCIA • Sea cuidadoso, incluso si está familiarizado con el taladro percutor. Recuerde que un momento de descuido es suficiente para causar lesiones graves. Antes de intentar utilizar una herramienta, asegúrese de familiarizarse con todas las funciones de operación e instrucciones de seguridad. -
Página 28: Instrucciones De Funcionamiento
INSTRUCCIONES DE FUNCIONAMIENTO 1. Para fijar el paquete de baterías a. Alinee la parte elevada del paquete de baterías con las ranuras de la parte inferior de la herramienta y luego deslice el paquete de baterías hacia dentro de la herramienta, como se muestra. - Página 29 INSTRUCCIONES DE FUNCIONAMIENTO 3. Interruptor tipo gatillo de velocidad variable a. Coloque el selector de dirección de rotación (E) a la izquierda o derecha de la herramienta según sea necesario para desbloquear el interruptor tipo gatillo (F). b. Para encender el taladro/destornillador, presione el interruptor tipo gatillo (F).
- Página 30 INSTRUCCIONES DE FUNCIONAMIENTO 5. Luz de trabajo LED La luz de trabajo LED (G), ubicada en la base del taladro percutor, se iluminará cuando presione el interruptor tipo gatillo. Esto brinda más iluminación a la superficie de la pieza de trabajo para usar la herramienta en áreas con poca iluminación.
- Página 31 INSTRUCCIONES DE FUNCIONAMIENTO 8. Embrague de torque ajustable El anillo de ajuste de torque (B) se puede configurar en cualquiera de las 24 configuraciones de torsión cuando la herramienta está en el modo atornillado Ajuste la fuerza de torsión girando el anillo de ajuste de torque (B).
- Página 32 INSTRUCCIONES DE FUNCIONAMIENTO 11. Manija auxiliar Este taladro percutor está equipado con un mango auxiliar (H). Para una operación más fácil, se puede usar el mango con la mano izquierda o la derecha. El mango se puede bloquear en las dos posiciones que se muestran en la Fig.
- Página 33 INSTRUCCIONES DE FUNCIONAMIENTO Retiro de las brocas a. Coloque el selector de dirección de rotación (E) en la posición central de bloqueo. b. Abra las mordazas del portabrocas. c. Retire la broca para taladro. ADVERTENCIA • No sostenga el cuerpo del mandril con una sola mano y use la potencia del taladro percutor para apretar o aflojar las mordazas del mandril en la broca para taladro.
- Página 34 INSTRUCCIONES DE FUNCIONAMIENTO Taladrado en madera a. Para obtener un máximo rendimiento, use brocas de acero de alta velocidad o de tres puntas para perforar madera. b. Coloque el selector de modo (C) en función taladro para obtener el mejor rendimiento posible.
- Página 35 INSTRUCCIONES DE FUNCIONAMIENTO 14. Tornillos autoperforantes En lo posible, use tornillos tipo estándar para facilitar el atornillado y mejorar el agarre. a. Instale la punta de destornillador adecuada. b. Coloque el selector de modo (C) en función atornillado para obtener el mejor rendimiento posible.
-
Página 36: Cuidado Y Mantenimiento
CUIDADO Y MANTENIMIENTO Todo el mantenimiento debe estar a cargo solo de un técnico de servicio calificado. Limpieza Antes de limpiar o realizar cualquier mantenimiento, retire el paquete de baterías de la herramienta. Para un uso seguro y adecuado, siempre mantenga limpias la herramienta y sus ranuras de ventilación. -
Página 37: Solución De Problemas
SOLUCIÓN DE PROBLEMAS ADVERTENCIA Coloque el selector de dirección de rotación (E) en la posición de bloqueo central y retire el paquete de baterías del taladro percutor antes de realizar procedimientos de solución de problemas. PROBLEMA CAUSA POSIBLE ACCIÓN CORRECTIVA El martillo El paquete de baterías Cargue el paquete de baterías.