
Manuales relacionados para Teka FTM 221 EU


Resumen de contenidos para Teka FTM 221 EU
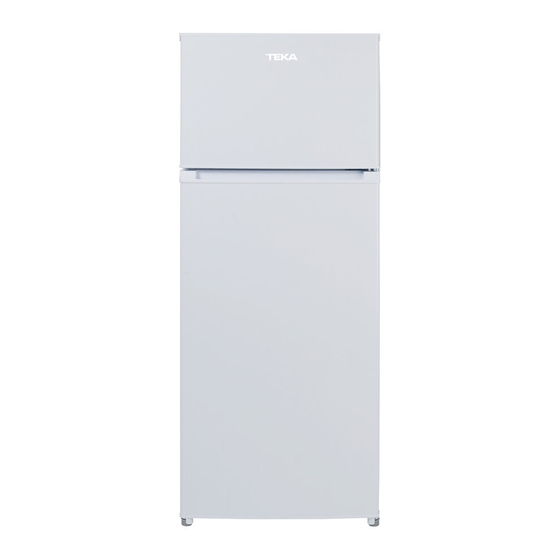
- Página 1 User Manual FTM 221 EU / FTM 240 EU / FTM 247 EU / FTM 249 EU FTM 310 EU / FTM 319 EU / FTM 321 EU / FTM 327 EU FTM 410 VR01 / FTM 419 / FTM 421 / FTM 427 ES PT www.teka.com...
- Página 3 Advertencia : riesgo de fuego/materiales inflamables Este el cable de alimentación está dañado, debe ser reemplazado por el fabricante, su agente de servicio o personas con calificaciones similares para evitar un peligro. almacene sustancias explosivas como latas de aerosol con un carburante inflamable en este aparato.
-
Página 4: Para En Estándar
Para EN estándar: o por falta de experiencia y conocimiento si se les ha dado supervisión o involucrados. Los niños no deben jugar con el aparato. La limpieza y el mantenimiento del usuario no deben ser realizados por niños sin supervisión. Los niños de 3 a 8 años de edad pueden cargar y descargar aparatos de refrigeración. - Página 12 El polvo detrás del refrigerador y en el suelo deben limpiarse oportunamente para mejorar el efecto de enfriamiento y el ahorro de energía. Revise la junta de la puerta con regularidad para asegurarse de que no haya residuos. Limpie la junta de la puerta con un paño suave humedecido con agua jabonosa o detergente diluido.
- Página 16 Ficha de Producto Marca comercial TEKA Modelo FTM 221 EU / FTM 240 EU / FTM 247 EU / FTM 249 EU Categoría Frigorífico- congelador Clase de eficiencia energé ca Consumo de energía en kWh/año, según los resultados obtenidos en la prueba estándar de 24 horas; el 221 kWh/año...
- Página 17 TEKA:...
-
Página 18: Tabla De Contenido
Conteúdo RECOMENDAÇÕES DE SEGURANÇA ................. 1 INSTALAÇÃO ........................2 Localização ......................... 2 Reverter abertura de porta ..................3 Requisitos de espaço para a porta abrir..............7 Limpar antes de usar....................7 Antes de usar o seu frigorífico..................7 Acessórios interiores......................7 Descrição geral do produto ....................8 Funcionamento........................ -
Página 19: Recomendações De Segurança
RECOMENDAÇÕES de SEGURANÇA... -
Página 20: Instalação
Para pessoa responsável pela sua segurança. instruções devem incluir a seguinte matéria: Para evitar a contaminação dos alimentos, respeite as seguintes instruções: drenagem acessíveis. – Armazene carne crua e peixe em recipientes adequados no frigorífico, para que não fiquem em contato ou pinguem em outros alimentos. -
Página 21: Reverter Abertura De Porta
circulação do ar em volta do aparelho e melhorar a eficiência do processo de refrigeração. 2.2 Reverter abertura de porta Ferramentas necessárias: Chave de parafusos po “PHILLIPS”, normal e de estrela Re re a tampa da parte superior direita deixando as partes eléctricas a descoberto, deixa a parte esquerda com a tampa. - Página 22 Retire o bloqueio final da porta como se vê na imagem em baixo. Por favor retire o outro bloqueio da porta (a azul na imagem), para o por do outro lado, tal como fez com o parafuso no inicio do processo. Retire os parafusos da parte inferior do frigorífico tal como fez na parte superior, utilizando uma chave de estrela.
- Página 23 Reponha todas as dobradiças e do outro lado e fixe-as com os parafusos. Reponha as ligações do meio. Fixe a porta na posição correcta fixando-a nas ligações a meio (peças verdes na imagem).
- Página 24 Ponha a tampa superior no seu lugar. 10) Regule a parte superior na posição correcta antes de a fixar e tapar. Ponha as tampas nos parafusos e as coberturas destes parafusos na posição correspondente. ·Assegure-se que o aparelho está desligado da corrente e vazio. ·Ajuste os pés para a posição mais alta.
-
Página 25: Requisitos De Espaço Para A Porta Abrir
2.3 Requisitos de espaço para a porta abrir A porta do aparelho deve abrir na totalidade. W×D≥902×1052mm Nivelamento Para fazer o nivelamento é necessária a utilização dos dois pés na parte frontal do aparelho. Se o aparelho não estiver nivelado, a porta e os alinhamentos magnéticos não funcionarão devidamente. -
Página 26: Descrição Geral Do Produto
deixar sempre uma prateleira de vidro no último lugar mesmo por cima da gaveta da fruta e legumes. Para fazer isso, puxe a prateleira e mova para baixo ou para cima e remova-a. Faça o mesmo no inverso para voltar a pôr a prateleira numa altura diferente. Se necessitar guardar uma maior quantidade de alimentos nos compartimentos do frigorífico ou no congelador, pode retirar uma ou mais prateleiras ou gavetas do aparelho, segundo as necessidades do seu dia-a-dia. -
Página 27: Ruídos No Interior Do Aparelho
Botão está na posição “Max”, temperatura mais fria ◆ Em ambientes muito quentes ou durante os dias mais quentes de Verão, deve pôr o termostato na posição “Max”. É provável que o compressor trabalhe continuamente para manter uma temperatura baixa no interior do frigorífico. -
Página 28: Dicas Para A Limpeza
-Não use sabão, detergente, bicarbonatos, spray de limpeza, etc., visto que podem causar odores no interior do frigorífico ou contaminar os alimentos. -Limpe a área de garrafeira, prateleiras e gavetas com um pano humedecido em água com sabão, detergente diluído na água, etc. Seque com um pano macio ou deixe secar ao ar. -Limpe a superfície externa do frigorífico com um pano suave humedecido em água com sabão, detergente diluído na água, etc, e depois passe um pano seco. -
Página 29: Cuidados A Ter Com O Calor
Verifique se os recipientes da comida estão bem-postos, se o aparelho Ruídos altos está nivelado, se as partes interiores do aparelho estão devidamente colocadas. Cuidados a ter com o calor É normal o motor do frigorífico emitir calor, em especial durante o Verão, este ◆... -
Página 30: Eliminação Do Aparelho Quando Deixar De Funcionar
Eliminação do aparelho quando deixar de funcionar Aparelhos velhos ainda têm algum valor residual. Um método amigo do ambiente para eliminar o seu velho aparelho implica certificar-se de que matérias-primas reutilizáveis, serão recolhidas e usadas novamente refrigeradores usados do seu frigorífico e materiais de isolamento, requerem um cuidado especial na sua eliminação. - Página 31 Ficha do Produto Marca comercial TEKA Modelo FTM 221 EU / FTM 240 EU / FTM 247 EU / FTM 249 EU Frigorífico Categoria Classe de eficiência energé ca Consumo de energia de kWh/ano, com base nos resultados do ensaio normalizado durante 24 horas. O kWh/ano valor real do consumo de energia dependerá...
- Página 32 TEKA...
- Página 33 Contents SAFETY WARNINGS ......................1 INSTALLTION ........................3 Location ........................3 Reversing the Door Swing(optionnal) ..............3 Door Handle Install Illumination (optional) ............... 7 Door Space Requirements ..................8 Levelling the Unit ....................... 8 Cleaning Before Use ....................8 Before Using Your Unit ....................8 Interior Accessories ....................
-
Página 34: Safety Warnings
1. SAFETY WARNINGS Warning: risk of fire / flammable materials This appliance is intended to be used in household and similar applications such as staff kitchen areas in shops, offices and other working environments; farm houses and by clients in hotels, motels and other residential type environments;... - Página 35 -Take off the doors. -Leave the shelves in place so that children may not easily climb inside. refrigerator must be disconnected from the source of electrical supply before attempting the installation of accessory. Refrigerant and cyclopentane foaming material used for the refrigerator are flammable. Therefore, when the refrigerator is scrapped it shall be kept away from any fire source and be recovered by a special recovering company with corresponding qualification other than be disposed by combustion, so as to prevent damage to the environment or any other harm.
-
Página 36: Installtion
2. INSTALLTION 2.1 Location When selecting a position for your unit you should make sure the floor is flat and firm, and the room is well ventilated. Avoid locating your unit near a heat source, e.g. cooker, boiler or radiator. Also avoid direct sunlight as it may increase the electrical consumption. - Página 37 2) Remove the screws fixed the top-hinge with cross-slot screwdriver. 3) Replace the top-hinge and the top-door limit block and the door bearing bush to the other side. Remove the nut with sleeve.Take off the washer then remove the axes to the other side and fixed.
- Página 38 Note:the refrigerator-freezer incline angle less 45°. 5) Replace the bottom door bearing bush and the limit block. 6) Replace the bottom hinge to the other side then fix it with screws 7) Replace the mid-hinge.
- Página 39 8) Set the bottom door right position,fix the mid-hinge. 9) Replace the top-hinge. 10) Set the top door right position,fix the top-hinge and the cover. 11) Install the four screw caps and two catches to corresponding position. ·Ensure the Appliance is unplugged and empty. ·Adjust the two leveling feet to their highest position.
-
Página 40: Door Handle Install Illumination (Optional)
*The picture above is only for reference. The actual configuration will depend on the physical product or statement by the distributor 2.3 Door Handle Install Illumination (optional) Note: Figures in the user manual are only for reference. The actual product may differ slightly. The refrigerator must be disconnected from the source of electrical supply before attempting the installation of accessory. -
Página 41: Door Space Requirements
Door Space Requirements The unit's door must be able to open fully as shown. W×D≥902×1052mm Levelling the Unit To do this adjust the two levelling feet at the front of the unit. If the unit is not level, the door and magnetic seal alignments will not be covered properly. -
Página 42: Interior Accessories
◆ Before Plugging in You must check that you have a socket which is compatible with the plug supplied with the unit. ◆ Before Turning On! Do not turn on until two hours after moving the unit. 2.8 Interior Accessories Various glass or plastic storage shelves are included with your appliance - different models have different combinations. -
Página 43: Product Overview
3. PRODUCT OVERVIEW *The picture above is only for reference. The actual configuration will depend on the physical product or statement by the distributor 4. OPERATION 4.1 Switching On Your Unit Setting“Off” :UnitOff Setting“Min” :Less Cool Temperature Setting“Med” or “MID” :Normal Operation(adequate for most situations) Setting“Max”... -
Página 44: Noise Inside The Unit
thermostat control knob is set to OFF, the refrigerator will not be running. 4.2 Noise Inside the Unit! You may notice that your unit makes some unusual noises. Most of these are perfectly normal, but you should be aware of them! These noises are caused by the circulation of the refrigerant liquid in the cooling system. -
Página 45: Cleaning Tips
the interior of the refrigerator or contaminated food. Clean the bottle frame, shelves and drawers with a soft cloth dampened with soapy water or diluted detergent. Dry with a soft cloth or dry naturally. Wipe the outer surface of the refrigerator with a soft cloth dampened with soapy water, detergent, etc., and then wipe dry. -
Página 46: Trouble Shooting
7. Trouble shooting The following simple issues can be handled by the user. Please call the after-sale service department if the issues are not settled. Whether the freezer is plugged and connected to power; Inoperation Low voltage; Failure power or tripping circuit Odorous foods should closely wrapped;... -
Página 47: Disposal
If it is the outer condenser, the rear wall should be always clean free of dust or any impurities. ◆ The appliance should be located in the coolest area of the room, away from heat producing appliances or heating ducts, and out of the direct sunlight. ◆... - Página 48 Product Specifica on Brand TEKA Model FTM 221 EU / FTM 240 EU / FTM 247 EU / FTM 249 EU Refrigerator-freezer Category Energy Class Energy consump on of kwh per year, based on standard test results of 24 hours. The actual energy consump on...
- Página 49 TEKA:...
- Página 51 16131000A39834...