Tabla de contenido
Publicidad
Idiomas disponibles
Idiomas disponibles
Enlaces rápidos
OWNER'S MANUAL - MANUEL D'UTILISATION - BENUTZERHANDBUCH
LIBRETTO ISTRUZIONI MANUAL DE UTILIZADOR - MANUAL DEL USUARIO
WARNING!
Carefully read, understand and follow the instructions
provided in this manual, and keep it in a safe place for
future reference. If you have any doubt whatsoever regarding
the use or care of your helmet, please see your retailer for
assistance or advice. Failure to follow the warnings and
instructions provided herein can result in the failure of the
helmet to protect you in an accident, resulting in a head injury
or death.
ATTENTION !
Veuillez lire avec attention, comprendre et suivre les
instructions fournies dans ce manuel, et veuillez le garder
en lieu sûr pour vous en servir ultérieurement. En cas de
doute concernant l'utilisation ou l'entretien du casque, veuillez
demander l'aide ou l'avis de votre revendeur. Tout non respect
des précautions et recommandations fournies dans ce manuel
peut entraîner une défaillance dans l'efficacité du casque à
vous protéger en cas d'accident, provoquant une blessure
grâve ou la mort.
WARNUNG!
Lesen Sie diese Anleitung aufmerksam durch und bewahren
Sie sie sorgfältig auf. Bei Fragen zur Verwendung oder
Pflege Ihres Helms wenden Sie sich an Ihren Einzelhändler.
Falls Sie die Warnungen und Hinweise dieser Anleitung nicht
befolgen, kann das die Schutzwirkung des Helms im Falle eines
Unfalls beeinträchtigen, was zu einer schweren oder tödlichen
Kopfverletzung führen kann.
EVO-ONE 2
per potersene servire ulteriormente. In caso di dubbio riguardo
l'utilizzo o la manutenzione del casco, chiedere l'aiuto o
l'avviso del proprio rivenditore. Il non rispetto delle precauzioni
e raccomandazioni fornite in questo libretto può provocare
una mancanza dell'efficacità del casco a proteggere in caso
d'incidente, provocando una ferita grave o la morte.
tuviera cualquier duda sobre la utilización o cuidado de su casco
por favor diríjase a su establecimiento habitual. No seguir los
avisos y consejos de utilización presentes en este manuscrito
podría disminuir la protección para la cual este casco esta
diseñado, pudiendo causar traumatismos craneales o incluso la
muerte en caso de accidente.
ATTENZIONE!
Leggere con attenzione, capire e seguire le istruzioni
fornite in questo libretto e conservarlo in luogo sicuro
ATENCIÓN!
Lea atentamente, siga las instrucciones de este manual
y guárdelo en lugar seguro para futuras referencias. Si
Publicidad
Capítulos
Tabla de contenido

Manuales relacionados para Shark EVO-ONE 2


Resumen de contenidos para Shark EVO-ONE 2
- Página 1 EVO-ONE 2 OWNER’S MANUAL - MANUEL D’UTILISATION - BENUTZERHANDBUCH LIBRETTO ISTRUZIONI MANUAL DE UTILIZADOR - MANUAL DEL USUARIO WARNING! ATTENZIONE! Carefully read, understand and follow the instructions Leggere con attenzione, capire e seguire le istruzioni provided in this manual, and keep it in a safe place for fornite in questo libretto e conservarlo in luogo sicuro future reference.
-
Página 2: Tabla De Contenido
Nous vous remercions d’avoir choisi Norme : Le casque Evo-One 2 est homologué et un SHARK Evo-One 2. Le Evo-One 2 est un conforme au règlement UNECE R 22/05. casque de qualité, parfaitement adapté Ce casque est donc conforme aux exi- à... -
Página 3: Anatomie Du Casque
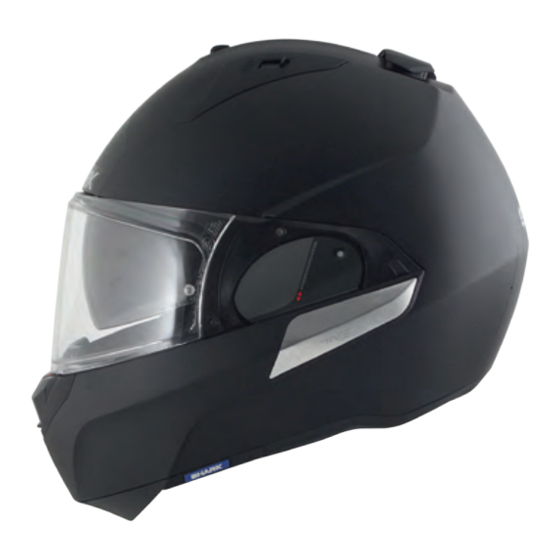
ANATOMIE DU CASQUE 1) Ecran 2) Pare-soleil 3) Bouton de mécanisme de pare-soleil 4) Ventilation supérieure 5) Ventilation inférieure 6) Boucle de jugulaire : 6a Double-anneaux - 6b “Précise Lock“ 7) Joint d’embase 8) Joint d’écran 9) Mécanisme de mentonnière... -
Página 4: Choisir Sa Taille
CHOISIR SA TAILLE ATTENTION ! Aucun casque ne peut est nécessaire de vérifier que le casque protéger entièrement l’utilisateur de correspond bien à votre tête. Lorsque tous les chocs possibles à haute ou basse que vous choisissez un nouveau casque, vitesse. - Página 5 CHOISIR SA TAILLE 3. Avec la jugulaire serrée, attraper l’arrière Pour toute question concernant le choix de du casque par la base et essayer de le la bonne taille de casque, demandez conseil retirer de votre tête dans un mouvement à...
-
Página 6: Jugulaire
JUGULAIRE JUGULAIRE Pour bloquer la jugulaire, il suffit d’enfiler la lan- Votre casque Evo-One 2 est équipé selon les guette dans l’emplacement prévu sur la boucle versions et les pays d’une jugulaire à fermeture jusqu’à ce que la tension soit parfaite rapide «... - Página 7 JUGULAIRE ATTENTION ! Ne jamais utiliser le passant correctement fermé la jugulaire dans les boucles comme seule fermeture de la jugulaire double-D. Répétez alors les étapes décrites ci- . Afin d’être correctement serrée, la jugulaire contre. Ne jamais rouler avec la jugulaire ouverte, mal doit passer selon les instructions dans les fermée ou mal positionnée.
-
Página 8: Un Casque Évolutif
METTRE LE CASQUE UN CASQUE EVOLUTIF Pour chausser, mettre casque Evo-One 2 est un vrai casque évolutif, ® en position jet, ensuite vous devez le il vous permet d’avoir un casque Inté- saisir au niveau des attaches de gral vous apportant toutes les qualités de jugulaires et les écarter légèrement... -
Página 9: Intégral/Jet
INTÉGRAL/JET INTÉGRAL/JET En décomposant bien le mouvement, pressez à Pour transformer votre casque de la configuration fond le bouton rouge de la mentonnière (Fig. A), Intégral à Jet, réalisez de façon aisée la manipu- l’écran se soulèvera légèrement de lui-même lation suivante, tout en gardant le casque sur la (AUTO-UP) puis avancez et levez la mentonnière . -
Página 10: Jet/Intégral
JET/INTÉRAL indiqué (Fig. A) et la ramener vers JET/INTÉGRAL l’avant l’écartant légèrement Cette manipulation est tout aussi aisée. Votre (Fig. B-C). Une fois que la mentonnière écran peut être en position haute ou basse; est en position basse, vous devez entendre il remontera doucement automatiquement 2 “clics“... -
Página 11: Ecran
ÉCRAN DÉMONTAGE Nous avons conçu votre casque afin que cette opération s’effectue très facilement : - mettez l’écran en position haute (Fig. A) ; - appliquez une pression sur les clics (Fig. B) à l’aide d’un tournevis ou d’une pointe quelconque ; - faites pivoter l’écran (Fig. - Página 12 ATTENTION ! Si vous conduisez à haute vitesse, n’ouvrez pas l’écran. LE PARE-SOLEIL Votre Evo-One 2 est équipé d’un pare-soleil intégré à Il pourrait se détacher et laisser vos yeux et votre visage sans protection. commande extérieure.
-
Página 13: Pare-Soleil
; relevé, le bouton est vers l’arrière (voir photo ci-dessus). Pour assurer sa protection et améliorer sa durée de vie, la surface extérieure du pare-soleil de Evo-One 2 est traitée anti-rayures. Pour son entretien et son nettoyage, veuillez suivre les mêmes conseils préconisés pour l’écran exté- rieur. -
Página 14: Textiles
TEXTILES DÉMONTAGE DE L’INTÉRIEUR Nous vous conseillons d’effectuer ces manipula- tions en configuration Jet : - Retournez votre casque ; - Séparez les deux parties de la jugulaire ; - Déclipsez la partie arrière de la coiffe afin de la sortir de son logement (Fig. - Página 15 TEXTILES MONTAGE DE L’INTÉRIEUR - Repositionnez les coussinets de joue en faisant passer la sangle de jugulaire dans la fente des mousses (Fig. A) et reclipser toutes les pressions (Fig. B). - Débutez l’opération en enfilant la partie plastique de l’avant de la coiffe dans son logement (Fig.
- Página 16 TEXTILES LES TEXTILES NETTOYAGE DE L’INTÉRIEUR Les textiles et mousses de confort du Evo-One Les parties textiles internes sont lavables, il est important, afin de ne pas les détériorer, 2 vous permettront d’apprécier au mieux les de suivre scrupuleusement les conseils ci- performances de votre casque.
-
Página 17: Ventilations
VENTILATIONS VENTILATIONS DE COIFFE ATTENTION ! Ne manipulez pas ventilations pendant Les prises d’air supérieures (Fig. A) per- vous conduisez. Vous pourriez perdre le mettent une entrée d’air sur la partie haute contrôle de votre moto, causant ainsi un de la tête et ainsi de renouveler l’air de la accident, des blessures corporelles ou la mort. - Página 18 VENTILATIONS - BAVETTE ANTI-REMOUS VENTILATION DE BOUCHE. BAVETTE ANTI REMOUS. complément ventilation Pour utiliser la bavette anti-remous, de désembuage, il est possible d’utiliser tirer la prise comme indiqué pour une ventilation de boûche pour amener l’air niveau menton. la déplier (Fig. C). Pour la replier, Ces 2 ventilations peuvent être utili- replacer la bavette dans sa position sées de concert ou indépendamment.
-
Página 19: Garantie 5 Ans
Vous venez de choisir pour votre sécurité et votre plaisir maximum de garantie, le remplacement d’un quelconque un casque SHARK. Il a été conçu avec le plus grand soin élément durant ce temps ne prolonge pas cette durée. pour vous apporter toute satisfaction. Toutefois pour votre Procédures... - Página 20 • Cleaning ..................16 • Ventilations ................. 17 • 5 years warranty ................ 18 • Legal informations ..............20 Thank you for choosing a Evo-One 2 Standard: helmet. The Evo-One 2 is a top-quality This Evo-One 2 SHARK helmet has been...
-
Página 21: Anatomy Of The Helmet
ANATOMY OF THE HELMET 1) Visor 2) Sun shield 3) Sun shield mechanism button 4) Upper ventilation 5) Lower ventilation 6) Chin strap buckle: 6a Double-D ring 6b “Precise Lock“ 7) Base seal 8) Visor seal 9) Chin section mechanism... -
Página 22: Choose Your Size
A HELMET IN YOUR SIZE WARNING! No helmet can protect because of different head shapes, this the wearer from all foreseeable size reference can only be considered high or low speed impacts. However, for as a guide. For maximum protection, it maximum protection, the helmet must be is necessary to check that the helmet is of proper fit and the chin strap must be... - Página 23 A HELMET IN YOUR SIZE move the helmet. If not, the hel- If you have any questions about proper- ly sizing your helmet, see your retailer met is too big for you; select for assistance. a smaller size. See figure Each of these tests must be repeated 3.
-
Página 24: Chin Strap
CHIN STRAP CHIN STRAP Choose your SHARK Evo-One 2 helmet and Depending on the various versions and the attach the holding system. When the “Precise country concerned, your SHARK Evo-One 2 hel- Lock” is adjusted to the medium position, the met is equipped with a chin strap with a “Precise... - Página 25 CHIN STRAP WARNING! Never use the strap loop to the chin strap with the double-D rings. secure your helmet to your head. In order to Repeat the steps above. Never ride with the chin be properly fastened, you must thread the strap strap loose, improperly fastened or improperly positioned.
-
Página 26: A Helmet That Can Change Its Use
For proper fitting, position the chin guard ITS USE while in the Jet configuration (i.e. open), The Evo-One 2 is an helmet that can truly then grip it at the level of the chin straps change its use; it enables you to have an... -
Página 27: Full Face/Open Face
FULL FACE/OPEN FACE FULL FACE/OPEN FACE Press the red button on the chin protection Switch your helmet from a full face to an open (Fig.A) and the screen will slightly go up auto- face configuration, in a simple way, by keeping matically (AUTO-UP). - Página 28 OPEN FACE /FULL FACE OPEN FACE / FULL FACE left hand thumb as per as shown (Fig. A) and tilt it forward (Fig B-C) while drawing aside it This transformation is equally easy. Your visor slightly. Once the chin section is in the low screen may be in either low or high position;...
-
Página 29: Visor
VISOR SCREEN REMOVAL We have designed your helmet to make this ope- ration very easy: - Move the visor to the high position (Fig. A); - Apply pressure to the catches using a screwdri- ver or similar pointed instrument (Fig. B); - Pivot the visor (Fig. - Página 30 THE SUN SHIELD visor and do not try to open the visor. The The Evo-One 2 is equipped with an Integral sun shield visor could become dislodged, leaving your with external controls. eyes and face unprotected. In addition, your head could be pulled to the side.
-
Página 31: Sun Shield
To ensure its protection and lengthen its lifespan, the external surface of the Evo-One 2 sun shield has been given an anti-scratch treatment. To maintain and clean it, please follow the same instructions as for the external surface of the visor. -
Página 32: Textile Parts
TEXTILE PARTS REMOVING THE INTERIOR PARTS We advise you to carry out this operation with the helmet in the Jet configuration. - Turn your helmet over. - Separate the two parts of the chin strap. - Detach the back part of the headgear to remove it from its casing (Fig. - Página 33 TEXTILES PARTS REPLACING THE INTERIOR PADDING - Reposition the cheek pads by passing the chin straps through the slit in the foam (Fig. A) and clip all the studs from the two cheek pads (Fig. B). - Start the operation by sliding the plastic tabs of the front of the head section in its housing beginning with one side (Fig.
-
Página 34: Cleaning
TEXTILE PARTS THE TEXTILES CLEANING THE INTERIOR The interior textile parts are washable; it is The Evo-One 2 make it easy for you to important to follow the instructions below appreciate fully the performance of your scrupulously to avoid damaging them: helmet. -
Página 35: Ventilations
VENTILATIONS VENTILATIONS INSIDE THE HELMET. WARNING! Do not open or close any vents while operating your motorcycle. You The upper air intakes (Fig. A) allows air to enter onto the upper part of the head and thus renew could lose control of your motorcycle, resulting the air in the head section. - Página 36 AIRVENTS/CHIN COVER AIRVENTS ANTI-TURBULENCE CHIN COVER As a complement to the defogging venti- To make proper use the anti-turbulence lation, it is possible to use an air vent to chin cover, pull the grip as indicated in spray air around the chin. These 2 types order to deploy it (Fig.
-
Página 37: Years Warranty
5 years as from the SHARK network shall cover these costs up to a limit which date of purchase. After this period, if you continue to... - Página 38 Der SHARK-Evo-One 2-Helm ist aner- Evo-One 2 entschieden haben. kannt und mit der Norm UNECE R 22/05 Der Evo-One 2 ist ein Qualitätshelm, und konform. Der Helm entspricht somit den als solcher für Stadt- oder Überlandfah- Anforderungen, die in allen Ländern rten bestens geeignet.
-
Página 39: Anatomie Des Helms
ANATOMIE DES HELMS 1) Visier 2) Sonnenblende 3) Knopf für den Sonnenblendemechanismus 4) Obere Lüftung 5) Untere Lüftung 6) Kinnriemenverschluss: 6a Doppelring ausgestattet 6b “Precise Lock“ 7) Abschlusskantendichtung 8) Visierdichtung 9) Kinnteilmechanismus... -
Página 40: Ein Helm In Ihrer Größe
EIN HELM IN IHRER GRÖSSE WARNUNG! Kein H e lm ist in de r Ko p ffor me n g ib t de r Kop fum fang Lage, den Träger be i sä mtliche n je d oc h n u r e in en u n ge fähr en H inweis . d e n k baren Kol lisi onen bei ho her o de r Um d ie b est mög lich e Sc hutz w ir kung z u g e ringer... - Página 41 EIN HELM IN IHRER GRÖSSE wä h len. Siehe Abbild un g B.3 . Fass en sic h d ie Pols ter u n g im La ufe der Ze it S ie den Helm hinten am un t er e n Ra nd a bn u tz en od er sons twie...
-
Página 42: Kinnriemen
Sie an, bis Sie einen Widerstand des Einstellschnalle an (Abb. A, B, C, D) . Ziehen Sie Ihren Evo-One 2-Helm auf und schließen Sie den Riemens und leichten Druck am Hals spüren. Der Kinnriemen. Wenn der „Precise Lock“ in der mittle- Druck darf nicht so groß... - Página 43 KINNRIEMEN WARNUNG! Schließen 1. Streifen Sie den Riemen so weit wie Kinnriemen niemals allein mit der möglich durch beide D-Ringe. Prüfen Sie, Halteschlaufe. ob die Kinnriemenunterlage glatt zwischen Um den Kinnriemen ordnungsgemäß zu dem Riemen und Ihrem Hals anliegt. Siehe schließen, ist es unbedingt erforderlich, Abbildung A.
-
Página 44: Ein Helm Für Jede Gelegenheit
EIN HELM FÜR JEDE GELEGENHEIT HELM AUFSETZEN EIN HELM FÜR JEDE GELEGENHEIT Bringen Sie zum Aufsetzen das Kinnteil in Evo-One 2 ist ein Helm wirklich für jede Ge- Position Jetkonfiguration (offen), ergrei- legenheit. Er bietet Ihnen den vollen Schutz, fen Sie die Kinnriemenbefestigungen die Sicherheit und das wasserdichte Visier und drücken Sie sie etwas nach außen,... -
Página 45: Vom Integralhelm Zum Jethelm
VOM INTEGRALHELM ZUM JETHELM den roten Knopf unten am Kinnschutz (Bild A). VOM INTEGRALHELM ZUM JETHELM Das Visier öffnet sich dabei automatisch einen Der Kinnschutz lässt sich einfach bei aufge- Spalt breit (AUTOUP). Drücken Sie dann den Kinn- setztem Helm hochklappen. Der Kinndeflek- schutz nach vorn und klappen Sie ihn hoch. -
Página 46: Vom Jethelm Zum Integralhelm
VOM JETHELM ZUM INTEGRALHELM und ziehen Sie in nach vorne indem Sie ihn leicht JET/ INTEGRALHELM Diese Änderung ist ebenfalls einfach vorzuneh- auseinanderschieben (Abb. C-D). Befindet sich men. Ihr Visier kann in der Stellung oben oder das Kinnteil in der unteren Stellung, müssen unten sein, es wird dann automatisch langsam Sie 2 „Klicks“... -
Página 47: Visier
VISIER ABSETZEN Der Helm ist eigens auf eine besonders leichte Visier-Demontage ausgelegt: - Schwenken Sie das Visier ganz nach oben (Abb. A). - Drücken Sie mit einem Schraubenzieher oder spitzen Gegenstand auf die Verschlüsse. - Drehen Sie das Visier (Abb. C) und ziehen Sie es leicht aus den Halterungen (Abb. - Página 48 Fahren Überlandfahrten nie mit geöffnetem SONNENBLENDE Visier und versuchen Sie nicht, das Visier Der Evo-One 2 ist mit einer Sonnenblende mit während der Fahrt zu öffnen. Das Visier könnte externem Bedienmechanismus ausgestattet. sich vom Helm lösen, so dass Augen und Gesicht ungeschützt wären.
-
Página 49: Sonnenblende
Knopf sich in der vorderen Position. Um die Sonnenblende ein- zufahren, schieben Sie den Knopf nach hinten. Für eine lange Lebensdauer trägt auch die Sonnenblende des Evo-One 2 eine kratzfeste Beschichtung. Verfahren Sie bei der Wartung und Reinigung der Sonnenblende genauso wie beim Visier. Wenn die Sonnenblende und/oder das Visier keine klare Sicht mehr bieten, sind sie umgehend auszutauschen. -
Página 50: Textilien
TEXTILIEN INNENAUSSTATTUNG EINSETZEN Wir empfehlen Ihnen, diese Handgriffe in der Jetkonfiguration vorzunehmen. - Drehen Sie Ihren Helm um. - Öffnen Sie den Kinnriemen. - Führen Sie das Endstück und anschließend den hinteren Teil heraus (Abb. B). - Bauen Sie das Nackenpolster aus, indem Sie den Haken auf der einen und dann auf der anderen Seite freigeben (Abb. - Página 51 TEXTILIEN EINBAU DER INNENAUSSTATTUNG - Bringen Sie die Wangenpolster wieder in Position, indem Sie die Kinnriemen durch die Aussparungen in den Polstern ziehen (Abb. A), und befestigen Sie alle Druckknöpfe der beiden Wangenpolster (Abb. B). - Beginnen Sie den Vorgang mit dem Wiedereinsetzen Plastikteils vor¬deren Teil des Oberkopfpolsters in seine...
- Página 52 Ausstattung trägt. Haushaltsseife. Lassen Sie den Bezug und die Schaumstoffpolster unbedingt an der Luft bei WARNUNG! Die Innenausstattung Ihres Evo-One 2 ist auf Verschleißfestigkeit und Raumtemperatur vollständig durchtrocknen, hohen Tragekomfort optimiert, unterliegt aber bevor Sie sie wieder in den Helm einset- zen.
-
Página 53: Belüftungen
BELÜFTUNGEN BELÜFTUNGEN WARNUNG! Öffnen und schließen Sie die Belüftungen nicht während der Der obere Lufteinlass (Abb. A) ermöglicht eine Fahrt. Es besteht die Gefahr, die Kontrolle Luftzufuhr im oberen Kopfbereich und somit über das Motorrad zu verlieren, was einen Unfall mit Verletzung oder Todesfolge nach die Erneuerung der Luft im Helminnern. - Página 54 KINNBELÜFTUNG/ KINNDEFLEKTOR KINNBELÜFTUNG. KINNDEFLEKTOR. Zusätzlich zur Antibeschlagbelüftung kann Um den Kinndeflektor zu verwenden, eine Belüftung für das Kinn genutzt werden. ziehen Sie wie gezeigt am Griff, um ihn Sie können diese beiden Belüftungen auszuklappen (Abb. C). entweder zusammen oder separat nut- Zum Einklappen, den Kinndeflektor zen.
-
Página 55: Jahres-Garantie
Außerdem fallen Mängel, die durch Gebrauch werden von den SHARK-Partnern übernommen. entstanden sind, nicht unter diese Garantie. Dazu zäh- SHARK behält sich das Recht vor, Arbeiten im Sinne len: Probleme mit Tragekomfort, Größe, Helmgeräu- dieser SHARK-Garantie mit Ersatzteilen durchzufüh- schen, Aerodynamik usw. - Página 56 • Aerazioni ......................17 - 18 • Garanzia di 5 anni ....................19 • Annotazioni legali ....................20 Grazie di avere scelto un Evo-One 2 è NORMATIVA! Il casco SHARK Evo-One 2 è omologato e un casco di qualità, perfettamente adatto conforme alla normativa UNECE R 22/05 all’uso urbano o extra urbano.
-
Página 57: Anatomia Del Casco
IL CASCO 1) Visiera 2) Para-sole 3) Comando meccanismo para-sole 4) Presa d’aria superiore 5) Presa d’aria mentoniera 6) Cinturino: 6a doppio anello - 6b “Precise Lock 7) Guarnizione inferiore 8) Guarnizione visiera 9) Meccanismo mentoniera... -
Página 58: Un Casco Su Misura
UN CASCO SU MISURA ATTENZIONE! Nessun casco servono solo ad orientare la scelta della talgia può proteggere completamente più adatta alla propria testa. Per una protezione l’utilizzatore da tutti gli urti possibili ad alta efficace è necessario verificare che il casco o bassa velocità. - Página 59 UN CASCO SU MISURA 3. con il cinturino allacciato, prendere il casco ripetute durante tutta la vita del casco, poichè la gommapiuma del comfort può evolvere col dalla base posteriore e provare a sfilarlo dalla passare del tempo. Se, nel corso della vita testa con un movimento rotativo.
-
Página 60: Cinturino
Sistema di tenuta ottenere una tensione perfetta (Fig. E). La Il casco SHARK Evo-One 2 è provvisto, in base alle versioni e ai Paesi, di un cinturino linguetta s’inserisce e si blocca automati- a chiusura rapida «Precise Lock»... - Página 61 CINTURINO ATTENZIONE! Non utilizzare mai Fare scivolare la cinghia più lunga del cinturino dentro i due anelli, verificando che il il passante di plastica come sola cuscinetto del comfort sia ben posizionato tra chiusura del cinturino. Per una chiusura cor- il cinturino e il collo.
-
Página 62: Un Casco Evolutivo
UN CASCO EVOLUTIVO METTERE IL CASCO Per infilare il casco, posizionare la mento- Evo-One 2 è un vero casco evolutivo che niera in configurazione Jet (aperta), affer- permette di avere un casco integrale che rarlo a livello dei punti di attacco delle apporti tutte le qualità... -
Página 63: Integrale/Jet
INTEGRALE/JET calzato in testa. Il sottogola dev’essere ripiegato. INTEGRALE/JET Spingere a fondo il bottone rosso della mento- Per trasformare il casco dalla configurazione niera (Fig. A ), la visiera si solleverà staccandosi integrale a Jet, realizzare facilmente la mani- leggermente (auto-uP), poi avanzare e sollevare polazione seguente, sempre tenendo il casco la mentoniera. -
Página 64: Jet/Integrale
JET/INTEGRALE indicato (fig. A) e portala verso l’avanti JET/INTEGRALE allargandola leggermente (fig. B-C). Anche questa trasformazione è molto facile. Quando mentoniera è posi- Non importa se la visiera è in posizione alta zione bassa, si devono sentire 2 «clic» o bassa, salirà lentamente in automatico per ottenere un blocco completo (Fig D). -
Página 65: Visiera
VISIERA RIMOZIONE Abbiamo concepito il casco in modo che questa operazione sia effettuata molto facilmente : - mettere la visiera in posizione alzata (Fig. a) ; -applicare una pressione (Fig. B) aiutandosi con un cacciavite o una punta qualsiasi ; -ruotare la visiera (Fig. - Página 66 ATTENZIONE! Se si sta guidando PARA-SOLE a velocità elevata, non aprire la Lo Evo-One 2 è equipaggiato di un para-sole inte- visiera. Potrebbe staccarsi lasciando gli grato con comando esterno. occhi e il viso senza protezione. Inoltre...
-
Página 67: Para-Sole
(vedere foto sotto). Per assicurare la sua protezione e migliorare la sua durata di vita, la su- perficie esterna del parasole dell’ Evo-One 2 è trattata anti-graffio. Per la manutenzione e la pulizia, seguire gli stessi consigli preconizzati per la visiera esterna. -
Página 68: I Tessuti
I TESSUTI SMONTAGGIO DEGLI INTERNI Consigliamo di fare queste operazioni in configu- razione Jet: - Rigirare il casco; - Separare le due parti del sottogola; - Sganciare la parte posteriore del rivesti¬mento interno per estrarla dalla sua sede (Fig. B). - Smontare il paranuca liberando il gancio prima su un lato e poi sull’altro (Fig. - Página 69 I TESSUTI MONTAGGIO DEGLI INTERNI -Cominciare l’operazione infilando la parte plastica all’avanti della cuffia nel suo allog¬gio (Fig. A), cominciando da uno dei due lati (come indicato dalla freccia 1) ; -Posizionare la cuffia correttamente ; -attaccare i bottoni della parte posteriore della cuffia (Fig.
- Página 70 I tessuti e la gommapiuma per il comfort del Le parti tessili interne sono lavabili ; è impor- Evo-One 2 permetteranno di apprezzare al meglio tante, al fine di non deteriorarli, di seguire le prestazioni del casco. Le parti in contatto con...
-
Página 71: Aerazioni
AERAZIONI ATTENZIONE ! Non manipolare mai VENTILAZIONE SUPERIORE le prese d’aria durante la guida. La presa d’aria superiore (Fig. A) consente un Si rischierebbe di perdere il controllo della ingresso dell’aria sulla parte superiore della testa, moto, causando un incidente, delle ferite nonché... - Página 72 VENTILAZIONE ANTERIORE/SOTTOGOLA ANTI-VENTO VENTILAZIONE ANTERIORE SOTTOGOLA ANTI-VENTO Come complemento della ventilazione Per utilizzare il sottogola anti-vento, tirare la anti-appannamento, è possibile utilizzare presa per estrarlo come illustrato (Fig. C). una ventilazione anteriore per portare l’aria Per chiuderlo, riportare il sottogola anti- a livello del mento.
-
Página 73: Garanzia Di 5 Anni
Tutte le richieste di garanzia devono essere fatte al riven- ogni difetto di fabbrica sui materiali sarà preso in conside- ditore SHARK presso il quale si è acquistato il casco. Affin- razione ai sensi della garanzia di SHARK. ché una richiesta di garanzia sia presa in considerazione, Limitazioni l’acquirente deve notificare presso il proprio rivenditore il... -
Página 74: Annotazioni Legali
Muchas gracias por haber elegido un Norma: Este casco SHARK Evo-One 2 está homo- Evo-One 2. El Evo-One 2 es un casco de logado y conforme con la norma UNECE calidad, perfectamente adaptado para R 22/05. Este casco está conforme con uso urb no y no urbano. - Página 75 ANATOMIE DU CASQUE 1) Pantalla 2) Pantalla solar 3) Mecanismo de la pantalla solar 4) Ventilación superior 5) Ventilación Inferior 6) Correa de cierre: 6a Doble-D 6b “Precise Lock“ 7) Junta de la base del casco 8) Junta de la pantalla 9) Mecanismo de la mentonera.
-
Página 76: Un Casco A Su Medida
UN CASCO A SU MEDIDA ¡ATENCION! Ningún casco puede considerada como un guía. Para su máxima proteger a su portador de cualquier protección, es necesario que el casco se impacto bien a alta o baja velocidad. Asi- adapte bien a la forma de su cabeza. Cuan- mismo, para su máxima protección, su do nos probamos un casco nuevo, hay que casco debe de estar bien ajustado y la... - Página 77 UN CASCO A SU MEDIDA 3. Agarre el casco de su parte trasera e Si usted tiene alguna duda sobre como averiguar la talla de su casco, pida consejo intente sacárselo de la cabeza. Siguien- en su establecimiento más cercano. Cada temente empuje el casco hacia arriba por una de estas pruebas debe de repetirse a lo la parte delantera.
-
Página 78: Correa De Cierre
Según la versión o con El sistema «Precise Lock» dentado le y los países, el Evo-One 2 puede estar equi- permite un reglaje fino y preciso, gracias a pado con una hebilla de yugular de doble la longitud importante longitud de su parte anilla. - Página 79 CORREA DE CIERRE 1. Deslice la parte más larga de la cor- ¡ATENCION! Nunca utilice la hebilla rea por el interior de los dos anillos, mien- plástica para asegurar el casco a su tras confirma que el almohadillado está bien cabeza.
-
Página 80: Un Casco Que Puede Cambiar Su Uso
UN CASCO QUE PUEDE CAMBIAR SU Para ponerse el casco, colocar el bar- boquejo en configuración jet (abierto), Evo-One 2 es un casco que puede verda- coger las sujeciones de las yugulares y deramente cambiar su uso; este le permite sepa¬rarlas ligeramente hacia el exterior... -
Página 81: Integral/Jet
INTEGRAL /JET rojo que se encuentra en el medio de la mento- COMO PASAR DE INTEGRAL A JET nera (foto A) con esta acción la pantalla se elevara Transformar su casco de configuración integral a ligeramente de manera automática (auto-up). Una jet es muy sencillo. -
Página 82: Jet/Integral
JET/INTEGRAL JET/INTEGRAL por adelante, saliéndolo un poco (Fig B-C). Esta manipulación también es muy fácil. La Una vez que el barboquejo esté en posi- pantalla puede estar en posición alta o baja; ción baja, deberá oír 2 “clics “para obtener subirá... -
Página 83: Pantalla
LA PANTALLA COMO DESMONTAR LA PANTALLA Para el desmontaje, hemos diseñado su casco para que esta operación se efectúa muy fácil- mente: - Ponga la pantlla en posición alta (Fig. A). - Presione sobre los clics (Fig. B) con ayuda de un destornillador o de cualquier punta. - Página 84 Póngase en contacto con su distribuidor habitual y pida consejo. PARA-SOLE ATENCION! NUNCA conduzca utilizando El Evo-One 2 está equipado con una pantalla solar inte- la pantalla solar como única protección grada controlada desde el exterior. ocular. Usted debe de conducir siempre con la pantalla principal cerrada, como descrito en la sección anterior.
- Página 85 Para asegurar su protección y una duración elevada, la superficie externa de la pantalla solar del Evo-One 2 ha sido impregnada con una capa de tratamiento anti-ralladuras. Para su mantenimiento y limpieza, siga por favor las mismas instrucciones que para la pantalla exterior.
-
Página 86: I Tessuti
I TESSUTI COMO EXTRAER EL ALMOHADILLADO INTERNO Le aconsejamos efectuar estas manipula¬ciones en configuración Jet: - De la vuelta al casco; - Separe las dos partes de la yugular; - Suelte el clip de la parte posterior del forro con el fin de sacarlo de su aloja¬miento (Fig. B). - Desmonte el paranuca soltando el gancho por una parte y después por la otra (Fig. -
Página 87: Reposicione El Almohadillado Lateral
I TESSUTI REEMPLAZAR EL ALMOHADILLADO INTERIOR -Comience la operación encajando la parte plástica frontal de la sección del almohadil¬lado perteneciente a la cabeza empezando por una de las esquinas (Foto -Posicione el almohadillado correctamente en el fondo del casco. -Conecte los dos clips en la parte trasera del almohadillado (Fotos B-C). - Página 88 Las partes interiores de tela del casco son Las partes textiles y almohadilladlo que lavables; es importante seguir las siguientes proporcionan comodidad al Evo-One 2 instrucciones para evitar dañarlas: hacen que usted aprecie al máximo el Las almohadillas laterales y la sección supe- rendimiento de su casco.
-
Página 89: Ventilaciones
VENTILACIONES ATENCION! No abra o cierre ninguna VENTILACIÓN DE LA COFIA INTERIOR ventilación mientras que conduce La toma de aire superior (Fig. A) permite una entra- su motocicleta. Podría perder el control da de aire dirigida a la parte superior de la cabeza, de esta, resultando en un accidente, lesión renovando así... - Página 90 VENTILACIÓN DE BOCA/ SOLAPA ANTI-REMOLINO VENTILACIÓN DE BOCA. SOLAPA ANTI-REMOLINO. Como complemento de la ventilación para Para utilizar la solapa anti-remolino, eliminar el vaho, es posible utilizar una tire de la toma como está indicado para ventilación de boca para que entre aire a desplegarla (Fig.
-
Página 91: Garantía 5 Años
SHARK donde se adquirió el casco. Caso garantía, SHARK, a través de los agentes de su red de de haber desaparecido, se harán a través del distribuidor ventas, se compromete a reparar o reemplazar cualquier componente defectuoso, hasta un límite máximo que es... -
Página 92: Menciones Legales
“Ce manuel d’utilisation ainsi que les images contenues ne peuvent être ni essence, ni aucun autre solvant. Seuls les écrans : SHARK VZ150 considérés comme contractuels. SHARK se réserve le droit d’améliorer homologué...