Tabla de contenido
Publicidad
Idiomas disponibles
Idiomas disponibles
Enlaces rápidos
Publicidad
Capítulos
Tabla de contenido
Solución de problemas

Manuales relacionados para Kicker KEY500.1


Resumen de contenidos para Kicker KEY500.1
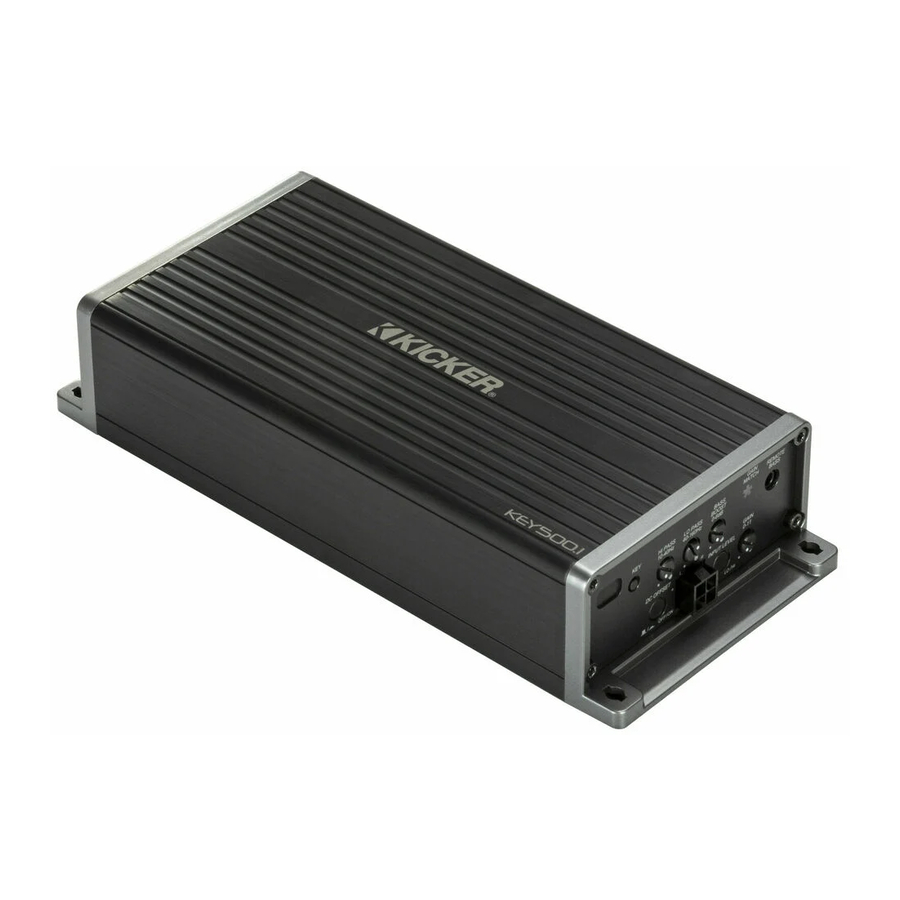
- Página 1 Owner’s Manual Manual del Propietario Manuel d’utilisation Benutzerhandbuch KEY500.1 Mono DSP Amp Amplificador Mono SP Amplificateur DSP mono Mono-DSP-Verstärker select language seleccione el idioma choisir la langue sprache auswählena...
-
Página 2: Tabla De Contenido
Contents Overview ......3 Specifications ......4 Installation ...... 5 Mounting ....... 5 Wiring ........6 Operation ....... 9 Features ........ 9 KEY Auto Setup ....11 CXARC Remote Bass Installation ....14 Troubleshooting .... 15 Warranty ...... 16 Garantía | Garantie ..60 English... -
Página 3: Overview
NEVER COVER AMPLIFIER OR SUBWOOFER – MINIMUM OF 1 IN. (2.5 CM) FROM FRONT OF SPEAKER AND ANY SURFACE. HEARING LOSS HAZARD: YOUR KICKER PRODUCT CAN PRODUCE SOUND LEVELS THAT CAN PERMANENTLY DAMAGE YOUR HEARING! TO PREVENT POSSIBLE PERMANENT HEARING LOSS: IMMEDIATELY REDUCE VOLUME IF YOU EXPERIENCE ANY PAIN OR OTHER SYMPTOMS. -
Página 4: Specifications
Specifications Model: KEY500.1 RMS Power @ 14.4V, 4Ω mono, ≤ 1% THD+N 150 x 1 @ 14.4V, 2Ω mono, ≤ 1% THD+N 300 x 1 @ 14.4V, 1Ω mono, ≤ 1% THD+N 500 X 1 Length [in, cm] 8-1/8, 20.7 Height [in, cm] 1-11/16, 4.3... -
Página 5: Installation
The new extended warranty applies only to KICKER amplifiers and accessories sold to consumers by Authorized KICKER Dealers in the United States of America or its possessions. It also only applies to the original purchaser of KICKER amplifiers and accessories. One warranty extension per amplifier is allowed regardless of the number of amplifier installation kits purchased. -
Página 6: Wiring
Wiring Disconnect the vehicle’s battery to avoid an electrical short. Then connect the ground wire to the amplifier. Make the ground wire short, 24” (60cm) or less, and connect it to a paint-and-corrosion-free, solid, metal area of the vehicle’s chassis. Adding an additional ground wire of this same gauge (or larger) between the battery’s negative post and the vehicle chassis is recommended. - Página 7 If you ever need to remove the amplifier from the vehicle after it has been installed, the ground wire should be the last wire disconnected from the amplifier--just the opposite as when you installed it. KICKER recommends 8 gauge wire. External Fuse Model (sold separately) Power/Ground Wire KICKER Wiring Kit KEY500.1...
- Página 8 For multiple amplifier installations where distribution blocks are used, each amplifier should have its proper-rated fuse installed between the amplifier and the distribution block within eighteen inches of the block, or on the distribution block if it provides for fusing. The primary power wire should also be fused between the battery and distribution block, within eighteen inches of the battery’s positive terminal, with a fuse or breaker rated at least to the sum of the...
-
Página 9: Operation
DC OFFSET INPUT LEVEL − Features DC OFFSET: The KEY500.1 automatic turn-on mode uses DC Offset detection, which can be selected on the end panel. Using the DC Offset mode causes the REM wire to have +12V out for turning on additional amplifiers. DC Offset turn-on can only be used if speaker-level (hi-level) audio inputs are being used. -
Página 10: Bass Boost
It matches the output of the source unit to the input level of the amplifier and features Gain Matching to prevent clipping the input. Use the KEY500.1 Gain Match track from www.KICKER.com/test-tones... -
Página 11: Key Auto Setup
You will need to load a source for the KEY500.1 test tracks from your head unit, whether CD, MP3, AUX, Bluetooth, USB etc. Uncompressed audio is recommended for best results, as this will ensure full amplitude across the frequency spectrum. - Página 12 30, turn it to 23). Press and hold the KEY button for 3 seconds until the gain match LED flashes quickly 3 times. Start the “Key500.1 Gain Match” track (The amplifier mutes its outputs during the Setup process so there will be no sound from the amplifier during setup).
- Página 13 KEY algorithm. Press and hold the KEY button for 5 seconds until the Gain Match LED slowly flashes, then release the button. Start the “Key500.1 Sweep” track. While the KEY algorithm is running the Gain match LED will flash slowly. This process will take about 1.5 minutes and is very loud.
-
Página 14: Cxarc Remote Bass Installation
CXARC Remote Bass Installation Surface-mount the CXARC remote using the supplied screws. GAIN REMOTE MATCH BASS BASS HI PASS LO PASS BOOST 10-40Hz 40-160Hz 0-6dB GAIN 0-11 DC OFFSET INPUT LEVEL − back view Remote cable passes audio; do not run cable parallel to power wires. -
Página 15: Troubleshooting
There are Power (PWR) & Protection (PRT) LEDs on the side panel of your KICKER KEY series amplifier. Depending on the state of the amplifier and the vehicle’s charging system, the LEDs will glow either green or red. When the green LED is lit, this indicates the amplifier is turned on and no trouble exists. -
Página 16: Warranty
Should service be necessary under this warranty for any reason due to manufacturing defect or malfunction during the warranty period, KICKER will repair or replace (at its discretion) the defective merchandise with equivalent merchandise. Warranty replacements may have cosmetic scratches and blemishes. -
Página 17: What Is Not Covered
Service performed by anyone other than KICKER HOW LONG WILL IT TAKE? KICKER strives to maintain a goal of one week turnaround for all electronics (amplifiers, crossovers, equalizers, etc.) returns. Delays may be incurred if lack of replacement inventory or parts is encountered. - Página 18 Contenido Descripción general ..19 Especificaciones ....20 Instalación ....21 Montaje ....... 21 Cableado ......22 Funcionamiento .... 25 Características ....25 Configuración automática KEY ....27 Instalación del control remoto de graves CXARC ..30 Resolución de problemas 31 Garantía | Garantie ..
-
Página 19: Descripción General
NUNCA CUBRA EL SMPLIFICADOR O SUBWOOFER; DEJE UN MÍNIMO DE 1 IN. (2.5 CM) DESDE LA PARTE FRONTAL DEL ALTAVOZ Y DE CUALQUIER SUPERFICIE RIESGO DE PÉRDIDA AUDITIVA: ¡SU PRODUCTO KICKER TIENE LA CAPACIDAD DE PRODUCIR NIVELES DE SONIDO QUE PUEDEN DAÑAR DE FORMA PERMANENTE SU AUDICIÓN! PARA EVITAR UNA POSIBLE PÉRDIDA PERMANENTE DE LA AUDICIÓN:... -
Página 20: Especificaciones
Especificaciones Modelo: KEY500.1 Potencia RMS @ 14.4V, 4Ω mono, ≤ 1% THD+N 150 x 1 @ 14.4V, 2Ω mono, ≤ 1% THD+N 300 x 1 @ 14.4V, 1Ω mono, ≤ 1% THD+N 500 X 1 Longitud [in, cm] 8-1/8, 20.7 Altura [in, cm] 1-11/16, 4.3... -
Página 21: Instalación
Este programa no aplica para productos de segunda mano o productos restaurados de fábrica. Esta oferta es por tiempo limitado, así que acuda lo antes posible con el Distribuidor autorizado KICKER para conocer los detalles. -
Página 22: Cableado
Cableado Desconecte la batería del vehículo para evitar un cortocircuito. Posteriormente conecte el cable de tierra al amplificador. Recorte el cable de tierra a 24” (60 cm) o menos, y conéctelo a una área metálica, sólida, sin pintura ni corrosión de la carrocería del vehículo. - Página 23 último en ser desconectado del amplfiicador, lo opuesto a cuando se instala. KICKER recomienda un cable de calibre 8. Fusible externo Cable de Kit de cableado...
- Página 24 Para instalaciones de múltiples amplificadores donde se utilizan bloques de distribución, cada amplificador debe tener su propio fusible con la clasificación apropiada instalado entre el amplificador y el bloque de distribución a una distancia no mayor a 18 pulgadas del bloque, o en el bloque de distribución si este provee de fusibles.
-
Página 25: Funcionamiento
− Características COMPENSACIÓN DE CC: El modo de encendido automático del KEY500.1 usa deteccion de Compensación de corriente continua (CC), que puede ser seleccionada en el panel de extremo. El uso del modo de Compensación de CC provoca que el cable REM tenga +12 V para encender amplificadores adicionales. -
Página 26: Control Remoto De Bajos
La salida de la unidad fuente coincide con el nivel de entrada del amplificador y ofrece Ajuste de ganancia para evitar la sobremodulación de la entrada. Use la pista de Ajuste de ganancia de KEY500.1 www.KICKER.com/test-tones con la Configuración automática de KEY para alcanzar los ajustes más... -
Página 27: Configuración Automática Key
Necesitará cargar una fuente para las pistas de prueba de KEY500.1 desde su unidad principal, ya sea CD, MP3, AUX, Bluetooth, USB, etc. Para mejores resultados se recomienda audio sin comprimir, ya que esto garantizará... - Página 28 KEY por 3 segundos hasta que el LED de ajuste de ganancia parpadee rápidamente tres veces. Inicie la pista “Key500.1 Gain Match” (el amplificador silencia sus salidas durante el proceso de configuración, por lo que no se escuchará sonido del amplificador durante la configuración).
- Página 29 KEY por 5 segundos hasta que el LED de ajuste de ganancia parpadee lentamente; después suelte el botón. Inicie la pista “Key500.1 Sweep”. Mientras el algoritmo KEY se está ejecutando el LED de Ajuste de ganancia parpadeará lentamente. Este proceso tomará...
-
Página 30: Instalación Del Control Remoto De Graves Cxarc
Instalación del control remoto de graves CXARC Monte el control remoto CXARC sobre la superficie usando los tornillos suministrados. GAIN REMOTE MATCH BASS BASS HI PASS LO PASS BOOST 10-40Hz 40-160Hz 0-6dB GAIN 0-11 DC OFFSET INPUT LEVEL − vista trasera El cable remoto pasa el audio;... -
Página 31: Resolución De Problemas
Hay LED de Alimentación (PWR) y Protección (PRT) en el panel lateral de su amplificador de la serie KEY de KICKER. Dependiendo del estado del amplificador y del sistema de carga del vehículo, los LED se iluminarán en verde o en rojo. Cuando el LED se ilumina en verde, esto indica que el amplificador está... - Página 32 Table des matières Présentation ....33 Spécifications ...... 34 Installation ....35 Montage ......35 Câblage ......36 Utilisation ..... 39 Caractéristiques ....39 Configuration automatique KEY 41 Installation des basses à distance CXARC ..44 Dépannage ....45 Garantía | Garantie ..60 Français...
-
Página 33: Présentation
NE COUVREZ JAMAIS L'AMPLIFICATEUR OU LE CAISSON DE BASSES ; 1 PO (2,5 CM) MINIMUM DE L'AVANT DU HAUT-PARLEUR ET DE TOUTE SURFACE. RISQUE DE PERTE AUDITIVE : VOTRE PRODUIT KICKER PEUT PRODUIRE DES NIVEAUX SONORES SUSCEPTIBLES D'ENDOMMAGER VOTRE AUDITION DE FAÇON PERMANENTE ! POUR PRÉVENIR UNE ÉVENTUELLE PERTE AUDITIVE PERMANENTE :... -
Página 34: Spécifications
Spécifications Modèle : KEY500.1 Puissance efficace (RMS) @ 14,4 V, 4 Ω mono, ≤ 1 % 150 x 1 THD+N{1} 300 x 1 @ 14,4 V, 2 Ω mono, ≤ 1 % THD+N 500 X 1 @ 14,4 V, 1 Ω mono, ≤ 1 % THD+N Longueur [po, cm] 8-1/8, 20,7... -
Página 35: Installation
Installation Montage Choisissez un emplacement structurellement solide pour monter votre amplificateur KICKER. Assurez-vous qu'il n'y a aucun élément derrière la zone de mise en place des vis. Choisissez un emplacement qui offre un espace libre d'au moins 4 po (10 cm) pour la ventilation de l'amplificateur. -
Página 36: Câblage
Câblage Débranchez la batterie du véhicule pour éviter un court- circuit. Connectez ensuite le fil de terre à l'amplificateur. Faites en sorte que le fil de terre soit court, 24 po (60 cm) ou moins, et connectez-le à une zone métallique solide, sans peinture ni corrosion, du châssis du véhicule. - Página 37 être le dernier fil déconnecté de l'amplificateur, c'est-à-dire le contraire de la façon dont vous l'avez installé. KICKER recommande un fil de calibre Fusible externe Fil d'alimentation/ Kit de câblage...
- Página 38 Pour les installations à plusieurs amplificateurs où des blocs de distribution sont utilisés, chaque amplificateur doit avoir son fusible de calibre approprié installé entre l'amplificateur et le bloc de distribution à moins de dix-huit pouces du bloc, ou sur le bloc de distribution s'il prévoit une fusion.
-
Página 39: Utilisation
− Caractéristiques DC OFFSET : le mode de mise en marche automatique du KEY500.1 utilise la détection DC Offset, qui peut être sélectionnée sur le panneau d'extrémité. L'utilisation du mode DC Offset permet au câble REM d'avoir une sortie +12 V pour activer des amplificateurs supplémentaires. -
Página 40: Bass Boost
Il fait correspondre la sortie de l'unité source au niveau d'entrée de l'amplificateur et dispose d'une correspondance de gain afin d'éviter l'écrêtage de l'entrée. Utilisez la piste de correspondance de gain KEY500.1 www.KICKER.com/test-tones avec la configuration automatique KEY pour obtenir les paramètres les plus précis et les plus performants. -
Página 41: Configuration Automatique Key
Vous devrez charger une source pour les pistes de test KEY500.1 à partir de votre unité principale, qu'il s'agisse de CD, MP3, AUX, Bluetooth, USB, etc. Le son non compressé est recommandé pour de meilleurs résultats, car cela garantira une amplitude complète sur... - Página 42 à 23). Appuyez sur le bouton KEY et maintenez-le enfoncé pendant 3 secondes jusqu'à ce que la LED de correspondance de gain clignote rapidement 3 fois. Démarrez la piste « Key500.1 Gain Match » (l'amplificateur coupe ses sorties pendant le processus de configuration afin qu'il n'y ait aucun son provenant de l'amplificateur pendant la configuration).
- Página 43 KEY et maintenez-le enfoncé pendant 5 secondes jusqu'à ce que la LED Gain Match clignote doucement, puis relâchez le bouton. Démarrez la piste « Key500.1 Sweep ». Pendant l'exécution de l'algorithme KEY, la LED de correspondance de gain clignote doucement. Ce processus prend environ 1,5 minute et est très bruyant.
-
Página 44: Installation Des Basses À Distance Cxarc
Installation des basses à distance CXARC Montez la télécommande CXARC en surface à l'aide des vis fournies. GAIN REMOTE MATCH BASS BASS HI PASS LO PASS BOOST 10-40Hz 40-160Hz 0-6dB GAIN 0-11 DC OFFSET INPUT LEVEL − vue arrière Le câble de la télécommande passe l'audio ; ne passez pas le câble parallèlement aux fils d'alimentation. -
Página 45: Dépannage
(PWR) et de protection (PRT) se trouvent sur le panneau latéral de votre amplificateur de la gamme KICKER KEY. En fonction de l'état de l'amplificateur et du système de charge du véhicule, les LED s'allument en vert ou en rouge. Lorsque la LED verte est allumée, cela indique que l'amplificateur est sous tension et qu'il n'y a aucun problème. - Página 46 Inhalt Übersicht ..... 47 Spezifikationen ....48 Installation ....49 Montage ......49 Verkabelung ......50 Betrieb ......53 Merkmale ......53 KEY-Auto-Setup ....55 CXARC Remote-Bass Installation ....58 Fehlersuche ....59 Garantía | Garantie ..60 Deutsche...
-
Página 47: Übersicht
DECKEN SIE NIEMALS DEN VERSTÄRKER ODER DEN SUBWOOFER AB – MINDESTENS 2,5 CM (1 ZOLL) VON DER VORDERSEITE DES LAUTSPRECHERS UND JEDER OBERFLÄCHE. GEFAHR DES GEHÖRVERLUSTS: IHR KICKER-PRODUKT KANN SCHALLPEGEL ERZEUGEN, DIE IHR GEHÖR DAUERHAFT SCHÄDIGEN KÖNNEN! UM EINEN MÖGLICHEN DAUERHAFTEN HÖRVERLUST ZU VERHINDERN: REDUZIEREN SIE DIE LAUTSTÄRKE SOFORT, WENN SIE SCHMERZEN ODER ANDERE SYMPTOME... -
Página 48: Spezifikationen
Spezifikationen Modell: KEY500.1 RMS-Leistung bei 14,4 V, 4 Ω mono, ≤ 1 % THD+N 150 x 1 bei 14,4 V, 2 Ω mono, ≤ 1 % THD+N 300 x 1 bei 14,4 V, 1 Ω mono, ≤ 1 % THD+N 500 x 1 Länge [Zoll, cm] 8-1/8, 20,7 Höhe [Zoll, cm]... -
Página 49: Installation
Installation Montage Wählen Sie für die Montage Ihres KICKER-Verstärkers einen geeigneten, stabilen Aufstellort. Vergewissern Sie sich, dass sich hinter dem Bereich, in den die Schrauben eingedreht werden sollen, keine Gegenstände befinden. Wählen Sie einen Standort, der mindestens 10 cm (4") offene Belüftung für den Verstärker bietet. Montieren Sie wenn möglich den Verstärker innerhalb des klimatisierten... -
Página 50: Verkabelung
Verkabelung Klemmen Sie die Fahrzeugbatterie ab, um einen elektrischen Kurzschluss zu vermeiden. Schließen Sie dann das Erdungskabel an den Verstärker an. Verlegen Sie das Erdungskabel kurz, maximal 60 cm, und verbinden Sie es mit einem lack- und korrosionsfreien, massiven Metallbereich des Fahrzeugchassis. Es wird empfohlen, ein zusätzliches Massekabel mit demselben oder einem größeren Querschnitt zwischen dem Minuspol der Batterie und dem Fahrzeugchassis... - Página 51 Wenn Sie den Verstärker nach der Installation aus dem Fahrzeug ausbauen müssen, sollte das Massekabel das letzte Kabel sein, das vom Verstärker getrennt wird – genau umgekehrt wie bei der Installation. KICKER empfiehlt ein 8-Gauge-Kabel. Externe Sicherung KICKER Modell (separat erhältlich) Strom-/Erdungskabel...
- Página 52 Bei Installationen mit mehreren Verstärkern, bei denen Verteilerblöcke verwendet werden, sollte für jeden Verstärker die entsprechende Sicherung zwischen dem Verstärker und dem Verteilerblock innerhalb eines Abstands von 18 Zoll zum Block oder auf dem Verteilerblock installiert werden, wenn dieser eine Sicherung vorsieht. Das primäre Stromkabel sollte auch zwischen der Batterie und dem Verteilerblock abgesichert werden, und zwar innerhalb eines Abstands von 18 Zoll zum Pluspol der Batterie mit einer Sicherung oder...
-
Página 53: Betrieb
DC OFFSET INPUT LEVEL − Merkmale DC OFFSET: Der automatische Einschaltmodus des KEY500.1 verwendet die DC-Offset-Erkennung, die auf dem Endpaneel ausgewählt werden kann. Die Verwendung des DC-Offset-Modus bewirkt, dass die REM-Leitung +12 V ausgibt, um zusätzliche Verstärker einzuschalten. Das Einschalten des DC- Offsets kann nur benutzt werden, wenn Audioeingänge... - Página 54 Eingangsverstärkungsregler ist kein Lautstärkeregler. Er passt den Ausgang des Quellgeräts an den Eingangspegel des Verstärkers an und verfügt über Gain Matching, um ein Übersteuern des Eingangs zu verhindern. Verwenden Sie den KEY500.1 Gain Match Track von www.KICKER.com/test-tones mit dem KEY- Auto-Setup, um die genauesten und besten Einstellungen zu erreichen.
-
Página 55: Key-Auto-Setup
Geräuschverbesserung des Fahrzeugs vorher deaktiviert wurden. Sie müssen eine Quelle für die KEY500.1- Testtracks von Ihrem Hauptgerät laden, egal ob CD, MP3, AUX, Bluetooth, USB usw. Unkomprimiertes Audiomaterial wird für beste Ergebnisse empfohlen, da dies die volle Amplitude über das gesamte Frequenzspektrum gewährleistet. - Página 56 Ausgang zu kappen beginnt (wenn das Quellgerät auf 30 geht, drehen Sie es auf 23). Halten Sie die KEY-Taste 3 Sekunden lang gedrückt, bis die Gain Match-LED dreimal schnell blinkt. Starten Sie den Track „Key500.1 Gain Match“ (Der Verstärker schaltet seine Ausgänge während des Setup-Prozesses stumm, so dass während des Setups kein Ton vom Verstärker zu hören ist).
- Página 57 Algorithmus auszuführen. Halten Sie die KEY-Taste 5 Sekunden lang gedrückt, bis die Gain Match-LED langsam blinkt, und lassen Sie dann die Taste los. Starten Sie den Titel „Key500.1 Sweep“. Während der KEY-Algorithmus läuft, blinkt die Gain Match-LED langsam. Dieser Vorgang dauert etwa 1,5 Minuten und ist sehr laut.
-
Página 58: Cxarc Remote-Bass Installation
CXARC Remote-Bass Installation Montieren Sie die CXARC-Fernbedienung mit den mitgelieferten Schrauben auf der Oberfläche. GAIN REMOTE MATCH BASS BASS HI PASS LO PASS BOOST 10-40Hz 40-160Hz 0-6dB GAIN 0-11 DC OFFSET INPUT LEVEL − Rückansicht Das Fernbedienungskabel leitet die Audiosignale weiter; das Kabel darf nicht parallel zu den Stromkabeln verlegt werden. -
Página 59: Fehlersuche
Wenn Ihr Verstärker nicht zu funktionieren scheint, überprüfen Sie zuerst die offensichtlichen Dinge, wie z. B. durchgebrannte Sicherungen, schlechte oder falsche Verkabelung, falsche Einstellung der Frequenzweichenschalter und Verstärkungsregler usw. An der Seitenwand Ihres KICKER-Verstärkers der KEY-Baureihe befinden sich LEDs für die Stromversorgung (PWR) und den Schutz (PRT). Je nach Zustand des Verstärkers und des Ladesystems des Fahrzeugs leuchten die LEDs entweder grün... -
Página 60: Garantía | Garantie
(“a todo volumen”) en todo sentido. La línea de altavoces y amplificadores KICKER es la mejor del mercado de audio de automóviles y por lo tanto representa el “combustible” para vivir a todo volumen en el área de “estéreos de automóvil” de la vida de nuestros clientes.