Publicidad
Idiomas disponibles
Idiomas disponibles
Enlaces rápidos
H-6286GR
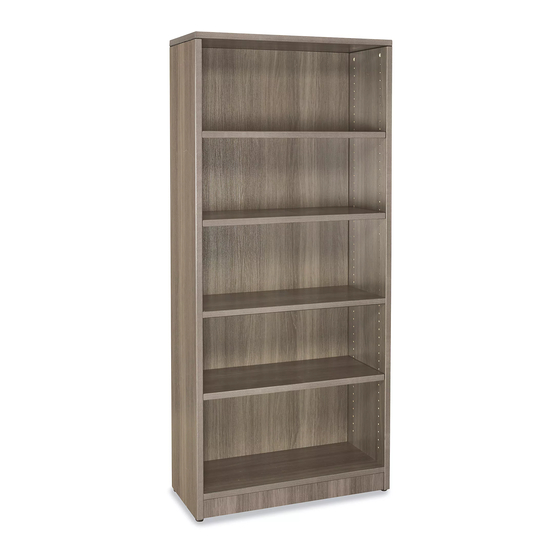
5-SHELF OFFICE BOOKCASE
TOOLS NEEDED
Phillips Screwdriver
(Optional)
1
A
Cam Lock Pin x 31
E
Adjustable Glide x 4
PAGE 1 OF 9
Drill
5/16" Drill Bit
(Optional)
3
5
8
2
8
6
8
4
7
B
Cam Lock x 31
F
Cam Lock Cap x 31
1-800-295-5510
uline.com
Two Person Assembly
Recommended
PARTS
#
DESCRIPTION
1
Left Side Panel
2
Right Side Panel
3
Top Panel
4
Bottom Panel
5
Back Panel
6
Fixed Shelf
7
Skirt Panel
8
Shelf
C
Dowel x 24
Wall Anchor Kit
G
Para Español, vea páginas 4-6.
Pour le français, consulter les pages 7-9.
QTY
1
1
1
1
1
1
1
3
D
Shelf Dowel x 14
M4 x 20 mm Screw x 2
Plastic Anchor x 2
M4 x 40 mm Screw x 2
0521 IH-6286GR
Publicidad

Resumen de contenidos para Uline H-6286GR
- Página 1 Para Español, vea páginas 4-6. Pour le français, consulter les pages 7-9. H-6286GR 1-800-295-5510 uline.com 5-SHELF OFFICE BOOKCASE TOOLS NEEDED Two Person Assembly Phillips Screwdriver Drill 5/16" Drill Bit Recommended (Optional) (Optional) PARTS DESCRIPTION Left Side Panel Right Side Panel...
- Página 2 ASSEMBLY NOTE: Assemble unit on a smooth, non-marring 2. Insert cam lock pins (A) and dowels (C) into back panel. Insert cam locks (B) into bottom panel and surface to prevent scratching. Check that all parts are included. fixed shelf. Attach bottom panel and fixed shelf and tighten cam locks using a Phillips head screwdriver.
- Página 3 M4 x 40 mm screws and screwdriver. (See Figure 5) two M8 x 36 mm plastic anchors. Tighten cable tie to prevent tipping. (See Figure 7) Figure 5 Figure 7 Wall Panel Back 1-800-295-5510 uline.com PAGE 3 OF 9 0521 IH-6286GR...
- Página 4 H-6286GR 800-295-5510 uline.mx LIBRERO DE 5 REPISAS PARA OFICINA HERRAMIENTAS NECESARIAS Se Recomienda Armar Desarmador de Cruz Taladro Broca de 5/16" Entre Dos Personas (Opcional) (Opcional) PARTES DESCRIPCIÓN CANT. Panel Lateral Izquierdo Panel Lateral Derecho Panel Superior Panel Inferior Panel Posterior...
- Página 5 ENSAMBLE NOTA: Ensamble la unidad sobre una superficie 2. Inserte los pasadores para tuercas minifix (A) y los taquetes (C) en el panel posterior. Inserte las tuercas lisa que no deje marcas para evitar rayones. Verifique que todas las partes estén incluidas. minifix (B) en el panel inferior y la repisa fija.
- Página 6 M4 x 40 mm y dos anclajes de cruz. (Vea Diagrama 5) plástico M8 x 36 mm. Apriete el cincho para evitar que se vuelque. (Vea Diagrama 7) Diagrama 5 Diagrama 7 Panel Pared Superior Parte Superior Parte Posterior 800-295-5510 uline.mx PAGE 6 OF 9 0521 IH-6286GR...
- Página 7 H-6286GR 1-800-295-5510 uline.ca BIBLIOTHÈQUE DE BUREAU – 5 TABLETTES OUTILS REQUIS Montage à deux Tournevis cruciforme Perceuse Mèche de perceuse personnes recommandé (optionnel) de 5/16 po (optionnel) PIÈCES DESCRIPTION QTÉ Panneau latéral gauche Panneau latéral droit Panneau supérieur Panneau inférieur Panneau arrière...
- Página 8 MONTAGE 2. Insérez les goujons d'excentrique (A) et les REMARQUE : Montez le meuble sur une surface lisse qui ne marque pas afin d'éviter les rayures. chevilles (C) dans le panneau arrière. Insérez des Vérifiez que toutes les pièces sont incluses. excentriques (B) dans le panneau inférieur et la tablette fixe.
- Página 9 M4 x 40 mm et deux ancrages en plastique M8 Panneau Figure 5 x 36 mm. Resserrez l'attache autobloquante pour supérieur empêcher tout basculement. (Voir Figure 7) Figure 7 Panneau supérieur Panneau arrière 1-800-295-5510 uline.ca PAGE 9 OF 9 0521 IH-6286GR...


