Tabla de contenido
Publicidad
Idiomas disponibles
Idiomas disponibles
Enlaces rápidos
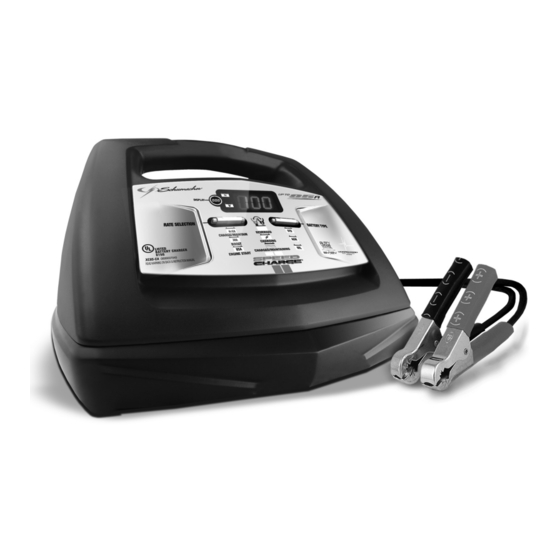
Model / Modelo:
XC85-CA
Automatic Battery Charger
Cargador de baterías automático
PLEASE SAVE THIS OWNERS MANUAL AND READ BEFORE EACH USE. This manual
will explain how to use the battery charger safely and effectively. Please read and follow these
instructions and precautions carefully.
POR FAVOR CONSERVE ESTE MANUAL DEL USUARIO Y LEALO ANTES DE CADA
USO. En este manual le explica cómo utilizar el cargador de batería de manera segura y
confiable. Por favor, lea y siga las siguientes instrucciones y precauciones.
OWNERS MANUAL
MANUAL DEL USUARIO
0099001420-02
Publicidad
Tabla de contenido
Solución de problemas

Manuales relacionados para Schumacher Electric XC85-CA


Resumen de contenidos para Schumacher Electric XC85-CA
- Página 1 OWNERS MANUAL MANUAL DEL USUARIO Model / Modelo: XC85-CA Automatic Battery Charger Cargador de baterías automático PLEASE SAVE THIS OWNERS MANUAL AND READ BEFORE EACH USE. This manual will explain how to use the battery charger safely and effectively. Please read and follow these instructions and precautions carefully.
-
Página 2: Tabla De Contenido
CONTENTS IMPORTANT SAFETY INSTRUCTIONS ..................3 PERSONAL SAFETY PRECAUTIONS ..................3 PREPARING TO CHARGE ......................4 CHARGER LOCATION .........................4 DC CONNECTION PRECAUTIONS ....................4 FOLLOW THESE STEPS WHEN BATTERY IS INSTALLED IN VEHICLE ........4 FOLLOW THESE STEPS WHEN BATTERY IS OUTSIDE VEHICLE ........5 GROUNDING AND AC POWER CORD CONNECTIONS ............5 ASSEMBLY INSTRUCTIONS ......................5 CONTROL PANEL ........................5 OPERATING INSTRUCTIONS .....................6... -
Página 3: Important Safety Instructions
1. IMPORTANT SAFETY INSTRUCTIONS SAVE THESE INSTRUCTIONS. 1.1 SAVE THESE INSTRUCTIONS – 1.9 Do not disassemble charger; take it to This manual contains important safety a qualified serviceman when service or and operating instructions. repair is required. Incorrect reassembly may result in a risk of electric shock or fire. 1.2 Keep out of reach of children. -
Página 4: Preparing To Charge
3. PREPARING TO CHARGE 3.1 If necessary to remove battery from battery without removable cell caps, such vehicle to charge, always remove as valve regulated lead acid batteries, grounded terminal from battery first. Make carefully follow manufacturer’s recharging sure all accessories in the vehicle are off, instructions. -
Página 5: Follow These Steps When Battery Is Outside Vehicle
7. FOLLOW THESE STEPS WHEN BATTERY IS OUTSIDE VEHICLE A SPARK NEAR THE BATTERY MAY connect NEGATIVE (BLACK) charger clip CAUSE A BATTERY EXPLOSION. TO to free end of cable. REDUCE THE RISK OF A SPARK NEAR 7.5 Do not face battery when making final THE BATTERY: connection. -
Página 6: Operating Instructions
RATE SELECTION BUTTON BATTERY TYPE BUTTON Use this button to select one of the following: Use this button to set the type of battery to charge. • 6<>2A CHARGE/MAINTAIN – For charging small and large batteries. Not – Used in cars, trucks and •... - Página 7 If charging cannot be completed normally, MAINTAINING A BATTERY charging will abort. When charging aborts, The XC85-CA charges and maintains the charger’s output is shut off and the both 6 and 12 volt batteries. CHARGING (yellow/orange) LED will NOTE: The maintain mode technology flash.
- Página 8 USING THE ENGINE START FEATURE While waiting for cranking, the digital display shows rdy. Your battery charger can be used to jump start your car if the battery is low. Follow • Cranking – When cranking is detected, all safety instructions and precautions for the charger will automatically deliver up charging your battery.
-
Página 9: Maintenance And Care
TESTING AFTER CHARGING battery, following the instructions given in previous sections. After the unit has been changed from 2. Plug the charger AC power cord into tester to charger (by selecting a desired the AC outlet. rate), it remains a charger. To change the battery charger back to a tester, press the 3. - Página 10 Troubleshooting PROBLEM POSSIBLE CAUSE REASON/SOLUTION Battery clamps do not The charger is equipped No problem; this is a normal spark when touched with an auto-start feature. condition. together. It will not supply current to the battery clamps until a battery is properly connected. The clamps will not spark if touched together.
-
Página 11: Before Returning For Repairs
Manufacturer does not provide any warranty for any accessories used with this product that are not manufactured by Schumacher Electric Corporation and approved for use with this product. This Limited Warranty is void if the product is misused, subjected to careless handling, repaired, or modified by anyone other than Manufacturer or if this unit is resold through an unauthorized retailer. -
Página 12: Instrucciones Importantes De Seguridad
1. INSTRUCCIONES IMPORTANTES DE SEGURIDAD GUARDE ESTAS INSTRUCCIONES. 1.1 GUARDE ESTAS INSTRUCCIONES – efectúe reparaciones. Este manual contiene instrucciones 1.9 No desarme el cargador; hágalo revisar operativas y de seguridad de importancia. por una persona capacitada que efectúe 1.2 Mantener fuera del alcance de los niños. reparaciones cuando necesite servicio de mantenimiento o una reparación. -
Página 13: Preparación Para La Carga
de metal sobre la batería. Esto podría 2.8 Utilice este cargador solamente para provocar chispas o un cortocircuito en la cargar baterías de tipo PLOMO-ÁCIDO, batería o en cualquier otra pieza eléctrica GEL y AGM-recargables con recomienda que podría provocar una explosión. usar capacidad de la batería de 12Ah (6V) y 22-59Ah (12V). -
Página 14: Siga Estos Pasos Cuando La Batería Esté Colocada En El Vehículo
6. SIGA ESTOS PASOS CUANDO LA BATERÍA ESTÉ COLOCADA EN EL VEHÍCULO UNA CHISPA PROVOCADA CERCA batería al borne POSITIVO (POS, P, +) sin DE LA BATERÍA PUEDE CAUSAR LA descarga a tierra de la batería. Conecte EXPLOSIÓN DE LA BATERÍA. PARA el gancho NEGATIVO (NEGRO) al chasis REDUCIR EL RIESGO DE PROVOCAR del vehículo o al bloque motor alejado... -
Página 15: Instrucciones De Montaje
PELIGRO: Nunca altere el cable o USO DE UN CABLE DE EXTENSIÓN enchufe de C.A. suministrado, si no se El uso de una extensión no se ajusta al tomacorriente, haga instalar un recomienda. Si debe usar una extensión, tomacorriente adecuado con descarga siga estas pautas: a tierra por medio de un electricista •... -
Página 16: Instrucciones De Operación
INDICADORES LEDS serán más delgadas y poseerán una composición de materiales algo diferente. LED CLAMPS REVERSED Las baterías regulares no se deben utilizar (pinzas invertido) [rojo] parpadea: en aplicaciones de ciclo profundo. Las conexiones están inversas. – La construcción de la malla de fibra LED CHARGING (carga) [amarillo/ •... - Página 17 (véase la sección LOCALIZACIÓN Y SOLUCIÓN DE PROBLEMAS para MANTENIENDO UNA BATERÍA una descripción de los códigos de error). El XC85-CA cargos y mantiene las Para reajustar después de una carga baterías de 6 y 12 voltios, manteniéndolas rechazada, desenchufe el cargador a carga completa.
-
Página 18: Utilizar La Función De Encendido De Motor
UTILIZAR LA FUNCIÓN DE uno de estos tres estados: ENCENDIDO DE MOTOR • Esperar para dar arranque – El El cargador de batería se puede utilizar cargador espera hasta que se le de para impulsar el auto si la batería está arranque al motor antes de suministrarle baja. -
Página 19: Mantenimiento Y Cuidado
botón SELECCIÓN DE VELOCIDAD NOTA: El probador de batería solo cuando el LED ARRANQUE DEL MOTOR está diseñado para probar baterías. La está encendido (excepto durante los 180 prueba de un dispositivo con un voltaje segundos de enfriamiento) cerrará el que cambie rápidamente podría arrojar cargador y activará... - Página 20 CÓDIGO DESCRIPCIÓN RAZÓN/SOLUCIÓN DE ERROR El cargador no puede alimentar La batería no mantiene la carga. Podría ser la batería cargada el el modo de causado por un escape en la batería o la batería mantenimiento. podría estar en malas condiciones. Cerciórese de que no haya fugas en la batería.
-
Página 21: Especificaciones
PROBLEMA CAUSA POSIBLE SOLUCIÓN No puedo seleccionar El Cargador está equipado con No hay problema; es una condición los 6 o 12 Voltios. Detección de Auto Voltaje, que normal. automáticamente detecta el voltaje y carga la batería. Presiono el botón de Cuando se conecta por primera Esto es normal. -
Página 22: Garantía Limitada
El Fabricante no presta garantía por lo accesorios utilizados con este producto que no sean los fabricados por Schumacher Electric Corporation y que no estén aprobados para su uso con este producto. La presente Garantía Limitada será nula si el producto se utiliza en forma errónea, se trata de manera inadecuada, es reparado o modificado... -
Página 23: Warranty Card
WARRANTY CARD / TARJETA DE GARANTÍA SAVE ON POSTAGE! ACTIVATE YOUR WARRANTY ONLINE – THE QUICK AND EASY WAY! Go to www.batterychargers.com to register your product online. (No internet access? Send in the completed warranty card.) 2 YEAR LIMITED WARRANTY PROGRAM REGISTRATION MODEL: _____________________ DESCRIPTION: ________________________ This is the only express limited warranty, and the manufacturer neither assumes nor authorizes anyone to assume or make any other obligation.