Capítulos
Tabla de contenido

Manuales relacionados para ROBBE POWER PEAK TRIPLE 360 W EQ-BID


Resumen de contenidos para ROBBE POWER PEAK TRIPLE 360 W EQ-BID
- Página 1 Bedienungsanleitung Operating instructions Notice d’utilisation Istruzioni per l´utilizzo Manual de uso Návod k obsluze POWER PEAK ® TRIPLE 360 W EQ-BID No. 8562 © robbe Modellsport...
-
Página 2: Sicherheitshinweise
Sie sich für das Automatik-Lade gerät Power Peak ® Triple 360 W EQ-BID aus dem robbe Sortiment entschieden haben. Damit besitzen Sie ein kompaktes 3 fach-Ladegerät mit Akkumanagement und Equalizer für den Anschluss an 12 V DC. -
Página 3: Tabla De Contenido
Programmiervorgang Ansehen der Daten des BID-Chip/Key Lade- / Entladevorgänge mit BID-Chip/Key Ende eines Lade- / Entladevorganges 10.1 Anzeige der Lade- / Entladedaten 10.2 Zusatzinformationen (Data-View-Taste) Fehlermeldungen Allgemeine Sicherheitshinweise Gewährleistung Empfohlenes Zubehör Konformitätserklärung Akku u. Altgeräteentsorgung Service Adressen © robbe Modellsport... -
Página 4: Lieferumfang
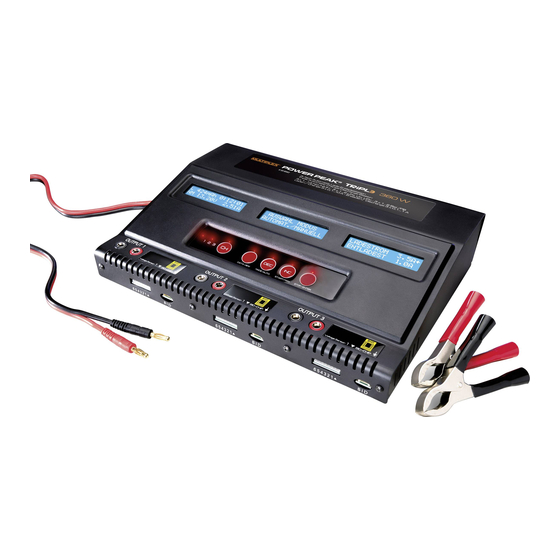
POWER PEAK ® TRIPLE 360 W EQ-BID 8562 1. LIEFERUMFANG POWER PEAK ® TRIPLE 360 W EQ-BID No. 8562 Der Lieferumfang enthält: 1x Power Peak ® Triple 360 W EQ-BID 1x steckbare Batterieklemmen 1x BID-Chip mit Kabel © robbe Modellsport... -
Página 5: Allgemeine Beschreibung
Schnell kann es passieren, dass man am Ladegerät eine falsche Einstellung vornimmt und schon hat der wertvolle Akku Schaden genommen. Das revolutionäre BID-System von robbe bietet eine geniale Lösung für dieses Problem. Jedem Akku wird ein kleiner, leichter BID-Chip zugeordnet. Er speichert alle relevanten Daten zum optimalen Laden und Entladen des Akkus. -
Página 6: Bedienelemente
• Mit dieser Taste werden bei manuellem Betrieb, im Einstellmodus die Werte der Ladeparameter um einen Schritt verringert und bei der Menüauswahl das jeweils vor- herige Menü ausgewählt. • Mit der ‘MODE’-Taste kann direkt vor dem Start der gewünschte Vorgang (LADEN, ENTLADEN, ENTL->LADEN oder LAGERPROGRAMM) ausgewählt werden. • Nach dem Verbinden mit der Versorgungsspannung wird mit dieser Taste im Auswahl- menü der “automatische Modus” (AUTOMAT.) aktiviert. © robbe Modellsport... -
Página 7: Technische Daten
2,5 V pro Zelle bei LiFe 1,8 V pro Zelle bei Bleiakkus Abschaltung: NC / NiMH: automatisch, digitales-Delta-Peak-System Blei- und Lithium: automatisch, spannungsabhängig, CC-CV Verfahren Abmessungen: ges. 270 x 195 x 50 mm Funktionen: Laden, Entladen, Entladen-Laden, Balancieren, 10 interne Speicherplätze © robbe Modellsport... -
Página 8: Inbetriebnahme Des Ladegerätes
Metall Akkus, ‘LP’ für Lithium-Polymer Akkutyp Akkuspannung strom Akkus, ‘Li‘ für Lithium Ionen Akkus, ‘LF‘ für Lithium Ferrum Akkus und ‘Pb’- für Bleiakkus) dargestellt. Damit werden während eines Lade- bzw. Entladevorganges auf einen Blick sämtliche wichtigen Parameter angezeigt. © robbe Modellsport... -
Página 9: Anschluss Der Akkus
Kabels an den Equalizer verdeutlichen. EQ-Adapter EQ-Adapter EQ-Adapter robbe-JSTXH No.8214 robbe-TP/FP No.8215 robbe-PQ No.8213 6. AUTOMATIK MODUS Wird vom Startdisplay aus die Taste ‘AUTO’ betätigt, arbeitet der Lader im automatischen Modus, dabei sind alle Parameter automatisch optimiert. „AUTOMAT“ nur für NC/ NiMH Akkus verfügbar. © robbe Modellsport... -
Página 10: Menüstruktur Des Automatik Modus
Display des Automatik-Modus angezeigt. Nach dem Ende des Vorganges, wenn der Akku voll ge- oder entladen ist, werden im Display die erreichten Werte (ge- oder entladene Kapazität, Vorgangszeit, Akkutyp, aktuelle Akkuspannung und der aktuelle Strom) ange- zeigt. © robbe Modellsport... -
Página 11: Manueller Modus
‘ENTER’- Taste Taste Taste Taste INC/DEC INC/DEC ‘ENTER’- ‘ENTER’- Taste Taste Taste Taste INC/DEC INC/DEC ‘ENTER’- ‘ENTER’- Taste Taste Taste Taste INC/DEC INC/DEC ‘ENTER’- ‘ENTER’- Taste Taste Taste Taste INC/DEC ‘ENTER’- ‘ENTER’- INC/DEC Taste Taste Taste Taste © robbe Modellsport... -
Página 12: Einstellen Der Parameter
Einstellungen durchgeführt werden, damit das Ladegerät im manuellen Modus den Vorgang optimal abarbeiten kann: • Speicherplatz • Akkutyp • Zellenzahl • Akkukapazität (bzw. Akkuspannung bei LiPo, LiIo, LiFe und Pb) • Ladestrom • Entladestrom • Piepser (AUS,1-5) Hinweis: Nur Werte in der ersten Zeile können bei blinkendem Pfeilsymbol geändert werden. © robbe Modellsport... -
Página 13: Auswahl Des Akkutyps
Zellenzahl Akkuspannung 3,7 Volt 3,6 Volt 3,3 Volt 7,4 Volt 7,2 Volt 6,6 Volt 10,8 Volt 11,1 Volt 9,9 Volt 14,4 Volt 14,8 Volt 13,2 Volt 18,0 Volt 18,5 Volt 16,5 Volt 21,6 Volt 22,2 Volt 19,8 Volt © robbe Modellsport... -
Página 14: Einstellung Des Ladestromes
Der Ladestrom kann von 0,1 A bis 10 A eingestellt werden. Die max. Ladestromstärke ist dabei aber von der Akkuspannung bzw. dem Akkutyp abhän- gig (bei Lithium Akkus max. 2C). Der Prozessor des Ladegerätes begrenzt den max. Ladestrom. © robbe Modellsport... -
Página 15: Einstellung Des Entladestromes
Signal zeigt den Zustand an. Danach wird das Arbeits- display, in dem alle wichtigen Parameter an- gezeigt werden, dargestellt (siehe Kap. 5.1). • Mit der ‘INC’- oder ‘DEC’-Taste kann während des Vorgangs der Strom geändert werden, der neue Wert blinkt vor der Übernahme zunächst. © robbe Modellsport... -
Página 16: Bid-Chip/Key
Startdisplay angezeigt. 8.1 MENüSTRUKTUR BEI ANGESCHLOSSENEM BID CHIP/ KEy INC/DEC Taste ‘ENTER’- INC/DEC ‘ENTER’- Taste ‘ENTER’- Taste Taste Taste INC/DEC INC/DEC ‘ENTER’- ‘ENTER’- Taste Taste Taste Taste INC/DEC INC/DEC ‘ENTER’- ‘ENTER’- Taste Taste Taste Taste INC/DEC Taste © robbe Modellsport... -
Página 17: Programmiervorgang
‘DEC’-Taste aktualisiert werden. Nach einer wei- teren Betätigung der ‘ENTER’-Taste blinkt die Monatszahl, und kann mit der ‘INC / DEC’-Taste verändert werden. Nach dem gleichen Verfahren wird das aktuelle Tagesdatum eingestellt. Zur Speicherung muss nochmals die ‘ENTER’-Taste betätigt werden. © robbe Modellsport... -
Página 18: Ansehen Der Daten Des Bid-Chip/Key
Ladezyklen und das programmierte Datum ange- zeigt. 9. LADE- / ENTLADEVORGäNGE MIT BID-CHIP/KEy Der BID-Chip/Key hat so geringe Abmessungen, dass er in jedem Zubehör untergebracht werden kann. Die Bilder auf der nächsten Seite veranschaulichen die Verwendung eines BID-Chips. © robbe Modellsport... -
Página 19: Ende Eines Lade- / Entladevorganges
Werte des Vorganges kontinuierlich ange- zeigt (siehe Kap. 5.1). Ein erfolgreich abgeschlossener Vorgang wird akustisch gemeldet. Im Display wer- Lade- bzw. aktuelle den, wie in der nebenstehende Abbil dung, Entlade- Akkuspannung Akkutyp die wichtigsten Daten dargestellt. strom © robbe Modellsport... -
Página 20: Zusatzinformationen (Data-View-Taste)
Einzelanzeige der ge- und entladenen Kapazität Anzeige der Vorgangszeit Equalizing Anzeige der einzelnen Zellenspannungen bei angeschlossenem Lithium Akku ( Zelle 1-6 ). Gesamtübersicht über die aktuellen einzelnen Zellenspannungen. Anzeige der aktuellen Akkuparameter. Anzeige für aktuellen internen Speicherplatz. Anzeige für aktuellen BID Speicher. © robbe Modellsport... -
Página 21: Fehlermeldungen
BID bitte neu programmieren (gespeicherte Daten werden zurückgesetzt). Angeschlossene Zelle(n) befinden sich in einer Spannungslage über 4,3 Volt. Angeschlossene Zelle(n) befinden sich in einer Spannungslage unter 2,75 V bei LiPo und LiIo oder 2,0 V bei LiFe. Voltage-Sensoranschluß fehlerhaft. © robbe Modellsport... -
Página 22: Allgemeine Sicherheitshinweise
Senden Sie Ihre Geräte an die für das jeweilige Land zu ständige Servicestelle. Zur Bearbeitung Ihrer Gewährleistungsansprüche müssen folgende Voraussetzungen erfüllt werden: • Legen Sie Ihrer Sendung den Kaufbeleg (Kassenzettel) bei. • Die Geräte wurden gemäß der Bedienungsanleitung be t rieben. • Es wurden ausschließlich empfohlene Stromquellen und original robbe-Zubehör verwendet. • Feuchtigkeitsschäden, Fremdeingriffe, Verpolung, Über l as t ungen und mechanische Beschädigun- gen liegen nicht vor. • Fügen Sie sachdienliche Hinweise zur Auffindung des Fehlers oder des Defektes bei. © robbe Modellsport... -
Página 23: Empfohlenes Zubehör
No. 8539 BID-Kabel, 500 mm No. 8475 Equalizer Adapterkabel Equalizer Adapterkabel BID-KEY 2X3S EHR No.8888 1x 3S XH-EHR No.4023 No.4029 Equalizer Adapterkabel Adapterkabel 3 x 2S Adapterkabel 3X 2S EHR 2x3S XH-EHR No.4031 XH-EHR No.4023 XH No.4031 XH © robbe Modellsport... -
Página 24: Konformitätserklärung
Vorschriften der entsprechenden CE Richtlinien trum. Dies gilt für alle Länder der Europäischen befindet. Die Original-Konformitätserklärung fin- Union sowie anderen Europäischen Ländern mit den Sie im Internet unter www.robbe.com, bei separatem Sammelsystem. der jeweiligen Gerätebeschreibung durch Aufruf des Logo-Buttons „Conform“. 16. Service Adressen... - Página 25 Operating instructions POWER PEAK ® TRIPLE 360 W EQ-BID No. 8562 © robbe Modellsport...
- Página 26 Regardless of the legal argument employed, our obligation to pay compensation is limited to the invoice value of those robbe products directly involved in the event in which the damage occurred, unless otherwise prescribed by law. This does not apply if the company is deemed to have unlimited liability according to statutory regulation due to deliberate or gross negligence.
- Página 27 End of a charge / discharge process 10.1 Display of the charge / discharge data 10.2 Additional Information (Data View Button) Error messages General safety notes Guarantee Recommended accessories Conformity Declaration Disposal of used equipment and batteries Service Centre Addresses © robbe Modellsport...
- Página 28 POWER PEAK® TRIPLE 360 W EQ-BID CONTENTS POWER PEAK ® TRIPLE 360 W EQ-BID No. 8562 The Set contains: 1x Power Peak ® Triple 360 W EQ-BID 1 x Pair of plug-in battery connectors 1 x BID-Chip with lead © robbe Modellsport...
-
Página 29: General Description
It is easy to set up the charger incorrectly for a specific type of battery, resul- ting in costly damage to the battery. The revolutionary BID-System from robbe offers a brilliant solution for this problem. Each battery will be fitted with a small, light BID chip/key. This stores all the relevant data to charge and discharge the bat- tery to the optimum. -
Página 30: Controls
• The required operation (CHARGE, DISCHARGE, DISCHARGE->CHARGE or STORE) can be pre-selected with the MODE button. • After connecting to the supply voltage, this button is used to activate "automatic mode" (AUTO.) in the selection menu. ‘INC’ / START / MAN BUTTON • In Manual Mode- during set-up, this button is used to increase the value of the charge parameter by one and select the next menu in the menu selection. © robbe Modellsport... - Página 31 1.8 V per cell for lead batteries Charge Cut-Off: NC/NiMH: automatic, digital Delta-Peak system Lead and lithium: automatic, voltage-dependent, CC-CV method Dimensions: est. 270 x 195 x 50 mm Functions: Charge, discharge, discharge-charge, balance 10 internal memory locations © robbe Modellsport...
-
Página 32: Using The Charger For The First Time
LF for lithium-ferum battery and Pb for lead battery) is shown on the bottom line. The display therefore shows all important Charge / Actual battery parameters at a glance during a charging discharge Battery type voltage or discharging operation. current © robbe Modellsport... -
Página 33: Connecting The Battery
6. AUTOMATIC MODE When the "AUTO" button is pressed from the start display, the charger operates in auto- matic mode, whereupon, all the parameters are set automatically. "AUTOMATIC" is only available for NC / NiMH battery types. © robbe Modellsport... -
Página 34: Menu Structure In Automatic Mode
The process can be terminated by pressing the STOP button; the display for automatic mode is then shown again. When the process is complete, the achieved final values are shown in the display (charge/discharge capacity, process time, battery type, battery voltage and current). © robbe Modellsport... -
Página 35: Manual Mode
‘ENTER’ ‘ENTER’ ‘+’ button button button button ‘ENTER’ ‘+’ ‘ENTER’ button button button ‘+’ ‘ENTER’ ‘+’ ‘ENTER’ button button button button ‘+’ ‘ENTER’ ‘+’ ‘ENTER’ button button button button ‘+’ button ‘ENTER’ ‘ENTER’ ‘+’ button button button © robbe Modellsport... -
Página 36: Setting Up The Parameters
• Battery memory • Battery type • Cell count • Battery capacity (or battery voltage for LiPo, LiIo, LiFe and Pb) • Charge current • Discharge current • Buzzer (OFF, 1-5) Note: Only values in the first line can be changed with the flashing arrow symbol being affected. © robbe Modellsport... - Página 37 Cell count Battery voltage 3,6 Volt 3,7 Volt 3,3 Volt 7,2 Volt 7.4 Volt 6.6 Volt 10,8 Volt 11.1 Volt 9,9 Volt 14,4 Volt 14,8 Volt 13,2 Volt 18,0 Volt 18,5 Volt 16,5 Volt 22,2 Volt 21,6 Volt 19.8 Volt © robbe Modellsport...
- Página 38 (max. 2C for lithium batteries). The processor in the battery charger limits the maximum charging current if the maximum charging capacity is excee- ded. © robbe Modellsport...
-
Página 39: Setting The Discharge Current
• Press the START button to start the charging process, an acoustic signal indicates the status. Then the working display, containing all the important parameters, is then shown (see Section 5.1). With the 'INC' or 'DEC' button , you can change the current during the charging procedure, the new value flashes before being adopted. © robbe Modellsport... -
Página 40: Bid Chip/Key
Start display is shown again. 8.1 MENU STRUCTURE WITH A BID CHIP/ KEy CONNECTED ‘+’ but- ‘ENTER’- ‘+’ ENTER’ Taste ENTER’ button button button ‘+’ but- ‘+’ ENTER’ ENTER’ button button button ‘+’ ENTER’ ‘+’ ENTER’ button button button button ‘+’ but- © robbe Modellsport... - Página 41 To keep track of the data of when a battery was first used, a date can be entered in the form 'YYYY-MM-DD'. The programming of the dates information is initiated by pressing ENTER. In addition to the '+' and '-' signs the year flashes in the top line. It can be updated with the 'INC' or 'DEC' button. After pressing ENTER again the months flashes and can be edited with the 'INC'/DEC-' button. The day is set in the same way. The setting is finally entered to memory by pressing ENTER. © robbe Modellsport...
-
Página 42: Reading The Data Stored On The Bid Chip / Bid Key
CHARGE / DISCHARGE PROCESSES WITH A BID CHIP / KEy BID chip / keys are so small that you can slip them into whatever other accessories you are using. The pictures on the next page show how BID chips are used. © robbe Modellsport... -
Página 43: End Of A Charge / Discharge Process
An audible signal will be heard upon suc- time cessful conclusion of the charging process. As shown in the illustration opposite, the most important data are shown in the display. Charge / Actual battery discharge voltage Battery type current © robbe Modellsport... -
Página 44: Additional Information (Data View Button)
Time display of charge/discharge process Equalizing display of individual cell voltages for connected lithium battery (cell 1-6) General overview of the current individual cell voltages Display of the current battery parameters Display of current internal battery memory Display of current BID memory © robbe Modellsport... -
Página 45: Error Messages
BID (stored information will be reset) Voltage level of connected cell(s) has risen above 4.3 Volt. Voltage level of connected cell(s) has fallen below 2.75 Volt for LiPo and LiIo or 2.0 Volt for LiFe. Voltage-Sensor connection error. © robbe Modellsport... -
Página 46: Guarantee
Send your device to the approved Service Centre in your country. The following requirements must be fulfilled before we can process your guarantee claim: • You must include proof of purchase (till receipt) with the returned product. • You must have operated the product in accordance with the operating instructions. • You must have used only the recommended power sources and genuine robbe accessories. • There must be no damage present caused by moisture, unauthorised intervention, polarity rever- sal, overloading and mechanical stress. • Please include a concise, accurate description of the fault to help us locate the problem. © robbe Modellsport... -
Página 47: Recommended Accessories
No. 8475BID lead, 500 mm Equalizer Adapter lead Equalizer Adapter lead BID-KEY 2X3S EHR No.8888 1x 3S XH-EHR No.4023 No.4029 Equalizer Adaptor Lead Adaptor Lead 3 x 2S Adapter lead 3X 2S EHR 2x3S XH-EHR No.4031 XH-EHR No.4023 XH No.4031 XH © robbe Modellsport... -
Página 48: Conformity Declaration
15. Conformity Declaration This symbol means that you should dis- pose of electrical and electronic equip- robbe Modellsport GmbH & Co. KG hereby ment separately from the household declares that this device conforms to the fun- waste when it reaches the end of its useful life. - Página 49 Notice d'utilisation POWER PEAK ® TRIPLE 360 W EQ-BID Réf. 8562 © robbe Modellsport...
- Página 50 Nous sommes heureux que vous ayez opté pour le chargeur automatique Power Peak® Triple 360 W EQ-BID issu de la gamme robbe. Vous disposez ainsi d'un triple chargeur compact avec gestion et équilibrage des accus pour connection en 12V continu.
- Página 51 Fin de séquence de charge / décharge 10.1 Indication des paramètres de charge / décharge 10.2 Informations complémentaires (touche Data-View) Messages de dérangement Consignes générales de sécurité Garantie Accessoires recommandés Déclaration de conformité Mise au rebut des appareils et accus usagés Adresses SAV © robbe Modellsport...
-
Página 52: Contenu De La Livraison
POWER PEAK ® TRIPLE 360 W EQ-BID 8562 1. CONTENU DE LA LIVRAISON POWER PEAK ® TRIPLE 360 W EQ-BID RéF. 8562 Contenu de la livraison : 1x Power Peak ® Triple 360 W EQ-BID 1x pinces pour batteries 1x BID-Chip avec câble © robbe Modellsport... -
Página 53: Description Générale
"propre" procédure de charge. Une erreur de paramétrage du chargeur peut ainsi survenir facilement et le précieux accu être endommagé. Le système révolutionnaire BID de robbe propose une solu- tion géniale à ce problème. A chaque accu est affecté une petite puce BID. -
Página 54: Eléments De Commande
TOUChE ‘DEC’/ MODE / AUTO Dans le cas d'une procédure manuelle, cette touche va permettre de réduire d'un échelon les paramètres de charge et dans le choix des menus, de revenir au menu précédent. • La touche ‘MODE’ permet la sélection directe avant le démarrage de la fonction souhai- tée (CHARGE, DECHARGE, DECHARGE->CHARGE, STOCKAGE). • Après connexion de l'appareil à la source de courant, activer à l'aide de cette touche le "mode automatique" (AUTOMAT.) dans le menu. © robbe Modellsport... -
Página 55: Caractéristiques Techniques
Coupure en fin de procédure : Cd-Ni / NiMH : automatique, système numérique Delta-Peak. Plomb et Lithium: automatique, dépend de la tension, pprocédure CC-CV Encombrement : 270 x 195 x 50 mm Fonctions: charge, décharge, décharge-charge, équilibrage. 10 emplacements mémoire internes © robbe Modellsport... -
Página 56: Mise En Service Du Chargeur
Lithium-Polymère, 'Li' pour les accus Lithium-ion, 'LF' pour les accus Lithium-Fer et 'Pb' pour les accus au Plomb. Ainsi tous les paramètres importants du déroulement d'une charge ou d'une décharge, sont visualisés. © robbe Modellsport... -
Página 57: Branchement Des Accus
Adaptateur EQ Adaptateur EQ Adaptateur EQ robbe-JSTXH No.8214 robbe-TP/FP No.8215 robbe-PQ No.8213 6. MODE AUTOMATIQUE Si depuis l’affichage de départ on actionne la touche 'AUTO', le chargeur se met en mode automatique et dans ce cas les paramètres sont optimisés automa- tiquement. © robbe Modellsport... -
Página 58: Structure Du Menu En Mode Automatique
A la fin de la séquence lorsque l’accu est chargé / déchargé, les valeurs atteintes s’affichent sur l’écran (capacité chargée ou déchargée, temps écoulé, type d'accu, tension actuelle de l'accu, et intensité de la charge en cours). © robbe Modellsport... -
Página 59: Mode Manuel
Touche ‘+’‘ ‘ENTER’ ‘ENTER’ ‘+’‘ Touche Touche Touche Touche ‘+’‘ ‘ENTER’ ‘+’‘ ‘ENTER’ Touche Touche Touche Touche ‘+’‘ ‘ENTER’ ‘+’‘ ‘ENTER’ Touche Touche Touche Touche ‘+’‘ ‘ENTER’ ‘+’‘ ‘ENTER’ Touche ‘+’‘ Touche Touche Touche ‘ENTER’ ‘ENTER’ ‘+’‘ © robbe Modellsport... -
Página 60: Mise Au Point Des Paramètres
être effectués pour que le chargeur puisse optimiser le déroulement en mode manuel. • Emplacement de sauvegarde • Type d'accu • Nombre d'éléments • Capacité de l'accu (ou bien tension de l’accu pour des LiPo, Lilo, LiFe, et Pb) • Intensité de charge • Intensité de décharge • Buzzer (AUS,1-5) À noter : seules les valeurs de la première ligne peuvent être modifiées pendant que la flèche clignote. © robbe Modellsport... - Página 61 3,6 volts 3,7 volts 3,3 volts 7,2 volts 7,4 volts 6,6 volts 10,8 volts 11,1 volts 9,9 volts 14,4 volts 14,8 volts 13,2 volts 18,0 volts 18,5 volts 16,5 volts 22,2 volts 21,6 volts 19,8 volts © robbe Modellsport...
- Página 62 L'intensité de charge peut être réglée de 0,1A à 10A. L'intensité maximale de charge dépend du nombre d'éléments ou de la tension de l'accu (pour les accus au Lithium max. 2C). Le processeur du chargeur limite l'intensité max. de charge. © robbe Modellsport...
-
Página 63: Sauvegarde Des Réglages
Ensuite l’écran affiche tous les paramètres importants (Voir chap. 5.1) • Pendant la procédure on peut faire varier le courant à l’aide de la touche "INC" ou "DEC" ; la valeur clignote alors, avant d’être prise en compte. © robbe Modellsport... -
Página 64: Puce/Clé Bid
8.1 STRUCTURE DU MENU LORSQU'UNE PUCE/CLé BID EST RACCORDéE Touche ‘+’‘ Touche Touche Touche ‘ENTER’ Touche ‘+’‘ ‘ENTER’ ‘ENTER’ Touche Touche Touche Touche ‘+’‘ ‘ENTER’ ‘+’‘ ‘ENTER’ Touche Touche Touche Touche ‘+’‘ ‘ENTER’ ‘+’‘ ‘ENTER’ Touche ‘+’‘ © robbe Modellsport... -
Página 65: Procédure De Programmation
'ENTER' le chiffre des mois clignote et peut être modidié par la touche 'INC' ou 'DEC'. La date du jour peut ainsi être rentrée. Pour permettre la mémorisa- tion, appuyer encore une fois sur la touche 'ENTER'. © robbe Modellsport... -
Página 66: Déroulement D'une Charge/Décharge Avec Une Puce/Clé Bid
9. DéROULEMENT D'UNE ChARGE/DéChARGE AVEC LA PöUCE/CLé BID Le BID-CHIP/Key a des dimensions si réduites qu'il peut aisément trouver sa place parmi les acces- soires d'un chargeur. Les images sur la page suivan- te montrent l'utilisation d'un BIP-Chip. © robbe Modellsport... -
Página 67: Fin De Procédure De Charge Ou De Décharge
(voir Chapitre 5.1). Une séquence qui s’est déroulée avec succès est annoncée par un signal sonore. Courant de Tension actuel- Sur l’écran, comme sur le graphique les charge ou de le de l‘accu Type d‘accu principaux paramètres sont affichés. décharge © robbe Modellsport... -
Página 68: Informations Complémentaires (Touche Data-View)
Affichage de l’équilibrage pour chaque élément pour une connexion d’un accu au Lithium (Elément 1-6) Aperçu de la tension actuelle de chaque élément. Tensions des éléments Indication des paramètres actuels de l’accu Indication sur l’état actuel de la mémoire interne Indication sur l’état actuel de la mémoire BID © robbe Modellsport... -
Página 69: Messages De Dérangement
à une tension supérieure à 4,3 Volt. Le(s) élément(s) connectés sont à une tension inféri- eure à 2,75 Volt pour des accus LiPo et Lilo ou 2,0 V pour des Life. Branchement du capteur de tension en dérangement © robbe Modellsport... -
Página 70: Règles Générales De Sécurité
Pour le traitement de vos droits à la garantie, les conditions suivantes doivent être remplies : • Joindre la facture (ticket de caisse) à l'envoi Les appareils ont été utilisés conformément aux prescriptions de la notice. • Seul des sources d'alimentation recommandées ont été utilisées , seul des accessoires d'origine robbe ont été utilisés. • Les dégâts dus à l'humidité, à des interventions de personnes non autorisées, d'inversions de la polarité, de surtensions, de surcharges et de détériorations mécaniques ne sont apas pris en compte. -
Página 71: Accessoires Recommandés
Cordon adaptateur éga- BID-KEY liseur Réf. 8888 liseur 2X3S EHR Réf. 4023 1x 3S XH-EHR Réf. 4029 Câble Adaptateur Câble Adaptateur3 x 2S Cordon adaptateur 3x2S Égaliseur 2x3S XH-EHR EHRC Réf. 4031 XH-EHR Réf. 4023 XH Réf. 4031 XH © robbe Modellsport... -
Página 72: Déclaration De Conformité
15. Déclaration de conformité Ce symbole signifie que les petits appareils électriques et électroniques Par la présente, la société robbe Modellsport en fin de vie doivent être mis au rebut Gmbh & Co. KG déclare que cet appareil est séparément des ordures ménagères. - Página 73 Manuale d‘uso POWER PEAK ® TRIPLE 360 W EQ-BID N. 8562 © robbe Modellsport...
-
Página 74: Norme Di Sicurezza
è limitato al valore direttamente fatturato dei prodotti robbe interessati all'evento che ha causato il danno. Ciò non è valido nel caso in cui, in base a norme giuridiche vincolanti, si debba rispondere di dolo o grave negligenza. - Página 75 Procedure di carica/scarica con BID-Chip/KEY Fine procedura di carica/scarica 10.1 Visualizzazione dei dati di carica/scarica 10.2 Informazioni aggiuntive (Tasto Data-View) Segnalazione errori Norme generali di sicurezza Garanzia Accessori consigliati Certificato di conformità Smaltimento degli apparecchi usati Indirizzi Service © robbe Modellsport...
-
Página 76: Contenuto Della Confezione
POWER PEAK ® TRIPLE 360 W EQ-BID 8562 CONTENUTO DELLA CONFEzIONE POWER PEAK ® TRIPLE 360 W EQ-BID No. 8562 La confezione contiene: 1x Power Peak ® Triple 360 W EQ-BID 1x morsetti per batteria innestabili 1x BID-Chip con cavo © robbe Modellsport... -
Página 77: Descrizione Generale
BID-Chip/Key, questi possono essere facilmente visualizzati sul display del caricabatterie. Grazie a questa funzione, non è più necessario l'utilizzo del computer e dei relativi software per avere sotto occhio tutti i dati riguardanti lostato della batteria. © robbe Modellsport... -
Página 78: Comandi
• Questo tasto permette di diminuire di una grandezza (in modalità manuale) i valori dei parametri di ricarica e, all'interno della selezione dei menù, permette di selezionare il menù precedente. • Con il tasto MODE è possibile selezionare direttamente prima dell'avvio la procedura desiderata (RICARICA, SCARICA, SCARICA->RICARICA oppure STORE). • Consente di attivare la "modalità automatica" (AUTOMAT.) all'interno del menù di sele- zione non appena l'apparecchio viene collegato alla fonte di alimentazione. © robbe Modellsport... -
Página 79: Dati Tecnici
NC / NiMH: sistema digitale di spegnimento automatico Delta-Peak. Batterie al piombo e al litio: spegnimento automatico, in funzione della tensione, con procedura CC-CV Dimensioni: di legge 270 x 195 x 50 mm Funzioni: Ricarica, scarica, scarica-ricarica, bilanciamento, 10 memorie interne © robbe Modellsport... -
Página 80: Accensione E Utilizzo Del Caricabatterie
Litio-Ferro, e "Pb" per batteria Tipo di ne accumula- scarica accumu- al piombo). In tal modo vengono visualizzati tore latore tutti i parametri importanti durante un pro- cesso di carica o scarica. © robbe Modellsport... -
Página 81: Collegamento Degli Accumulatori
Adattatore EQ Adattatore EQ Adattatore EQ robbe-JSTXH N.8214 robbe-TP/FP N.8215 robbe-PQ N. 8213 6. MODALITà AUTOMATICA Azionando il tasto AUTO dal menù d'avvio, il cari- cabatterie viene impostato per lavorare in modalità automatica, di conseguenza i parametri vengono ottimizzati automaticamente. -
Página 82: Struttura Del Menù In Modalità Automatica
Alla fine di ogni procedura, quando l'accumulatore è completamente carico o scarico, sul display sarà possibile visualizzare i parametri raggiunti (capacità caricata o scaricata, tempo del processo, tipo di accumulato- re, attuale tensione dell'accumulatore e attuale corrente). © robbe Modellsport... -
Página 83: Modalità Manuale
Tasto ‘+’ = Tasto ‘+’ ‘ENTER’ ‘ENTER’ Tasto = Tasto Tasto ‘+’ = Tasto ‘+’ ‘ENTER’ ‘ENTER’ Tasto = Tasto Tasto ‘+’ = Tasto ‘+’ ‘ENTER’ ‘ENTER’ Tasto ‘+’ = Tasto = Tasto Tasto ‘+’ ‘ENTER’ ‘ENTER’ © robbe Modellsport... -
Página 84: Impostazione Dei Parametri
• Spazio di memoria • Tipo di accumulatore • Numero di celle • Capacità dell'accumulatore (e tensione dell'accumulatore LiPo, LiIo, LiFe e Pb) • Corrente di carica • Corrente di scarica • Fischio (SPENTO, 1-5) Attenzione: solo i valori della prima riga, segnalati dalla freccia, possono essere modificati. © robbe Modellsport... - Página 85 3,6 Volt 3,7 Volt 3,3 Volt 7,4 Volt 7,2 Volt 6,6 Volt 11,1 Volt 10,8 Volt 9,9 Volt 14,8 Volt 14,4 Volt 13,2 Volt 18,0 Volt 18,5 Volt 16,5 Volt 21,6 Volt 22,2 Volt 19,8 Volt © robbe Modellsport...
- Página 86 0,1 A a 10 A. Il valore massimo della corrente di carica dipende però dalla tensione dell'accumulatore e dal tipo di accumulatore (per i litio è max. 2C). Il processore dell'apparecchio di carica limita la corrente massima di carica. © robbe Modellsport...
-
Página 87: Impostazione Del Segnale Acustico
Dopodiché viene visualizzato il display di lavoro, in cui appaiono tutti i parametri importanti (Vedi Cap. 5.1). •Con i tati "INC" e "DEC" si può cambiare l'intensità di corrente con procedura in corso, il nuovo valore lampeggia prima di essere registrato. © robbe Modellsport... -
Página 88: Bid-Chip/Key
8.1 STRUTTURA MENù CON BID CHIP/ KEY COLLEGATA Tasto ‘+’ Tasto Tasto ‘+’ Tasto ‘ENTER’ Tasto ‘ENTER’ ‘ENTER’ Tasto Tasto Tasto Tasto ‘+’ ‘+’ ‘ENTER’ ‘ENTER’ Tasto Tasto Tasto ‘+’ Tasto ‘+’ ‘ENTER’ ‘ENTER’ Tasto ‘+’ © robbe Modellsport... -
Página 89: Procedura Di Programmazione
"INC" e "DEC". Premendo un'altra volta il tasto "ENTER" inizierà a lampeggiare il numero del mese, anch'esso potrà essere modificato utilizzando i tasti "INC" e "DEC". Seguire la stessa procedura per modificare il giorno. Per la memorizzazione premere nuovamente il tasto "ENTER". © robbe Modellsport... -
Página 90: Visione Dei Dati Della Bid-Chip/ Bid-Key
9. PROCEDURE DI CARICA/SCARICA CON BID-CHIP/KEY Le dimensioni così ridotte di una BID-Chip/Key ne consentono l'utilizzo con qualsiasi accessorio. Le immagini della pagina successiva mostrano l'uso di un BID-Chip. © robbe Modellsport... -
Página 91: Fine Procedura Di Carica/Scarica
(vedi Cap. 5.1). Un segnale acustico informa quando una procedura si è conclusa correttamente. Come mostra l'immagine accanto sul dis- corrente tensione istan- play vengono visualizzati tutti i dati più di ricarica/ tipo di batteria tanea scarica importanti. © robbe Modellsport... -
Página 92: Informazioni Aggiuntive (Tasto Data-View)
Visualizzazione delle tensioni di ciascuna cella dell'accumulatore Litio collegato (celle 1-6 ). Visualizzazione generale delle tensioni attuali su ogni singola cella. Zellenspannungen. Mostra i parametri attuali della batteria. Mostra la memoria interna attuale. Mostra la memoria BID attuale. © robbe Modellsport... -
Página 93: Notifiche D'errore
I dati sul BID Chip/Key non possono essere elaborati dal Power Peak Triple 360 W EQ-BID, ad esempio il numero di celle programmato o la capacità sono troppo alti o il tipo di accumulatore N/A non è suppor- tato (USER). Programmare nuovamente il BID (i dati salvati vengono resettati). -
Página 94: Norme Generali Di Sicurezza
Spedire l'apparecchio difettoso al centro di assistenza responsabile per il rispettivo Paese. Per poter far valere i diritti a garanzia devono essere soddisfatti i seguenti requisiti: • Allegare alla spedizione lo scontrino fiscale. • Gli apparecchi sono stati utilizzati seguendo le istruzioni per l'uso. • Si sono utilizzate esclusivamente le fonti di energia elettrica raccomandate e gli accessori robbe originali. • I guasti non sono dovuti ad umidità, manomissioni da parte di terzi, inversione di polarità, sovracca- richi e danni meccanici. • Allegare indicazioni dettagliate relative al difetto o al malfunzionamento riscontrato. © robbe Modellsport... -
Página 95: Accessori Raccomandati
Cavetto Adattatore Cavetto Adattatore Chiave BID Equalizer N.8888 Equalizer 2X3S EHR N.4023 1x 3S XH-EHR N.4029 Cavo Adattatore Equalizer Cavo Adattatore 3 x 2S Cavo Adattatore 3 x 2S 2x3S XH-EHR EHR N.4031 XH-EHR N.4023 XH N.4031 XH © robbe Modellsport... -
Página 96: Certificato Di Conformità
15. Dichiarazione di conformità Questo simbolo indica che al termine del loro utilizzo gli apparecchi elettronici Con la presente robbe Modellsport GmbH & Co. di dimensioni limitate devono essere KG dichiara che questo apparecchio è conforme smaltiti separatamente. ai requisiti base e ad altre disposizioni rilevanti Smaltire l'apparecchio presso gli appositi punti della relativa direttiva CE. - Página 97 Manual de uso POWER PEAK ® TRIPLE 360 W EQ-BID No. 8562 © robbe Modellsport...
- Página 98 Siempre que la ley lo permita se restringe la obligación a indemnización, independiente- mente del motivo legal que la motive, al valor de la factura del producto de robbe implicado directamente en el suceso causante del daño. Esta norma no se aplicará cuando en virtud de precepto legal imperativo se deba responder ilimitadamente por dolo o por negligencia grave.
- Página 99 Fin de un proceso de carga / descarga 10.1 Indicación de los datos de carga / descarga 10.2 Información adicional (tecla Data-View) Avisos de errores Indicaciones Generales de Seguridad Garantía Accesorios recomendados Declaración de conformidad Eliminación de aparatos viejos Domicilios del servicio técnico © robbe Modellsport...
- Página 100 POWER PEAK ® TRIPLE 360 W EQ-BID CONTENIDO POWER PEAK ® TRIPLE 360 W EQ-BID NO. 8562 El contenido es el siguiente: 1x Power Peak ® Triple 360 W EQ-BID 1x pinzas de batería enchufables 1 x BID CHIP con cable © robbe Modellsport...
-
Página 101: Descripción General
“propio” proceso de carga.Es fácil equivocarse al ajustar el cargador, lo que daña la batería de forma irreversible. El revolucionario sistema BID de robbe ofrece una solución ideal para este problema. A cada batería se le asigna un pequeño y ligero BID-Chip que guarda todos los datos relevantes para una correcta carga y descarga de la batería. -
Página 102: Elementos De Mando
• Con la tecla ‘MODE’, se puede seleccionar directamente antes del inicio el proceso deseado (CARGAR, DESCARGAR, DESC->CARGAR o STORE). • Después de conectar con la tensión de alimentación, se activa con esta tecla el “modo automático” (AUTOMAT.)en el menú de selección. © robbe Modellsport... -
Página 103: Características Técnicas
1,8V por elemento con baterías de plomo Desconexión: NiCad / NiMH: automático, sistema digital Delta-Peak plomo y litio: automático, depende de la tensión, procedimiento CC-CV Abmessungen: ges. 270 x 195 x 50 mm Funciones: Cargar, descargar, descargar-cargar, balancear 10 memorias internas © robbe Modellsport... -
Página 104: Puesta En Funcionamiento Del Cargador
‘LF‘ para baterías de litio y hierro y ‘Pb’ Tipo de de la batería descarga batería para baterías de plomo). De esta forma, se indican durante un proceso de carga o descarga todos los parámetros importantes en un vistazo. © robbe Modellsport... -
Página 105: Conexión De La Batería
Adaptador EQ Adaptador EQ Adaptador EQ robbe-JSTXH No.8214 robbe-TP/FP Ref. 8215 robbe-PQ No.8213 MODO AUTOMÁTICO Al accionar la tecla ‘AUTO’ desde el display de inicio, el cargador trabaja en el modo automático. Esto quiere decir, que todos los parámetros están optimizados de forma automática. -
Página 106: Estructura Del Menú Del Modo Automático
Al finalizar el proceso, cuando la batería está completamente cargada o descargada, se indican en el display los valores alcanzados (capacidad cargada o descargada, tiempo del proceso, tipo de batería, tensión actual de la batería y corriente actual). © robbe Modellsport... -
Página 107: Modo Manual
Tecla ‘+’ ENTER’ ENTER’ ‘+’ Tecla Tecla Tecla Tecla ‘+’ ENTER’ ‘+’ ENTER’ Tecla Tecla Tecla Tecla ‘+’ ENTER’ ‘+’ ENTER’ Tecla Tecla Tecla Tecla ‘+’ ENTER’ ‘+’ ENTER’ Tecla ‘+’ Tecla Tecla Tecla ENTER’ ENTER’ ‘+’ © robbe Modellsport... -
Página 108: Configuración De Los Parámetros
óptima en el modo manual: • Espacio de memoria • Tipo de batería • cantidad de elementos • Cantidad de la batería (y tensión de la batería con LiPo, LiIo, LiFe y Pb) • Corriente de carga • Corriente de descarga • Zumbador (PARO,1-5) Nota: Cuando parpadea el símbolo de la flecha, solamente se pueden cambiar los valores en la primera línea. © robbe Modellsport... -
Página 109: Explicación Store Mode
3,6 voltios 3,7 voltios 3,3 voltios 7,2 voltios 7,4 voltios 6,6 voltios 10,8 voltios 11,1 voltios 9,9 voltios 14,4 voltios 14,8 voltios 13,2 voltios 18,5 voltios 18,0 voltios 16,5 voltios 22,2 voltios 21,6 voltios 19,8 voltios © robbe Modellsport... -
Página 110: Entrada De La Capacidad De La Batería
0,1 A hasta 10 A. Pero, la fuerza máxima de la corriente de carga depende de la cantidad de elementos o de la tensión de la batería (en el caso de baterías de litio max. 2 C). El procesador del cargador limita la corriente de carga máxima. © robbe Modellsport... -
Página 111: Ajuste De La Corriente De Descarga
Una señal acústica muestra el estado. A continuación, se indica el display de trabajo, que indica todos los parámetros importantes (ver cap. 5.1). • Con la tecla ‘INC’ o ‘DEC’, se puede modi- ficar la corriente durante el proceso. El nuevo valor parpadea primero antes de la aceptación. © robbe Modellsport... -
Página 112: Bid-Chip/Key
ESTRUCTURA DEL MENú CON UN BID CHIP/ KEy CONECTADO Tecla ‘+’ ‘ENTER’- Taste Tecla Tecla Tecla ‘+’ ‘ENTER’ ‘ENTER’ Tecla Tecla Tecla Tecla ‘+’ ‘+’ ‘ENTER’ ‘ENTER’ Tecla Tecla Tecla Tecla ‘+’ ‘ENTER’ ‘+’ ‘ENTER’ Tecla ‘+’ © robbe Modellsport... -
Página 113: Proceso De Programación (Ejemplo, Programación De La Fecha)
Para determinar el primer uso de la batería, es posible introducir una fecha en el formato ‘AAAA-MM-DD’. Pulsando la tecla "ENTER" se inicia la introducción de la fecha. Además de los signos ‘+’ y ‘-’ del lado derecho, en la línea superior parpadea la cifra del año que puede actualizar- se mediante las teclas ‘INC’ o ‘DEC’. Si se vuelva a pulsar la tecla ‘ENTER’, parpadeará la cifra corres- pondiente al mes, que podrá modificarse igualmen- te mediante las teclas ‘INC / DEC’. Ajustar la fecha del día mediante el mismo procedimiento. Volver a pulsar la tecla ‘ENTER’ para guardar la fecha. © robbe Modellsport... -
Página 114: Leer Los Datos Del Bid-Chip/ Bid-Key
PROCESOS DE CARGA O DESCARGA CON BID-CHIP/KEy EL BID-Chip/Key es tan pequeño, que puede insta- larse cómodamente en cada accesorio de un carga- dor. Las fotos en la página siguiente, representan el uso de un BID-Chip. © robbe Modellsport... -
Página 115: Final De Un Proceso De Carga / Descarga
Cuando un proceso finaliza con éxito, se indica de forma acústica. El display indica los datos mas importantes, como la foto de Corriente Tensión actual al lado. Tipo de de carga / de la batería batería descarga © robbe Modellsport... -
Página 116: Información Adicional (Tecla Data-View)
( elemento 1-6 ). Vista general sobre las tensiones individuales de los diferentes elementos. Indicación de los parámetros actuales de la batería. Indicación para el espacio actual e interno de la memoria. Indicación para la memoria actual BID. © robbe Modellsport... -
Página 117: Avisos De Errores
El (los) elemento(s) conectados tienen una tensión superior a 4,3 voltios. El (los) elemento(s) conectados, tienen una tensión por debajo de 2,75V con LiPo y LiIo o 2,0V con LiFe. Conexión del sensor de voltaje errónea © robbe Modellsport... -
Página 118: Consejos Generales De Seguridad
Enviar los aparatos al servicio de atención al cliente de su país. Envíe sus aparatos al centro de servicio técnico competente para su país. Para la tramitación de sus solicitudes de garantía deben cumplirse los siguientes requisitos: • Adjunte a su envío el comprobante de compra (ticket de caja). • Los aparatos tienen que haber sido utilizados conforme a las instrucciones de uso. • Sólo ha aplicado las fuentes de corriente recomendadas y los accesorios originales de robbe. • No hay daños por humedad, ni intervenciones ajenas, ni sobretensiones, ni sobrecargas, ni daños mecánicos.. • Incluya la información conveniente para la localización del fallo o del defecto. © robbe Modellsport... -
Página 119: Accesorios Recomendados
Cable adaptador del KEY BID ecualizador Ref. 8888 ecualizador 2X3S EHR Ref. 4023 1x 3S XH-EHR Ref. 4029 Cable Adapt. Equalizer Cable Adapt. 3 x 2S Cable Adaptador 3x2S 2x3S XH-EHR XH-EHR No.4023 XH No.4031 XH Ref. 4031 © robbe Modellsport... -
Página 120: Declaración De Conformidad
Copyright robbe-Modellsport 2011 Queda prohibida la reproducción total o parcial de este documento sin el consentimiento por escrito de robbe Modellsport GmbH & Co. KG. robbe Modellsport GmbH & Co.KG Metzloser Straße 38 D-36355 Grebenhain Metzlos/Gehaag Teléfono +49 (0) 6644 / 87-0 www.robbe.com... - Página 121 Návod k obsluze POWER PEAK ® TRIPLE 360 W EQ-BID Čís. 8562 © robbe Modellsport...
-
Página 122: Návod K Obsluze
Pokud to zákon připouští, omezuje se závazek firmy robbe Modellsport k plnění náhrady škody, bez ohledu na právní důvody, na hodnotu faktury za množství zboží firmy robbe Modellsport, které se bezprostředně podílelo na poškozující události. Toto neplatí, pokud firma robbe Modellsport podle závazných zákonných předpisů... - Página 123 Čtení das z BID čipu/klíče Nabíjení/vybíjení s BID čipem/klíčem Ukončení nabíjení/vybíjení 10.1 Zobrazení dat nabíjení/vybíjení 10.2 Doplňkové informace (tlačítko Data-View Chybová hlášení Všeobecné bezpečnostní pokyny Záruční podmínky Doporučené příslušenství Prohlášení o shodě Likvidace použitých aku a nabíječe Servisní adresy © robbe Modellsport...
-
Página 124: Obsah Setu
POWER PEAK ® TRIPLE 360 W EQ-BID 8562 1. OBSAh SETU POWER PEAK ® TRIPLE 360 W EQ-BID Č. 8562 Set obsahuje: 1x Power Peak ® Triple 360 W EQ-BID 1x nástrčné akusvorky 1x BID-čip s kabelem © robbe Modellsport... -
Página 125: Všeobecný Popis
„vlastní“ nabíjecí proces. Tak se může lehce stát, že na nabíječi prove- dete chybné nastavení a akumulátor tím poškodíte. Revoluční systém BID firmy robbe poskytuje geniální řešení těchto problémů. Každému aku se přiřadí malý a lehký BID-čip/klíč. Ten ukládá do paměti všechna relevantní... -
Página 126: Ovládací Prvky
• Tlačítkem ‘MODE’ lze přímo před spuštěním zvolit požadovaný proces (CHARGE- nabíjení, DISCHARGE-vybíjení nebo DISC->CHAR o STORE). • Po propojení se zdrojem napětí tímto tlačítkem v menu volby aktivujete "automatický mód" (AUTOMAT). © robbe Modellsport... - Página 127 1,8V/čl. u olověných aku Odpojení: NiCd / NiMH: automaticky, digitální systém Delta-Peak Olověné a lithiové aku: automaticky, v závislosti na napětí, postup CC-CV Rozměry : celk. 270 x 195 x 50 mm Funkce: nabíjení, vybíjení, vybíjení-nabíjení, balancování 10 interních pamětí © robbe Modellsport...
-
Página 128: Uvedení Nabíječe Do Provozu
‘LP’ pro lithium- polymerové aku, ‘Li‘ pro lithium-ionové aku, ‘LF‘ pro Lithium Ferrum aku a ‘Pb’ pro olověné aku). Tak jsou vždy na okamžik aktuální napětí nabíjecí/vybíjecí typ aku akumulátorů zobrazovány během procesu nabíjení proud nebo vybíjení veškeré důležité parametry. © robbe Modellsport... -
Página 129: Připojení Aku
Tento příklad slouží pouze ke znázornění a má zobrazovat připojení servisního kabelu k balanceru. EQ-adaptér EQ-adaptér EQ-adaptér robbe-JSTXH č.8214 robbe-TP/FP č.8215 robbe-PQ č.8213 AUTOMATICKý MóD Pokud ze startovacího displeje stisknete klávesu ‘AUTO’’, pracuje nabíječ v automatickém módu, přičemž všechny parametry jsou automaticky opti- malizovány. © robbe Modellsport... -
Página 130: Struktura Menu Automatického Módu
(viz. kap 5.1). K označení automatického módu se vymění údaj o proudu s nápisem ‘auto’. Tlačítkem ‘STOP’ lze ukončit proces, poté se znovu zobrazí displej automatického módu. Po ukončení procesu, když je akumulátor plně nabitý nebo vybitý, se na displeji zobrazí dosažené hodnoty (nabité nebo vybité kapacity, trvání procesu, typ aku, aktuální napětí aku a aktuální proud). © robbe Modellsport... -
Página 131: Manuální Mód
‘+’- tlačítko tlačítko tlačítko tlačítko ‘+’- ‘ENTER’- ‘+’- ‘ENTER’- tlačítko tlačítko tlačítko tlačítko ‘+’- ‘ENTER’- ‘+’- ‘ENTER’- tlačítko tlačítko tlačítko tlačítko ‘+’- ‘ENTER’- ‘+’- ‘ENTER’- tlačítko tlačítko tlačítko tlačítko ‘+’- Taste ‘ENTER’- ‘ENTER’- ‘+’- tlačítko tlačítko tlačítko © robbe Modellsport... -
Página 132: Nastavení Parametrů
• paměťová pozice • typ akumulátoru • Počet článků • Kapacita aku (popř. napětí aku u LiPo, LiIo, LiFe a Pb) • nabíjecí proud • vybíjecí proud • Bzučák (AUS=vypnuto,1-5) Upozornění: Změnit lze jen hodnoty v prvním řádku, když vedle nápisu bliká šipka. © robbe Modellsport... - Página 133 3,7 V 3,6 V 3,3 V 7,4 V 7,2 V 6,6 V 10,8 V 11,1 V 9,9 V 14,4 V 14,8 V 13,2 V 18,0 V 18,5 V 16,5 V 21,6 V 22,2 V 19,8 V © robbe Modellsport...
- Página 134 NASTAVENí NABíjECíhO PROUDU Nabíjecí proud lze nastavovat v rozsahu od 0,1 A až 10 A. Max. hodnota nabíjecího proudu přitom závisí na počtu článků nebo na napětí aku (u lithiových aku max. 2C). Procesor nabíječe omezuje max. nabíjecí proud. © robbe Modellsport...
-
Página 135: Spuštění Procesu Nabíjení/Vybíjení
• Pro jistotu jsou uložené parametry ještě jednou zobrazeny. • Stisknutím klávesy ‘START’spustíte pro- ces nabíjení, tento stav je signalizováni i akusticky. Poté se zobrazí pracovní displej, na kterém jsou zobrazeny všechny- důležité parametry (viz. kap. 5.1). • Klávesou ‘+’- nebo ‘-’ lze během procesu mě- nit proud, nová hodnota před převzetím nejprve bliká. © robbe Modellsport... -
Página 136: Bid-Čip/Klíč
BID čip 8.1 STRUKTURA MENU S PřIPOjENýM BID ČIPEM/KLíČEM ‘+’- tlač. ‘ENTER’- ‘+’- ‘ENTER’- tlačítko ‘ENTER’- tlačítko tlačítko tlačítko ‘+’- ‘+’- ‘ENTER’- ‘ENTER’- tlač. tlačítko tlačítko tlačítko ‘+’- ‘ENTER’- ‘+’- ‘ENTER’- tlač. tlačítko tlačítko tlačítko ‘+’- tlač. © robbe Modellsport... -
Página 137: Postup Programování
Stisknutím klávesy ‘ENTER’ se zahájí zadávání data. Kromě znaků ‘+’ a ‘-’ vpravo v horním řádku bliká i letopočet. Ten lze aktualizovat klávesou ‘INC’ nebo ‘DEC’. Dalším stisknutím klávesy ‘ENTER’ začne blikat údaj o měsíci, který lze změnit klávesami ‘INC / DEC’. Stejným způsobem lze nastavit i aktuální den. Pro uložení do paměti se ještě jednou musí stisknout tlačítko ‘ENTER’. © robbe Modellsport... -
Página 138: Čtení Das Z Bid Čipu/Klíče
Dalším dvojitým stiskem tlačítka ‘INC’ vyvoláte pos- lední údaje, které zobrazují počet nabíjecích cyklů a naprogramované datum. 9. NABíjENí/VyBíjENí S BID ČIPEM/KLíČEM BID čip/klíč má tak malé rozměry, že jej lze umístit v každém příslušenství. Obrázky na další straně znázorňují použití BID čipu. © robbe Modellsport... -
Página 139: Ukončení Nabíjení/Vybíjení
/ (Finish) bliká pracovním displeji nepřetržitě zobrazují kapacita vybíjení hodnoty procesu (viz. kap 5.1). Úspěšně ukončený proces je akusticky signalizován. Na displeji jsou zobrazena nejdůležitější data, viz. obrázek. nabíjecí/ aktuální napětí vybíjecí typ aku proud © robbe Modellsport... -
Página 140: Doplňkové Informace
Zobrazení doby nabíjení Zobrazení balancování napětí jednotlivých článků - pokud jsou připojeny litiové články (1-6). Celkový přehled o aktuálních napětích jednotli- vých článků Zobrazení aktuálních parametrů akumulátorů. Zobrazení aktuální interní paměťové pozice. Zobrazení pro aktuální BID paměť. © robbe Modellsport... -
Página 141: Chybová Hlášení
BID (uložená data se vynulují). Připojené články se nachází na úrovni napětí nad 4,3 V. Připojené články se nachází v úrovni napětí pod 2,75 V u Li-Poly a Lilo nebo 2,0 V u LiFe akumulátorů. Chybné zapojení servisního kabelu. © robbe Modellsport... -
Página 142: Všeobecné Bezpečnostní Pokyny
Náklady spojené s odesláním do servisu hradí zákazník, zaslání zpět od nás je zdarma. Nevyplacené zásilky nemůžeme přijmout. Za škody vzniklé při dopravě nebo ztrátu nemůže firma Robbe převzít zodpovědnost. Doporučujeme uzavřít patřičné pojištění. Nabíječe zasílejte vždy příslušnému servisu ve Vaší zemi. -
Página 143: Doporučené Příslušenství
č. 8473 Čís. 8539 BID-kabel, 500 mm č. 8475 Adaptér-kabel balanceru Adaptér-kabel balanceru BID-klíč 2x3S EHR č.8888 1x 3S XH-EHR č.4023 č.4029 Adaptérkabel balanceru Adaptér-kabel 3X2S Adaptér-kabel 3X 2S EHR 2X3S XH-EHR) č.4031 XH-EHR č.4023 XH č.4031 XH © robbe Modellsport... -
Página 144: Prohlášení O Shodě
15. Prohlášení o shodě Uvedený symbol upozorňuje na skutečnost, že musí být výrobek na Tímto firma robbe Modellsport prohlašuje, že je konci své životnosti zlikvidován v místě tento přístroj v souladu se základními nařízeními k tomu určenému a ne v běžném domácím a ostatními relevantními předpisy dle CE směrnic.