Publicidad
Idiomas disponibles
Idiomas disponibles
Enlaces rápidos
MG3750
© 2019 Koninklijke Philips N.V.
All rights reserved
4222.002.9244.1 (21/5/2019)
2
3
4
5
6
7
2
1
2
8
9
10
2
1
11
12
13
14
15
16
17
18
19
20
21
22
23
1
10
11
1
9
2
12
8
3
13
7
14
15
4
5
16
6
English
Introduction
Congratulations on your purchase and welcome to
Philips! To fully benefit from the support that
Philips offers, register your product at
www.philips.com/welcome.
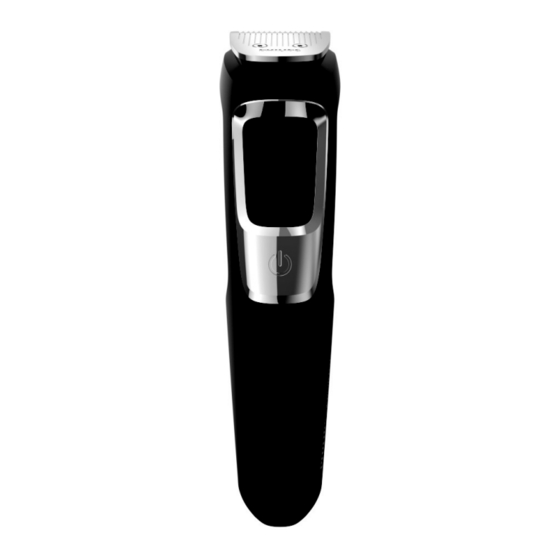
General description (Fig. 1)
1
Rotary nose and ear trimmer
2 Detail trimmer
3 Full-size trimmer
4 On/off button
5 Handle
6 Socket for small plug
7 Beard comb (7 mm, 9/32 in)
8 Beard comb (5 mm, 3/16 in)
9 Beard comb (3 mm, 1/8 in)
10 Beard and stubble comb (1 mm, 3/64 in)
11 Hair comb (9 mm, 3/8 in)
12 Hair comb (12 mm, 15/32 in)
13 Hair comb (16 mm, 21/32 in)
14 Pouch
15 Supply unit
16 Small plug
Not shown: Cleaning brush
Important safety information
Read this important information carefully before
you use the appliance and its accessories and save
it for future reference. The accessories supplied
may vary for different products.
Danger
- Keep the supply unit dry (Fig. 2).
Warning
- To charge the battery, only use the detachable
supply unit (HQ840) provided with the
appliance.
- The supply unit contains a transformer. Do not
cut off the supply unit to replace it with another
plug, as this causes a hazardous situation.
1
- This appliance can be used by children aged
from 8 years and above and persons with
reduced physical, sensory or mental capabilities
or lack of experience and knowledge if they
have been given supervision or instruction
concerning use of the appliance in a safe way
and understand the hazards involved. Children
shall not play with the appliance. Cleaning and
user maintenance shall not be made by
children without supervision.
- Always check the appliance before you use it.
Do not use the appliance if it is damaged, as
this may cause injury. Always replace a
damaged part with one of the original type.
- This appliance contains batteries that are non-
replaceable.
- Do not open the appliance to replace the
rechargeable battery.
Caution
- This appliance is not washable. Never immerse
the appliance in water and do not rinse it under
the tap (Fig. 2).
- Only use this appliance for its intended purpose
as shown in the user manual.
- For hygienic reasons, the appliance should only
be used by one person.
- Never use compressed air, scouring pads,
abrasive cleaning agents or aggressive liquids
such as petrol or acetone to clean the
appliance.
- Do not use the supply unit in or near wall
sockets that contain an electric air freshener to
prevent irreparable damage to the supply unit.
Electromagnetic fields (EMF)
This Philips appliance complies with all applicable
standards and regulations regarding exposure to
electromagnetic fields.
General
- The supply unit is suitable for mains voltages
ranging from 100 to 240 volts.
- The supply unit transforms 100-240 volts to a
safe low voltage of less than 24 volts.
Charging
It takes approximately 8 hours to fully charge the
appliance. When the appliance is fully charged, it
has an operating time of up to 60 minutes.
1
Switch off the appliance.
2 Put the small plug in the appliance and put the
supply unit in the wall socket (Fig. 3).
3 After charging, remove the supply unit from the
wall socket and pull the small plug out of the
appliance (Fig. 4).
Using the appliance
Detaching and attaching cutting elements
1
To detach a cutting element, push upwards
against the teeth of the cutting element and
take it off the handle (Fig. 5).
2 To attach a cutting element, insert the lug of the
cutting element into the guiding slot at the front
and push the back of the cutting element onto
the product ('click') (Fig. 6).
Detaching and attaching combs
1
To detach any type of comb from the cutting
element, pull its back part off the appliance and
then slide it off the cutting element (Fig. 7).
2 To attach any type of comb onto a cutting
element, slide the front part of the comb onto
the teeth and push the projection at the back of
the comb into the appliance ('click') (Fig. 8).
Switching the appliance on and off
1
Press the on/off button once to switch the
appliance on or off (Fig. 9).
Precision attachments for use on
face
Nose and ear trimmer
You can use the nose and ear trimmer to trim your
nose hair and ear hair.
- Make sure your nasal passages are clean. Make
sure your outer ear channels are clean and free
from wax.
- Do not insert the tip more than 0.5 cm, 3/16 in
and make controlled movements.
- Always clean the attachment after each use.
Trimming nose hair
1
Gently move the tip in and out of nose while
turning it around to remove unwanted hairs
(Fig. 10).
Trimming ear hair
1
Slowly move the tip round the ear to remove
hairs that stick out beyond the rim of the ear.
2 Gently move the tip in and out of the outer ear
channel to remove unwanted hairs (Fig. 11).
Detail trimmer
You can use the detail trimmer without a comb to
create fine lines and contours around your facial
style, close to the skin (to a length of 0.5 mm,
1/32 in).
1
Hold the detail trimming head perpendicular to
the skin and move the trimming head upwards
or downwards with gentle pressure (Fig. 12).
Attachments for use on beard
Full-size trimmer
You can use the full-size metal trimmer without a
comb to trim hair close to the skin or to create
clean lines around your beard, neck and sideburns
close to the skin (to a length of 0.5 mm, 1/32 in).
1
To trim hair close to the skin, place the flat side
of the cutting element against your skin and
make strokes against the direction of hair
growth (Fig. 13).
2 For contouring, hold the cutting element
perpendicular to the skin and move it upwards
or downwards with gentle pressure (Fig. 14).
Beard combs
You can use the beard combs attached to the full-
size trimmer to evenly trim your beard and
moustache. The appliance comes with 3 different
beard combs. The indication on each comb
corresponds to the hair length in millimeters.
Note: You can also use the hair combs to trim your
beard (see 'Hair combs').
3 mm
1/8 inch
5 mm
3/16 inch
7 mm
9/32 inch
1
Attach a beard comb onto the appliance.
2 Switch on the appliance.
3 To trim most effectively, move the appliance
against the hair growth direction (Fig. 15). Make
sure that the surface of the comb always stays
in contact with the skin.
Stubble comb
You can use the stubble comb attached to the full
size trimmer to trim your stubble to a length of
1.5 mm (1/16 inch) (Fig. 16).
Attachments for use on head
Full-size trimmer
You can use the full-size metal trimmer without a
comb to clip hair very close to the skin (to a length
of 0.5mm/1/32in) or to create contours around
your ears or neck.
1
Move the appliance slowly and smoothly.
2 Follow the natural hairline (Fig. 17).
3 To contour the neckline and sideburns, turn the
appliance and make downward strokes (Fig. 18).
4 Only cut the hair ends. The hairline should be
close to the ear.
Hair combs
You can use a hair comb attached to the full-size
trimmer for an even haircut.The appliance comes
with 3 different hair combs. The indication on each
comb corresponds to the hair length in millimeters.
Note: You can also use the beard combs to clip
your hair (see 'Beard combs').
9 mm
3/8 inch
12 mm
15/32 inch
16 mm
21/32 inch
1
Attach a hair comb onto the appliance.
2 Switch on the appliance.
3 Slowly move the appliance against the hair
growth direction (Fig. 19). Press lightly and make
sure that the surface of the comb always stays
in contact with the scalp to obtain an even
result.
Cleaning and storage
Note: Only the attachments can be rinsed under
the tap.
Caution: Never use compressed air, scouring pads,
abrasive cleaning agents or aggressive liquids
such as petrol or acetone to clean the appliance.
1
Switch off the appliance and disconnect it from
the wall socket.
2 Wipe the handle of the appliance with a dry
cloth.
3 Remove any comb or attachment from the
appliance.
4 Brush and/or blow out any hair that has
accumulated in the hair chamber (Fig. 20).
5 Brush and/or blow out any hair that has
accumulated in the attachments and/or combs
(Fig. 21).
6 Clean the attachments (Fig. 22) and the combs
(Fig. 23) under a lukewarm tap after every use.
Note: Only the attachments and combs can be
rinsed under the tap
7 Carefully shake off excess water and let all parts
dry completely.
Note: Never dry the trimmer teeth with a towel
or tissue, as this may damage the trimmer teeth.
8 You can store the attachments in the pouch
supplied to keep them clean.
Recycling
- Do not throw away the product with the normal
household waste at the end of its life, but hand
it in at an official collection point for recycling.
By doing this, you help to preserve the
environment.
- This product contains a built-in rechargeable
battery which shall not be disposed of with
normal household waste. Please take your
product to an official collection point or a
Philips service center to have a professional
remove the rechargeable battery.
- Follow your country's rules for the separate
collection of electrical and electronic products
and rechargeable batteries. Correct disposal
helps prevent negative consequences for the
environment and human health.
Removing the rechargeable battery
Only remove the rechargeable battery when
you discard the product. Before you remove
the battery, make sure that the product is
disconnected from the wall socket and that
the battery is completely empty.
Take any necessary safety precautions when
you handle tools to open the product and
when you dispose of the rechargeable battery.
1
Check if there are screws in the back or front of
the appliance. If so, remove them.
2 Remove the back and/or front panel of the
appliance with a screwdriver. If necessary, also
remove additional screws and/or parts until you
see the printed circuit board with the
rechargeable battery.
3 Remove the rechargeable battery.
Warranty and support
If you need information or support, please visit
www.philips.com/support or read the
international warranty leaflet.
Warranty restrictions
Cutting units are not covered by the terms of the
international warranty because they are subject to
wear.
Español
Introducción
Enhorabuena por la adquisición de este producto,
y bienvenido a Philips. Para sacar el mayor partido
a la asistencia que Philips le ofrece, registre el
producto en www.philips.com/welcome.
Descripción general (Fig. 1)
1
Cortador rotativo de vello de nariz y oreja
2 Cortadora para detalles
3 Cortadora tamaño normal
4 Botón de encendido/apagado
5 Mango
6 Toma para clavija pequeña
7 Peine para barba (7 mm, 9/32 pulg.)
8 Peine para barba (5 mm, 3/16 pulg.)
9 Peine para barba (3 mm, 1/8 pulg.)
10 Peine de barba y de barba de pocos días (1 mm,
3/64 pulg.)
11 Peine para cabello (9 mm, 3/8 pulg.)
12 Peine para cabello (12 mm, 15/32 pulg.)
13 Peine para cabello (16 mm, 21/32 pulg.)
14 Funda
15 Unidad de suministro
16 Conector pequeño
No se muestra: Cepillo de limpieza
Información de seguridad importante
Antes de usar el dispositivo y sus accesorios, lea
atentamente esta información importante y
consérvela por si necesitara consultarla en el
futuro. Los accesorios provistos pueden variar
según el producto.
Peligro
- Mantenga la unidad de suministro seca (Fig. 2).
Publicidad

Manuales relacionados para Philips MG3750


Resumen de contenidos para Philips MG3750
- Página 1 Enhorabuena por la adquisición de este producto, 3 To trim most effectively, move the appliance - This appliance contains batteries that are non- y bienvenido a Philips. Para sacar el mayor partido against the hair growth direction (Fig. 15). Make replaceable.
- Página 2 - La unidad de suministro contiene un suave (Fig. 12). un centro de servicio Philips para remover la transformador. No corte la unidad de suministro batería de manera profesional. para sustituirla por otra clavija, ya que podría Accesorios para la barba - Siga las reglas de su país para separar lo...