
Manuales relacionados para AEG L 75480 WD


Resumen de contenidos para AEG L 75480 WD
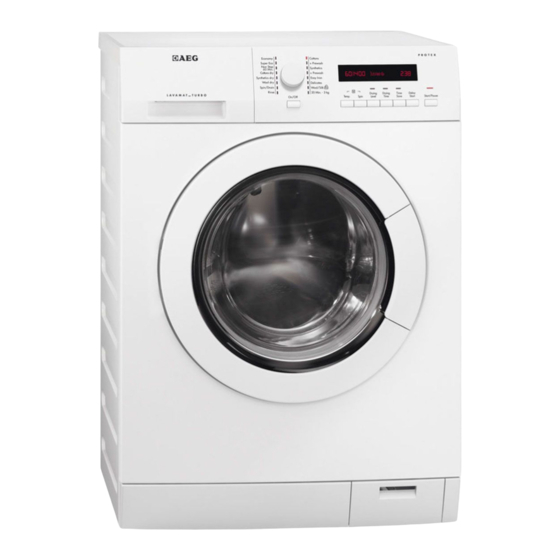
- Página 1 User Manual L 75480 WD Washer Dryer Manual de instrucciones Lavadora-secadora...
-
Página 2: Tabla De Contenido
16. TECHNICAL DATA....................32 FOR PERFECT RESULTS Thank you for choosing this AEG product. We have created it to give you impeccable performance for many years, with innovative technologies that help make life simpler features you might not find on ordinary appliances. Please spend a few minutes reading to get the very best from it. -
Página 3: Safety Information
ENGLISH SAFETY INFORMATION Before the installation and use of the appliance, carefully read the supplied instructions. The manufacturer is not responsible if an incorrect installation and use causes injuries and damages. Always keep the instructions with the appliance for future reference. - Página 4 Connect the mains plug to the mains socket only at • the end of the installation. Make sure that there is access to the mains plug after the installation.
-
Página 5: Safety Instructions
ENGLISH or pillows fitted with foam rubber pads should not be dried in the wash dryer. Fabric softeners, or similar products, should be used • as specified by the fabric softener instructions. Remove all objects from pockets such as lighters and •... -
Página 6: Water Connection
• Always use a correctly installed • Do not put flammable products or shockproof socket. items that are wet with flammable • Do not use multi-plug adapters and products in, near or on the appliance. extension cables. • Do not touch the glass of the door •... -
Página 7: Product Description
ENGLISH 3. PRODUCT DESCRIPTION 3.1 Appliance overview Worktop Detergent dispenser Control panel Door handle Rating plate Drain pump filter Feet for the appliance level 3.2 How to activate the child To close the door, turn the device anticlockwise until the groove is vertical. safety device 3.3 Fixing plate kit This device prevents children or pets to... -
Página 8: Control Panel
4. CONTROL PANEL 4.1 Control panel description On/Off button Tiempo de Secado button Programme knob Nivel de Secado button Display Centrifuga button Inicio/Pausa button Temp. button Inicio Diferido button Ahorra Tiempo button 4.2 Display Temperature area: Temperature indicator Cold water indicator. - Página 9 ENGLISH Spin area: Spin speed indicator No Spin indicator Rinse Hold indicator 1) Only available for Spin/Drain programme. Dryness level symbols Iron dry Cupboard dry Extra dry Display indicators Door locked - You cannot open the door when this symbol is on. You can open the door only when the symbol goes off.
-
Página 10: Programmes
Time area: Programme duration (washing and/or drying phase) When the programme starts, the time decreases with steps of 1 mi- nute. Delay start When you press the delay start button, the display shows the delay start time. Alarm codes If the appliance has a malfunction, the display shows alarm codes. - Página 11 ENGLISH Programme Maximum load Programme description Temperature Maximum spin (Type of load and soil level) range speed Synthetic items to be gentle washed. Normal and 4 kg 800 rpm light soil. Plancha Fácil 60°C - Cold 4 kg Delicate fabrics as acrylics, viscose, polyester items.
- Página 12 Programme Maximum load Programme description Temperature Maximum spin (Type of load and soil level) range speed White cotton and colour-fast cotton. Normal soil. 8 kg 1400 rpm The energy consumption decreases and the time of Algodón Eco the washing programme is extended.
-
Página 13: Programmes For Automatic Drying
ENGLISH Programme Inicio Extra Ahorra Centri- Diferi- fuga Rinse Tiempo Algodón Eco ■ ■ ■ ■ ■ 1) If the Permanent Extra Rinse option is activated, the appliance adds some additional rinses. In the Rinse programme, if you set a low spin speed the appliance performs delicate rinses and a short spin. 2) If you set a shorter duration, we recommend that you decrease the quantity of the load. -
Página 14: Woolmark Apparel Care - Blue
Dryness Level Type of fabric Load Spin Suggested (kg) speed duration (rpm) (mins) Cupboard Dry Cottons and Linen 1400 215 - 235 For items to put away (bathrobes, bath towels, etc) 1400 125 - 145 1400 85 - 95... -
Página 15: Options
ENGLISH At programme start the display shows the duration programme for the maximum load capacity. During the washing phase the programme duration is automatically cal- culated and can be greatly reduced if the laundry load is lower than the maximum load capacity (e.g. Cotton 60°C, maximum load capacity 8 kg, the programme duration exceeds 2 hours;... -
Página 16: Settings
7.3 Nivel de Secado You cannot set all time values for different types of Press this button to set one of 3 fabrics. automatic dryness levels proposed by the appliance. The display shows the 7.5 Ahorra Tiempo symbol of the set level: With this option you can decrease the Iron dry –... -
Página 17: Before First Use
ENGLISH 9. BEFORE FIRST USE 1. Put 2 litre of water in the detergent This removes all possible dirt from the compartment for washing phase. drum and the tub. This activates the drain system. 2. Put a small quantity of detergent in the compartment for washing phase. -
Página 18: Activating The Appliance
With the flap in the position DOWN: • Do not use gelatinous or thick liquid detergents. • Do not put more liquid detergent than the limit showed in the flap. • Do not set the prewash phase. • Do not set the delay start function. - Página 19 ENGLISH 10.6 Starting a programme 1. Press button Inicio/Pausa to set the appliance to pause. without the delay start The related indicator flashes. 2. Press button Inicio Diferido Press button Inicio/Pausa to start the programme. repeatedly until the display shows . The relevant indicator stops to flash and 3.
-
Página 20: End Of Cycle
The programme or the delay start The door lock indicator is on. The continues. door stays locked. 10.13 End of cycle You must drain the water to open the door: When the programme has finished, the 1. If necessary, decrease the spin appliance stops automatically. -
Página 21: Drying At Automatic Levels
ENGLISH 11.2 Drying at automatic levels The appliance calculates also the duration of the anti-crease and The laundry can be dried at pre-defined the cooling phases. levels of dryness: 2. Press Inicio/Pausa to start the programme. 1. Press Nivel de Secado again and •... -
Página 22: End Of The Programme
12.3 Washing & Timed Drying 2. Load the laundry one item at a time. To have a good drying To have a good drying the appliance performance do not exceed does not let you set a too low spin speed the maximum drying loads for the items to be washed and dried. -
Página 23: How To Remove The Fluff In The Garments
ENGLISH • To do not wash dark fabrics after you 1. Empty the drum. washed and dried light coloured 2. Clean the drum, the gasket and the fabrics (new sponge, wool, sweatshirt ) door with a wet cloth. and the contrary. 3. - Página 24 • Quilts. level of soil. • Bed covers. • If your appliance has not the • Duvets. detergent dispenser with the flap • Anoraks. device, add the liquid detergents with • Sleeping bags a dosing ball (supplied by the •...
-
Página 25: Care And Cleaning
ENGLISH To avoid the static charge at the end of When the drying programme is the drying cycle: completed remove the laundry in a short time. 1. Use fabric conditioner in the washing cycle. 2. Use special fabric conditioner for tumble dryers. -
Página 26: Cleaning The Inlet Hose And The Valve Filter
14.6 Cleaning the inlet hose and the valve filter 45° 20° 14.7 Cleaning the drain filter WARNING! Do not clean the drain filter if the water in the appliance is hot. - Página 27 ENGLISH...
-
Página 28: Emergency Drain
14.8 Emergency drain 0° C, remove the remaining water from the inlet hose and the drain pump. Because of a malfunction, the appliance 1. Disconnect the mains plug from the cannot drain the water. mains socket. If this occurs, do steps (1) through (9) of 2. -
Página 29: Possible Failures
ENGLISH • - No communication between WARNING! electronic elements of the appliance. Deactivate the appliance Switch off and switch on again. before you do the checks. • - The anti-flood device is on. Disconnect the appliance and close the water tap. Contact the Authorised Service Centre. - Página 30 Problem Possible solution Set the drain programme if you set an option which ends with water in the tub. The spin phase does not Set the spin programme. operate or the washing cycle lasts longer than usually. Make sure that the drain filter is not clogged. Clean the filter, if necessary.
-
Página 31: Emergency Door Opening
ENGLISH Problem Possible solution Decrease the laundry load. You cannot set an op- Make sure that you press only the wanted button(s). tion. The appliance does not Turn the water tap on. dry or does not dry cor- rectly. Make sure the drain filter is not clogged. Reduce the laundry load. -
Página 32: Technical Data
5. Take out the laundry and then close the appliance door. 6. Close the filter flap. 16. TECHNICAL DATA Dimension Width/ Height/ Depth/ 600 mm/ 850 mm/ 605 mm/ 639 mm Total depth Electrical connection Voltage 230 V Overall power... -
Página 33: Atención Y Servicio Al Cliente
16. DATOS TÉCNICOS....................64 PARA OBTENER RESULTADOS PERFECTOS Gracias por escoger este producto AEG. Este artículo ha sido creado para ofrecer un rendimiento impecable durante muchos años, con innovadoras tecnologías que facilitarán su vida y prestaciones que probablemente no encuentre en electrodomésticos corrientes. -
Página 34: Información Sobre Seguridad
INFORMACIÓN SOBRE SEGURIDAD Antes de instalar y utilizar el aparato, lea atentamente las instrucciones facilitadas. El fabricante no se hace responsable de los daños y lesiones causados por una instalación y uso incorrectos. Guarde siempre las instrucciones junto con el aparato para futuras consultas. - Página 35 ESPAÑOL El aparato se puede instalar de forma independiente • o debajo de una encimera con el espacio adecuado. El aparato no se debe instalar detrás de puertas que • puedan bloquearse, de puertas correderas o de puertas con bisagras por el lado contrario al del aparato, donde su puerta no se pueda abrir completamente.
-
Página 36: Instrucciones De Seguridad
No use el aparato si se han utilizado productos • químicos industriales para la limpieza. No utilice la lavadora-secadora para secar prendas no • lavadas. Las prendas como gomaespuma (espuma de látex), •... -
Página 37: Conexión Eléctrica
ESPAÑOL • No instale ni utilice el aparato si la se hayan usado durante mucho temperatura es inferior a 0 °C o si está tiempo, deje correr el agua hasta que expuesto a la intemperie. esté limpia. • Asegúrese de instalar el aparato en •... -
Página 38: Descripción Del Producto
2.5 Desecho • Retire el pestillo de la puerta para evitar que los niños y las mascotas • Desconecte el aparato de la red. queden encerrados en el aparato. • Corte el cable de conexión a la red y deséchelo. -
Página 39: Panel De Mandos
ESPAÑOL 4. PANEL DE MANDOS 4.1 Descripción del panel de control On/Off tecla Tiempo de Secado tecla Selector de programas Nivel de Secado tecla Pantalla Centrifuga tecla Inicio/Pausa tecla Temp. tecla Inicio Diferido tecla Ahorra Tiempo tecla 4.2 Pantalla Área de temperatura: Indicador de temperatura Indicador de agua fría. - Página 40 Área de centrifugado: Indicador de velocidad de centrifugado. Sin indicador de centrifugado Indicador de agua en la cuba. 1) Solo disponible en el programa de centrifugado/descarga Símbolos de nivel de secado Seco plancha Seco Armario Extra seco Indicadores de pantalla Puerta bloqueada: no se puede abrir la puerta cuando el símbolo...
-
Página 41: Programas
ESPAÑOL Área de la hora: Duración del programa (fase de secado y/o lavado) Cuando se inicia el programa, el tiempo se reduce a intervalos de 1 minuto. Inicio diferido Cuando se pulsa la tecla de inicio diferido, la pantalla muestra la hora del mismo. - Página 42 Programa Carga máxima Descripción del programa Margen de tem- Velocidad máx- (Tipo de carga y nivel de suciedad) peratura ima de centri- fugado Prendas sintéticas para lavado suave. Suciedad 4 kg 800 rpm normal y ligera. Plancha Fácil 60°C - Frío Prendas de tejidos delicados, como acrílicos, vis-...
- Página 43 ESPAÑOL Programa Carga máxima Descripción del programa Margen de tem- Velocidad máx- (Tipo de carga y nivel de suciedad) peratura ima de centri- fugado Algodón blanco y de colores resistentes. Sucie- 8 kg 1400 rpm dad normal. El consumo energético se reduce y se Algodón Eco amplía la duración del programa de lavado.
-
Página 44: Programas De Secado Automático
Programa Aclara- Inicio Ahorra Centri- do ex- Diferi- fuga Tiempo Algodón Eco ■ ■ ■ ■ ■ 1) Si se activa la opción de aclarado extra permanente, el aparato añade algunos aclarados adicionales. En el programa de Aclarado, si se ajusta una velocidad de centrifugado baja, el aparato realiza aclarados delicados y un breve centrifugado. -
Página 45: Woolmark Apparel Care - Azul
ESPAÑOL 5.3 Programas de secado por tiempo Nivel de secado Tipo de tejido Carga Veloci- Duración (kg) dad de sugerida centrifu- (min) gado (rpm) Extra Seco Algodón y lino 1400 225 - 245 Para materiales de fel- (albornoces, toallas de baño, 1400 135 - 155 etc.) -
Página 46: Valores De Consumo
6. VALORES DE CONSUMO Los datos de esta tabla son aproximados. Los datos pueden cambiar por varios motivos: la cantidad y tipo de colada, el agua y la tempera- tura ambiente. Al inicio del programa, la pantalla muestra la duración para la capacidad de carga máxima. -
Página 47: Nivel De Secado
ESPAÑOL • Ajuste esta opción para evitar arrugas que secar. La pantalla muestra el valor en los tejidos. ajustado. • El programa de lavado se detiene con Cada vez que se pulsa la tecla, se el agua en el tambor. El tambor gira aumenta el valor de tiempo en 5 regularmente para evitar arrugas en minutos. -
Página 48: Aclarado Extra Permanente
8.3 Aclarado extra tiempo hasta que se ilumine/apague permanente el indicador Puede activar esta opción: Con esta opción puede tener de forma • Antes de pulsar Inicio/Pausa: se permanente un aclarado extra cuando bloquean las opciones y el selector ajuste un nuevo programa. -
Página 49: Compruebe La Posición De La Tapa
ESPAÑOL Cumpla siempre las instrucciones que se encuentran en el envase de los productos de detergente. 10.3 Compruebe la posición de la tapa 1. Tire del dosificador de detergente hasta el tope. 2. Presione la palanca hacia abajo para Con la tapa abatible en extraer el dosificador. -
Página 50: Inicio De Un Programa Sin Inicio Diferido
10.8 Inicio de un programa • La pantalla muestra: la temperatura por defecto, la con el inicio diferido velocidad de centrifugado, los indicadores de las fases del 1. Pulse la tecla Inicio Diferido programa y su duración. repetidamente hasta que la pantalla 2. -
Página 51: Cancelación De Un Programa En Curso
ESPAÑOL 10.11 Cancelación de un energía apaga automáticamente el aparato. programa en curso Cuando se vuelve a 1. Pulse la tecla On/Off para cancelar el encender el aparato, la programa y apagar el aparato. pantalla muestra el final del 2. Pulse el botón On/Off de nuevo para último programa encender el aparato. -
Página 52: Uso Diario - Solo Secado
• Transcurridos 5 minutos desde el final Gire el selector de programas para del programa de lavado ajustar un nuevo ciclo. Pulse la tecla On/Off para encender el aparato de nuevo. La pantalla muestra el final del último programa seleccionado. -
Página 53: Final Del Programa De Secado
ESPAÑOL • La pantalla va mostrando • Se enciende en la pantalla. periódicamente un nuevo valor • El indicador Inicio/Pausa se apaga. de tiempo. • En los últimos minutos del ciclo de • El indicador de secado secado, el aparato realiza una fase de comienza a parpadear. -
Página 54: Lavado Y Secado Temporizados
Para obtener un buen 12.4 Fin del programa secado, el aparato no permite ajustar una baja El aparato se para automáticamente. velocidad de centrifugado Suenan las señales acústicas, si están con las prendas que van a activadas. lavarse y secarse. -
Página 55: Consejos
ESPAÑOL 13. CONSEJOS Existen quitamanchas especiales. Utilice ADVERTENCIA! el quitamanchas especial adecuado al Consulte los capítulos sobre tipo de mancha y tejido. seguridad. 13.3 Detergentes y aditivos 13.1 Introducir colada • Utilice solo detergentes y aditivos • Divida la colada en: ropa blanca, ropa especialmente fabricados para de color, ropa sintética, prendas lavadoras:... - Página 56 13.5 Dureza del agua • = La prenda puede secarse en secadora Si la dureza del agua de su zona es alta o • = El ciclo de secado es de alta moderada, se recomienda usar un temperatura descalcificador de agua para lavadoras.
-
Página 57: Mantenimiento Y Limpieza
ESPAÑOL 14. MANTENIMIENTO Y LIMPIEZA 14.3 Lavado de mantenimiento ADVERTENCIA! Consulte los capítulos sobre Con los programas a baja temperatura, seguridad. es posible que quede algo de detergente en el tambor. Realice 14.1 Limpieza del exterior periódicamente un lavado de mantenimiento. -
Página 58: Limpieza Del Tubo De Entrada Y El Filtro De La Válvula
14.6 Limpieza del tubo de entrada y el filtro de la válvula 45° 20° 14.7 Limpieza del filtro de desagüe ADVERTENCIA! No limpie el filtro si el agua del aparato está caliente. - Página 59 ESPAÑOL...
-
Página 60: Desagüe De Emergencia
14.8 Desagüe de emergencia inferior a 0°, retire el agua restante del tubo de entrada y la bomba de desagüe. Debido a una avería, el aparato no 1. Desenchufe el aparato de la toma de puede desaguar. red. Si esto ocurre, realice los pasos 1) a 9) 2. -
Página 61: Posibles Fallos
ESPAÑOL • - La puerta del aparato está • - El dispositivo anti inundación abierta o no está bien cerrada. Revise se ha puesto en marcha. Desconecte la puerta. el aparato y cierre el grifo. Póngase en contacto con el servicio técnico •... - Página 62 Problema Posible solución Compruebe que el filtro de desagüe no está obstruido. Limpie el filtro si fuera necesario. Consulte el capítulo "Mantenimien- to y limpieza". Compruebe que la manguera de desagüe está conectada cor- rectamente. Ajuste el programa de descarga si selecciona un programa sin la fase de descarga.
-
Página 63: Apertura De Emergencia
ESPAÑOL Problema Posible solución El ciclo es más corto que El aparato calcula una nueva duración en función de la carga el tiempo mostrado. de colada. Consulte el capítulo "Valores de consumo". El ciclo es más largo que Una carga no equilibrada aumenta la duración. Es un compor- el tiempo mostrado. -
Página 64: Datos Técnicos
2. Desenchufe el aparato de la toma de PRECAUCIÓN! red. Asegúrese de que el 3. Abra la tapa abatible del filtro. tambor no esté girando. 4. Mantenga el desbloqueo de Espere hasta que el emergencia hacia abajo y, al mismo tambor deje de girar, si tiempo, abra la puerta del aparato. - Página 65 ESPAÑOL ambiente y la salud pública, así como a residuos domésticos. Lleve el producto a reciclar residuos de aparatos eléctricos y su centro de reciclaje local o póngase en electrónicos. No deseche los aparatos contacto con su oficina municipal. marcados con el símbolo junto con los...
- Página 66 www.aeg.com...
- Página 67 ESPAÑOL...
- Página 68 www.aeg.com/shop...