Registrarse
Cargar
Manuales
Marcas
Ingeteam Manuales
Inversores
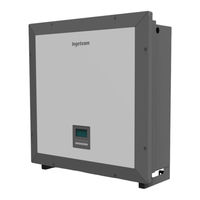
INGECON SUN 40TL U M480
Ingeteam INGECON SUN 40TL U M480 Manuales
Manuales y guías de usuario para Ingeteam INGECON SUN 40TL U M480. Tenemos
1
Ingeteam INGECON SUN 40TL U M480 manual disponible para descarga gratuita en PDF: Manual De Instalacion Y Uso
Ingeteam INGECON SUN 40TL U M480 Manual De Instalacion Y Uso (108 páginas)
Marca:
Ingeteam
| Categoría:
Inversores
| Tamaño: 6.03 MB
Tabla de contenido
English
8
Important Safety Instructions
5
Safety Conditions
5
Personal Protective Equipment (PPE)
6
Symbols on the Inverters
6
Tabla de Contenido
8
Contents
8
1 About this Manual
10
Scope and Nomenclature
10
Recipients
10
Symbols
10
2 Unit Description
11
Overview
11
Optional Accessories
11
Electrical Safety
11
Contamination Class
12
Acoustic Contamination
12
Electrical Diagram of the System
12
Grid Configurations
12
Specifications Tables
13
Configuration Parameters
14
Description of Cable Inlets
15
3 Receipt of the Unit and Storage
16
Reception
16
Equipment Identification
16
Transport Damage
16
Storage
16
Conservation
16
4 Transporting the Equipment
17
Transport
17
Unpacking
17
5 Preparation for Installing the Unit
20
Environment
20
Environmental Conditions
21
Supporting Surface and Fastening
21
Protection of the Connection to the Electricity Grid
22
Type of Grid
22
Cable Length
22
Photovoltaic Panels
22
6 Installing the Unit
23
General Requirements for Installation
23
Attaching the Unit to the Wall
23
Opening and Closing the Housing
26
7 Connection of Accessories
27
Safety Instructions for Connecting Accessories
27
Communication Via RS-485
28
Ethernet or Ethernet TCP Communication
29
Communication Via GSM/GPRS
30
Communication Via Bluetooth or Bluetooth + RS-485
31
Communication Via Wi-Fi
32
Connection of Accessories for Communicating with the Wattmeter in the Instantaneous Self-Consumption
33
Connecting the Potential-Free Auxiliary Relay
33
8 AC Connection
34
Safety Instructions for the AC Connection
34
Wiring Requirements for the AC Connection
34
AC Connection Process
34
600 DC Connection
36
Safety Instructions for the DC Connection
36
Wiring Requirements for the DC Connection
36
DC Connection Process
36
10 Display Control
38
Keypad and Leds
38
Display
39
Menu Structure
40
Main Menu
41
The Unit´s First Configuration
41
Configure the Power Limit
41
Configuring the Country/ Regulation
41
Configuring the Modbus ID
41
Configuring the Auxiliary Relay
42
Configuring the Cosine of Phi
42
Configure the Inverter to Work in Self-Consumption Mode
42
Configure the Inverter to Work in a Grid with Diesel Generator
42
Place the Inverter in Operating Mode
42
Place the Inverter in Stop Mode
42
See the Daily Power Graph
43
See the Energy Graph for the Last 24 Days
43
Monitor the Inverter´s Variables
43
List of Alarms, Notifications and Reasons for Shutdown
45
See Inverter Data
45
Reset to Default Settings
46
Perform a Ventilation Test
46
Change Display Language
46
Change Date and Time
46
Perform a Partial Delete of Accumulated Data
46
Block Inverter Screen
46
11 First Connection to the Grid
47
Unit Inspection
47
Inspection
47
Hermetic Sealing of the Unit
47
Process for the First Connection to the Grid
47
12 Firmware Update
49
13 Shutting down the Unit
50
Process of Shutting down the Unit
50
14 Maintenance
51
Safety Conditions
51
Condition of the Housing
51
Condition of Cables and Terminals
51
Cooling System
51
15 Troubleshooting
52
Alarms. LED Messages
52
16 Waste Handling
54
Español
58
Condiciones Importantes de Seguridad
55
Condiciones de Seguridad
55
Equipo de Protección Individual (EPI)
56
Simbología en Los Inversores
57
Contenidos
58
1 Información sobre Este Manual
60
Campo de Aplicación y Nomenclatura
60
Destinatarios
60
Simbología
60
2 Descripción del Equipo
61
Visión General
61
Accesorios Opcionales
61
Seguridad Eléctrica
61
Grado de Contaminación
62
Contaminación Acústica
62
Esquema Eléctrico del Sistema
62
Configuraciones de Red
62
Tablas de Características
63
Parámetros de Configuración
64
Descripción de Accesos de Cableado
65
3 Recepción del Equipo y Almacenamiento
66
Recepción
66
Identificación del Equipo
66
Daños en el Transporte
66
Almacenamiento
66
Conservación
66
4 Transporte del Equipo
67
Transporte
67
Desembalaje
67
5 Preparación para la Instalación del Equipo
70
Entorno
70
Condiciones Medioambientales
71
Superficie de Apoyo y Anclaje
71
Protección de la Conexión a la Red Eléctrica
72
Tipo de Red
72
Longitud del Cableado
72
Paneles Fotovoltaicos
72
6 Instalación del Equipo
73
Requerimientos Generales de Instalación
73
Fijación del Equipo en Pared
73
Apertura y Cierre de la Envolvente
76
7 Conexión de Accesorios
77
Indicaciones de Seguridad para la Conexión de Accesorios
77
Comunicación Vía RS-485
78
Comunicación Vía Ethernet O Ethernet TCP
79
Comunicación Vía GSM / GPRS
80
Comunicación Vía Bluetooth O Bluetooth + RS-485
81
Comunicación Vía Wi-Fi
82
Conexión del Accesorio para la Comunicación con Vatímetro en Autoconsumo Instantáneo
83
Conexión del Relé Auxiliar Libre de Potencial
83
8 Conexión de AC
84
Indicaciones de Seguridad para la Conexión de AC
84
Requisitos del Cableado para la Conexión de AC
84
Proceso de Conexión de AC
84
9 Conexión de DC
86
Indicaciones de Seguridad para la Conexión de DC
86
Requisitos del Cableado para la Conexión de DC
86
Proceso de Conexión de DC
86
10 Manejo del Display
88
Teclado y LED
88
Display
89
Organización de Menús
90
Menú Principal
91
Realizar la Primera Configuración del Equipo
91
Configurar la Limitación de Potencia
91
Configurar el País / Normativa
91
Configurar el Número de Modbus
91
Configurar el Relé Auxiliar
92
Configurar el Coseno de Phi
92
Configurar el Inversor para Trabajar en Modo Autoconsumo
92
Configurar el Inversor para Trabajar en una Red con Generación DIésel
92
Poner el Inversor en Estado de Funcionamiento
92
Poner el Inversor en Estado de Paro
92
Consultar la Gráfica de Potencia Diaria
93
Consultar la Gráfica de Energías de Los Últimos 24 Días
93
Monitorizar las Variables del Inversor
93
Visualizar Alarmas, Avisos y Motivos de Paro
95
Consultar Datos del Inversor
95
Realizar un Reset a Estado de Fábrica
96
Realizar un Test de Ventilación
96
Cambiar el Idioma del Display
96
Cambiar la Fecha y Hora
96
Realizar un Borrado Parcial de Datos Acumulados
96
Bloquear la Pantalla del Inversor
96
11 Primera Conexión a Red
97
Revisión del Equipo
97
Inspección
97
Cierre Hermético del Equipo
97
Proceso para la Primera Conexión a Red
97
12 Actualización de Firmware
99
13 Desconexión del Equipo
100
Proceso de Desconexión del Equipo
100
14 Mantenimiento
101
Condiciones de Seguridad
101
Estado de la Envolvente
101
Estado de Los Cables y Terminales
101
Sistema de Refrigeración
101
15 Solución de Problemas
102
Alarmas. Indicaciones de Los LED
102
Descripción
102
16 Tratamiento de Residuos
104
Publicidad
Publicidad
Productos relacionados
Ingeteam INGECON SUN 4.6 TL
Ingeteam INGECON SUN 40TL M480
Ingeteam INGECON SUN 470 TL
Ingeteam INGECON SUN 3.68 TL
Ingeteam INGECON SUN 5 TL
Ingeteam INGECON SUN 375 TL
Ingeteam INGECON SUN 625 TL
Ingeteam INGECON SUN 1Play 2.7HF
Ingeteam INGECON SUN 1Play 3.3HF
Ingeteam INGECON SUN 1Play 5HF
Ingeteam Categorias
Inversores
Cargadores de Batería
Controladores
Cargadores de Batería para Coches
Unidades de Control
Más Ingeteam manuales
Login
Entrar
O
Iniciar sesión con Facebook
Iniciar sesión con Google
Cargar el manual
Cargar desde el disco
Cargar desde la URL