Tabla de contenido
Publicidad
Idiomas disponibles
Idiomas disponibles
Enlaces rápidos
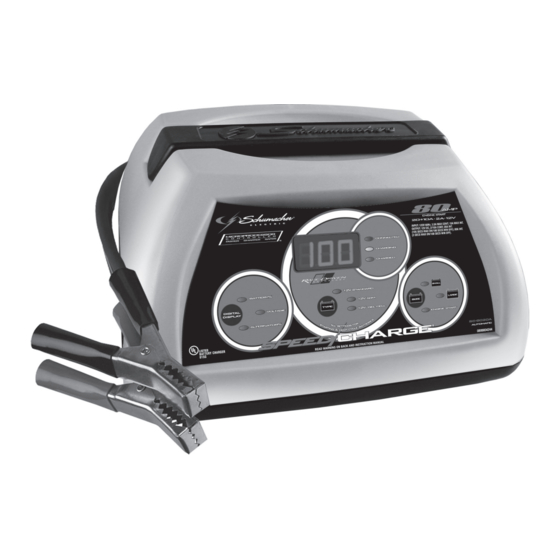
Model / Modelo: SC-8020A
Automatic Battery Charger / Cargador de batería automático
Amperage / Amperaje: 2, 10◄►20
•
•
•
READ THE ENTIRE MANUAL BEFORE USING THIS PRODUCT.
FAILURE TO DO SO CAN RESULT IN SERIOUS INJURY OR DEATH.
•
LEA EL MANUAL COMPLETO ANTES DE UTILIZAR ESTE PRODUCTO.
CUALQUIER FALLA PODRÍA RESULTAR EN SERIAS LESIONES O PODRÍA
SER MORTAL.
Voltage / Tensión: 12
OWNER'S MANUAL
MANUAL dEL USUARiO
00-99-000826/0909
Publicidad
Tabla de contenido
Solución de problemas

Manuales relacionados para Schumacher Electric SC-8020A


Resumen de contenidos para Schumacher Electric SC-8020A
- Página 1 Model / Modelo: SC-8020A Automatic Battery Charger / Cargador de batería automático Voltage / Tensión: 12 Amperage / Amperaje: 2, 10◄►20 • OWNER’S MANUAL • MANUAL dEL USUARiO • READ THE ENTIRE MANUAL BEFORE USING THIS PRODUCT. FAILURE TO DO SO CAN RESULT IN SERIOUS INJURY OR DEATH.
-
Página 3: Tabla De Contenido
TABLE OF CONTENTS SECTION PAGE IMPORTANT SAFETY INSTRUCTIONS PERSONAL PRECAUTIONS PREPARING TO CHARGE CHARGER LOCATION DC CONNECTION PRECAUTIONS FOLLOW THESE STEPS WHEN BATTERY IS INSTALLED IN VEHICLE. FOLLOW THESE STEPS WHEN BATTERY IS OUTSIDE VEHICLE. BATTERY CHARGING – AC CONNECTIONS ASSEMBLY INSTRUCTIONS CHARGER CONTROLS OPERATING INSTRUCTIONS... - Página 4 ÍNDICE SECCIÓN PÀGINA INSTRUCCIONES IMPORTANTES DE SEGURIDAD PRECAUCIONES PERSONALES PREPARACIÓN PARA LA CARGA UBICACIÓN DEL CARGADOR PRECAUCIONES DE CONEXIÓN EN CC SIGA ESTOS PASOS CUANDO LA BATERÍA ESTÉ COLOCADA EN EL VEHÍCULO. SIGA ESTOS PASOS CUANDO LA BATERÍA SE ENCUENTRE FUERA DEL VEHÍCULO.
- Página 5 IMPORTANT: READ AND SAVE THIS SAFETY AND INSTRUCTION MANUAL. SAVE THESE INSTRUCTIONS – The SC-8020A offers a wide range of features to accommodate your needs. This manual will show you how to use your charger safely and effectively. Please read, understand and follow these instructions and precautions carefully, as this manual contains important safety and operating instructions.
-
Página 6: Important Safety Instructions
IMPORTANT SAFETY INSTRUCTIONS Risk of electric shock or fire. Do not expose the charger to rain or snow. Use only recommended attachments. Use of an attachment not recommended or sold by Schumacher® Electric Corporation may result in a risk of fire, electric shock or injury to persons or damage to property. To reduce the risk of damage to the electric plug or cord, pull by the plug rather than the cord when disconnecting the charger. -
Página 7: Preparing To Charge
To reduce the risk of a battery explosion, follow these instructions and those published by the battery manufacturer and the manufacturer of any equipment you intend to use in the vicinity of the battery. Review the cautionary markings on these products and on the engine. This charger employs parts, such as switches and circuit breakers, that tend to produce arcs and sparks. -
Página 8: Charger Location
3.10 Determine the voltage of the battery by referring to the vehicle owner’s manual and make sure that the output voltage selector switch is set to the correct voltage. If the charger has an adjustable charge rate, charge the battery in the lowest rate first. -
Página 9: Follow These Steps When Battery Is Outside Vehicle
For a negative-grounded vehicle, connect the POSITIVE (RED) clip from the battery charger to the POSITIVE (POS, P, +) ungrounded post of the battery. Connect the NEGATIVE (BLACK) clip to the vehicle chassis or engine block away from the battery. Do not connect the clip to the carburetor, fuel lines or sheet-metal body parts. -
Página 10: Battery Charging - Ac Connections
BATTERY CHARGING – AC CONNECTIONS Risk of electric shock or fire. This battery charger is for use on a nominal 120-volt circuit. The charger must be grounded to reduce the risk of electric shock. The plug must be plugged into an outlet that is properly installed and grounded in accordance with all local codes and ordinances. The plug pins must fit the receptacle (outlet). Do not use with an ungrounded system. - Página 11 Battery Type Button Use this button to set the type of battery to be charged. • Regular – Set the button to STANDARD. This battery type is usually used in cars, trucks and motorcycles. These batteries have vent caps and are often marked “Low Maintenance”...
-
Página 12: Operating Instructions
OPERATING INSTRUCTIONS The charger does not have an ON/OFF switch. The On and Off commands are controlled by plugging the SC-8020A into a 120V AC electrical wall outlet only after the battery connections have been made. Charging Ensure that all of the charger components are in place and in good working condition, including the plastic boots on the battery clips. - Página 13 NOTE: The charger automatically switches between Charge Mode and Maintain Mode as necessary. The CHARGED (green) LED will cycle on when the battery is at full charge and off when the voltage drops below a preset level and the charger goes into Charge Mode. General Charging Notes Fan: The charger is designed to control its cooling fan for efficient operation.
- Página 14 Testing After Charging: After the SC-8020A has been changed from tester to charger (by selecting a charge rate) it remains a charger. To change the SC-8020A back to a tester, press the BATTERY SIzE button until all BATTERY SIzE LEDs are off.
- Página 15 Tester Status LEDs: When the SC-8020A is operating as a battery tester, the status LEDs light under the following conditions: • The CHARGED LED will light if a charged battery is tested. • The CHARGING LED does not light in the battery test mode.
-
Página 16: Calculating Charge Time
CALCULATING CHARGE TIME Use the following table to more accurately determine the time it will take to bring a battery to full charge. First, identify where your battery fits into the chart. NR means that the charger setting is NOT RECOMMENDED. Find your battery’s rating on the chart below, and note the charge time given for each charger setting. -
Página 17: Troubleshooting
TROUBLESHOOTING PROBLEM POSSIBLE CAUSE SOLUTION The battery is connected The charger is in tester Press the BATTERY SIzE and the charger is on, but mode, not charger mode. button to activate charging isn’t charging. and select a charge rate. Indicator lights are lit in You might have accidentally Make sure nothing is an erratic manner, not... - Página 18 PROBLEM POSSIBLE CAUSE SOLUTION Charger makes a loud buzz Transformer laminations No problem, this is a normal or hum. vibrate (buzz). condition. Shorted Diode Assembly or Have charger checked by a Output Rectifier Assembly qualified technician. (hum). Short or no start cycle when Drawing more than 80 Crank time varies with the cranking engine.
-
Página 19: Before Returning For Repairs
Manufacturer does not provide any warranty for any accessories used with this product that are not manufactured by Schumacher Electric Corporation and approved for use with this product. This Limited Warranty is void if the product is misused, subjected to careless handling, repaired, or modified by anyone other than Manufacturer or if this unit is resold through an unauthorized retailer. - Página 20 AND THE MANUFACTURER NEITHER ASSUMES OR AUTHORIZES ANYONE TO ASSUME OR MAKE ANY OTHER OBLIGATION TOWARDS THE PRODUCT OTHER THAN THIS WARRANTY. Schumacher Electric Corporation Customer Service 1-800-621-5485 Monday – Friday 7:00 a.m. to 5:00 p.m. CST Schumacher and the Schumacher Logo are registered trademarks of Schumacher Electric Corporation •...
-
Página 21: Importante
IMPORTANTE: LEA Y GUARDE ESTE MANUAL DE INSTRUCCIONES Y SEGURIDAD. GUARDE ESTAS INSTRUCCIONES: El SC-8020A ofrece una amplia gama de características para satisfacer sus necesidades. Este manual le mostrará cómo utilizar su cargador en forma segura y efectiva. Por favor, lea, comprenda y siga estas instrucciones y precauciones cuidadosamente, ya que este manual contiene instrucciones operativas y de seguridad de importancia. -
Página 22: Instrucciones Importantes De Seguridad
INSTRUCCIONES IMPORTANTES DE SEGURIDAD El riesgo de descarga eléctrica o incendio No exponga el cargador a la lluvia o a la nieve. Utilice solamente accesorios recomendados. El uso de un accesorio no recomendado o suministrado por Schumacher® Electric Corporation puede provocar riesgo de incendio, descarga eléctrica o lesiones a personas o daño a la propiedad. -
Página 23: Precauciones Personales
PRECAUCIONES PERSONALES Riesgo de gases explosivos. Resulta peligroso trabajar en forma cercana a una batería de plomo. Las baterías generan gases explosivos durante su normal funcionamiento. Por este motivo, resulta de suma importancia que siga las instrucciones cada vez que utiliza el cargador. Para reducir el riesgo de explosión de una batería, siga estas instrucciones y aquellas publicadas por el fabricante de la batería y por el fabricante de cualquier equipo que intente utilizar en la proximidad de la batería. -
Página 24: Ubicación Del Cargador
Si resulta necesario extraer la batería del vehículo para cargarla, siempre retire el terminal con descarga a tierra en primer lugar. Asegúrese de que todos los accesorios en el vehículo se encuentren apagados para evitar la formación de arcos eléctricos. Asegúrese de que el área que rodea a la batería se encuentre bien ventilada mientras se carga la batería. -
Página 25: Siga Estos Pasos Cuando La Batería Esté Colocada En El Vehículo
SIGA ESTOS PASOS CUANDO LA BATERÍA ESTÉ COLOCADA EN EL VEHÍCULO. Una chispa provocada cerca de la batería puede causar la explosión de la batería. Para reducir el riesgo de provocar chispas cerca de la batería: Ubique los cables de CA y CC para reducir el riesgo de daños a la cubierta, a la puerta y a las piezas móviles o calientes del motor. -
Página 26: Carga De Batería, Conexiones De Ca
Conecte el gancho POSITIVO (ROJO) del cargador al borne POSITIVO (POS, P, +) de la batería. Ubíquese junto con el extremo libre del cable que previamente sujetó al borne NEGATIVO (NEG, N, -) de la batería a la mayor distancia posible de la batería. -
Página 27: Controles Del Cargador
CONTROLES DEL CARGADOR Botón Display Mode (Modo de pantalla) Utilice este botón para establecer la función de la pantalla digital en una de las siguientes opciones: • % de batería : la pantalla digital muestra un porcentaje de carga estimado de la batería conectada a los ganchos de batería pertenecientes al cargador. -
Página 28: Instrucciones Operativas
INSTRUCCIONES OPERATIVAS El cargador carece de interruptor para encendido y apagado. Los controles para encendido y apagado se controlan conectando SC-8020A en el tomacorriente de 120V CC y sólo después de que las conexiones de la batería se han realizado. - Página 29 Modo de carga automática Cuando se selecciona el TAMAÑO PEQUEÑO O GRANDE DE LA BATERÍA, el cargador está listo para realizar una carga automática. Cuando se realiza una carga automática, el cargador cambia del Modo de Mantenimiento (ver a continuación) automáticamente después que la batería se cargue. Carga anulada Si no se puede completar la carga normalmente, la carga se anulará.
- Página 30 Utilizar la función de encendido de motor El cargador de batería se puede utilizar para impulsar el auto si la batería está baja. Siga estas instrucciones de cómo utilizar la función ENGINE START (encendido de motor). ADVERTENCIA Siga todas las instrucciones y precauciones de seguridad para cargar la batería.
- Página 31 (modo de pantalla) para configurar el probador a BATTERY % (% de batería) para poder leer la tensión como un porcentaje de carga. Probador y Cargador: Cuando lo encienda por primera vez, SC-8020A funciona como probador, no como cargador. Para seguir utilizándolo solo como probador, no presione el botón de TAMAÑO DE LA BATERÍA. Al seleccionar un índice de carga se activa el cargador de batería y se desactiva...
- Página 32 Probar Luego de Cargar: Luego de cambiar al SC-8020A de probador a cargador (al seleccionar un índice de carga), permanece como cargador. Para cambiar el SC-8020A nuevamente a probador, presione el botón de TAMAÑO DE BATERÍA hasta que todos los LED de los TIPOS DE BATERÍA estén apagados.
-
Página 33: Calculando El Tiempo De Carga
• Cuando la pantalla digital del probador se configura para V OLTAJE, no se encenderán los LED correspondientes a CARGADA y CARGANDO. Notas Sobre la Prueba del Alternador • El porcentaje del alternador puede variar de 0 a 199. • La PANTALLA DIGITAL no se puede configurar para % del ALTERNADOR durante la carga. • El porcentaje 0 de un ALTERNADOR no indica que la salida del ALTERNADOR sea 0V, indica que la salida es demasiado baja para cargar la batería. -
Página 34: Instrucciones De Mantenimiento
INSTRUCCIONES DE MANTENIMIENTO 13.1 Después de usar y antes de realizar mantenimiento, desenchufe y desconecte el cargador de la batería (ver Secciones 6, 7 y 8). 13.2 Utilice un paño seco para limpiar la corrosión de toda la batería y otra suciedad o aceite de los terminales, cables y carcasa del cargador. - Página 35 PROBLEMA CAUSA POSIBLE SOLUCION La luz verde de La batería puede estar Si la batería está montada CARAGADA, se enciende completamente cargada o en el auto, encienda las minutos después de pudo haber sido cargada luces de enfrente por unos conectar la batería.
- Página 36 PROBLEMA CAUSA POSIBLE SOLUCION Ciclo corto o sin comenzar Está recibiendo más de 75 El tiempo de arranque varía al arrancar el motor. amperios con la cantidad de corriente recibida. Si el arranque recibe más de 80 amperios, el tiempo de arranque puede ser menos de 3 segundos.
-
Página 37: Antes De Devolver A Reparaciones
ésta se pueda reparar o reemplazar. El Fabricante no presta garantía por lo accesorios utilizados con este producto que no sean los fabricados por Schumacher Electric Corporation y que no estén aprobados para su uso con este producto. La presente Garantía Limitada será... - Página 38 EXPRESA Y EL FABRICANTE NO ASUME NI AUTORIZA A NADIE A ASUMIR O A ADQUIRIR NINGUNA OTRA OBLIGACIÓN RESPECTO DEL PRODUCTO QUE NO SEA LA PRESENTE GARANTÍA. Servicio de atención al cliente de Schumacher Electric Corporation 1-800-621-5485 Lunes-viernes 7:00 a. m. a 5.00 p. m. CST...