Tabla de contenido
Publicidad
Idiomas disponibles
Idiomas disponibles
Enlaces rápidos
Publicidad
Tabla de contenido

Manuales relacionados para S&P CTBH ECOWATT


Resumen de contenidos para S&P CTBH ECOWATT
- Página 1 CTBH ECOWATT...
-
Página 2: Caja De Conexiones
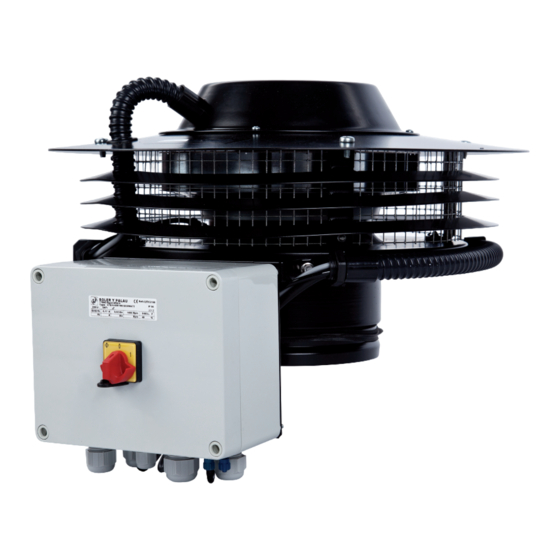
ESPAÑOL CAJA DE CONEXIONES... -
Página 3: Conexión Electrica
CONEXIÓN ELECTRICA Comprobar que el mando del Paro/marcha este en posición “0” Abrir la tapa de la caja de mandos y conectar una alimentación monofásica 230V 50/60Hz a los bornes J1 La consola para ajustar y visualizar los parámetros se suministra como accesorio y con un cable de 1 metro. Conectar el cable de la consola PROSYS CTBH al enchufe J9 situado en el circuito electrónico de la caja de mando (ver página 3) Cerrar la tapa de la caja de mandos... - Página 4 Pulsando la tecla aparecen los valores siguientes: RPM:xxx rpm RPM : Velocidad del tejado en revoluciones por minuto. C : X XX% : Porcentaje de la velocidad máxima Número del canal correspondiente al número del tejado. AJUSTES: Para modificar los parámetros del tejado pulsar las dos teclas durante 5 segundos: IDIOMA ESPANOL...
- Página 5 S&P CTBH ? CTBH - xxxx Para modificar modelo (500, 800 o 1300) pulsar la tecla Para cambiar de valor pulsar la tecla CAUDAL CONSIGNA XXXM3/h Para modificar caudal pulsar la tecla Para cambiar de valor pulsar la tecla TEMPERATURA PARO Numero de planta Tº...
-
Página 6: Red De Tejados
RED DE TEJADOS: Es posible conectar hasta 32 tejados para crear una red para permitir el control y ajustarlos desde un solo tejado. Para crear una red de tejados, se debe asignar tejado a tejado, un número de canal antes que sean conectados entre ellos. -
Página 7: Ajustes De Primer Nivel
Segunda etapa: Conectar las cajas de control entra ellas, en los terminales A y B guardando el orden de las letras (ver figura a bajo – conectar el terminal A de la caja de control 1 con el terminal A de la caja de control 2, etc.…..). El cable tiene que ser de dos conductores trenzados y blindados, con una sección mínima de AWG24 y una longitud máxima de 1000m. - Página 8 ENGLISH CONNECTIONS...
-
Página 9: Electrical Connection
ELECTRICAL CONNECTION - Check that the on/off isolator switch is on position “0” - Open the front cover of the control box and connect the main supply 230V 50/60Hz to the terminal J1 - The remote control used to adjust and display parameters is supply with a 1 meter length cable. - First connect this cable to the remote control PROSYS CTBH and then to the outlet J9, placed on the PCB of the control box. - Página 10 Pressing the key gives access to other data: RPM:xxxrpm RPM : Fan speed RPM C : X XX %: Fan speed in % (of the maximum speed). Fan number SETTINGS To change all the parameters of the fan press keys simultaneously for 5 seconds.
- Página 11 S&P CTBH ? CTBH - XXXX To modify the model (500, 800 or 1300) press the key To confirm press the key SETUP AIRFLOW XXXM3/h To modify the airflow press the key To confirm press the key TEMP. OFF Number of floor(s) Tº...
- Página 12 FAN NETWORK: It is possible to connect up to 32 fans with another to design a fan network which can be adjusted and controlled with only one remote control. To create a fan network, assign fan by fan, a channel number to each fan without connecting one to each other.
- Página 13 Second step: Connect the control boxes one to each other, to the terminals A and B, keeping the letter order (See figure below - connect terminal A from the control box 1 to the terminal A of the control box 2, etc…). This cable must be a two wire shielded twisted pair cable, with a minimum section of AWG24 and a maximum length of 1000m.
-
Página 14: Boitier De Raccordements
FRANÇAIS BOITIER DE RACCORDEMENTS... -
Página 15: Raccordement Electrique
RACCORDEMENT ELECTRIQUE Vérifier que la commande du Marche/arrêt est en position “0” Ouvrir le couvercle du boitier de commande et raccorder à une alimentation 230V 50/60Hz aux bornes J1 La console de programmation des paramètres est fournie avec un câble de 1 mètre. Raccorder le connecteur RJ45 de la console PROSYS CTBH à... -
Página 16: Mot De Passe
En appuyant sur la touche les valeurs suivantes sont visibles: RPM:xxxrpm RPM : Vitesse de rotation de la tourelle en tours par minute C : X XX %: Pourcentage de la vitesse maxi. Numéro du canal correspondant au numéro de la tourelle REGLAGES: Pour modifier l’ensemble des paramètres de la tourelle appuyer simultanément sur les touches... - Página 17 Pour modifier le modèle (500, 800 ou 1300) appuyer sur la touche Pour confirmer appuyer sur la touche DEBIT CONSIGNE XXXM3/h Pour modifier le débit appuyer sur la touche Pour confirmer appuyer sur la touche TEMP. ARRET < xxºc Nombre d'étage(s) Tº...
- Página 18 RÉSEAU DE TOURELLES: Il est possible de raccorder jusqu’à 32 tourelles entre elles pour créer un réseau de dont chaque tourelle peut être ajustée et contrôlée à partir d’une seule console. Pour créer un réseau de tourelles, il faut assigner, tourelle par tourelle, un numéro de canal avant qu’ils ne soient connectés entre eux.
- Página 19 ème étape: Connecter les boitiers de control entre eux, entre les bornes de connection A et B, en conservant l’ordre des lettres (Voir figure ci-dessous – connecter le terminal A du boitier de contrôle 1 avec le terminal A du boitier de contrôle 2, etc…).
- Página 20 S&P SISTEMAS DE VENTILACIÓN, SL C. Llevant, 4 Polígono Industrial Llevant 08150 Parets del Vallès Barcelona - España Tel. +34 93 571 93 00 Fax +34 93 571 93 01 www.solerpalau.com Ref. 9023025600...