Tabla de contenido
Publicidad
Enlaces rápidos
Read all instructions carefully before proceeding.
Lire toutes les instructions attentivement avant de commencer
l'installation.
Leer detenidamente todas las instrucciones antes de comenzar
la instalación.
IMPORTANT
• Record the serial number
IMPORTANT
• Noter le numéro de série
IMPORTANTE
• Registre el número de serie
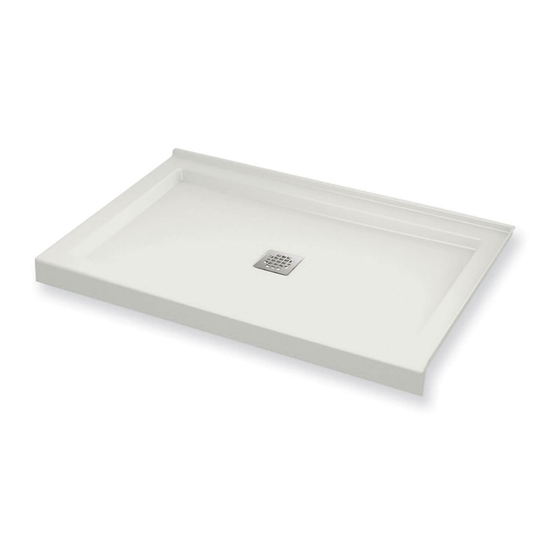
DISTINCT & ZONE SQUARE SHOWER BASE INSTALLATION
INSTALLATION BASE DE DOUCHE DISTINCT & ZONE SQUARE
INSTALACIÓN DE BASE DE DUCHA DISTINCT & ZONE SQUARE
SAVE THIS GUIDE FOR FUTURE REFERENCE.
CONSERVER POUR UN USAGE ULTÉRIEUR.
CONSERVE ESTE MANUAL COMO REFERENCIA.
INSTALLATION INSTRUCTIONS
GUIDE D'INSTALLATION
GUÍA DE INSTALACIÓN
Serial number • Numéro de série • Número de Serie
Publicidad
Tabla de contenido

Resumen de contenidos para MAAX ZONE SQUARE 48
- Página 1 INSTALLATION INSTRUCTIONS GUIDE D’INSTALLATION GUÍA DE INSTALACIÓN DISTINCT & ZONE SQUARE SHOWER BASE INSTALLATION INSTALLATION BASE DE DOUCHE DISTINCT & ZONE SQUARE INSTALACIÓN DE BASE DE DUCHA DISTINCT & ZONE SQUARE Read all instructions carefully before proceeding. SAVE THIS GUIDE FOR FUTURE REFERENCE. CONSERVER POUR UN USAGE ULTÉRIEUR.
-
Página 2: Tabla De Contenido
Table of contents: Page Tools and supplies......................3 Parts and components......................4 1. Building the structure..................... 5 2. Installing the base......................6 3. Finish..........................10 4. Maintenance........................11 5. Warranty.......................... 12 Table de matières: Page Outils et matériaux......................3 Pièces et composantes.......................4 1. -
Página 3: Tools And Supplies
TOOLS OUTILS HERRAMIENTAS REQUIRED REQUIS NECESARIAS 1/8" drill bits Mèches de 1/8 Utility knife Couteau à lame 24" level min. Electric drill Pencil rétractable Niveau de 24po. min. Perçeuse électrique Crayon Cuchillo multiuso Nivel de 24" min. Taladro eléctrico Lápiz 18"... -
Página 4: Components Composantes Componentes
PARTS PIÈCES PIEZAS ZONE SQUARE 48 & 60 DISTINCT 48 COMPONENTS COMPOSANTES COMPONENTES Part Nom de la pièce Pieza Qty / Qté / Cant. Code Base Base Base Drain cover (with Couvercle de drain linéaire (inclus Cubierta del desagüe (incluido... -
Página 5: Building The Structure
Follow all instructions and check them off as you go. Suivre toutes les instructions et les cocher lorsqu'elles sont terminées. Siga todas las instrucciones y marcarlas cuando estén terminadas. Building the structure; drain position STEP Construction de la structure; position du drain ÉTAPE Construcción de la estructura;... -
Página 6: Installing The Base
Montar el desagüe como se ilustra.APRETAR A MANO ÚNICAMENTE! REMOVER EL EXCESO DE SILICONA. Threshold Seuil Umbral Zone square 48 shown Zone square 48 affiché Zone square 48 ilustrado Check me! Cochez-moi! Marcarme! Top view / Vue de dessus / Vista superior Install the base (1) pushing it completely against the back studs. - Página 7 Installing the base (cont'd) STEP Installation de la base (suite) ÉTAPE Instalación de la base (cont.) ETAPA Verify the base leveling. Mark the studs and the floor Check me! where shims will be required to perfectly level the base. Cochez-moi! If the base is completely leveled go to step 2.5.
- Página 8 Installing the base (cont'd) STEP Installation de la base (suite) ÉTAPE Instalación de la base (cont.) ETAPA Check me! Lift the base. Place cement or wood shims under all legs Cochez-moi! to support the shower base floor. Lower the shower base Marcarme! and validate leveling and stability of the base on the floor.
- Página 9 Installing the base (cont'd) STEP Installation de la base (suite) ÉTAPE Instalación de la base (cont.) ETAPA Check me! Cochez-moi! With a 1/8" drill bit, drill holes in the base flange then Marcarme! secure the base to all the wall studs with #8 x 1¾" flat-head screws (not included).
-
Página 10: Finish
Finish STEP Finition ÉTAPE Acabado ETAPA Seal the joint between the unit and the wall covering Check me! with a bead of silicone. As shown, leave a 1" gap on the Cochez-moi! sides to work as a weep hole. Marcarme! Make sure to never obstruct the weep holes. -
Página 11: Maintenance
ENTRETIEN MANTENIMIENTO MAINTENANCE La desinfección periódica es una excelente Regular disinfection provides an effective Une désinfection régulière constitue une defence against various types of bacteria excellente prévention contre les types de forma de prevenir la aparición de diferentes tipos de bacterias que suelen desarrollarse that can develop in deposits that build up bactéries susceptibles de se développer over time in all bathtubs and showers. -
Página 12: Warranty
Sauf dans le cas des produits MAAX munis Salvo en el caso de productos de MAAX con Except in the case of MAAX products with d’accessoires pré-assemblés, MAAX en aucun cas accesorios de plomería pre-instalados, MAAX...


