Publicidad
Idiomas disponibles
Idiomas disponibles
Enlaces rápidos
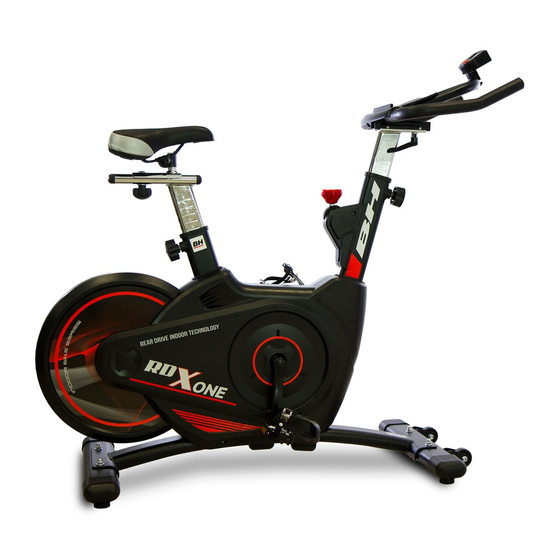
H9140
Instrucciones de montaje y utilización
Instructions for assembly and use
Instructions de montage et utilisation
Montage und Gebrauchsanleitung
Instruções de montagem e utilização
Istruzioni di montaggio e uso
Montage-en gebruiksinstrukties
Publicidad

Manuales relacionados para BH FITNESS H9140


Resumen de contenidos para BH FITNESS H9140
- Página 1 H9140 Instrucciones de montaje y utilización Instructions for assembly and use Instructions de montage et utilisation Montage und Gebrauchsanleitung Instruções de montagem e utilização Istruzioni di montaggio e uso Montage-en gebruiksinstrukties...
- Página 2 Fig.1 Fig.2 Fig.3...
- Página 3 Fig.4 Fig.5 Fig.7 Fig.7...
- Página 4 Español AVISO IMPORTANTE DE utilice accesorios no recomendados por el fabricante. SEGURIDAD.- coloque objetos cortantes PRECAUCIONES. alrededor de la máquina. Esta bicicleta ha sido diseñada y 9 Las personas discapacitadas no construida de modo que proporcione deberán utilizar la máquina sin la la máxima seguridad.
- Página 5 INSTRUCCIONES DE MONTAJE.- REGULACIÓN HORIZONTAL DEL SILLÍN.- Para el montaje de esta unidad se Aflojando un poco el pomo de apriete recomienda la ayuda de otra persona. de tija en sentido contrario a las Saque unidad la caja y agujas del reloj, cuando lo tenga a la compruebe que tiene todas las piezas medida adecuada para realizar el Fig.1:...
- Página 6 6.- COLOCACIÓN DEL MONITOR.- compruebe que el asentamiento en el suelo y su nivelación sean correctos. Coloque la abrazadera (E8) en el Esto se conseguirá roscando más o manillar (E3) y fíjela con el tornillo menos los pies regulables (B7) como (E7).
- Página 7 2. REVISIÓN, POMOS DE APRIETE.- poco oblicuo, dando lugar a un aumento Los 3 pomos de apriete que dispone de ruido y a la posibilidad de que se la unidad se deberán aflojar y rociar salga la correa. con un spray de engrase con el objeto - Apriete nuevamente las tuercas y de garantizar la movilidad de los vuelva a colocar las tapas laterales.
- Página 8 English IMPORTANT SAFETY ADVICE.- 7 This appliance must only be used for the purposes described in this manual. PRECAUTIONS. DO NOT use accessories that are not This bicycle has been designed and recommended by the manufacturer. constructed provide maximum safety. Nevertheless, certain 8 Do not place sharp objects near the...
- Página 9 ASSEMBLY INSTRUCTIONS.- HORIZONTAL ADJUSTMENT THE SADDLE.- The assistance of a second person is Loosen the knob slightly by turning it recommended when assembling this anticlockwise, move the saddle to a unit Take the unit out of its box and position comfortable for doing exercise make sure that all of the pieces are and then tighten the knob securely by there Fig.1:...
- Página 10 Stay within the references without adjustable feet (B7) up or down, as going beyond the “STOP” mark. shown in Fig.6. 6.- ATTACHING THE MONITOR.- MOVEMENT & STORAGE.- Place the clamp (E8) on the handlebar The unit is equipped with wheels (B2) (E3) and fix it with the screw (E7).
- Página 11 2. CHECKING THE TIGHTENING sufficient) otherwise the drive sprocket KNOBS.- might become skewed, creating a lot The 3 tightening knobs should be more noise and making it possible for loosened off and sprayed with a the belt to fall off. lubricant to ensure that they remain -Tighten up nuts again and put the operative.
- Página 12 Francais IMPORTANTES CONSIGNES DE de sport appropriées pour ce faire. Nouez bien vos lacets de chaussures. SÉCURITÉ.- 7 Cet appareil ne doit être utilisé PRÉCAUTIONS. qu’aux fins indiquées dans cette Cette bicyclette a été conçue et notice. NE pas utiliser d’accessoires fabriquée de façon à...
- Página 13 3 Il incombe au propriétaire de vérifier RÉGLAGE DE LA HAUTEUR DE LA si tous les utilisateurs de la machine SELLE.- sont habilités pour le faire et de leur Dévissez légèrement le pommeau de fournir les informations requises à fixation de la tige dans le sens propos des précautions à...
- Página 14 La pédale gauche (IL), signalée par la Pour réduire résistance lettre (L) est à visser dans le sens pédalage, tournez bouton contraire à celui des aiguilles d’une tension (A11) dans le sens contraire à montre dans la bielle gauche signalée celui des aiguilles d’une montre (-).
- Página 15 ENTRETIEN DE LA MACHINA.- ENTRETIEN, LES 200 HEURES.- Par mesure d’hygiène, le guindon et la 1. RÉVISION & RÉGLAGE DE LA selle doivent éter nettoyés à l’aide d’un CEINTURE. spray de désinfection après chaque -Vérifiez si la ceinture est tendue séance.
- Página 16 Deutsch WICHTIGER kann sich im Fahrrad verklemmen. Benutzen Sie Jogging- oder Aerobic- SICHERHEITSHINWEIS.- Schuhe. Achten Sie darauf, dass die VORSICHTSMASSNAHMEN. Schnürsenkel fest gebunden sind. Dieses Fahrrad wurde so entwickelt und konstruiert, dass es maximale 7 Benutzen Sie dieses Gerät nur zu Sicherheit bietet.
- Página 17 ALLGEMEINE HINWEISE.- 2. Positionieren Sie das vordere Ständerrohr (B) mit den Rädern so, 1 Dieses Gerät ist für den häuslichen dass die roten Punkte übereinstimmen Gebrauch vorgesehen. Das Gewicht und die Räder nach vorn zeigen Fig.2, des Benutzers darf 100 Kg nicht setzen Schrauben (B5),...
- Página 18 Die Definitionen rechts und links gehen einen Spannungsregler (A11), der sich von der Sichtweise des auf dem Sattel am Rohr des Hauptrahmens (A) in Übungsposition sitzenden Anwenders befindet Fig.6. aus. Dreht diesen Regler Das mit (IR) markierte rechte Pedal wird Uhrzeigersinn, erhält Uhrzeigersinn...
- Página 19 Durch leichtes Anheben und Schieben WARTUNGSMASSNAHMEN NACH an der Vorderseite können Sie Ihr 200 NUTZUNGSSTUNDEN.- Gerät problemlos 1. ÜBERPRÜFUNG UND gewünschten Ort transportieren Fig.7. BEFESTIGUNG DES RIEMENS. Bewahren Sie das Gerät an einem - Prüfen Sie ob der Keilriemen richtig trockenen Ort mit möglichst geringen gespannt wird.
- Página 20 Portugues AVISO IMPORTANTE DE utilize acessórios que não sejam recomendados pelo fabricante. SEGURANÇA.- 8 Não coloque objectos cortantes á PRECAUÇÕES. volta da máquina. Esta bicicleta desenhada pessoas alguma construída de modo a proporcionar a incapacidade não deverão utilizar a máxima segurança.
- Página 21 INSTRUÇÕES DE MONTAGEM.- Coloque-o dentro do referências, sem sair das referências de STOP. Para a montagem desta unidade recomendamos a ajuda de outra REGULAÇÃO HORIZONTAL DO pessoa. Retire a unidade da caixa e SELIM.- comprove que estão todas as peças Desapertando um pouco o botão mola Fig.1.
-
Página 22: Coloque O Guiador (B3) A Uma
REGULAÇÃO VERTICAL DO Importante: GUIADOR.- Este comando de tensão (A11) possui Coloque o guiador (B3) a uma sistema travagem distância que lhe seja cómoda para emergência, que apertando desde realizar o exercício, sem sair das cima com força produz uma travagem referências de MÁX e aperte o botão mais repentina do volante. - Página 23 MANUTENÇÃO CADA 100 corretamente esticada com tensão. Se a correia derrapa, será necessário esticar HORAS.- com mais tensão. 1. APERTE PEDAIS. - Retire as tampas laterais e folgue as Apesar de que os pedais vão montados, porcas no máximo 2 voltas. o pedal direito (marcado com a letra R) - Tense com uma chave as porcas monta-se aparafusando-o no sentido...
- Página 24 Italiano AVVERTIMENTO IMPORTANTE NON usi accessori non consigliati dal fabbricante. DI SICUREZZA.- 8 Non collochi oggetti taglienti attorno PRECAUZIONI. alla bicicletta. Questa bicicletta è stata disegnata e persone handicappate costruita in modo che garantisca la dovranno usare l’ apparecchio senza l’ massima sicurezza.
-
Página 25: Prenda Il Tubo Del Cavalletto
ISTRUZIONI DI MONTAGGIO.- Rimanete entro la riferimenti senza andare oltre al punto di riferimento di Pel il montaggio di questo apparecchio STOP. è consigliabile l' aiuto di una seconda persona. REGOLAZIONE ORIZZONTALE DEL Estragga l' apparecchio dalla scatola e SELLINO.- verifichi di avere a disposizione tutti i Allenti un poco la maniglia di stretta pezzi Fig.1. - Página 26 REGOLAZIONE VERTICALE DEL Importante: Questo comando MANUBRIO.- tensione (A11) ha un sistema di Collochi il manubrio (E3) ad una frenata di emergenza, stringendolo distanza comoda per realizzare l' con forza, si provoca una frenata più allenamento senza andare oltre al immediata per il volante.
- Página 27 MANUTENZIONE, 100 ORE.- sarà necessario tesare la cinghia. - Rimuova le coperture laterali ed 1. STRETTA DEI PEDALI. allenti i dadi un massimo di 2 giri. Anche se i pedali devono essere -Stringa con una chiave i dadi piccoli. montati, il pedale destro (marchiato Faccia attenzione che il dado giri lo con una R) si monta avvitandolo in stesso numero di gire in ambedue i lati...
- Página 28 Nederlands BELANGRIJKE (loopschoenen of aerobic) wanneer u het apparaat gebruikt. Strik uw veters VEILIGHEIDSVOORSCHRIFTEN.- goed. VOORZORGSMAATREGELEN. 7 Gebruik dit apparaat uitsluitend voor Deze hometrainer dusdanig gebruiksdoeleinden, zoals ontworpen en geconstrueerd om een beschreven deze handleiding. maximale veiligheid te waarborgen. U Gebruik GEEN accessoires die niet moet echter...
- Página 29 Dit apparaat mag onder geen beding zijn plaats en draai de schroeven van als speelgoed gebruikt worden. de klamp stevig aan. 3 Het valt onder de verantwoording AFSTELLEN VAN DE HOOGTE VAN eigenaar zich ervan HET ZADEL.- verzekeren dat alle gebruikers van het Draai de instelknop van de zadelpen apparaat gedegen geïnformeerd zijn een beetje los (tegen de wijzers van...
- Página 30 5.- PLAATSING VAN HET STUUR.- Daarom wordt aanbevolen, na het beëindigen oefening, Plaats het stuur (E3) in de stuurbuis weerstandsregelaar (E), Fig.4. Draai de knop (E14) en de minimumstand zetten ringen (E16). voorkomen dat de remschoen verhardt. Sluit de kabels (E2) en (E15) aan. VERTICALE AFSTELLING VAN HET Belangrijk: Deze weerstandsregelaar STUUR.-...
- Página 31 Strijk het vliegwiel elke keer, of ten ONDERHOUD NA ELKE 200 minste een maand, met een rust- GEBRUIKSUREN.- remmer. 1. DE RIEM CONTROLEREN & AANPASSEN. ONDERHOUD NA ELKE 100 - Controleer of de riem goed gespannen GEBRUIKSUREN.- is. Als de riem verschuift, is het 1.
- Página 32 H9140...
- Página 33 Para pedido de repuesto: Indicar el código de la pieza y la cantidad To order replacement parts: State the part code and Quantity Pour toute commande pièces détachées: Indiquer le code de la pièce et la quantité Bestellung von Ersatzteilen: Bitte angeben Teil-code und Menge Para encomenda de peça de recambio: Indicar o código da peça ea quantidade Per ordinare pezzi di ricambio: Indicare il codice del pezzo e la quantità...
- Página 34 Español Por medio de la presente Exercycle S.L. declara que este producto cumple con los requisitos esenciales y cualesquiera otras disposiciones aplicables o exigibles de la Directivas 2011/65/CE y 2014/30/CE. English Hereby, Exercycle S.L, declares that this product is in compliance with the essential requirements and other relevant provisions of Directives 2011/65/EC and 2014/30/EC.
- Página 35 BH FITNESS SPAIN BH GERMANY GmbH BH FITNESS ASIA EXERCYCLE,S.L. Grasstrasse 13 BH Asia Ltd. (Manufacturer) 45356 ESSEN No.80, Jhongshan Rd., P.O.BOX 195 GERMANY Daya Dist., 01080 VITORIA (SPAIN) Taichung City 42841, Tel.: +34 945 29 02 58 Tel: +49 2015 997018 Taiwan.