
Manuales relacionados para B.A. International BA Optima E+


Resumen de contenidos para B.A. International BA Optima E+
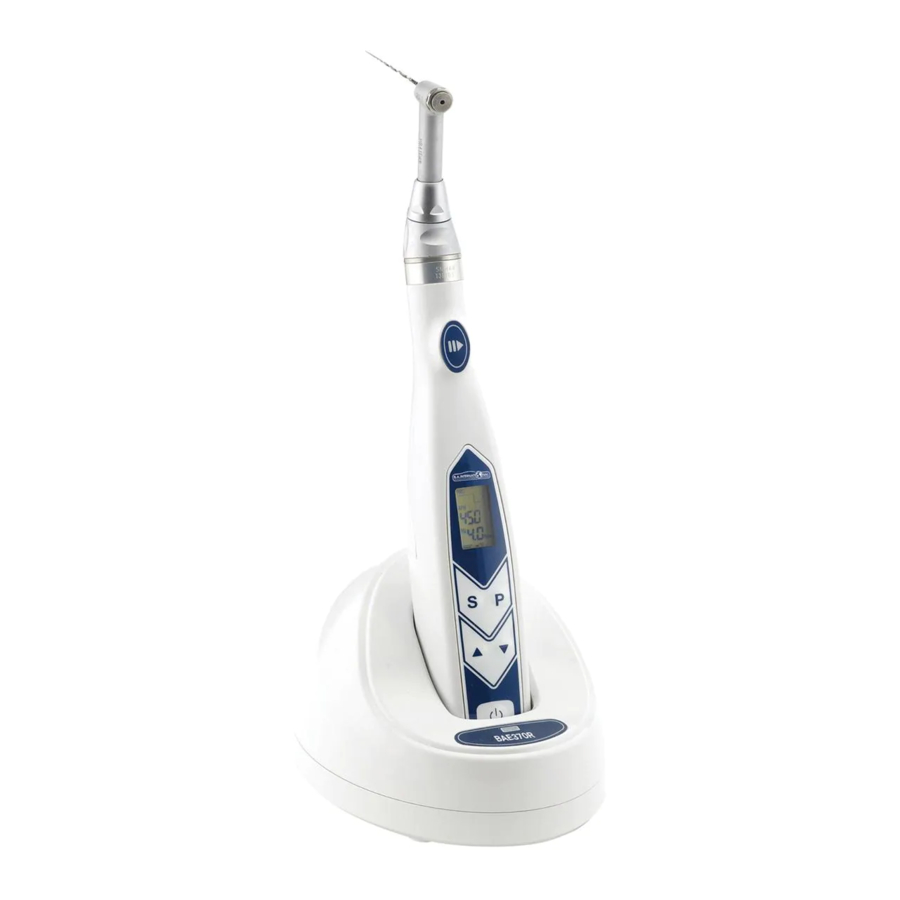
- Página 1 BA182050 9796027 BA Optima E+ Cordless Endodontic Unit BAE370R Rev.2019/03 BAE370R_IFU-Final.indd 1 02/04/2019 12:22:18...
- Página 2 BAE370R_IFU-Final.indd 2 02/04/2019 12:22:31...
-
Página 3: Tabla De Contenido
INSTRUCTION FOR USE BA Optima E+ Cordless Endodontic Unit Read this operation manual carefully before use 1. WARNING for operation instructions, care and mainte- 2. MACHINE CLASSIFICATION nance. Keep this operation manual for future reference. 3. PRODUCT FEATURES 4. PRODUCT SPECIFICATION 5. -
Página 4: Warning
1. WARNING WARNING SYMBOLS • Please read the warnings before operation. • Warnings are to prevent injury and damage to user and patient. These are all for your safety, please follow the instructions. • Class II equipment To identify equipment meeting the safety requirements specifi ed for Class II equipment according to IEC 60536. -
Página 5: Electric Safety
CAUTION • Do not lubricate the motor handpiece. • Do not heat sterilize the motor handpiece. Do not autoclave the • Please consider the safety of patient fi rst and take care during the motor handpeice. product operating. • Only qualifi ed person in dental surgery can be allowed to use the •... -
Página 6: Machine Classification
2. MACHINE CLASSIFICATION Machine has been confi rmed that it complies with the rules of medical machinery IEC 60601-1 : 2007 which provides reasonable protec- • Type and Degree of protection against electric shock: tions against harmful interference in typical medical installations. Class II/Type BF Machine can radiate radio frequency energy. -
Página 7: Product Specification
4. PRODUCT SPECIFICATION Charger Motor Handpiece Angle Handpiece BA182511 BA182510 BAE07 BA680057 BAE05 BA680055 BAE03 BA680053 ACL(B)-41EP ACL(B)-42EP ACL(B)-46EP Input : AC100-240V, Rated Voltage : Gear Ratio : 20:1 Gear Ratio : 16:1 Gear Ratio : 10:1 50/60HZ, Max0.1A DC 2.4V±20% Output : DC 4.5V Battery : 1.2V X 2EA= Dimensions :... -
Página 8: Lcd And Operation Panel
7. LCD AND OPERATION PANEL 1 Power Button Push the power button until the power is on and the LCD panel lights.Push the power button until turn off over the I second. 2 Select-S Button This button is to select the settings for RPM, torque, gear ratio and auto reverse mode in programs 1-5. In programs 6-7 (reciprocation mode), this button is used to select the settings for forward rotation angle and reverse rotation angle. - Página 9 Auto Reverse: If the load is removed after auto reverse rotation, it returns to the normal rotation again. Auto Reverse Off: Auto reverse rotation is not activated. Battery Symbol: shows 3 Steps for charging amount Beep Sound Symbol (On/Off): Beep sound function for each operating condition Program: shows current program and control from Step 1 to 5 Torque: controls torque, shows current torque limitation (Measurement: N.cm) Speed: controls rotation speed...
-
Página 10: Operation Process
8. OPERATION PROCESS Operation Method 1. How to charge • Plug the Power cord jack into the inlet placed back side of Charging Station. • Insert the Power cord and plug in. • Turn on the Power switch and check if the power lamp is on and Beep sound is ringing Place the motor handpiece into the Charging Station. -
Página 11: How To Operate
4. How to operate Warning • Turn on the power by pressing down the Power Button. • Due to Automatic Power Off function, after 4 min. •Press the Program button until the program number suitable for the without On/Off Button operation, the unit turns off file to be used is displayed. -
Página 12: Error And Remedy
Warning • When the battery level is depleted i.e when the remaining charge indicator is low the actual load may be to high for the device to reach the preset torque limit value. In this case (in the case of operation by batteries), the auto reverse function will not be activated. When high torque is required, use this product in a condition where the batteries are not signifi... - Página 13 2. Sterilization 132 °C Sterilization product list • Angle handpiece Sterilization Method Sterilization Temperature Time Drying • Dry the applicable product completely after cleaning. time • Put the applicable product in a sterile bag and seal tightly. Moist heat 132 °C 4 minute 30 minute •...
-
Página 14: Trouble Shooting
11. TROUBLE SHOOTING When trouble is found, check the following before contacting dealer. If none of these are applicable or the trouble is not remedied even after action has been taken, contact dealer. Problem Cause Solution The power of motor handpiece is not Battery has been discharged. -
Página 15: Symbol
Service Charge In case of fault or malfunction through misuse of the user - Using with wrong Input Voltage - In case of user’s misuse or improper use - Dropping the unit during setting, moving or using - Using consumable parts or accessories not recommended by manufacturer - Malfunction after repairing at the places not recommended by manufacture Other cases - Fault by Act of God (fi... - Página 16 BAE370R_IFU-Final.indd 16 02/04/2019 12:22:34...
- Página 17 MANUAL DE INSTRUCCIONES BA Optima E+ Cordless Endodontic Unit Lea este manual de funcionamiento atentamen- 1. ADVERTENCIA te antes de usar el producto. En él encontrará 2. CLASIFICACIÓN DEL APARAT instrucciones sobre el funcionamiento, cuidado y mantenimiento del aparato. Guarde este ma- 3.
-
Página 18: Advertencia
1. ADVERTENCIA SÍMBOLOS DE ADVERTENCIA • Lea estas advertencias antes de poner el aparato en funcionamiento. • Las advertencias se incluyen para evitar lesiones y daños al usuario Tipo de advertencia Grado de lesiones o daños y al paciente. Por su seguridad, siga todas las instrucciones. Prohibición La advertencia protege frente a muerte o pérdida material. -
Página 19: Clasificación Del Aparato
PRECAUCIÓN CLASIFICACIÓN DEL APARATO • Tenga siempre en cuenta la seguridad del paciente en primer lugar • Preste atención para no poner la aguja ni el perno en la base del y tenga cuidado cuando utilice el aparato. cargador. • Solo personas con una titulación en cirugía dental pueden usar el •... -
Página 20: Clasificación Del Aparat
2. CLASIFICACIÓN DEL APARAT Se ha confi rmado que el aparato cumple las reglas de instrumentos médicos IEC 60601-1: 2007 que ofrecen protección razonable frente • Tipo y grado de protección frente a descarga eléctrica: a interferencias perjudiciales en instalaciones médicas normales. Clase 2/Tipo BF El aparato puede emitir energía de radiofrecuencia. -
Página 21: Especificaciones Del Producto
4. ESPECIFICACIONES DEL PRODUCTO Cargador Pieza de mano con Pieza de mano angulada motor BA182511 BA182510 BAE07 BA680057 BAE05 BA680055 BAE03 BA680053 ACL(B)-41EP ACL(B)-42EP ACL(B)-46EP Entrada: 100-240 V Tensión nominal: Relación de reducción: Relación de reducción: Relación de reducción: CA, 50/60 Hz, Máx. 2,4 V CC ±20 % 20:1 16:1... -
Página 22: Lcd Y Panel De Funcionamiento
7. LCD Y PANEL DE FUNCIONAMIENTO 1 Botón de encendido Pulse el botón de encendido para encender el aparato. Se iluminará el panel LCD. Pulse el botón de encendido durante 1 segundo para apagar el aparato. 2 Botón de selección S Esta tecla permite seleccionar las configuraciones para las R.P.M., el torque, relación de transmisión y para la rotación automática hacia atrás en los programas 1-5. - Página 23 Inversión automática: Si la carga se retira después de la rotación inversa automática, la rotación vuelve a la normalidad. Apagado del modo inverso automático: La rotación inversa automática no está activada. Símbolo de la batería: muestra 3 pasos para la cantidad de carga Símbolo de pitido (activado/desactivado): Función de pitido para cada condición de funcionamiento Programa: muestra el programa y control actuales desde el paso 1 al 5...
-
Página 24: Funcionamiento
8. FUNCIONAMIENTO Método de funcionamiento 1. Carga del aparato • Conecta la clavija del cable de alimentación en la toma que está en la parte posterior de la base de carga. Introduzca el cable de alimentación y enchúfelo. • Conecte la alimentación y compruebe que el piloto esté encendido y se ha oído un pitido. -
Página 25: Modo De Empleo
4. Modo de empleo Advertencia • Encienda el aparato pulsando el botón de encendido. • Debido a la función de apagado automático, la • Pulsar la tecla Program hasta visualizar el número correcto para la unidad se apagará automáticamente después de 4 lima que se quiere usar. -
Página 26: Errores Y Soluciones
Advertencia • Cuando el nivel de la batería es bajo, es decir, cuando el indicador de carga restante muestra un nivel bajo, la carga real puede ser demasiado alta para que el aparato llegue al valor límite del torque preconfi gurado. En este caso (si se están usando las baterías), la función de inversión automática no se activará. -
Página 27: Esterilización
2. Esterilización 132 °C Lista de productos de es • Pieza de mano angulada Método de esterilización Esterilización Temperatura Duración Tiempo de • Seque el producto totalmente después de limpiarlo. secado • Coloque el producto en una bolsa esterilizada y séllela correcta- Esterilización con 132 °C 4 minutos 30 minutos... -
Página 28: Solución De Problemas
11. SOLUCIÓN DE PROBLEMAS Cuando encuentre un problema, compruebe la tabla siguiente antes de ponerse en contacto con el distribuidor. Si el problema no tiene que ver con los que se muestran en la tabla o no se soluciona después de haber emprendido la acción requerida, póngase en contacto con el distribuidor. Problema Causa Solución... -
Página 29: Costes De Mantenimiento
Costes de mantenimiento En caso de avería o fallo a causados por el uso indebido por parte del usuario - Uso con la tensión de red errónea - En caso de uso indebido o inadecuado por parte del usuario - Dejar caer la unidad durante el ajuste, traslado o uso - Uso de consumibles o accesorios no recomendados por el fabricante - Avería después de reparación en lugares no recomendados por el fabricante Otros casos... - Página 30 BAE370R_IFU-Final.indd 30 02/04/2019 12:22:36...
- Página 31 MODE D´EMPLOI BA Optima E+ Cordless Endodontic Unit Lisez attentivement ce manuel avant emploi 1. MISE EN GARDE pour les instructions d‘utilisation, d‘entretien et 2. CLASSIFICATION DE L’APPAREIL de maintenance. Conservez ce manuel d‘utilisa- tion pour une consultation ultérieure. 3. CARACTÉRISTIQUES DU PRODUIT 4.
-
Página 32: Mise En Garde
1. MISE EN GARDE SYMBOLES DE MISE EN GARDE • Veuillez lire les mises en garde avant utilisation. • Les mises en garde visent à prévenir les blessures et les dommages Classifi cation Degré de blessure et de dommage à l’utilisateur et au patient. Elles concernent votre sécurité, veuillez suivre les instructions. -
Página 33: Sécurité Électrique
ATTENTION CLASSIFICATION DE L’APPAREIL • Veuillez considérer la sécurité du patient en premier et faire atten- • Veillez à ne pas mettre d’aiguille dans le port de charge du chargeur. tion pendant le fonctionnement du produit. • Placez le moteur de la pièce à main dans le chargeur après avoir •... -
Página 34: Classification De L'appareil
2. CLASSIFICATION DE L’APPAREIL L’appareil a été jugé conforme à la norme sur les appareils médicaux CEI 60601-1 : 2007 qui prévoit des protections raisonnables contre • Type et degré de protection contre les chocs électriques les interférences nuisibles dans les centres médicaux. L’appareil peut Classe II / Type BF émettre de l’énergie radioélectrique. -
Página 35: Spécifications Du Produit
4. SPÉCIFICATIONS DU PRODUIT Chargeur Moteur (Seul) Contre-angle BA182511 BA182510 BAE07 BA680057 BAE05 BA680055 BAE03 BA680053 ACL(B)-41EP ACL(B)-42EP ACL(B)-46EP Entrée AC100-240V, Tension nominale : Rapport de trans- Rapport de trans- Rapport de trans- 50/60HZ, Max0.1A 2,4 V CC ±20 % mission 20:1 mission 16:1 mission : 10:1... -
Página 36: Lcd Et Écran De Commande
7. LCD ET ÉCRAN DE COMMANDE 1 Bouton d’alimentation Appuyez sur le bouton jusqu’à ce que l’appareil soit sous tension et que l’écran LCD s’allume. Appuyez sur le bouton d’alimentation jusqu’à extinction. 2 Bouton de sélection-S Ce bouton permet de sélectionner les réglages de la vitesse, du couple, du rapport de transmission et du mode inversion automatique dans les programmes 1 à... - Página 37 Inversion automatique : Si la charge est enlevée après inversion automatique, la rotation redevient normale Inversion automatique en position arrêt : L’inversion automatique n’est pas activée. Symbole batterie : Affi che 3 étapes de charge Symbole du bip sonore (Marche / Arrêt) : Fonction pour chaque condition de fonctionnement Programme: Affi...
-
Página 38: Processus De Fonctionnement
8. PROCESSUS DE FONCTIONNEMENT Mode de fonctionnement 1. Chargement • Connectez le cordon d’alimentation à l’entrée de câble à l’arrière du socle de recharge. Insérez la prise du cordon d’alimentation et connectez. • Allumez l’interrupteur d’alimentation et vérifi ez le fonctionnement du voyant d’alimentation et du bip sonore. - Página 39 4. Fonctionnement • Allumez l’appareil en appuyant sur le bouton d’alimentation. Avertissement Appuyez sur la touche Programme jusqu’à ce que le numéro de programme correspondant s’affi che. (Appuyez sur le bouton pro- • Grâce à la fonction arrêt automatique, si le bouton ON/ gramme jusqu’à...
-
Página 40: Erreur Et Résolution
Avertissement • Lorsque la batterie s’épuise, c’est-à-dire lorsque l’indicateur de charge restante est faible, la charge réelle sur la lime peut être trop élevée pour que l’appareil atteigne la valeur de couple prédéfi nie. Dans ce cas (en cas d’utilisation de la batterie), la fonction inversion automatique ne sera pas activée. -
Página 41: Lubrification
2. Stérilisation 132 °C Liste des produits de stérilisation • Contre-angle Méthode de stérilisation Stérilisation Température Durée Temps de • Séchez complètement le produit après le nettoyage. séchage • Mettez le produit dans un sac stérile et fermez hermétiquement. Stérilisation à 132 °C 4 minutes 30 minutes •... -
Página 42: Résolution Des Problèmes
11. RÉSOLUTION DES PROBLÈMES En cas de problème, vérifi ez les points suivants avant de contacter le revendeur. Si aucun de ces cas ne s’applique ou si le problème n’est pas résolu même après que des mesures ont été prises, contactez votre revendeur. Problème Cause Solution... -
Página 43: Frais De Service
Frais de service En cas de panne ou de dysfonctionnement dû à une mauvaise utilisation de l’utilisateur - Utilisation avec une tension d’entrée incorrecte - En cas de mauvaise utilisation ou d’utilisation inadéquate par l’utilisateur - Chute de l’appareil pendant le réglage, le déplacement ou l’utilisation - Utilisation de pièces ou d’accessoires non recommandés par le fabricant - Dysfonctionnement après une réparation non recommandée par le fabricant Autres cas... - Página 44 BAE370R_IFU-Final.indd 44 02/04/2019 12:22:39...
- Página 45 GEBRAUCHSANWEISUNG BA Optima E+ Cordless Endodontic Unit Lesen Sie die in diesem Benutzerhandbuch ent- 1. WARNHINWEISE haltenen Anleitungen zu Bedienung, P ege und 2. GERÄTEKATEGORIE Wartung genau durch, bevor Sie das Produkt verwenden. Bewahren Sie dieses Benutzerhand- 3. PRODUKTEIGENSCHAFTEN buch zum späteren Nachschlagen auf 4.
-
Página 46: Warnhinweise
1. WARNHINWEISE Warnsymbole • Lesen Sie bitte vor der Bedienung die Warnhinweise. • Die Warnhinweise dienen dazu, Verletzung und Schädigung von Be- Klassifi kation der Grad der Verletzungen und Schäden Warnhinweise nutzer und Patient zu vermeiden. Sie dienen Ihrer Sicherheit. Bitte daher die Anweisungen befolgen Dieser Warnhinweis soll vor Verlust von Leben Verbot... -
Página 47: Elektrische Sicherheit
ACHTUNG • Wischen Sie vor dem Einsetzen des Motorhandstücks in die Lade- station etwaige Flüssigkeiten oder Staub ab. Ist der Ladekontakt • Bitte stellen Sie die Sicherheit des Patienten voran und gehen Sie verschmutzt, besteht die Gefahr, dass er rostet und nicht mehr bei der Bedienung des Produkts vorsichtig vor. -
Página 48: Gerätekategorie
2. GERÄTEKATEGORIE Die Erfüllung der Vorgaben für medizinische Geräte IEC 60601-1: 2007 bezüglich angemessenem Schutz gegen schädliche Störgrößen • Art und Grad des Schutzes gegen Stromschlag: in typischen medizinischen Installationen wurde bestätigt. Klasse II/Typ BF Das Gerät kann Hochfrequenzenergie ausstrahlen. Wird es nicht ge- Grad des Schutzes gegen Wasser (herabfallende Tropfen) mäß... -
Página 49: Produktspezifikation
4. PRODUKTSPEZIFIKATION Ladestation Motorhandstück Handstückskopf BA182511 BA182510 BAE07 BA680057 BAE05 BA680055 BAE03 BA680053 ACL(B)-41EP ACL(B)-42EP ACL(B)-46EP Eingangsleistung: Nennspannung: Übersetzung: 20:1 Übersetzung: 16:1 Übersetzung: 10:1 AC100-240V, DC 2,4 V, 1,3 A 50/60HZ, Max 0.1A Ausgangsleistung: Akku: 1,2 V X 2 EA= Abmessungen: Abmessungen: Abmessungen:... -
Página 50: Lcd-Anzeige Und Bedienfeld
7. LCD-ANZEIGE UND BEDIENFELD 1 Ein/Aus-Taste Drücken Sie auf die Ein/Aus-Taste, bis sich das Gerät eingeschaltet hat und die LCD-Anzeige leuchtet. Drücken Sie auf die Ein/Aus-Taste, bis sich das Gerät ausschaltet. 2 Auswahltaste S Diese Taste dient zur Auswahl von Drehzahl, Drehmoment, Übersetzung oder automatischem Rückwärtsmodus in Programmen 1-5. - Página 51 Autom. Rückwärtsmodus: Wird die Last nach dem automatischen Rückwärtsmodus entfernt, kehrt das Gerät wieder in den Vorwärtsmodus zurück. Autom. Rückwärtsmodus aus: Autom. Rückwärtsmodus nicht aktiviert. Akkusymbol: Zeigt den Ladestand in 3 Stufen an. Pieptonsymbol (Ein/Aus): Pieptonfunktion für jede Betriebsbedingung. Programm: Zeigt aktuelles Programm und Steuerung von Schritt 1 bis 5 an. Drehmoment: Steuert das Drehmoment, zeigt die aktuelle Drehmomentbegrenzung an (Messung: N.cm).
-
Página 52: Bedienung
8. BEDIENUNG Bedienungsmethode 1. Laden des Geräts • Stecken Sie den Netzstecker in die Buchse auf der Rückseite der Ladestation. Stecken Sie das Netzkabel an der Steckdose an. • Schalten Sie die Ein/Aus-Taste ein und überprüfen Sie, ob das Be- triebslämpchen leuchtet und ein Piepton zu hören ist. -
Página 53: Bedienung Des Geräts
4. Bedienung des Geräts • Schalten Sie das Gerät durch Drücken der Ein/Aus-Taste ein. Warnung •Drücken Sie die Programmtaste, bis die Programmnummer, die für • Die automatische Ausschaltfunktion bewirkt, dass die Feile geeignet ist, erscheint. (Halten Sie die Programmtaste sich das Gerät nach 4 Minuten ohne Bedienung der gedrückt, bis ein Piepton zu hören ist, um die eingestellten Werte Ein/Aus-Taste ausschaltet. -
Página 54: Fehlermeldung Und Behebung
Warnung • Ist der Akku fast entleert, d.h., wenn eine geringe Ladung angezeigt wird, kann das Gerät den eingestellten Drehmoment-Grenzwert möglicher- weise aufgrund der hohen Last nicht erreichen. In diesem Fall (bei Akkubetrieb) wird der automatische Rückwärtsmodus nicht aktiviert. Achten Sie darauf, dass die Akkus nicht stark entladen sind (an der Akku-Anzeige zu sehen), wenn Sie mit hohem Drehmoment arbeiten möchten. - Página 55 2. Sterilisation 132 °C Liste der zu sterilisierenden Produkte • Handstückkopf Sterilisationsmethode Sterilisation Temperatur Dauer Trocknungszeit • Trocknen Sie das betreffende Produkt nach der Reinigung vollständig Sterilisation bei 132 °C 4 Minuten 30 Minuten feuchter Hitze • Legen Sie das betreffende Produkt in einen sterilen Beutel und ver- schließen Sie ihn gut.
-
Página 56: Problembehebung
11. PROBLEMBEHEBUNG Bei Störungen lesen Sie folgenden Abschnitt durch, bevor Sie einen Händler kontaktieren. Falls Sie hier keine Lösung fi nden oder die Störung dennoch nicht behoben werden kann, kontaktieren Sie Ihren Händler. Problem Ursache Lösung Das Motorhandstück ist nicht eingeschaltet. Der Akku ist entladen. -
Página 57: Symbole
Wartungsgebühr Bei durch unsachgemäße Handhabung bedingten Defekten oder Störungen - Verwendung mit der falschen Spannung - Im Fall eines unsachgemäßen Gebrauchs - Herunterfallen des Geräts während des Einstellens, Bewegens oder der Bedienung - Verwendung von Verbrauchsgütern und Zubehör, die nicht vom Hersteller empfohlen wurden - Störungen nach Reparatur durch Einheiten, die nicht vom Hersteller empfohlen wurden Sonstige Fälle - Durch höhere Gewalt (Feuer, Meeresluft- oder wasser, Überschwemmung usw.) bedingte Defekte... - Página 58 BAE370R_IFU-Final.indd 58 02/04/2019 12:22:41...
- Página 59 MANUALE DI ISTRUZIONI BA Optima E+ Cordless Endodontic Unit Leggere attentamente il presente manuale di 1. AVVERTENZA istruzioni prima di eseguire le procedure di fun- 2. CLASSIFICAZIONE DELLA MACCHINA zionamento, cura e manutenzione. Conservare il manuale per utilizzi futuri. 3. CARATTERISTICHE DEL PRODOTTO 4.
-
Página 60: Avvertenza
1. AVVERTENZA SIMBOLI DI AVVERTENZA • Si prega di leggere le avvertenze prima di mettere in funzione il prodotto. Classifi cazione dell’av- Grado di infortuni e danni vertenza • Le avvertenze intendono evitare infortuni e danni per l’utente e il paziente. -
Página 61: Sicurezza Elettrica
ATTENZIONE • Posizionare il manipolo a motore nel caricabatteria una volta eli- minati i liquidi o la polvere. Se il terminale di carica è sporco, può • Si prega di considerare innanzitutto la sicurezza del paziente e di arrugginirsi e non caricare correttamente. fare attenzione durante il funzionamento del prodotto. -
Página 62: Classificazione Della Macchina
2. CLASSIFICAZIONE DELLA MACCHINA È stato confermato che la macchina rispetta le norme sulle apparec- chiature medicali IEC 60601-1: 2007 che fornisce protezioni ragione- • Tipo e grado di protezione dalle scosse elettriche: voli da interferenze dannose in tipiche installazioni mediche. Classe II/Tipo BF La macchina può... -
Página 63: Pecifiche Tecniche Del Prodotto
4. PECIFICHE TECNICHE DEL PRODOTTO Caricabatterie Motore Contrangolo BA182511 BA182510 BAE07 BA680057 BAE05 BA680055 BAE03 BA680053 ACL(B)-41EP ACL(B)-42EP ACL(B)-46EP Ingresso: C.a. 100- Tensione nominale: Rapporto di riduzione: Rapporto di riduzione: Rapporto di riduzione: 240V, 50/60HZ, Max C.c. 2,4V±20 20:1 16:1 10:1 0,1A Uscita: C.c. -
Página 64: Pannello Operativo Lcd
7. PANNELLO OPERATIVO LCD 1 Pulsante di alimentazione Premere il pulsante di alimentazione fino all’accensione della corrente e all’illuminazione del pannello LCD. Premere il pulsante di alimentazione fino allo spegnimento. 2 Pulsante S Selezione Questo tasto permette di selezionare le impostazioni per RPM, torque, rapporto di trasmissione e rotazione automatica all’indietro nei programmi 1-5. - Página 65 Inversione automatica: Se si rimuove il carico dopo l’inversione automatica, si torna alla rotazione normale. Inversione automatica OFF: L’inversione automatica non è attivata. Simbolo della batteria: mostra 3 tacche indicanti la quantità di carica Simbolo del bip sonoro (On/Off): Funzione di emissione di bip sonoro per ogni condizione operativa Programma: : mostra il programma e il controllo corrente dalla Fase 1 a quella 5 Coppia: : controlla la coppia, mostra la limitazione della coppia corrente (misurazione: N.cm) Velocità: controlla la velocità...
-
Página 66: Processo Operativo
8. PROCESSO OPERATIVO Metodo di funzionamento 1. Come eseguire la ricarica • Inserire la spina jack del cavo di alimentazione nell’ingresso situato sul lato posteriore della stazione di ricarica. Inserire il cavo di ali- mentazione e collegare. • Accendere l’alimentazione tramite l’apposito tasto e verifi care che la spia di alimentazione sia accesa e sia emesso il bip audio. - Página 67 4. Come utilizzare lo strumento Avvertenza • Accendere l’alimentazione premendo il pulsante di alimentazione.# • Premere il pulsante Program fino a quando viene visualizzato il nu- • Data la funzione di spegnimento automatico senza mero del programma desiderato per la lima da utilizzare. (Premere l’utilizzo del pulsante On/Off, dopo 4 min.
-
Página 68: Errori E Soluzioni
Avvertenza • Quando la batteria è scarica, vale a dire, quando la spia sulla carica residua è bassa, il carico effettivo potrebbe essere eccessivo perché il dispositivo sia in grado di raggiungere il valore sul limite di coppia preimpostato. In tal caso (nel caso del funzionamento a batteria), la funzione di inversione automatica non sarà... - Página 69 2. Sterilizzazione 132 °C Elenco dei prodotti da sterilizzare • Contrangolo Metodo di sterilizzazione Sterilizzazione Temperatura Tempo Tempo di asciugatura • Asciugare completamente il prodotto dopo la pulizia. • Sistemare il prodotto pertinente in una busta sterile e sigillare. Sterilizzazione a 132 °C 4 minuti 30 minuti...
-
Página 70: Dei Problemi
11. INDIVIDUAZIONE E RISOLUZIONE DEI PROBLEMI Quando si rileva un problema, verifi care quanto segue prima di contattare il rivenditore. Se il problema non è indicato o se non è risolto neanche dopo l’attuazione di una soluzione, contattare il rivenditore. Problema Causa Soluzione... -
Página 71: Simbolo
Oneri di servizio In caso di guasto o problema correlato all’uso improprio da parte dell’utente - Utilizzo con la tensione di ingresso errata - In caso di uso errato o improprio da parte dell’utente - Far cadere l’unità durante l’impostazione, lo spostamento o l’utilizzo - Utilizzo di parti di consumo o accessori non consigliati dal produttore - Guasto dopo la riparazione di punti non consigliata dal produttore Altri casi... - Página 72 BAE370R_IFU-Final.indd 72 02/04/2019 12:22:44...
- Página 73 HANDLEIDING BA Optima E+ Cordless Endodontic Unit Lees deze handleiding zorgvuldig door voor ge- 1. WAARSCHUWING bruik voor instructies met betrekking tot de be- 2. MACHINE CLASSIFICATIE diening en het onderhoud. Bewaar deze handlei- ding voor toekomstig gebruik. 3. PRODUCTEIGENSCHAPPEN 4.
-
Página 74: Waarschuwing
1. WAARSCHUWING Warnsymbole • Lees de waarschuwingen voor gebruik. • De waarschuwingen dienen om letsel en schade aan de gebruiker Waarschuwingsclas- Mate van letsel en schade sifi catie en de patiënt te voorkomen. Deze zijn bedoeld voor uw veiligheid, gelieve de instructies op te volgen. De waarschuwing dient om verlies van levens Verbod en eigendom te voorkomen... -
Página 75: Elektrische Veiligheid
LET OP batterijlader stopt. Als u het met kracht in de verkeerde richting in de lader duwt, kan dit schade veroorzaken. • Overweeg altijd eerst de veiligheid van de patiënt en wees voorzich- • Zorg ervoor dat u de pin niet in de laad terminal van de batterijlader tig tijdens het gebruik van het product. -
Página 76: Machine Classificatie
2. MACHINE CLASSIFICATIE De machine voldoet aan de regels voor medische machines IEC 69601-1: 2007, dat redelijke bescherming biedt tegen schadelijke • Type en mate van bescherming tegen elektrische schokken: interferentie in typische medische installaties. De machine kan ra- Klasse II/Type BF diofrequenties uitstralen. -
Página 77: Productspecificatie
4. PRODUCTSPECIFICATIE Lader Motorhandstuk Hoekstuk BA182511 BA182510 BAE07 BA680057 BAE05 BA680055 BAE03 BA680053 ACL(B)-41EP ACL(B)-42EP ACL(B)-46EP Input: AC100-240V, Nominale spanning: Versnelling: : 20:1 Versnelling: 16:1 Versnelling: 10:1 50/60HZ, Max 0.1A DC 2,4 V, 1,3 A Output: Batterij: 1,2 V X 2 Afmetingen: Afmetingen: Afmetingen:... -
Página 78: Lcd-Bedieningspaneel
7. LCD-BEDIENINGSPANEEL 1 Schakelaar Druk op de schakelaar tot het toestel is ingeschakeld en het LCD-paneel oplicht. Druk gedurende 1 seconde op de schakelaar tot het toestel is uitgeschakeld. 2 Selecteer-S knop Deze knop is voor het selecteren van het toerental, de torque, instrumentratio en auto-reverse modus in programma 1-5. In programma 6-7 (reciproke modus), wordt deze knop gebruikt om de instelling te selecteren van de van de voorwaartse rotatiehoek en de achterwaartse rotatiehoek. - Página 79 Automatisch omkeren: Als de belasting wordt weggenomen nadat de rotatie automatisch werd omgekeerd gaat het toestel terug over op de normale rotatie. Automatisch omkeren uit: Automatisch de rotatie omkeren is niet ingeschakeld. Batterij-symbool: Geeft de lading van de batterij weer in 3 stappen Biep-symbool (Aan/Uit): PBiep-functie voor elke gebruikstoestand Programma: geeft het huidige programma weer en de controle van stap 1 tot 5 Koppel: controleert koppel, geeft de huidige koppelbeperking weer (Meting: N.cm)
-
Página 80: Bediening
8. BEDIENING Bedieningsmethode 1. Opladen • Steek de stekker van het snoer in de ingang aan de achterkant van het laadstation. Steek het snoer in het stopcontact. • Schakel het toestel aan en ga na of het stroomlampje aan is en of het toestel biept. - Página 81 4. Gebruik Waarschuwing • Schakel het toestel in door op de schakelaar te drukken. • Druk op de Program-knop totdat het geschikte programmanummer • Het toestel schakelt automatisch uit als de Aan/Uit voor de te gebruiken vijl op het display verschijnt. (Blijf op de Pro- knop 4 minuten niet wordt gebruikt, omwille van gram-knop drukken totdat een ‘piep’geluid is te horen waardoor de automatische uitschakelfunctie.
-
Página 82: Foutmeldingen En Oplossing
Waarschuwing • Wanneer de batterij leeg is, d.w.z. wanneer de indicator voor de resterende lading laag is, kan de werkelijke belasting te hoog zijn om ervoor te zorgen dat het apparaat de vooraf ingestelde grenswaarde voor het koppel bereikt. In dit geval (wanneer het toestel op batterijen werkt) zal de automatische omkeerfunctie niet worden geactiveerd. - Página 83 2. Sterilisatie 132 °C Productlijst voor sterilisatie • Hoekstuk Sterilisatiemethode Sterilisatie Temperatuur Duur Droogtijd • Droog het product volledig af nadat het is gereinigd. Vochtige 132 °C 4 minuten 30 minuten • Stop het product in een steriele zak en verzegel die stevig. hittesterilisatie •...
-
Página 84: Probleemoplossing
11. PROBLEEMOPLOSSING Controleer het volgende bij problemen voor u contact opneemt met de dealer. Als het onderstaande niet van toepassing is, of als het probleem niet is opgelost nadat u de actie hebt uitgevoerd, dient u contact op te nemen met de dealer. Probleem Oorzaak Oplossing... -
Página 85: Symbool
Servicekosten In geval van een defect of storing omwille van foutief gebruik - Gebruik met foutieve input spanning - In geval van foutief gebruik door de gebruiker - Het toestel laten vallen tijdens het plaatsen, verplaatsen of gebruik - Het gebruik van onderdelen of accessoires die niet werden aanbevolen door de fabrikant - Storing na reparatie op plaatsen die niet werden aanbevolen door de fabrikant Andere gevallen - Defect door overmacht (brand, zee, wind of water, overstroming, enz.) - Página 86 NOTES BAE370R_IFU-Final.indd 86 02/04/2019 12:22:46...
- Página 87 NOTES BAE370R_IFU-Final.indd 87 02/04/2019 12:22:46...
- Página 88 Distributed by: BA International Ltd. Unit 9, Kingsthorpe Business Centre Studland Road, Northampton MERIDIUS MEDICAL EUROPE LIMITED Unit 3D, North Point House North point Business Park NN2 6NE, UK. New Mallow Road CORK, T23AT2P, Ireland Made in Korea +353 212066448 Rev.2019/03 BAE370R_IFU-Final.indd 88 02/04/2019 12:22:46...