Tabla de contenido

Manuales relacionados para QuickLabel QL-800

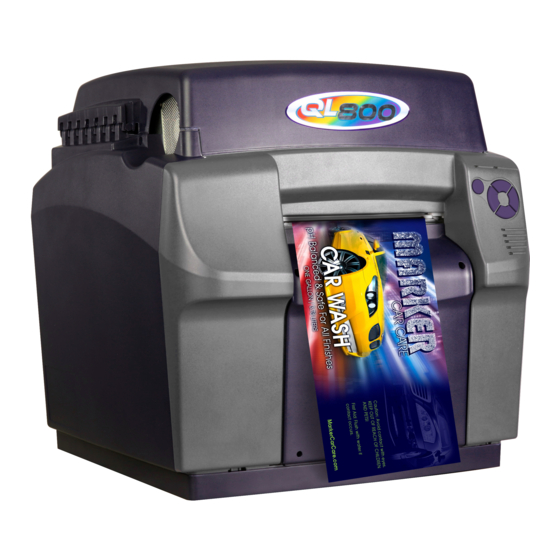
Resumen de contenidos para QuickLabel QL-800
- Página 1 ® The Labels You Want When You Need Them. QUICK START GUIDE QL-800 - Guía de arranque rápido Guide de prise en main rapide QL-800 QL-800 Kurzanleitung QL-800 快速入门指南 QuickLabel.com 22834671-E (1.2)
-
Página 3: Unpacking The Printer
QL-800 Quick Start Guide Use the instructions in this guide to quickly set up your new QL-800 printer. For detailed information about printer operation, please refer to the QL-800 User Guide. After installing the printer driver, you can access the QL-800 User Guide by choosing Start >... - Página 4 Close the main side door but leave the lower side door open. Grasp the maintenance cartridge and pull it straight out of the printer. Then reinstall the maintenance cartridge. Ensure it is fully inserted in the printer. Close the lower side door. QL-800 Quick Start Guide...
-
Página 5: Included Parts
Installing the Printer Driver Ensure the QL-800 is powered on but not connected to your PC via the USB cable. Power on your PC and insert the QL-800 Installer CD in the CD drive. The Installer CD wizard will open. Choose Install Driver. - Página 6 Note: A USB configuration is required for the initial installation. You can later install the printer as a network printer by following the instructions in the QL-800 User Guide. When prompted, connect the QL-800 to your PC with a USB cable. The installation will continue once the USB connection is made.
- Página 7 Save the foam support block and strap for future shipping purposes. Verify that the maintenance roller assembly is level and installed properly. Make sure both ends of the roller are snapped into place. QL-800 Quick Start Guide...
- Página 8 To avoid drying out the printhead, do not open the printhead packaging until you are ready to use it. Open the printhead packaging over an appropriate receptacle to safely capture any excess shipping fluid. Ensure the printer is powered on and the ink cartridges have been installed. QL-800 Quick Start Guide...
- Página 9 Remove the clip holding the cover near the center of the printhead cartridge. • Carefully remove the protective cover. Do not touch any of the ink ports or nozzle plate after the orange cover is removed. QL-800 Quick Start Guide...
- Página 10 11. Tilt the top of the printhead cartridge toward the back of the printer, about 20 degrees. Then gently place the back of the printhead cartridge into the print engine. Avoid touching the printhead connector circuit board inside the printer. QL-800 Quick Start Guide...
- Página 11 16. Open the top cover and verify that ink has filled all of the five tubes shown below. If ink is not visible in all of the indicated tubes, contact Technical Support. Do not run the After Shipping Wizard in the QL-800 Maintenance Utility again or an ink overflow may occur.
-
Página 12: Loading Media
[7] and the adjustable media guide [6]. Slowly guide the media into the printer as illustrated. You will feel slight resistance as the media enters the roller area. Make sure there is no excessive slack in the media during this process. QL-800 Quick Start Guide... - Página 13 QL-800 User Guide. Next Steps You have finished setting up the printer. Please refer to the QL-800 User Guide to set up the printer driver, configure optional QuickLabel software, and begin printing labels. Visit www.QuickLabel.com for video tutorials on setting up and using the QL-800 printer.
- Página 14 QL-800 Quick Start Guide...
-
Página 15: Ql-800 - Guía De Arranque Rápido
Consulte la guía del usuario para información más detallada acerca de la operación de la QL-800. Después de haber instalado el controlador de impresión de la QL-800, se tendrá acceso a la guía del usuario a través de Inicio > Todos los programas > QuickLabel QL-800 >... - Página 16 Tome el cartucho de mantenimiento y extráigalo de la impresora en línea recta. Después vuelva a instalar el cartucho de mantenimiento. Asegúrese de que esté completamente introducido en la impresora. Cierre la puerta lateral inferior. QL-800 - Guía de arranque rápido...
-
Página 17: Piezas Incluidas
Cuando el LED verde deje de parpadear y permanezca encendido, la impresora estará lista para usarse. Nota: el LED rojo permanecerá encendido hasta que usted ejecute el Asistente del procedimiento posterior al envío, explicado más adelante en esta guía. QL-800 - Guía de arranque rápido... -
Página 18: Cómo Instalar El Controlador De La Impresora
Cómo instalar el controlador de la impresora Asegúrese de que la QL-800 esté encendida pero no conectada a la PC a través del cable USB. Encienda la computadora e inserte el CD de instalación de la QL-800 en el lector de discos. -
Página 19: Preparación Del Rodillo De Mantenimiento
Guarde el bloque de apoyo y la tira de amarre a efectos de posibles envíos en el futuro. Compruebe que el conjunto de rodillo esté horizontal y correctamente en su lugar. Asegúrese de que ambos extremos del rodillo hayan encajado en su lugar. QL-800 - Guía de arranque rápido... -
Página 20: Instalación De Los Cartuchos De Tinta
La impresora está diseñada para que los cartuchos de tinta no se puedan introducir en las ranuras incorrectas. No intente introducir cartuchos de tinta en ranuras distintas de las correctas. Cierre los retenedores de los cartuchos de tinta. Cierre la puerta lateral principal. QL-800 - Guía de arranque rápido... -
Página 21: Instalación Del Cabezal De Impresión
Proteja en todo momento el conjunto de cabezal contra contaminantes suspendidos en el aire, como polvo y fibras. Retire todo exceso de líquido de envío que pudiera haber en el conjunto con un paño limpio sin pelusa. QL-800 - Guía de arranque rápido... - Página 22 Retire cuidadosamente el soporte plástico del conjunto de cabezal de impresión. Oriente los puertos de tinta en dirección contraria a la parte delantera (lado de la salida de las etiquetas) de la impresora. 10. Alinee el conjunto de cabezal con la ranura correspondiente. QL-800 - Guía de arranque rápido...
- Página 23 Si el retenedor no cierra, no lo fuerce. Extraiga el cabezal e inténtelo una vez más. 14. Cierre la cubierta superior. 15. Use el Asistente del procedimiento posterior al envío en la Herramienta de mantenimiento de la QL-800. QL-800 - Guía de arranque rápido...
-
Página 24: Cómo Cargar Los Materiales De Impresión
Si en alguno de los tubos no hay tinta, comuníquese con el grupo de apoyo técnico. No vuelva a ejecutar el Asistente del procedimiento posterior al envío de la utilidad Herramienta de mantenimiento de la QL-800, ya que pudiera producirse un desbordamiento de tinta. -
Página 25: Pasos Siguientes
QL-800. Pasos siguientes Con esto finaliza la preparación de la impresora. Consulte la guía del usuario de la QL-800 a efectos de instalar el controlador de la impresora, configurar otros módulos de software opcionales QuickLabel, y comenzar a imprimir etiquetas. - Página 26 QL-800 - Guía de arranque rápido...
-
Página 27: Déballage De L'imprimante
Guide d'utilisation de la QL-800. Lorsque vous aurez installé le pilote d'imprimante, vous pourrez accéder au Guide d'utilisation QL-800 en cliquant sur Démarrer > Toutes les applications > QuickLabel QL-800 > Guide d'utilisation. Déballage de l'imprimante Retirez la boîte d'accessoires et les matériaux d'emballage du carton. - Página 28 Fermez la trappe latérale principale, mais laissez la trappe latérale inférieure ouverte. Attrapez la cartouche de maintenance et tirez tout droit pour la sortir de l'imprimante. Puis, remettez-la en place. Assurez-vous qu'elle est complètement insérée dans l'imprimante. Fermez la trappe latérale inférieure. Guide de prise en main rapide QL-800...
-
Página 29: Pièces Fournies
Assurez-vous que la QL-800 est sous tension mais n'est pas connectée à votre ordinateur par USB. Mettez votre ordinateur sous tension et insérez le CD d'installation de la QL-800 dans le lecteur. L'assistant du CD Installation s'ouvre. Sélectionnez Installer le pilote. - Página 30 Guide d'utilisation QL-800. À l'invite, connectez la QL-800 à votre PC à l'aide d'un câble USB. L'installation se poursuit une fois la connexion USB effectuée.
- Página 31 Conservez le bloc de support en mousse et la sangle, vous pourriez en avoir besoin expédier à nouveau l'imprimante. Vérifiez que l'ensemble du rouleau de maintenance est de niveau et correctement mis en place. Assurez-vous que les deux extrémités du rouleau sont bien enclenchées aux emplacements correspondants. Guide de prise en main rapide QL-800...
- Página 32 L'imprimante est conçue de telle manière qu'il est impossible d'insérer les cartouches d'encre au mauvais emplacement. Ne tentez pas d'insérer des cartouches d'encre au mauvais emplacement. Fermez les loquets des cartouches d'encre. Puis, fermez la trappe latérale principale. Guide de prise en main rapide QL-800...
- Página 33 Protégez en permanence la cartouche de la tête d'impression de la contamination, par exemple de la poussière ou des fibres textiles. Essuyez tout surplus de liquide de la cartouche de la tête d'impression à l'aide d'un chiffon propre non pelucheux. Guide de prise en main rapide QL-800...
- Página 34 Retirez soigneusement le support en plastique de la cartouche de la tête d'impression. Dirigez les ports d'encre à l'opposé de l'avant de l'imprimante (côté sortie des étiquettes). 10. Positionnez la cartouche de la tête d'impression en face de son emplacement. Guide de prise en main rapide QL-800...
- Página 35 Si le loquet ne se ferme pas, ne forcez pas. Retirez la tête d'impression et réessayez. 14. Fermez le capot supérieur. 15. Terminez l'assistant Après expédition dans l'Utilitaire de maintenance de la QL-800. Guide de prise en main rapide QL-800...
-
Página 36: Chargement De Supports
Si vous ne voyez pas d'encre dans tous les tubes indiqués, veuillez contacter l'Assistance technique. Ne lancez plus l'assistant Après expédition dans l'Utilitaire de maintenance de la QL-800, car l'encre risquerait de déborder. 17. Fermez le capot supérieur. Chargement de supports Faites tourner l'écrou à... -
Página 37: Étapes Suivantes
Étapes suivantes Vous avez terminé l'installation de votre imprimante. Veuillez vous reporter au Guide d'utilisation QL-800 pour installer le pilote d'impression, configurer le logiciel QuickLabel en option et commencer à imprimer des étiquettes. Rendez-vous sur www.QuickLabel.com pour regarder des tutoriels vidéo sur l'installation et l'utilisation de l'imprimante QL-800. - Página 38 Guide de prise en main rapide QL-800...
-
Página 39: Drucker Auspacken
Detaillierte Informationen zum Betrieb des Druckers entnehmen Sie bitte der Bedienungsanleitung des QL-800. Nach der Installation des Druckertreibers können Sie auf die QL-800-Bedienungsanleitung zugreifen, indem Sie Start > Alle Programme > QuickLabel QL-800 > Bedienungsanleitung auswählen. Drucker auspacken Entfernen Sie die Zubehörbox und das Verpackungsmaterial aus dem Versandkarton. - Página 40 Klappe geöffnet. Ziehen Sie die Wartungspatrone in einer geradlinigen Bewegung aus dem Drucker heraus. Setzen Sie die Wartungspatrone anschließend wieder ein. Vergewissern Sie sich, dass sie vollständig in den Drucker eingeschoben ist. Schließen Sie die untere seitliche Klappe. QL-800 Kurzanleitung...
-
Página 41: Lieferumfang
Anleitung beschrieben wird. Installation des Druckertreibers Vergewissern Sie sich, dass der QL-800 eingeschaltet, aber nicht über das USB-Kabel an Ihren Computer angeschlossen ist. Schalten Sie Ihren Computer ein und legen Sie die QL-800-Installations-CD in das CD- Laufwerk ein. - Página 42 Drucker später als Netzwerkdrucker installieren, indem Sie die in der QL-800- Bedienungsanleitung beschriebenen Schritte ausführen. Wenn Sie dazu aufgefordert werden, verbinden Sie den QL-800 über ein USB-Kabel mit Ihrem Computer. Der Installationsvorgang wird fortgesetzt, sobald die USB-Verbindung hergestellt worden ist.
- Página 43 Herausnehmen des Blocks vorsichtig vor, um zu vermeiden, dass sich die Wartungswalzeneinheit verschiebt. Bewahren Sie den Schaumstoffblock und den Gurt für einen späteren Transport des Geräts auf. Stellen Sie sicher, dass die Wartungswalzeneinheit waagerecht und korrekt installiert ist. Vergewissern Sie sich, dass beide Enden der Walze eingerastet sind. QL-800 Kurzanleitung...
- Página 44 Fall mit Ihren Fingern in diesen Bereich. Der Drucker ist so konzipiert, dass die Tintenpatronen nicht in die falschen Schächte eingesetzt werden können. Versuchen Sie nicht, Tintenpatronen mit Gewalt in einen falschen Schacht einzuschieben. Schließen Sie die Tintenpatronenverriegelungen. Schließen Sie danach die seitliche Hauptklappe. QL-800 Kurzanleitung...
- Página 45 Technischen Support oder Ihrem Vertriebspartner. Legen Sie die Druckkopfkassette nicht ungeschützt ab. Schützen Sie die Druckkopfkassette immer gegen Verschmutzung wie z. B. Staub oder Fasern. Wischen Sie beim Transport ausgetretene Flüssigkeit mit einem sauberen, fusselfreien Tuch von der Druckkopfkassette ab. QL-800 Kurzanleitung...
- Página 46 Streifens darauf, dass Sie einen Winkel von mindestens 45° zur Oberfläche des Druckkopfs einhalten. Entsorgen Sie die entfernten Kunststoffstreifen sofort und achten Sie darauf, dass die Streifen nicht mit den elektrischen Kontakten oder den Druckkopfdüsen in Berührung kommen. Nehmen Sie vorsichtig die Kunststoffklammer von der Druckkopfkassette ab. QL-800 Kurzanleitung...
- Página 47 Falls sich die Verriegelung nicht schließen lässt, versuchen Sie nicht, sie mit Gewalt zu bewegen. Nehmen Sie den Druckkopf heraus und versuchen Sie es noch einmal. 14. Schließen Sie die obere Abdeckung. 15. Beenden Sie den "Nach dem Versand"-Assistenten im QL-800-Wartungsprogramm. QL-800 Kurzanleitung...
-
Página 48: Laden Des Materials
Röhrchen mit Tinte gefüllt sind. Falls die Tinte nicht in allen Röhrchen sichtbar ist, wenden Sie sich bitte an unseren Technischen Support. Führen Sie den "Nach dem Versand"-Assistenten im QL-800- Wartungsprogramm NICHT noch einmal aus, da dies zu einem Tintenüberlauf führen könnte. - Página 49 Sie bitte alternativ die in der QL-800-Bedienungsanleitung beschriebene manuelle Ladeprozedur. Nächste Schritte Sie haben nun die Einrichtung des Druckers abgeschlossen. Führen Sie die in der QL-800- Bedienungsanleitung beschriebenen Schritte zur Einrichtung des Druckertreibers und zur Konfiguration optionaler QuickLabel-Softwareprodukte aus und beginnen Sie mit dem Drucken Ihrer Etiketten.
- Página 50 QL-800 Kurzanleitung...
- Página 51 QL-800 快速入门指南 使用本指南中的说明以快速设置新 QL-800 打印机。有关打印机操作的详细信息,请参阅 QL-800 用户指南。 安装打印机驱动程序后,您可通过选择开始 > 所有程序 > QuickLabel QL-800 > 用户指南来访 问 QL-800 用户指南。 打印机开箱 1. 从装运纸板箱中取出配件箱和包装材料。 2. 在另一人的帮助下,将打印机从装运纸板箱中抬起。 打印机很重,需要两个人搬运。一人应通过指定的提升部位抬起前部,而另一人应通 过指定的提升部位抬起后部。切勿通过卷轴抬起打印机。通过隐藏式手柄抬起打印机 前部。通过卷轴上方紫色框架的平坦区域抬起打印机后部。抬起打印机时,保持打印 机水平。 3. 将打印机放置在坚固、平坦,至少可支撑 100 磅 (45.4 公斤)的水平表面上。 4. 从打印机外部取出所有包装带。这种包装带用来将门和盖板固定到位。 此外,还有将维护墨盒固定到位的胶带。打开主侧门和下侧门,以接触并揭掉该胶带。 QL-800 快速入门指南...
- Página 52 5. 在主侧门打开的情况下,逆时针旋转黄色运输单元运输锁约 45 度,将其对准,然后将其直 接拉出。保存锁以备将来发货之用。 注:打印机发运时需安装交通运输锁。但是,锁固定后就无法移除运输单元。 6. 握住运输单元手柄,将运输单元从打印机直接拉出。然后,重新安装运输单元。确保其完全 插入打印机。 7. 关闭主侧门,但将下侧门打开。 8. 握住维护墨盒并将其从打印机直接拉出。然后,重新安装维护墨盒。确保其完全插入打印 机。 9. 关闭下侧门。 QL-800 快速入门指南...
- Página 53 2. 按住电源键 [3] 一秒钟,以开启打印机电源。 打印机将开始通电过程,包括打开打印头闩锁,绿色 LED 指示灯将瞬间闪烁。当绿色 LED 指 示灯停止闪烁并持续点亮时,打印机处于使用就绪状态。 注:在您使用本指南后面的 “ 装运后 ” 向导前,红色错误指示灯将亮起。 安装打印机驱动程序。 1. 确保 QL-800 打印机通电,但未通过 USB 线连接到您的计算机。 2. 打开您的计算机,将 QL-800 安装光盘插入 CD 驱动器。安装光盘向导将打开。选择安装驱动 程序。 如果自动运行程序未能自动启动,请使用 Windows 资源管理器来启动位于 CD 上的 “Setup.exe” 文件。 注:如果您没有 CD 驱动器,您可从 www.QuickLabel.com/downloads 获取软件。...
- Página 54 5. 出现提示时,使用 USB 线将 QL-800 连接到计算机。一旦 USB 连接完成,安装将继续。 6. 出现提示时,选择是否将 QL-800 设置为默认打印机。 7. 选择完成。 使用装运后向导 1. 启动 QL-800 维护实用工具。 从 Windows“ 开始 ” 菜单,选择开始 > 所有程序 > QuickLabel QL-800 > QL-800 维护实 用工具。语言和打印机提示将打开。 选择一种显示语言和您要连接的 QL-800 打印机。选择确定。 2. 选择清洁选项卡。 3. 选择装运后。请遵循屏幕上的说明完成此步骤。此向导将引导您完成下列操作。...
- Página 55 3. 检验维护卷筒组件是否水平,安装是否正确。确保卷筒两端卡入到位。 安装墨盒 为了安全起见,请将墨盒存放在儿童接触不到的地方。如果不慎误食墨水,应立即就医。 1. 打开主侧门。打开墨盒的两个闩锁 [1]。按下锁定机构的顶部并且向外拉,即可打开每个闩 锁。 墨盒闩锁有标签,显示每种墨水颜色的安装位置。 QL-800 快速入门指南...
- Página 56 2. 滑入墨盒,喷嘴端先进入,使标签面朝上。完全推入墨盒。 当喷嘴与打印机内的墨针啮合 , 您会在此过程结束时,感觉到轻微的阻力。每种颜色均重复 此步骤。 墨盒槽中有锋利的针。切勿将手指伸入此区域。 打印机的设计,使墨盒无法插入错误的插槽中。请勿尝试将墨盒插入错误的插槽中。 3. 闭合墨盒闩锁。然后,关闭主侧门。 安装打印头 打印头对静电放电 (ESD)十分敏感。处理打印头时,请采取 ESD 保护。 安装打印头墨盒时,请勿触摸打印头墨盒墨管接头、喷嘴表面,或电触点。只能通过手柄 握住打印头墨盒。 为避免打印头干涸,在您准备使用之前,请不要拆开打印头包装。 在一个合适的容器中,打开打印头包装,以便安全地捕获运输途中溢出任何多余液体。 1. 确保打印机已接通电源,并且墨盒已安装好。 2. 打开顶盖。 3. 确保打印头闩锁 [1] 处于打开 (垂直)位置。从两个射流管接头上取下帽保护 [2]。 注:打印头闩锁将处于打开位置。在安装打印头之前,不要闭合闩锁。如果闩锁意外闭合, 请勿撬开。关闭打印机,然后重新打开。打印机在通电过程中,如果未安装打印头,闩锁会 自动打开。 4. 从包装中取出打印头。 注:如果铝箔包装损坏,请向技术支持或经销商报告此问题。 请勿将未受保护的打印头墨盒放置在任何表面上。始终保护打印头墨盒免受灰尘或纤 维等污染。 5. 用一块干净的无绒布擦去打印头墨盒在运输途中溢出的液体。 QL-800 快速入门指南...
- Página 57 6. 握住打印头的手柄,从打印头墨盒上取下橙色塑料保护盖。 • 取下覆盖墨水端口的盖片。 • 在靠近打印头墨盒中心处取下固定盖的夹子。 • 小心地取下保护盖。橙色盖卸下后,不要触摸任何墨水端口或喷嘴板。 7. 一个手握住打印头墨盒。另一个手小心地取下保护塑料条。 • 抓住拉环,慢慢剥离覆盖电触点的塑料条。 • 抓住拉环,慢慢剥离覆盖打印头喷嘴的塑料条。撕胶带时,与打印头表面保持不小于 45° 的角度。 立即处理撕下的胶带,不得使其接触电触点或打印头喷嘴。 8. 小心地从打印头墨盒中取出塑料支架。 9. 使墨水端口远离打印机前部 (即:标签出口侧) 。 10. 将打印头墨盒与打印头插槽对准。 QL-800 快速入门指南...
- Página 58 11. 将打印头墨盒顶部向打印机背部倾斜约 20°。然后,轻轻地将打印头墨盒背部固定到打印 引擎中。 避免接触打印机内部的打印头连接器电路板。 12. 当打印头背部牢固定位后,轻轻地将打印头墨盒向前旋入紧靠打印头连接器电路板止挡的位 置。 如果打印头不能旋转到位,不要对其施力。取出打印头,然后再试一次。 13. 慢慢合上打印头闩锁。分射管接头应当推进并密封打印头墨盒。 如果闩锁不能闭合,不要对其施力。取出打印头,然后再试一次。 14. 合上顶盖。 15. 完成 QL-800 维护实用工具里的运输后向导 QL-800 快速入门指南...
- Página 59 16. 打开顶盖确定墨水已经填充到如下所示的 5 根墨水管中。 如果在指定的管道中未发现墨水,请联系技术支持。请不要再次点击 QL-800 维护实 用工具里的运输后向导,否则易导致墨水漏出。 17. 关闭顶盖 装载打印介质 1. 逆时针方向转动卷轴端部的蝶形螺母 [1],以松开卷轴。 2. 拧松外法兰 [4] 上的紧固件。然后,从卷轴上拆下外法兰。 3. 如图所示,定向纸卷 [2],并将其放在卷轴上。确保纸卷接触内法兰 [3]。 4. 顺时针方向转动卷轴端部的蝶形螺母 [1],直至感觉到阻力。这一操作可将纸卷固定到位。 5. 将外法兰 [4] 放在卷轴上。确保外法兰接触纸卷 [2]。 6. 拧紧外法兰 [4] 上的紧固件,直至感觉到阻力为止。这一操作可将外法兰固定到位。 7. 在打印机前部,将介质出口导轨 [5] 一直向右滑向控制面板。您可在打印前调整此导轨。 QL-800 快速入门指南...
- Página 60 8. 将介质置于靠近进纸槽处,并将可调介质导轨 [6] 滑到介质的宽度。介质的边缘应轻轻接触 固定介质导轨 [7] 边缘以及可调介质导轨 [6]。 9. 如图所示,慢慢将介质导入打印机。当介质进入卷筒区域时,您会感觉到轻微的阻力。确保 在此过程中,介质没有过于松弛。 10. 打印机发出三次蜂鸣音,表明已检测到介质。当打印机开始自动将介质送入打印机时,释放 介质。打印机将送入介质,介质装载过程将完成。 注:如果自动进纸过程失败,介质将从打印机中弹出。如果遇到多个装纸故障,请使用 QL- 800 用户指南中描述的备用手动进纸方法。 下一步 您已完成打印机的设置。请参阅 QL-800 用户指南设置打印机驱动程序,配置选项 QuickLabel 软 件,并开始打印标签。 有关设置和使用 QL-800 打印机的视频教程,请访问 www.QuickLabel.com。 QL-800 快速入门指南...