Tabla de contenido
Publicidad
Idiomas disponibles
Idiomas disponibles
Enlaces rápidos
Publicidad
Capítulos
Tabla de contenido

Manuales relacionados para FAAC TM2 X SW


Resumen de contenidos para FAAC TM2 X SW
- Página 1 TM2 X SW...
-
Página 2: Tabla De Contenido
DICHIARAZIONE DI CONFORMITÀ EU ..............14 TM2 X SW... -
Página 3: Collegamenti Elettrici
2,5 - 100 Grado di protezione IP33 Dimensioni (mm) 300x140xH95 Peso (g) In base al motore/centralina a cui il TM2 X SW è associato, la disponibilità di alcune funzioni cambia come indicato nella seguente tabella: CHIUSURA POSIZIONE RIAPERTURA APERTURA E POSIZIONE COMPATIBILITÀ... -
Página 4: Funzione Lux
FUNZIONE LUX IMPORTANTE! Per utilizzare la funzione luce nel modello“TM2 X SW” è necessario utilizzare un telecomando della serie TM2 X TS con la funzione LUX. TM2 X TS-1 TM2 X TS-7 Attivazione funzione luce Disattivazione funzione luce Attivazione/Disattivazione funzione luce... -
Página 5: Telecomandi Compatibili
Premere i tasti A e B Premere il tasto A contemporaneamente TM2 X SW A4518_6H80_Rev.A... -
Página 6: Spiegazione Delle Sequenze Di Comando
Il motore si riporta nella posizione iniziale anche quando la sequenza non viene completata, in questo caso effettuando una o due brevi rotazioni. Esempi di sequenze incomplete: ripetere la > 4 sec sequenza passo 1 ripetere la > 4 sec sequenza passo 1 passo 2 TM2 X SW A4518_6H80_Rev.A... -
Página 7: Posizione Del Sensore
POSIZIONE DEL SENSORE IMPORTANTE! È indispensabile collocare il sensore TM2 X SW lateralmente, il più vicino possibile alla tenda associata, evitando di posizionarla nella zona superiore o inferiore, coperta dalla tenda. CORRETTO SBAGLIATO SBAGLIATO ASSOCIAZIONE DI PIÙ MOTORI AL SENSORE Una singolo sensore TM2 X SW può... -
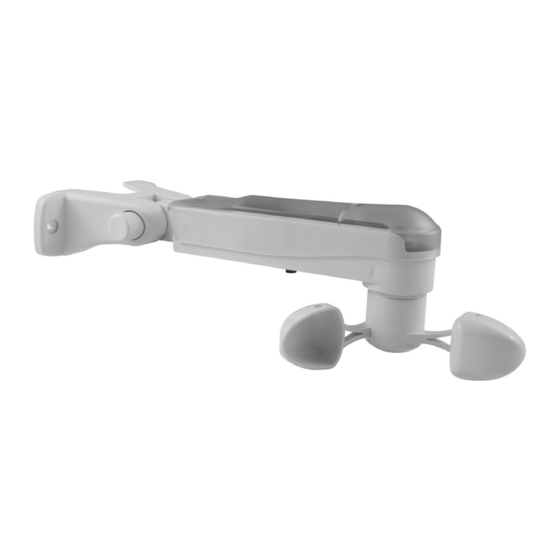
Página 8: Fissaggio Del Sensore
FISSAGGIO DEL SENSORE Il sensore TM2 X SW dispone di un meccanismo di posizionamento che ne per- mette il montaggio su qualsiasi superficie. Per regolare l’angolazione del supporto è necessario premere il pulsante posto in corrispondenza del perno di rotazione (vedi disegno). -
Página 9: Memorizzazione Del Sensore
2 sec tasto set CANCELLAZIONE DEL SENSORE Per cancellare l’associazione del sensore ad un motore, è necessario usare un te- lecomando memorizzato nel motore. La sequenza di cancellazione è la seguente: Tn: Telecomando memorizzato 2 sec TM2 X SW A4518_6H80_Rev.A... -
Página 10: Regolazione Della Funzione Vento
La regolazione della soglia del vento si effettua con l’apposita manopola, situata nella parte inferiore del sensore TM2 X SW, identificata con il simbolo della manica a vento. La regolazione può essere impostata da una velocità minima di 7,5 km/h, fino a una velocità... -
Página 11: Disattivazione Della Riapertura Automatica
Tn (2 sec) REGOLAZIONE DELLA FUNZIONE LUCE La regolazione della soglia della luce si effettua con l’apposita manopola, situata nella parte inferiore del sensore TM2 X SW, identificata con il simbolo REGOLAZIONE del sole. LUCE La regolazione può essere impostata da una intensità minima di 2,5 kLux (luce ambiente all’alba), fino a una intensità... -
Página 12: Attivazione Della Modalità Automatica/Manuale Con Telecomando Tm2 X Ts
TM2 X TS-7 Premendo brevemente il tasto, il display mostra l’impostazione attuale. Attivazione/Disattivazione Per cambiare l’impostazione, è necessario ripremere il tasto per almeno 3 secondi, fino a che il motore risponde con una sequenza di conferma. (3 sec) TM2 X SW A4518_6H80_Rev.A... -
Página 13: Modalità Test
La funzione di test sarà attiva per 3 minuti, durante i quali sarà possibile verificare l’impostazione delle soglie vento e luce, senza che sia necessario attendere i tempi di attivazione. Dopo 3 minuti, il sensore TM2 X SW ritornerà a funzionare in modo normale. -
Página 14: Dichiarazione Di Conformità Eu
DICHIARAZIONE DI CONFORMITÀ EU Il fabbricante, FAAC S.p.A. Soc. Unipersonale, dichiara che il tipo di apparecchia- tura radio marca FAAC modello TM2 X SW è conforme alle pertinenti normative di armonizzazione dell’Unione: Direttiva 2014/53/EU, Direttiva 2011/65/EU. Il testo completo della dichiarazione di conformità EU è disponibile al seguente indirizzo Internet: http://www.faac.biz/certificates... - Página 15 EU DECLARATION OF CONFORMITY ............... .27 TM2 X SW...
-
Página 16: Electrical Connections
IP33 Degree of protection 300x140xH95 Dimensions (mm) Weight (g) According to the motor / control unit to which the TM2 X SW is associated, the availability of certain features changes as indicated in the following table: OPENING AND ADDITIONAL AUTOMATIC CLOSING “PRIVACY”... -
Página 17: Lux Function
LUX FUNCTION ATTENTION! The light function in model TM2 X SW can by activated only by using a remote control series TM2 X TS with the LUX function. TM2 X TS-1 TM2 X TS-7 Activating the Sun sensor Deactivating the Sun sensor Activating/ Deactivating the Sun sensor Wind &... -
Página 18: Compatible Remote Controls
KEY TO SYMBOLS short motor rota- tion in one Wind-speed tuning direction Sun-sensor tuning DOWN long motor rotation in other direction double short rotation STOP DOWN Press buttons A and Press button A B at the same time TM2 X SW A4518_6H80_Rev.A... -
Página 19: Command Sequences Example
Example of a wrong sequence: repeat the > 4 sec sequence Step 1 repeat the > 4 sec sequence Step 1 Step 2 TM2 X SW A4518_6H80_Rev.A... -
Página 20: Where To Place The Wind & Sun Sensor
WHERE TO PLACE THE WIND & SUN SENSOR ATTENTION! The TM2 X SW sensor must be positioned to the side, as close as possible to its awning, and not above or below the awning coverage area. RIGHT WRONG WRONG SETTING OF SEVERAL MOTORS TO ONE SENSOR One single TM2 X SW sensor can be used to automate a group of motorised awnings. -
Página 21: Fitting The Wind & Sun Sensor
FITTING THE WIND & SUN SENSOR The TM2 X SW sensor has a positioning mechanism for fitting to any surface. To adjust fitting-angle, press the button to rotate the support (see drawing). PRESS TM2 X SW A4518_6H80_Rev.A... -
Página 22: Setting The Wind & Sun Sensor
SETTING THE WIND & SUN SENSOR To associate TM2 X SW sensor to a motor, a remote control must be already memo- rised on the motor. The setting sequence is the following: Tn: Already programmed remote control 2 sec Button set DELETING THE WIND &... -
Página 23: Setting The Wind Sensor
The wind level point can be set using the button provided in the lower part of the TM2 X SW sensor, identified by the windsock symbol. The speed can be set from a minimum of 7,5 Km/h to a maximum of 45 Km/h. -
Página 24: Deactivating Automatic Reopening
Tn: Already programmed remote control Tn (2 sec) SETTING THE SUN SENSOR The light level point can be set using the button provided in the lower part of the TM2 X SW sensor, “SUN LIGHT” identified by the sun symbol. SETTING The light intensity can be set from a minimum of 2.5 kLux (dawn light) up to a maxi-... -
Página 25: Activating The Automatic Or Manual Setting Mode By The Remote
(3 sec) TM2 X TS-7 By pressing briefly the button the display will show the current setting. Activating/ Deactivating To change setting press the same button for at least 3 seconds till the motor feedback. (3 sec) TM2 X SW A4518_6H80_Rev.A... -
Página 26: Test Mode
The test function lasts for 3 minutes, during which the wind and light level settings can be checked, without waiting for the activation times. After 3 minutes, the TM2 X SW sensor returns to normal mode function. Set button... -
Página 27: Eu Declaration Of Conformity
EU DECLARATION OF CONFORMITY The manufacturer, FAAC S.p.A. Soc. Unipersonale, hereby, declares that the FAAC model TM2 X SW radio equipment is in compliance with Directive 2014/53/EU, Directive 2011/65/EU. The full text of the EU declaration of conformity is available at the following Internet address: http://www.faac.biz/certificates. - Página 28 EU-KONFORMITÄTSERKLÄRUNG ................40 TM2 X SW...
-
Página 29: Elektrische Anschlüsse
Einstellung Sonnensensor (klux) 2,5 - 100 Schutzgrad IP33 Dimensionen (mm) 300x140xH95 Gewicht (g) Entsprechend der Verwendung des TM2 X SW, mit Motor oder Funkempfänger, ändert sich die Verfügbarkeit einiger Funktionen wie folgend beschrieben: ÖFFNEN UND ZUSÄTZLICHE PRIVACY- SCHLIEßEN DURCH AUTOMATISCHE KOMPATIBILITÄT... -
Página 30: Funktion Lux
FUNKTION LUX ACHTUNG! Zur Funktion des Sonnensensor beim “TM2 X SW” muss ein Handsender der Baureihe TM2 X TS mit der “LUX” Funktion verwendet werden. TM2 X TS-1 TM2 X TS-7 Sonnensensor Aktivieren Sonnensensor Aktivieren / Deaktivieren des Sonnensensors Deaktivieren Windwächter und Sonnsensor aktiv. -
Página 31: Kompatible Handsender
Deactivating the Sun sensor Auswahl SYMBOLERKLÄRUNG Einzelne “kurze” Drehung in eine Windgeschwindigkeit Richtung Einstellung Sonnensensor Einstellung Einzelne “längere” Drehung in die andere Richtung Zweifache “kurze” Drehung des Motors Stopp Zugleich die Tasten Taste A drücken A und B drücken TM2 X SW A4518_6H80_Rev.A... -
Página 32: Eingabe Der Befehlsfolgen
Drehung in die entgegengesetzte Richtung. Bei unvollständiger Befehlsfolge kehrt der Motor, nach 1 oder 2 kurzen Drehungen, in die Startposition zurück. Beispiel einer unvollständigen Befehlsfolge: Befehlsfolge > 4 Sek wiederholen! Schritt 1 Befehlsfolge > 4 Sek wiederholen! Schritt 1 Schritt 2 TM2 X SW A4518_6H80_Rev.A... -
Página 33: Positionierung Der Wetterstation
POSITIONIERUNG DER WETTERSTATION VORSICHT! Die Wetterstation TM2 X SW ist seitlich, so nahe wie möglich an der entsprechenden Markise zu montieren. Diese darf weder unterhalb oder oberhalb, noch von der Markise verdeckt montiert werden. RICHTIG FALSCH FALSCH ANSCHLUSS MEHRERER MOTOREN AN DIE WETTERSTATION Mit einer einzelnen Wetterstation TM2 X SW können bis zu 5 Markisen, die mit... -
Página 34: Befestigung Der Wetterstation
BEFESTIGUNG DER WETTERSTATION Die Wetterstation TM2 X SW beinhaltet einen Verstellmechanismus der die Montage in diversen Positionen erlaubt. Die Verstellung der Neigung des Halters kann durch drücken des “Knopfes” ausgeführt werden. Bei Druck löst sich die Einrastung und ermöglicht die Verstellung. -
Página 35: Einprogrammierung Der Wetterstation
Tn: Eingestellter Handsender 2 Sek Taste set LÖSCHUNG DER WETTERSTATION Zur Löschung der Verbindung der Wetterstation zum Motor, muss ein bereits eingestellter Handsender benutzt werden. Zur Löschung geht man wie folgt vor: Tn: Eingestellter Handsender 2 Sek TM2 X SW A4518_6H80_Rev.A... -
Página 36: Einstellung Des Windwächters
Die Einstellung der Wind-Alarmauslösung erfolgt über das unten am Gehäuse be- findliche, mit dem Symbol der Windhose versehene, Einstellrad der Wetterstation TM2 X SW. Der “Windalarm” kann auf drei verschiedene Niveaus, von minimal 7,5 Km/h bis maximal 45 km/h, eingestellt werden. -
Página 37: Deaktivierung Der Automatischen Öffnung Nach Einem Windalarm
über das unten am Gehäuse befindliche, mit dem Symbol der Sonne ver- EINSTELLUNG sehene, Einstellrad der Wetterstation TM2 X SW. “SONNENALARM” Die Einstellung kann von minimal 2,5 kLux (Licht bei Sonnenaufgang) bis zu einem maximalen Niveau von 100 kLux (Lichtverhältnisse Mittagssonne) getätigt wer- den. -
Página 38: Aktivieren / Deaktivieren Des Sonnensensors Mit Handsender Der
Bei kurzem antippen der Taste wir der bestehende Status gezeigt. Aktivieren / Deaktivieren Um den Sonnensensor zu aktivieren oder deaktivieren, die entsprechende Taste mindestens 3 Sekunden lang gedrückt halten, bis der Motor mit der hier abgebil- deten Rotationsfolge die Eingabe bestätigt. (3 Sek) TM2 X SW A4518_6H80_Rev.A... -
Página 39: Test Modus
Testfunktion bleibt für 3 Minuten aktiv, während dessen es möglich sein wird die Wind+Sonne Niveau Einstellungen zu prüfen. Nach 3 Minuten erlischt der Testmodus und die Wetterstation TM2 X SW kehrt in die normale Funktionstätigkeit zurück. Taste set (2 Sek) FUNKTIONSTEST DES WINDWÄCHTERS... -
Página 40: Eu-Konformitätserklärung
EU-KONFORMITÄTSERKLÄRUNG Der Hersteller FAAC S.p.A. Soc. Unipersonale erklärt hiermit, dass die FAAC Fun- kanlage des Typs TM2 X SW der Richtlinie 2014/53/EU, 2011/65/EU entspricht. Der vollständige Text der EU-Konformitätserklärung ist unter der folgenden Internetadresse verfügbar: http://www.faac.biz/certificates. Bologna, 18-09-2018 CEO A. Marcellan TM2 X SW A4518_6H80_Rev.A... - Página 41 DÉCLARATION DE CONFORMITÉ UE ............... .53 TM2 X SW...
-
Página 42: Connexions Électriques
Poids (g) La disponibilité de certaines fonctions change selon le moteur/récepteur auquel le TM2 X SW est associé. Voir le tableau qui suit: O U V E R T U R E E T P O S I T I O N I N - FERMETURE PAR RÉOUVERTURE AU-... -
Página 43: Fonction Lux
FONCTION LUX TRÈS IMPORTANT! Pour utiliser la fonction solaire du modèle “TM2 X SW”, il est néces- saire d’utiliser un émetteur de la série TM2 X TS avec la fonction LUX. TM2 X TS-1 TM2 X TS-7 Activation de la fonction solaire Activation/ Désactivation de la fonction solaire... -
Página 44: Émetteurs Compatibles
A et B simultanément touche A TM2 X SW A4518_6H80_Rev.A... -
Página 45: Explication Des Séquences De Commande
Le moteur retourne à la position initiale même si la séquence ne s’est pas achevée, en accomplissant dans ce cas une ou deux rotations brèves. Exemples de séquences incomplètes: répéter la > 4 sec séquence étape 1 répéter la > 4 sec séquence étape 1 étape 2 TM2 X SW A4518_6H80_Rev.A... -
Página 46: Mise En Place Du Capteur
MISE EN PLACE DU CAPTEUR TRÈS IMPORTANT! Il est impératif de placer le capteur TM2 X SW latéralement, le plus près possible du store auquel il est associé, et éviter de le placer au-dessus ou au-dessous du store. CORRECT INCORRECT... -
Página 47: Fixation Du Capteur
FIXATION DU CAPTEUR Le capteur TM2 X SW dispose d’un mécanisme de positionnement qui permet de le monter sur n’importe quelle surface. Pour régler l’angle du support, appuyer sur le bouton situé au niveau de l’axe de rotation (voir dessin). -
Página 48: Mémorisation Du Capteur
Tn: émetteur mémorisé 2 sec Bouton set ANNULATION DU CAPTEUR Pour annuler l’association du capteur au moteur, il faut utiliser un émetteur mémorisé sur le moteur. La séquence d’annulation est la suivante: Tn: émetteur mémorisé 2 sec TM2 X SW A4518_6H80_Rev.A... -
Página 49: Réglage De La Fonction Du Vent
Le réglage de la valeur de seuil du vent s’accomplit à travers le potentiomètre cor- respondant qui se trouve dans la partie inférieure du capteur TM2 X SW, identifiée par le symbole d’une manche à vent. Le réglage peut être programmé d’une vitesse minimum de 7,5 km/h à... -
Página 50: Désactivation De La Réouverture Automatique
à travers le potentiomètre corre- spondant qui se trouve dans la partie inférieure RÉGLAGE DE LA du capteur TM2 X SW, identifiée par le symbole LUMIÈRE du soleil. Le réglage peut être configuré d’une intensité minimum de 2,5 klux (lumière ambiante à... -
Página 51: Activation Du Mode Automatique/Manuel Avec Les Émetteurs Série Tm2 X Ts
Presser brièvement une des deux touches, l’écran affiche la configuration actuelle. Activation/Désactivation Pour changer la configuration, presser à nouveau la touche pendant au moins 3 sec. ; le moteur répond avec une séquence de confirmation. (3 sec) TM2 X SW A4518_6H80_Rev.A... -
Página 52: Mode De Test
La fonction test reste active 3 minutes pendant lesquelles il sera possible de vérifier la configuration des seuils de vent et lumière sans qu’il soit nécessaire d’attendre les temps d’activation. Passé 3 minutes, le capteur TM2 X SW reprendra son fonctionnement normal. -
Página 53: Déclaration De Conformité Ue
DÉCLARATION DE CONFORMITÉ UE Le fabricant, FAAC S.p.A. Soc. Unipersonale, déclare que le type d’équipement radio de la marque FAAC, modèle TM2 X SW est conforme à la directive 2014/53/EU, 2011/65/EU. Le texte complet de la déclaration de conformité UE peut être lu à l’adresse Internet suivante: http://www.faac.biz/certificates... - Página 54 BORRADO DEL SENSOR TM2 X SW EN UN MOTOR ............
-
Página 55: Conexiones Eléctricas
Grado de protección 300x140xH95 Dimensiones (mm) Peso (g) En base al motor/centralita al cual se encuentra asociada la TM2 X SW, la dispo- nibilidad de algunas funciones cambia como está indicado en la siguiente tabla: CIERRE CON REAPERTURA APERTURA Y POSICIÓN... -
Página 56: Función Lux
FUNCIÓN LUX ¡¡¡ MUY IMPORTANTE !!! Para utilizar la función luz en el modelo “TM2 X SW” es necesario utilizar un emisor serie TM2 X TS con la función LUX. TM2 X TS-1 TM2 X TS-7 Activar función Lux Desactivar función Lux Activar/ Desactivar función Lux... -
Página 57: Emisores Compatibles
Habrá que volver a codifi car la subida función que estábamos stop realizando. bajada Pulsar las teclas A Pulsar la tecla A y B simultáneamente. TM2 X SW A4518_6H80_Rev.A... -
Página 58: Explicación De Las Secuencias De Mando
Ejemplos de secuencias incompletas: repetir la > 4 seg secuencia paso 1 repetir la > 4 seg secuencia paso 2 paso 1 TM2 X SW A4518_6H80_Rev.A... -
Página 59: Posicionamiento Del Sensor
POSICIONAMIENTO DEL SENSOR ¡¡¡ MUY IMPORTANTE !!! Es indispensable colocar el sensor TM2 X SW lo más próximo posible al toldo aso- ciado, evitando posicionarlo en la parte superior o inferior del toldo. CORRECTO INCORRECTO INCORRECTO AGRUPACIÓN DE VARIOS MOTORES CON UN SENSOR Un solo sensor TM2 X SW nos permite controlar un grupo de toldos automatizados. -
Página 60: Fijación Del Sensor
FIJACIÓN DEL SENSOR El sensor TM2 X SW dispone de un mecanismo de posicionamiento que nos permi- tirá situar el sensor sobre cualquier superficie. Para regular el ángulo del soporte es necesario pulsar el botón situado junto a la articulación (véase dibujo). -
Página 61: Memorización Del Sensor
2 seg BOTÓN SET BORRADO DEL SENSOR TM2 X SW EN UN MOTOR Para proceder a la cancelación de un sensor en un motor, es necesaria la utilización de un emisor ya memorizado en el motor. La secuencia de cancelación es la siguiente:... -
Página 62: Regulación De La Función Viento
La regulación del umbral de viento se realiza por medio de un potenciómetro, situado en la parte inferior del sensor TM2 X SW e identificado con el símbolo del viento. El intervalo de funcionamiento del automatismo va desde una velocidad mínima de 7,5 Km/H, hasta una velocidad máxima de 45 Km/H. -
Página 63: Desactivación De La Reapertura Automática
10 minutos. Los tiempos de espera están programados para que el motor no esté en contínuo funcionamiento en los días de nubes pasajeras.La apertura y el cierre automático funcionan sólo cuando el motor se encuentre en modo automático. TM2 X SW A4518_6H80_Rev.A... -
Página 64: Activación De La Modalidad Automática/Manual Con Emisor Serie Tm2 X Ts
Pulsado brevemente el botón, el display muestra la programación actual. Activar/ Desactivar Para cambiar la programación, es necesario volver a pulsar el botón durante al me- nos 3 segundos, hasta que el motor responde con una secuencia de confirmación. (3 seg) TM2 X SW A4518_6H80_Rev.A... -
Página 65: Modo Test
Es posible repetir esta operación en varias ocasiones, para establecer el umbral deseado para la apertura y recogida automática en base a la intensidad de la luz. TM2 X SW A4518_6H80_Rev.A... -
Página 66: Declaración De Conformidad Ue
DECLARACIÓN DE CONFORMIDAD UE El fabricante, FAAC S.p.A. Soc. Unipersonale, declara que el tipo de equipo de radio marca FAAC modelo TM2 X SW cumple los requisitos de la directiva 2014/53/EU, 2011/65/EU. El texto completo de la declaración de conformidad UE está disponible en la siguiente dirección de Internet: http://www.faac.biz/certificates... - Página 67 EU-CONFORMITEITSVERKLARING ............... . .79 TM2 X SW...
-
Página 68: Elektrische Aansluitingen
7.5 - 45 Lichtsensor regeleing (klux) 2.5 - 100 Beschermingsklasse IP33 Afmetingen (mm) 300x140xH95 Gewicht (g) A|fhankelijk van de motor/regeleenheid waarmee de TM2 X SW gekoppeld is, zijn sommige functies verschillend; zie tabel hieronder: SLUITING OPENING EN EXTRA HEROPENING STAND COMPATIBILITEIT... -
Página 69: Lux Functie
LUX FUNCTIE BELANGRIJK! Om de lichtfunctie voor model “TM2 X SW” te gebruiken, heeft u een afstandsbediening van de serie TM2 X T met LUX functie nodig. TM2 X TS-1 TM2 X TS-7 Activering lichtfunctie Deactivering lichtfunctie Activering/Deactivering lichtfunctie Windsensor en lichtsensor actief... -
Página 70: Compatibele Afstandsbedieningen
Druk op de toetsen A Druk op toets A en B tegelijkertijd TM2 X SW A4518_6H80_Rev.A... -
Página 71: Uitleg Van De Bedieningsreeks
De motor keert naar de startpositie terug ook wanneer de reeks niet is afgerond. In dit geval graait hij een of twee keer kort. Voorbeelden van onvoltooide reeksen: de reeks > 4 sec herhalen stap 1 de reeks > 4 sec herhalen stap 1 stap 2 TM2 X SW A4518_6H80_Rev.A... -
Página 72: Stand Vd Sensor
STAND VD SENSOR BELANGRIJK! Het is belangrijk om de sensor TM2 X SW aan de zijkant en zo dicht mogelijk bij de gekoppelde zonwering. Voorkom een afgedekte plaatsing, boven of onder de zonwering. CORRECT FOUT FOUT MEERDERE MOTOREN OP EEN SENSOR Een enkele sensor TM2 X SW kan gebruikt worden om een groep gemotoriseerde zonweringen te regelen. -
Página 73: Bevestiging Vd Sensor
BEVESTIGING VD SENSOR De sensor TM2 X SW is voorzien van een bevestigingshulp waardoor deze op vrijwel elke oppervlak gemonteerd kan worden. Om de hoek van de drager af te stellen, dient u herhaaldelijk op de knop naast de draaipen (zie tekening) te drukken. -
Página 74: Sensor Memoriseren
SENSOR WISSEN Om de koppeling van de sensor met een motor te wissen moet een afstandsbediening van de motor gebruikt worden. De volgorde voor het wissen is als volgt: Tn: Gememoriseerde afstandsbediening 2 sec TM2 X SW A4518_6H80_Rev.A... -
Página 75: Windfunctie Afstellen
WINDFUNCTIE AFSTELLEN Het afstellen van de winddrempelwaarde gebeurt d.m.v. een draaiknop onderaan de sensor TM2 X SW, Deze is gekenmerkt door het windsoksymbool. Deze regeling kan vanaf de minimum windsnelheid van 7.5 km/uur, tot een maximum van 45 km/uur. Zoals in de tekening wordt weergegeven, is het raadzaam om de drempelwaarde niet boven de 4 in te stellen, d.w.z. -
Página 76: Automatische Heropening Deactiveren
Tn: Gememoriseerde afstandsbediening Tn (2 sec) LICHTFUNCTIE AFSTELLEN Het afstellen van de lichtdrempelwaarde gebeurt d.m.v. een draaiknop onderaan de sensor TM2 X SW, Deze is gekenmerkt door het zonsymbool. AFSTELLEN LICHT Deze functie kan met een minimum intensiteitswaarde van 2.5 KLux (lichtintensiteit bij zonsopgang), tot een maximum waarde van 100 KLux (lichtintensiteit op het midden vd dag) worden ingesteld. -
Página 77: Automatisch/Handmatig Modi Met Tm2 X Ts Afstandbediening Activeren
De toets even indrukken; de display gaat aan en toont de huidige instelling. Activering/Deactivering Om de instelling te wijzigen moet u minstens 3 sec. de gewenste toets ingedrukt houden totdat de motor reageert met een bevestigende beweging. (3 sec) TM2 X SW A4518_6H80_Rev.A... -
Página 78: Testmodus
De testfunctie blijft 3 minuten actief. Gedurende deze tijd kunt u de ingestelde wind- en lichtdrempelwaarden controleren zonder dat u op de activeringstijd hoeft te wachten. Nadat de 3 minuten zijn verstreken, gaat de sensor TM2 X SW terug naar de normale werking. set toets (2 sec) -
Página 79: Eu-Conformiteitsverklaring
EU-CONFORMITEITSVERKLARING FAAC S.p.A. Soc. Unipersonale verklaart dat de Sensor TM2 X SW voldoet aan de toepasselijke geharmoniseerde normen van de Unie: Richtlijn 2014/53/ EU, Richtlijn 2011/65/EU. De volledige tekst van de EU-conformiteitsverklaring is beschikbaar op de volgende website: http://www.faac.biz/certificates Bologna, 18-09-2018 CEO A. - Página 80 FAAC S.p.A. Soc. Unipersonale Via Calari, 10 - 40069 Zola Predosa BOLOGNA - ITALY Tel. +39 051 61724 - Fax +39 051 09 57 820 www.faac.it - www.faacgroup.com TM2 X SW A4518_6H80_Rev.A...