
Manuales relacionados para Graco Aire 4 Platinum


Resumen de contenidos para Graco Aire 4 Platinum
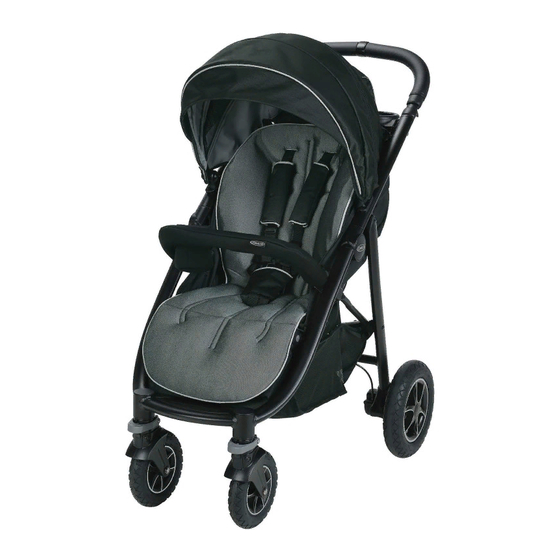
- Página 1 Aire 4™Platinum • featuring • que incluye • Owner’s Manual • Manual del propietario ©2017 Graco NWL0000623580E 7/17...
-
Página 2: Features • Características
4-H Removing Wheels • Cómo sacar las ruedas To Adjust Handle • Para ajustar la manija Enclosure • Recinto To Attach Graco® Infant Car Seat to Toddler Seat • Sujetar el asiento de automóvil para bebé Graco® al asiento para niño pequeño To Attach Graco®... - Página 3 (other than approved snug fit around your child. Graco stroller bags). Never place anything on the canopy. • CHILD MAY SLIP INTO LEG OPENINGS AND STRANGLE. • TO PREVENT A HAZARDOUS,...
- Página 4 STROLLER should it become serious injury or death. damaged or broken. • See Graco infant car seat • CAREGIVER MUST always help owners manual for maximum child get into and out of the size of child.
- Página 5 (Vea la accesorios en la manija (si no páginas 35-36, Recinto de son las bolsas para cochecito montaje automático). aprobadas por Graco). No • EVITE EL ATRAPAMIENTO DE ponga nunca nada sobre la LOS DEDOS: Tenga cuidado capota.
-
Página 6: Uso Del Asiento De Automóvil Para Bebé Graco ® Con El Cochecito
• NUNCA LEVANTE NI • LEA EL MANUAL incluido con TRANSPORTE el cochecito su asiento de automóvil Graco agarrado del apoyapiés. antes de usarlo con su • NUNCA LEVANTE NI cochecito. TRANSPORTE el cochecito •... - Página 7 • Vea el manual del propietario con el arnés del asiento de del asiento de automóvil para automóvil cuando usa el bebé Graco para determinar el asiento de automóvil en el tamaño máximo del niño. cochecito. Si su niño ya está...
- Página 8 2-A Parts List • Lista de piezas This model may not include some Este modelo podría no incluir algunas features shown below. Check that de las características que se indican a you have all the parts for this model continuación. Verifique que tenga BEFORE assembling your product.
- Página 9 To Open Stroller • Abrir el cochecito Be sure to place stroller on top of a piece of cardboard or some other protective cover to prevent any damage to floor. Asegúrese de poner el cochecito sobre un pedazo de cartón o algún otro material de protección para prevenir dañar el piso.
- Página 10 3. CHECK that the stroller is completely latched open every time you open the stroller and SNAP! before continuing with the rest of ¡CRAC! the assembly steps. Push down on stroller to be sure seat is locked. 3. VERIFIQUE que el cochecito esté completamente abierto y trabado cada vez que lo abre y antes de continuar los pasos de ensambla-...
- Página 11 Front Wheels • Las ruedas delanteras 1. Attach front wheels to post as shown. 1. Sujete las ruedas delanteras al poste como se indica. SNAP! ¡CRAC! 2. CHECK that wheels are securely attached by pulling on wheel assembly. 2. VERIFIQUE que las ruedas estén debidamente sujetadas tirando del ensamblaje de las ruedas.
- Página 12 3-C Rear Wheels • Las ruedas traseras WARNING DO NOT remove rear wheels unless replacing them. Child could fall on exposed rear axle and be injured. ADVERTENCIA NO saque las ruedas traseras a menos que las cambie. El niño podría caerse sobre el eje trasero expuesto y sufrir una lesión.
- Página 13 Arm bar • Barra para los brazos WARNING Always secure your child with the seat belt. The arm bar is not a restraint device. DO NOT lift the stroller by the arm bar. Use care when snapping the arm bar on the stroller with a child in the stroller. ADVERTENCIA Asegure siempre a su niño con el cinturón de seguridad.
- Página 14 Canopy • Capota 1. Slide canopy over mounts on frame and attach 3 hook and loop straps around canopy wire and two strips on sides of canopy. 1. Deslice la capota por los montantes del armazón y sujete las 3 correas de gancho y bucle alrededor del alambre de la capota y las dos tiras de los costados de la capota.
- Página 15 Parents Tray • La bandeja para padres Press parent tray onto canopy wire. Oprima la bandeja para padres sobre el alambre de la capota.
- Página 16 To Secure Child • Cómo sujetar al niño WARNING Falling Hazard: Always use the seat belt. ADVERTENCIA Peligro de caídas: Use siempre el cinturón de seguridad. 5 Point Harness • Arnés de 5 puntos 1. To open, press button on buckle to release the waist straps.
- Página 17 3. Use slide adjuster at shoulder and waist for tighter adjustment. To Use slide adjuster change shoulder harness slots, waist for further a see page 19. Repeat on other s Utilisez le régulate 3. Use el ajustador deslizable en el à...
- Página 18 3. Remove shoulder straps from stroller. 3. Saque las correas para los hombros del cochecito. 4. Attach waist straps to harness buckle as shown. 4. Sujete las correas para la cintura a la hebilla del arnés como se indica. 5. Use slide adjuster at waist for tighter adjustment.
- Página 19 Adjusting Shoulder Harness Position • Ajustar la posición del arnés para los hombros Shoulder harness anchor—larger child Anclaje del arnés del hombro - niño grande Shoulder harness anchor—smaller child Anclaje del arnés del hombro - niño pequeño Slide adjuster Ajustador deslizable Push harness anchor through the front of the seat then re-insert through desired slots at the same...
- Página 20 To Remove/Attach Seat • Cómo sacar/sujetar el asiento To Remove Toddler Seat • Cómo sacar el asiento para niño pequeño 1. Remove canopy by disconnecting 3 hook and loop straps from around canopy wire and two strips on sides of canopy. Slide canopy off of mounts on frame.
- Página 21 3. Lift up on foot end of pad to disconnect from seat. 3. Levante el extremo del pie de la almohadilla para desconectarla del asiento. 4. Press light gray buttons on seat pad mount at rear of seat and disconnect from seat pan. 4.
- Página 22 5. Unzip top of seat pad from parent tray. 5. Desabroche la cremallera de la parte superior de la almohadilla del asiento para separarla de la bandeja para padres. 6. Locate plastic tabs below height adjustment on handle. (a) Press tabs and pull both sets of stiffeners (b) (c) up out of channels in frame.
- Página 23 7. Remove seat pad from frame. 7. Saque la almohadilla del asiento del armazón. 8. Roll parent tray flap up and secure with hook and loop tabs. 8. Enrolle la aleta de la bandeja para padres y sujétela con las lengüetas de gancho y bucle.
- Página 24 To Attach the Seat • Cómo sujetar el asiento 1. Unroll parent tray flap by disconnecting hook and loop tabs. 1. Desenrolle la aleta de la bandeja para padres deshaciendo las lengüetas de gancho y bucle. 2. Place seat pad in frame as shown.
- Página 25 3. At top of seat pad: (a) Align end of flaps with plastic stiffener inside with channels in frame and push stiffeners SNAP! down channels. ¡CRAC! (b) Then align ends of next plastic stiffeners with channels in frame. (c) Push down until tabs secures in place.
- Página 26 5. Press seat pad mount to seat pan. CHECK that seat pad mount is secured by pulling on it and that gray buttons are fully visible. 5. Oprima el montante de la almohadilla del asiento al soporte del asiento. VERIFIQUE que el montante de la almohadilla del asiento está...
- Página 27 8. Attach (a) small flap to stroller tube then (b) pull strap with snap towards foot end of stroller and insert behind stroller tube then attach to small flap. Repeat on other side of stroller. 8. Sujete (a) la solapa pequeña al tubo del cochecito, luego (b) tire de la correa con el broche hacia el extremo del pie del cochecito e...
- Página 28 Canopy • Capota Canopy is UV50. When mesh is unzipped and extended canopy is not UV50. La capota tiene protección UV50. Cuando se desabroche la cremallera y se extienda la malla, la capota no tiene protección UV50. 1. Pull forward to open canopy. 1.
- Página 29 To Recline • Para reclinar WARNING When making adjustments to the stroller seat, make sure child’s head, arms, and legs are clear of moving seat parts and stroller frame. ADVERTENCIA Cuando realiza ajustes al asiento del cochecito, asegúrese que la cabeza, brazos y piernas del niño están lejos de las piezas del asiento que se mueven y del armazón del cochecito.
- Página 30 Foot Rest • Apoyapié 1. To raise footrest, lift up as shown. 1. Para levantar el apoyapié, levántelo hacia arriba como se indica. 2. To lower, push buttons as shown. To allow more room for child’s feet, push footrest down. 2.
- Página 31 Brakes • Los frenos WARNING Always apply brake. CHECK that brake is on by trying to push stroller. ADVERTENCIA Use siempre el freno. VERIFIQUE que el freno esté activado tratando de empujar el cochecito. 1. Push down on brake to lock brakes.
- Página 32 Swivel Wheels • Las ruedas giratorias Front swivel wheels lock for use on uneven surfaces such as grass, stones or gravel. Las ruedas giratorias delanteras se traban para el uso en superficies desparejas tales como césped, piedras o grava. 1. To lock. press up as shown. SNAP! 1.
- Página 33 4-H Removing Wheels • Cómo sacar las ruedas Front Wheel • Rueda delantera WARNING DO NOT remove wheels unless replacing them. Child could fall on exposed rear axle and be injured. ADVERTENCIA NO saque las ruedas traseras a menos que las cambie. El niño podría caerse sobre el eje trasero expuesto y sufrir una lesión.
- Página 34 To Adjust Handle • Para ajustar la manija To adjust handle, lift up on handle release and slide handle into desired position. Para ajustar la manija, levante la manija de liberación y deslice la manija hasta alcanzar la posición deseada.
- Página 35 Enclosure • Recinto WARNING DO NOT use enclosure with an older child that can lift up on hands and knees or crawl out. ADVERTENCIA NO use el recinto de montaje con un niño más grande que pueda levantarse usando las manos y las rodillas o salir gateando. 1.
- Página 36 3. Unfasten flaps. 3. Destrabe las aletas. 4. Unfasten hook and loop straps. 4. Destrabe las correas de gancho y nudo. 5. Thread straps through button holes on each side of seat panel. 5. Pase las correas a través de los agujeros en cada costado del panel del asiento.
- Página 37 Click Connect™ logo. Improper use of this product with a car seat may result in serious injury or death. Read the manual provided with your Graco car seat before using it with your product. • Always secure your child with infant car seat harness when using the car seat in the product.
- Página 38 1. Infant car seat can ONLY be inserted in stroller frame rear facing. 1. El asiento de automóvil para bebé SOLO se puede colocar en el armazón del cochecito orientado hacia atrás. 2. Recline the seat back to lowest position. 2.
- Página 39 4. Insert car seat into stroller and push down on car seat until the latches snap into the Click Connect™ mounts. 4. Ponga el asiento de automóvil en el cochecito y empuje el asiento de automóvil hacia abajo hasta que se trabe en los montantes Click Connect™.
- Página 40 To Attach Graco Infant Car Seat to Stroller ® Frame • Para sujetar el asiento de automóvil para bebé Graco al armazón del cochecito ® CHECK that arm bar is securely attached by pulling on arm bar. VERIFIQUE que la barra para los brazos esté...
- Página 41 CHECK that infant car seat is securely attached by pulling up on it. VERIFIQUE QUE el asiento de automóvil para bebé esté debida- mente instalado conectado con firmeza tirando hacia arriba de la misma. 4. To remove car seat, squeeze release handle at back of car seat, and lift car seat out of the stroller.
- Página 42 To Fold Stroller • Para plegar el cochecito WITH seat pad • CON la almohadilla del asiento 1. Before folding stroller: a. remove infant car seat if in use b. lock brakes 1. Antes de plegar el cochecito: a. saque el asiento de automóvil para bebé...
- Página 43 3. Storage latch will engage and stroller will rest on the rear wheels and handle. 3. La traba de almacenamiento se activará y el cochecito se apoyará en las ruedas traseras y la manija. SNAP! ¡CRAC! WITHOUT seat pad • SIN la almohadilla del asiento 1.
- Página 44 • FROM TIME TO TIME CHECK YOUR STROLLER for loose screws, worn parts, torn material or stitching. Replace or repair the parts as needed. Use only Graco replacement parts. • EXCESSIVE EXPOSURE TO SUN OR HEAT could cause fading or warping of parts.
- Página 45 Notes • Notas...
- Página 46 Notes • Notas...
- Página 47 Notes • Notas...
- Página 48 We currently do not accept product registrations from those living outside the United States of America. Para registrar su producto Graco desde dentro de los EE.UU., visítenos en línea en www.gracobaby.com/productregistration o envíe la tarjeta de registro provista con su producto.