Tabla de contenido
Publicidad
Idiomas disponibles
Idiomas disponibles
Enlaces rápidos
Use & Care Manual
Setup/
Sensor
Sensor
Sensor
Sensor
OPEN
OPEN
Help
Popcorn
Reheat
Cook
Cook
Control
Keep Warm
Defrost
Reheat
Reheat
CLOSE
CLOSE
Lock
On/Off
DrawerMicro
Start
Start
1
2
3
4
5
Add-A-Minute
Add-A-Minute
6
7
8
9
0
Stop/
Stop/
Clear
Clear
™
VMOD241 / CVMOD241
Power
Power
Level
Level
Timer/
Timer/
Clock
Clock
Oven
Publicidad
Capítulos
Tabla de contenido

Manuales relacionados para Viking DrawerMicro VMOD241


Resumen de contenidos para Viking DrawerMicro VMOD241
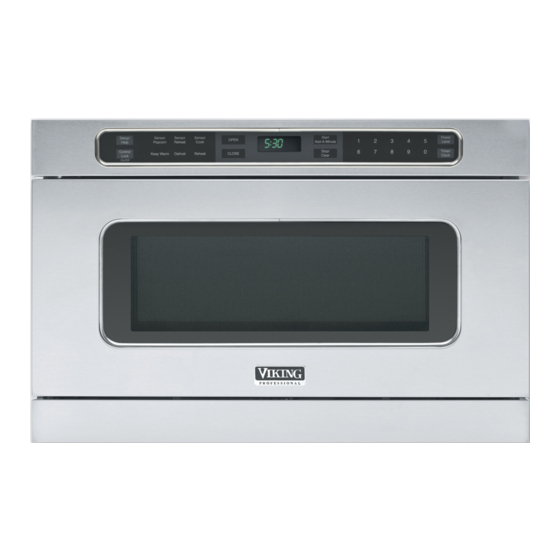
- Página 1 Use & Care Manual Setup/ Sensor Sensor Sensor Sensor Start Start Power Power OPEN OPEN Help Popcorn Reheat Cook Cook Add-A-Minute Add-A-Minute Level Level Control Stop/ Stop/ Timer/ Timer/ Keep Warm Defrost Reheat Reheat CLOSE CLOSE Lock Clear Clear Clock Clock On/Off DrawerMicro...
-
Página 3: Service Information
3. Clearly describe the problem that you are having. If you are unable to obtain the name of an authorized service agency, or if you continue to have a service problem, contact Viking Range, LLC at (888) 845-4641 or write to:... -
Página 4: Precautions To Avoid Possible Exposure To Excessive Microwave Energy
PrecaUtionS to avoiD PoSSiBLe eXPoSUre to eXceSSive microWave enerGY (a) Do not attempt to operate this oven with the door open since open- door operation can result in harmful exposure to microwave energy. It is important not to defeat or tamper with the safety interlocks. (b) Do not place any object between the oven front face and the door or allow soil or cleaner residue to accumulate on sealing surfaces. -
Página 5: Tabla De Contenido
taBLe of contentS 1 Service information 16 TO SET POWER LEVEL 17-18 SENSOR SETTINGS 2 PrecaUtionS to avoiD PoSSiBLe eXPoSUre to 18 SENSOR POPCORN / SENSOR REHEAT eXceSSive microWave enerGY 19-20 SENSOR COOK 21-22 DEFROST 3 taBLe of contentS 22 MANUAL DEFROST 4-5 imPortant SafetY 23 REHEAT inStrUctionS... -
Página 6: Important Safety Instructions
9. This appliance should be serviced only by qualified service personnel. Contact nearest Viking Authorized Servicer for examination, repair or adjustment. 10. Do not cover or block any openings on the appliance. - Página 7 18. be sure that fingers or other objects or materials are not around the appliance opening when the appliance is closed. 19. Do not put fingers or clothes around the drawer guides when the appliance is opened or closed. They could be caught in the guides when the appliance is closed.
-
Página 8: Information You Need To Know
Oven drawer. If there is any damage, do not op- Cavity erate the DrawerMicro Oven and contact your dealer or a VIKING AUTHORIZED SERVICER. eLectricaL GroUnDinG inStrUctionS This appliance must be grounded. In the event of an electrical short circuit, grounding reduces risk of electric shock by providing an escape wire for the electric current. -
Página 9: Radio Or Tv Interference
1. If you have any questions about the grounding or electrical instructions, consult a qualified electrician or servic person. 2. Neither Viking Range, LLC nor the dealer can accept any liability for damage to the oven or personal injury resulting from failure to observe the correct electri-cal connection procedures. -
Página 10: About Utensils And Coverings
• Shield with small fla pieces of aluminum foil any thin areas of meat or poultry to prevent overcooking before dense, thick areas are cooked thoroughly. • Stir foods from outside to center of dish once or twice during cooking, if possible. • Turn foods over once during microwaving to speed cooking of such foods as chicken and hamburgers. Large items like roasts must be turned over at least once. • Rearrange foods such as meatballs halfway through cooking both from top to bottom and from right to left. •... -
Página 11: About Children And The Microwave
Evaluate carefully before you purchase so that they meet your needs. A mi- crowave-safe thermometer will assist you in determining correct doneness and assure you that foods have been cooked to safe temperatures. Viking is not responsible for any damage to the DrawerMicro Oven when accessories are used. -
Página 12: About Safety
person should be in the same room. The child must be able to reach the DrawerMicro Oven comfortably. At no time should anyone be allowed to lean or swing on the DrawerMicro Oven. Children should be taught all safety precautions: use potholders, remove coverings carefully, pay special attention to packages that crisp food because they may be extra hot. -
Página 13: About Food
aBoUt fooD fooD Don't Eggs, • Puncture egg yolks before • Cook eggs in shells. cooking to prevent “explo- sausages, • Reheat whole eggs. sion”. nuts, seeds, • Dry nuts or seeds in fruits & • Pierce skins of potatoes, shells. vegetables apples, squash, hot dogs and sausages so that steam escapes. Popcorn • Use specially bagged pop- •... -
Página 14: Part Names
Part nameS Drawermicro oven 1. Control panel 2. Waveguide cover DO NOT REMOVE 3. Menu Label 4. Drawer sealing surfaces 5. Drawer light 6. DrawerMicro Oven guides 7. Vent 8. Name plate: open the DrawerMicro Oven fully. The label is slightly beyond the back wall of the microwave cavity facing up from the flat surface... -
Página 15: Control Panel
controL PaneL 26-27 19-20 21-22 Number next to the control panel illustration indicates pages on which there are feature descriptions and usage information. -
Página 16: Before Operating
Before oPeratinG before operating your new DrawerMicro Oven make sure you read and un- derstand this Use and Care Guide completely. • Before the DrawerMicro Oven can be used, follow these steps: 1. Plug in the DrawerMicroOven. ENJOY YOUR MICRO- WAVE TOUCH will appear. -
Página 17: Open Or Close Drawermicro Oven
oPen or cLoSe Drawermicro oven Always Touch the OPEN or CLOSE pad on the control panel to open or close the DrawerMicro Oven. Do not push or pull the Drawermicro oven by hand, except in case of emergency, such as a power failure. if necessary, push or pull slowly. -
Página 18: Drawermicro Oven Cooking
Drawermicro oven cookinG time cookinG Your DrawerMicro Oven can be programmed for 99 minutes 99 seconds (99.99). Always enter the seconds after the minutes, even if they are both zeros. • Suppose you want to cook for 5 minutes at 100%. 1. Enter cooking time 500. 2. To cook at 100% power (High), touch Start/Add-A-Minute pad. to Set PoWer LeveL There are eleven preset power levels. -
Página 19: Sensor Settings
SenSor SettinGS The Sensor is a semi-conductor device that detects the vapor (moisture and humidity) emitted from the food as it heats. The sensor adjusts the cooking times and power levels for various foods and quantities. Using Sensor Settings: 1. After the DrawerMicro Oven is plugged in, wait 2 minutes before using any sensor setting. -
Página 20: Sensor Popcorn / Sensor Reheat
Cover dish loosely; allow approximately 1/2 inch to remain uncovered to allow steam to escape. Plastic wrap should not touch food. 3. Wax paper: Cover dish completely; fold excess wrap under dish to secure. If dish is wider than paper, overlap two pieces at least one inch to cover. be careful when removing any covering to allow steam to escape away from you. -
Página 21: Sensor Cook
SenSor cookinG 1. Touch Sensor Cook pad once. 2. See Menu Label. Select desired food by touching number pad. Ex: Touch 5 for baked potatoes. 3. Touch Start/Add-A-Minute pad. Note: • To heat or cook other foods or foods above or below the quantity allowed on the SENSOR COOK CHART, cook manually. SenSor cook cHart fooD amoUnt ProceDUre... - Página 22 fooD amoUnt ProceDUre 5. baked potatoes 1 - 6 med. Pierce. Place on paper-towel-lined DrawerMicro Oven. After cooking, remove from microwave, wrap in aluminum foil and let stand 5 to 10 minutes. 6. Ground meat .25 - 2.0 lb. Use this setting to cook ground beef or turkey as patties or in a casserole to be added to other ingredients.
-
Página 23: Defrost
DefroSt Use this feature to defrost the foods shown in the DEFROST CHART on page 22. 1. Touch Defrost pad. 2. See Menu Label. Select desired food by touching the number pad. Ex: Touch 2 for steaks/chops. 3. Enter weight by touching number pads. 4. -
Página 24: Defrost Chart
DefroSt cHart fooD amoUnt ProceDUre 1. Ground .5 - 2.0 lb Remove any thawed pieces after each audible meat signal. Let stand, covered, for 5 to 10 minutes. 2. Steaks/ .5 - 3.0 lb After each audible signal, rearrange and if there chops are warm or thawed portions, shield with small flat pieces of aluminum foil. -
Página 25: Reheat
reHeat Reheat automatically computes the correct warming time and microwave power level for foods shown in the chart below. 1. Touch Reheat pad once. 2. See Menu Label. Select desired food by touching number pad. Ex: Touch 2 for frozen rolls or muffins 3. -
Página 26: Other Features
otHer featUreS keeP Warm Keep Warm allows you to keep food warm up to 30 minutes. Direct USe 1. Touch Keep Warm pad. 2. Enter desired time by touching the number pads. To enter 30 minutes, touch 3000. 3. Touch Start/Add-A-Minute pad. The oven will start. -
Página 27: Help
Note: • If Power Level pad is touched once, will be displayed. HIGH • If 100% is selected as the fina sequence, it is not necessary to touch the Power Level pad. • If you wish to know power level during cooking, simply touch the Power Level pad. As long as your finger is touching the Power Level pad, the power level will be displayed. • Keep Warm can be programmed even if 4 cooking sequences have been set. -
Página 28: Setup/Help
SetUP/HeLP If the electrical power supply to your DrawerMicro Oven should be interrupted, the display will intermittently show ENJOY YOUR MICRO- after the power is reinstated. WAVE TOUCH CLEAR TOUCH CLOCK If this occurs, the Setup/Help option you input will be erased. Simply touch Stop/Clear pad and reset. -
Página 29: Auto Start
aUto Start If you wish to program the DrawerMicro Oven to begin cooking automatically at a designated time of day, follow this procedure. 1. Touch Setup/Help pad 4 times. The display shows AUTO START TOUCH START 2. Touch Start/Add-A-Minute pad. 3. -
Página 30: Cleaning And Care
cLeaninG anD care eXterior The outside surface is precoated metal and plastic. Clean the outside with mild soap and water; rinse and dry with a soft cloth. Do not use any type of household or abrasive cleaner. StainLeSS SteeL SUrface The exterior should be wiped often with a soft damp cloth and polished with a soft dry cloth to maintain its beauty. -
Página 31: Waveguide Cover
WaveGUiDe cover ATTENTION: The waveguide cover, located on the inside top of the DrawerMicro Oven area, is made from mica, so it requires special care. Keep the waveguide cover clean to assure good microwave performance. Carefully wipe with a soft damp cloth any food spatters from the surface of the cover immediately after they occur. -
Página 32: Before You Call For Service
Before YoU caLL for Service Please check the following before calling for service. It may save you time and expense. ProBLem PoSSiBLe caUSe SoLUtion 1. Part or all of • Power cord of • Make sure the power DrawerMicro DrawerMicro Oven is not cord is tightly con- Oven does completely nected to the outlet. - Página 33 To obtain warranty service, contact the dealer from whom the product was purchased, an authorized Viking Range, LLC service agent, or Viking Range, LLC. Provide model and serial number and date of original purchase. For the name of your nearest authorized Viking Range, LLC service agency, call the dealer from whom the product was purchased or Viking Range, LLC.
-
Página 35: Horno Drawermicro
Manual de Uso y Cuidado Setup/ Sensor Sensor Sensor Sensor Start Start Power Power OPEN OPEN Help Popcorn Reheat Cook Cook Add-A-Minute Add-A-Minute Level Level Control Stop/ Stop/ Timer/ Timer/ Keep Warm Defrost Reheat Reheat CLOSE CLOSE Lock Clear Clear Clock Clock On/Off... -
Página 36: Información De Servicio
3. Describa claramente el problema que tiene. Si no puede obtener el nombre de una agencia de servicio autorizada o si continúa teniendo un problema de servicio, comuníquese con Viking Range, LLC al (888) 845-4641 o escriba a: VIKING RANGE, LLC... -
Página 37: Precauciones Para Evitar Posibles Exposiciones Al Exceso De Energía Del Microondas
PrecaUcioneS Para evitar PoSiBLeS eXPoSicioneS aL eXceSo De enerGÍa DeL microonDaS (a) No trate de operar este horno con la puerta abierta ya que la operación puede provocar una exposición perjudicial a la energía del microondas. No altere o manipule indebidamente los interbloqueos de seguridad. (b) No coloque ningún objeto entre la parte frontal del horno y la puerta, ni deje que se acumulen residuos de limpiadores o suciedad en las superfi- cies del cierre hermético. - Página 38 taBLa De conteniDo 2 informaciÓn De Servicio 20-21 TAbLA SENSOR POPCORN / SENSOR REHEAT 3 PRECAUCIONES PARA EVITAR 21 SENSOR COOKING (COCCIÓN POR POSIbLES Ex POSICIONES AL Ex CESO SENSOR) DE ENERGÍA DEL MICROONDAS 21-23 TAbLA SENSOR COOK 4 taBLa De conteniDo 24 DEFROST (DESCONGELAR) 5-6 inStrUccioneS De SeGUriDaD 24 TAbLA DEFROST...
-
Página 39: Instrucciones De Seguridad Importantes
9. Este electrodoméstico únicamente debe ser provisto de servicio de mantenimiento por personal de servicio calificado. Comuníquese con el Centro de servicio autorizado de Viking más cercano para su análisis técnico, reparación o ajuste. 10. No cubrir ni bloquear ningún orificio del elect odoméstico. - Página 40 18. Asegúrese que los dedos u otros objetos o materiales no se encuentran alrededor de la abertura del artefacto cuando esté se encuentre cerrado. 19. No coloque los dedos o ropa alrededor de las guías del cajón al momento de abrir o cerrar el artefacto. Éstos podrían quedar atrapados en las guías al cerrar el artefacto.
-
Página 41: Información Que Debe Conocer
Si encuentra algún daño, no opere el Horno DrawerMicro y comuníquese con su distribuidor o PERSONAL DE SERVICIO AUTORIZADO DE VIKING. inStrUccioneS Para coneXiÓn a tierra Este aparato se debe poner a tierra. Este horno está equipado con un cable que tiene un alambre y un enchufe con toma a tierra. -
Página 42: Interferencia De Radio Otelevisión
2. Viking y el distribuidor no aceptan ninguna responsabilidad por los daños al horno o las lesiones personales causadas por no seguir los procedimientos de conexión eléctrica correctos. -
Página 43: Sobre La Cocción Por Microondas
SoBre La cocciÓn Por microonDaS • Distribuya los alimentos con cuidado. Coloque las áreas más gruesas hacia la parte exterior del plato. • Verifiqu el tiempo de cocción. Cocine durante el período de tiempo más corto indicado y aumente como sea necesario. Los alimentos que se cocinan demasiado pueden quemarse o encenderse. • Cubra los alimentos durante su cocción. Consulte la receta o el libro de cocina para obtener sugerencias: Toallas de papel, papel encerado, película plástica para microondas o una tapa. - Página 44 • plásticos resistentes al microondas • platos de papel • cerámica, cerámica de gress y porcelana • fuentes (sin exceder el tiempo de precalentamiento recomendado. Siga las instrucciones del fabricante.) Estos artículos pueden ser usados para un corto tiempo de recalentamiento de alimentos con poca grasa o azúcar: • madera, paja, mimbre NO UTILICE • sartenes y utensilios para hornear de metal • platos con borde metálico • vidrio no resistente al calor •...
-
Página 45: Sobre Seguridad
Un termómetro resistente a las microondas le ayudará a determinar la cocción correcta y asegurará que sus alimentos se han cocido a temperaturas seguras. Viking no es responsable de ningún daño al Horno DrawerMicro causado por el uso de los accesorios. -
Página 46: Sobre Los Niños Y El Microondas
su alta calidad y minimizar la propagación de bacterias. • Conserve limpia la cubierta de la guía de onda. Los residuos de alimentos pueden producir arcos eléctricos o incendios. SoBre LoS niÑoS Y eL microonDaS Los niños menores de 7 años deben usar el Horno DrawerMicro bajo la su- pervisión cercana de un adulto. En el caso de los niños entre 7 y 12 años, la persona que los supervisa debe estar en la misma habitación. - Página 47 aLimento Lo qUe DeBe Hacer Lo qUe no DeBe Hacer Alimentos • Transfier los alimentos del • Calentar botellas para bebé a un plato pequeño y desechables. bebés caliéntelos con cuidado, revolvi- • Calentar las botellas endo con frecuencia. Verifique l con las tetinas pues- temperatura antes de servir.
-
Página 48: Nombre De Las Partes
nomBre De LaS ParteS Horno Drawermicro 1. Panel de control 2. Cubierta de la guía de onda NO LA RETIRE 3. Etiqueta de menú 4. Superficies de sellado del cajó 5. Iluminación del cajón 6. Guías del Horno DrawerMicro 7. Placa de identificación: Abra el Horno DrawerMicro por completo. -
Página 49: Panel De Control
PaneL De controL 28-29 20-21 20-21 21-23 24-25 El número cerca de la ilustración del panel de control indica las páginas donde puede encontrar descripciones de las características e información de uso. -
Página 50: Antes De Operar
anteS De oPerar Antes de operar su nuevo Horno DrawerMicro, asegúrese de haber leído y entendido completamente esta Guía de uso y cuidado. • Antes de usar el Horno DrawerMicro, siga estos pasos: 1. Conecte el Horno DrawerMicro. Aparecerá el mensaje ENJOY YOUR MICRO- WAVE TOUCH CLEAR TOUCH CLOCK 2. -
Página 51: Stop/Clear (Parar/Borrar)
StoP/cLear (Parar/Borrar) Presione el botón Stop/Clear (Parar/borrar) para: 1. borrar si comete un error durante la programación. 2. Cancelar el temporizador. 3. Detener el horno temporalmente durante la cocción. 4. Reingresar la hora del día en la pantalla. 5. Cancelar un programa durante la cocción, presionando dos veces. Para aBrir o cerrar eL Horno Drawermicro Siempre presione el botón OPEN o CLOSE en el panel de control para abrir o cerrar el Horno DrawerMicro. -
Página 52: Cocción En El Horno Drawermicro
cocciÓn en eL Horno Drawermicro tiemPo De cocciÓn El Horno DrawerMicro puede ser programado para 99 minutos 99 segundos (99.99). Siempre ingrese los segundos después de los minutos, aun si ambos son 0. • Suponga que desea cocinar por 5 minutos al 100%. 1. Ingrese el tiempo de cocción 500. 2. -
Página 53: Ajustes Del Sensor
ajUSteS DeL SenSor El sensor es un dispositivo semiconductor que detecta el vapor (humedad) emitido por los alimentos mientras se calientan. El sensor ajusta los tiempos de cocción y los niveles de potencia para diversos alimentos y cantidades. Uso de los ajustes del sensor: 1. -
Página 54: Sensor Popcorn / Sensor Reheat (Sensor De Palomitas De Maíz / Sensor De Recalentamiento)
envoltura de alimentos: Algunos alimentos se cocinan mejor cuando están cubiertos. Use la envoltura recomendada en la tabla de alimentos. 1. Tapa de la cacerola. 2. Película plástica: Use la película plástica recomendada para cocción en microondas. Envuelva los platos de forma suelta; deje un espacio de casi 1/2 pulgada sin cubrir para permitir la salida de vapor. -
Página 55: Sensor Cooking (Cocción Por Sensor)
taBLa SenSor PoPcorn / SenSor reHeat aLimento cantiDaD ProceDimiento Sensor 4 - 36 onzas Coloque en un plato o cacerola ligeramente Reheat más grande que la cantidad que va a reca- lentar. Aplane, si es posible. Recubra con una tapa, película plástica o papel encerado. Use envolturas como películas plásticas o tapas para grandes cantidades de alimentos con mayor densidad como estofados. - Página 56 taBLa SenSor cook aLimento cantiDaD ProceDimiento 2. Vegetales Coloque en una cacerola. Agregue frescos: duros 1-4 cucharadas de agua. Recubra con Zanahorias en .25 - 1.5 libras la tapa para vegetales tiernos. Use tajadas película plástica para vegetales tier- Maíz en mazorca 2 - 4 nos.
- Página 57 taBLa SenSor cook aLimento cantiDaD ProceDimiento 6. Carne molida .25 - 2.0 libras Use este ajuste para cocinar carne de res o de pavo picada como hamburguesas o en cacerolas para ser agregados a otros ingredientes. Coloque las hamburguesas en una rejilla para microondas y recubra con papel encerado.
-
Página 58: Defrost (Descongelar)
DefroSt (DeSconGeLar) Use esta función para descongelar los alimentos mostrados en la TAbLA DEFROST de la página 24-25. 1. Presione el botón Defrost. 2. Vea la Etiqueta de menú. Seleccione el alimento deseado presionando el botón de número. Ej: Presione 2 para bistec/chuletas. 3. -
Página 59: Descongelamiento Manual
aLimento cantiDaD ProceDimiento 2. bistec / .5 - 3.0 libras Después de cada señal audible, reacomode chuletas y si hubiera alguna porción tibia o desconge- lada, protéjala con piezas pequeñas y planas de papel aluminio. Retira las porciones de carne o pescado que estén casi descongela- das. -
Página 60: Reheat (Recalentamiento)
reHeat (recaLentamiento) Con Reheat (recalentamiento) puede calcular automáticamente y de manera correcta el tiempo de cocción y el nivel de potencia del microondas para los alimentos que se muestran en la siguiente tabla. 1. Presione el botón Reheat (Recalentamiento) una vez. 2. -
Página 61: Otras Características
otraS caracterÍSticaS keeP Warm (conServar caLiente) Con Keep Warm usted puede mantener los alimentos calientes hasta 30 minutos. USo Directo 1. Presione el botón Keep Warm. 2. Ingrese el tiempo deseado presionando los botones de números. Para ingresar 30 minutos, presione 3000. 3. -
Página 62: Help (Ayuda)
2. Ingrese el segundo tiempo de cocción. Repita presionando el botón Power Level hasta obtener el nivel deseado. Usted puede realizar este proceso hasta 4 veces. 3. Presione el botón Start/Add-A-Minute. Nota: • Si presionó el botón Power Level una vez, en la pantalla aparecerá el mensaje HIGH •... -
Página 63: Control Lock
controL Lock (BLoqUeo De controL) Control Lock evita que el microondas en cajón sea operado accidentalmente por niños pequeños, por ejemplo. El Horno DrawerMicro puede ajustarse para que el panel de control se desactive o bloquee. Para BLoqUear Presione el botón Control Lock durante 3 segundos. En la pantalla aparecerá LOCK ON Para DeSBLoqUear Presione el botón Control Lock durante 3 segundos. -
Página 64: Para Activar Nuevamente La Señal De Recordatorio
2. Presione el botón Start/Add-A-Minute. En la pantalla aparecerá el mensaje REMIND SIGNAL Para activar nUevamente La SeÑaL De recorDatorio 1. Presione tres veces el botón Setup/Help . En la pantalla aparecerá el mensaje REMIND SIGNAL ON ? TOUCH START 2. -
Página 65: Limpieza Y Cuidado
LimPieZa Y cUiDaDo Parte eXterna La superficie externa cuenta con revestimiento de metal y plástico. Limpie la parte externa con jabón suave y agua; enjuague y seque con un paño suave. No use ningún tipo de limpiador doméstico o abrasivo. SUPerficie De acero inoXiDaBLe La parte externa debe ser limpiada con frecuencia con un paño húmedo y se debe lustrar con un paño suave seco para mantener su belleza. -
Página 66: Guías Del Horno Drawermicro
GUÍaS DeL Horno Drawermicro Retire los restos de alimentos de las guías del Horno DrawerMicro. Limpie con un paño suave seco para eliminar restos que puedan obstaculizar al momento de abrir o cerrar el Horno DrawerMicro. cUBierta De La GUÍa De onDa ATENCIÓN: La cubierta de la guía de onda que se encuentra en la parte superior interna del Horno DrawerMicro está... -
Página 67: Antes De Solicitar Servicio
anteS De SoLicitar Servicio Revise la siguiente información antes de solicitar servicio. Esto puede ayudarle a ahorrar tiempo y dinero. ProBLema PoSiBLe caUSa SoLUciÓn 1. Un componente • El cable de • Asegúrese de que el o todo el Horno alimentación del cable de alimentación DrawerMicro no Horno DrawerMicro está... - Página 68 ProBLema PoSiBLe caUSa SoLUciÓn 5. La pantalla se • Falla en el suministro • Presione el botón enciende y eléctrico. Clear y restablezca apaga. el reloj. Si el Horno DrawerMicro está en uso, debe restablecer la función cocción. 6. Las ranuras • Durante la cocción, de ventilación el vapor debe salir emiten vapor.
-
Página 69: Garantía Del Horno Drawermicro
Para obtener el servicio de garantía, comuníquese con el distribuidor al que le compró el producto, un agente de servicio autorizado de Viking Range, LLC, o con Viking Range, LLC. Proporcione el modelo y número de serie y la fecha de compra original. Para conocer el nombre de su agencia de servicio autorizada de Viking Range, LLC más cercana, llame al distribuidor al que le compró... -
Página 71: Four Drawermicro
Manuel d’utilisation et d’entretien Setup/ Sensor Sensor Sensor Sensor Start Start Power Power OPEN OPEN Help Popcorn Reheat Cook Cook Add-A-Minute Add-A-Minute Level Level Control Stop/ Stop/ Timer/ Timer/ Keep Warm Defrost Reheat Reheat CLOSE CLOSE Lock Clear Clear Clock Clock On/Off Four DrawerMicro... -
Página 72: Informations De Dépannage
Nom du revendeur où a eu lieu l’achat 3. Décrire clairement le problème rencontré. En cas d’impossibilité d’obtention du nom d’une société de dépannage, ou si les ennuis continuent, contacter directement Viking Range, LLC au (888) 845-4641 ou écrire à : VIKING RANGE CORPORATION... - Página 73 PrécaUtionS PoUr éviter Le riSqUe D’Une eXPoSition aUX micro-onDeS (a) Ne pas essayer de faire fonctionner ce four lorsque que la porte est ouverte, car le fonctionnement avec la porte ouverte pourrait entraîner une exposition dangereuse aux micro-ondes. Il est important que le système de fermeture de sûreté...
- Página 74 taBLe DeS matiÈreS 2 informationS De 20-21 SENSOR POPCORN/ SENSOR REHEAT DéPannaGe (MAÏS SOUFFLÉ À CAPTEUR/ 3 PrécaUtionS PoUr éviter Le RÉCHAUFFAGE À CAPTEUR) riSqUe D’Une eXPoSition 21-23 SENSOR COOKING aUX micro-onDeS (CUISSON À CAPTEUR) 24-25 DEFROST (DÉGIVRAGE) 4 taBLe DeS matiÈreS 26 MANUAL DEFROST 5-6 imPortanteS conSiGneS (DÉGIVRAGE MANUEL)
-
Página 75: Importantes Consignes De Sécurité
9. Le service de cet appareil ne devrait être effectué que par un tech- nicien qualifié. Contactez votre agence de service agréée Viking pour l’évaluation, la réparation ou le réglage de l’appareil. 10. Ne recouvrez ni ne bouchez aucune ouverture ou sortie d’air de l’appareil. - Página 76 18. Assurez-vous d’éloigner les doigts et d’autres objets de l’ouverture du Four DrawerMicro lorsque ce dernier est fermé. 19. Gardez les doigts et les vêtements éloignés des glissières du tiroir en ouvrant et en fermant le Four DrawerMicro. Sinon, vous risquez de les attraper dans les glissières lors de fermer le Four DrawerMicro.
-
Página 77: Informations Incontournables
En cas de dommages, n’utilisez pas le Four DrawerMicro : contactez votre AGENT DE SERVICE AGRÉÉ VIKING. inStrUctionS De miSe à La terre éLectriqUeS Cet appareil doit être mis à la terre. Ce four est équipé d’un cordon d’alimentation avec fil de mise à... -
Página 78: À Propos De Votre Four Drawermicro
1. Pour toute question à propos de l’installation électrique ou de la mise à la terre, consulter un électricien de métier ou un réparateur qualifié 2. Ni Viking ni le détaillant ne peuvent être tenus responsables des dommages au four ou des blessures causés par une installation qui ne respecte pas les normes. -
Página 79: À Propos Des Ustensiles Et Des Couvertures
de cuisson indiqué puis ajoutez plus de temps au besoin. Des aliments trop cuits risquent de prendre feu. • Recouvrez les aliments pendant la cuisson. Consultez la recette ou un livre de cuisine pour des astuces: des serviettes en papier, du papier cire, du film plastique allant au micro-ondes ou bien un couvercle. -
Página 80: Micro-Ondes
• poterie, grès et porcelaine allant au micro-ondes • plat brunisseur (ne dépassez pas le temps de préchauffage recom- mandé. Suivez les instructions du fabricant.) Pour réchauffer des aliments pauvres en gras et en sucre, on peut utiliser pour un court temps les articles suivants: • bois, paille, osier N’UTILISEZ PAS •... -
Página 81: À Propos De La Sécurité
à vos besoins. Un thermomètre al- lant au micro-ondes vous aidera à déterminer l’état de cuisson des aliments et à vous assurer que la bonne température est atteinte. Viking décline toute responsabilité des dommages éventuels au Four DrawerMicro lors de l’utilisation de tels accessoires. -
Página 82: Préparation De Divers Aliments
temP aLiment 170˚F (77˚C) Pour la viande blanche de la volaille. 180˚F (82˚C) Pour la viande noire de la volaille. Pour vérifier si un aliment est bien cuit, insérez un thermomètre à viande dans une partie grosse ou dense, éloignée du gras et des os. Il ne faut j A- MAIS laisser le thermomètre dans l’aliment pendant la cuisson, sauf s’il est approuvé... - Página 83 aLiment À faire À ne PaS faire Maïs souffl • Utilisez des sacs de maïs • Mettre du maïs soufflé spécialement fait soufflé en des sac pour micro-ondes. en papier ordinaires • Écoutez pendant la ou en des bols en cuisson du maïs soufflé verre. quand les éclatements •...
-
Página 84: Nomenclature Des Pièces
nomencLatUre DeS PiÈceS four Drawermicro 1. Tableau de commandes 2. Couvercle du guide d’ondes NE PAS ENLEVER 3. Pavé Menu du Four DrawerMicro 4. Surfaces d’étanchéité du tiroir 5. Lampe du tiroir 6. Glissières du Four DrawerMicro 7. Sortie d’air 8. -
Página 85: Pavé Menu
Pavé menU 30-31 20-21 21-23 24-25 Les numéros à côté de l’illustration du pavé de touches indiquent les pages sur lesquelles vous trouverez des descriptions et des informations sur l’utilisation. -
Página 86: Avant De Faire Fonctionner L'appareil
avant De faire fonctionner L’aPPareiL Avant de faire fonctionner votre nouveau Four DrawerMicro, assurez-vous de lire et de comprendre à fond ce manuel d’utilisateur. • Avant la première utilisation du Four DrawerMicro, procédez comme suit: ENJOY YOUR MICRO- WAVE 1. branchez le Four DrawerMicro. TOUCH CLEAR TOUCH s’affiche CLOCK 2. -
Página 87: Stop/Clear
StoP/cLear (arrÊt/remiSe À Zéro) Appuyez sur la touche Stop/Clear pour: 1. Effacer un programme en cas d’erreur. 2. Annuler le minuteur. 3. Arrêter temporairement le fonctionnement du tiroir au micro-ondes pen- dant la cuisson minutée. 4. Afficher l’heu e. 5. Annuler un programme pendant la cuisson; appuyez deux fois pour la cuisson minutée. -
Página 88: Cuisson Au Four Drawermicro
cUiSSon aU four Drawermicro cUiSSon minUtée On peut programmer le Four DrawerMicro pour 99 minutes 99 secondes (99.99). Entrez toujours les secondes après les minutes, même s’il s’agit de deux zéros. • Supposons que vous vouliez faire une cuisson de 5 minutes à 100%. 1. Entrez le temps de cuisson 500. 2. -
Página 89: Réglages À Capteur
réGLaGeS À caPteUr Le Capteur est un dispositif à semi-conducteur qui détecte la vapeur (l’humidité) émise par l’aliment pendant la cuisson. Le capteur règle le temps et l’allure de cuisson en fonction de l’aliment et de la quantité. Utilisation Des réglages À capteur : 1. -
Página 90: Sensor Popcorn/Sensor Reheat (Maïs Soufflé À Capteur/ Réchauffage À Capteur)
micro-ondes. Recouvrez le plat de cuisson de manière pas trop serrée et laissez environ ½ pouce découvert pour permettre à la vapeur d’échapper. Le film plastique ne devrait pas ent er en contact avec l’aliment. 3. Papier cire: recouvrez le plat complètement; pliez l’excédent de papier sous le plat pour le tenir en place. -
Página 91: Sensor Cooking
taBLeaU SenSor PoPcorn/SenSor reHeat (suite) aLiment qUantité DémarcHe À SUivre Réchauffage 4 - 36 oz. Mettez l’aliment dans un plat ou dans une à capteur casserole un peu plus grand que l’aliment à réchauffer. Aplatissez l’aliment si possible. Recouvrez d’un couvercle, de film plastique ou de papier cire. - Página 92 taBLeaU SenSor cook (suite) aLiment qUantité DémarcHe À SUivre 2. Légumes: durs Mettez dans un plat de cuisson. Carottes, rondelles 0,25 - 1,5 lb. Ajoutez 1-4 cuillerées de table d’eau. Maïs en épis 2 - 4 Recouvrez d’un couvercle pour des Haricots verts 0,25 - 1,5 lb.
- Página 93 taBLeaU SenSor cook (suite) aLiment qUantité DémarcHe À SUivre 6. Viande hachée 0,25 - 2,0 lb. Utilisez ce réglage pour la cuisson de bœuf ou de dinde haché en galettes ou dans un plat pour ajouter à d’autres ingrédients. Mettez les galettes sur une grille allant au micro- ondes et recouvrez-les de papier cire.
-
Página 94: Defrost (Dégivrage)
DefroSt (DéGivraGe) Utilisez cette fonction pour décongeler les aliments indiqués dans le TAbLEAU DEFROST à la page 25. 1. Appuyez sur la touche Defrost. 2. Consultez le pavé Menu. Sélectionnez l’aliment voulu via les touches numériques. Ex: Appuyez sur 2 pour biftecks/côtelettes. 3. - Página 95 taBLeaU DefroSt aLiment qUantité DémarcHe À SUivre 1. Viande 0,5 - 2,0 lb Retirez les morceaux décongelés après chaque hachée signal sonore. Laissez reposer, à couvert, pour 5 à 10 minutes. 2. biftecks/ 0,5 - 3,0 lb Après chaque signal sonore, réarrangez les côtelettes morceaux et, s’il y a des morceaux chauds ou décongelés, recouvrez-les de petits morceaux...
-
Página 96: Manual Defrost
manUaL DefroSt (DéGivraGe manUeL) Si l’aliment que vous désirez décongeler ne figu e pas dans le TAbLEAU DEFROST ou si la quantité en est en dessous ou en dessus des limites in- diquées dans la colonne q UANTITÉ du TAbLEAU DEFROST, il faut faire un dégivrage manuel. -
Página 97: Reheat (Réchauffage)
reHeat (récHaUffaGe) Réchauffage calcule automatiquement le temps de réchauffage et l’allure requis pour les aliments indiqués dans le tableau ci-dessous. 1. Appuyez une fois sur la touche Reheat. 2. Consultez le pavé Menu. Sélectionnez l’aliment voulu via les touches numériques. Ex: Appuyez sur 2 pour des petits pains ou des muffin congelés. -
Página 98: Autres Caractéristiques
aUtreS caractériStiqUeS keeP Warm (GarDe aU cHaUD) Garde au chaud permet de garder l’aliment au chaud pour jusqu’à 30 minutes. emPLoi Direct 1. Appuyez sur la touche Keep Warm. 2. Entrez le temps voulu via les touches numériques. Pour 30 minutes, entrez 3000. -
Página 99: Help (Aide)
3. Appuyez sur la touche Start/Add-A-Minute. Remarque: • Si l’on appuie une fois sur la touche Power Level, s’affiche HIGH • Si la dernière séquence requiert une allure de 100%, il n’est pas nécessaire d’appuyer sur la touche Power Level. • Si vous désirez connaître l’allure pendant la cuisson, il ne faut qu’appuyer sur la touche Power Level. L’allure s’affiche aussi longtemps que vous maintenez une pression sur la touche Power Level. •... -
Página 100: Control Lock (Verrouillage Des Commandes)
controL Lock (verroUiLLaGe DeS commanDeS) La fonction de Control Lock prévient une utilisation non autorisée du tiroir par les enfants. On peut régler le Four DrawerMicro de manière à verrouiller ou à désactiver le tableau de commandes. PoUr verroUiLLer LOCK ON Appuyez sur la touche Control Lock pendant 3 secondes. -
Página 101: Mise En Marche Automatique
PoUr activer Le raPPeL De noUveaU 1. Appuyez trois fois sur la touche Setup/Help REMIND SIGNAL ON ? s’affiche TOUCH START 2. Appuyez sur la touche Start/Add-A-Minute. REMIND SIGNAL s’affiche miSe en marcHe aUtomatiqUe Si vous voulez programmer le Four DrawerMicro pour se mettre en marche automatiquement à... -
Página 102: Nettoyage Et Entretien
nettoYaGe et entretien eXtérieUr La surface extérieure est composée de métal enrobé et de plastique. Net- toyez l’extérieur avec du savon doux et de l’eau; rincez et essuyez avec un torchon doux. N’utilisez pas de nettoyant abrasif ni de nettoyant ménager. SUrface en acier inoXYDaBLe Il faut essuyer souvent l’extérieur avec un torchon doux et humide, puis le polir avec un torchon doux et sec pour maintenir la beauté... -
Página 103: Couvercle Du Guide D'ondes
GLiSSiÈre DU four Drawermicro Enlevez les miettes tombées dans les glissières du Four DrawerMicro. Es- suyez avec un torchon doux et sec de manière à ce que le Four DrawerMicro continue à ouvrir et à fermer facilement. coUvercLe DU GUiDe D’onDeS ATTENTION : Le couvercle du guide d’ondes, situé... -
Página 104: Avant D'appeler Un Technicien
AVANT D’APPELER UN TECHNICIEN Pour éviter des pertes de temps et des dépenses inutiles, veuillez effectuer les vérifications suivantes avant d’appeler un technicien ProBLÈme caUSe PoSSiBLe SoLUtion 1. Une partie ou • La fich du • Assurez-vous que la tout le Four Four DrawerMicro fiche est bien branché... - Página 105 ProBLÈme caUSe PoSSiBLe SoLUtion 5. L’affichage • Panne de courant. • Appuyez sur Clear clignote. (Remise à zéro) et réglez l’heure. Si le Four DrawerMicro fonctionnait, il faut pro- grammer la cuisson de nouveau. 6. De la vapeur sort • Pendant l’opération de la sortie d’air du four à...
-
Página 106: Garantie Du Four Drawermicro
Vous devrez alors fournir l'indication de modèle, le numéro de série et la date d'achat de l'appareil. Pour obtenir le nom de l'agence de service agrée par Viking Range, LLC la plus proche de chez vous, appelez le revendeur chez qui vous avez acheté, ou le service clientèle de Viking Range, LLC. - Página 107 Viking Range, LLC 111 Front Street Greenwood, Mississippi 38930 USA (662) 455-1200 For product information call 1-888-(845-4641) or visit our web site at vikingrange.com in the US or brigade.ca in Canada F20505 TINSEb492MRR3...