Tabla de contenido
Publicidad
Idiomas disponibles
Idiomas disponibles
Enlaces rápidos
Publicidad
Tabla de contenido

Manuales relacionados para Bimar FFFRoid VR20


Resumen de contenidos para Bimar FFFRoid VR20
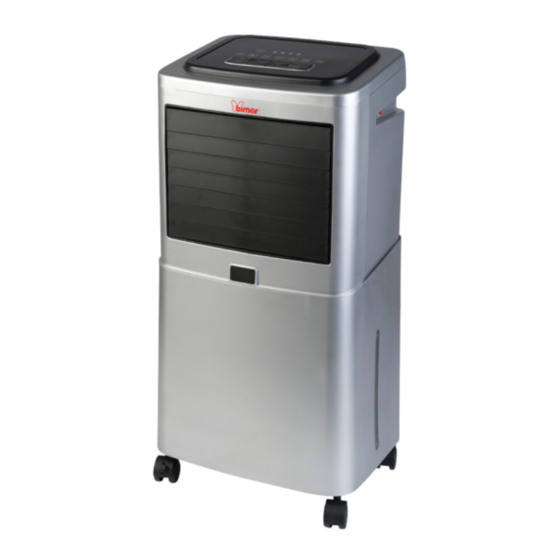
- Página 1 LIBRETTO ISTRUZIONI NOTICE D'INSTRUCTIONS INSTRUCTION BOOKLET BEDIENUNGSANLEITUNG FOLLETO DE INSTRUCCIONES VENTILATORE E RINFRESCATORE D’ARIA AIR COOLER FAN VENTILATEUR ET RAFRAICHISSEUR D'AIR LÜFTER UND LUFTERFRISCHER VENTILADOR Y ENFRIADOR DE AIRE type VR20/VR21.BI (mod.ACH-2010A) 1/41...
-
Página 2: Avvertenze Generali
Questo simbolo vi invita a leggere attentamente queste istruzioni prima dell’uso dell’apparecchio, ed eventualmente informare terzi, se necessario. Conservare il libretto per ulteriori consultazioni e per l’intera durata di vita dell’apparecchio. Se nella lettura di queste istruzioni d’uso alcune parti risultassero difficili nella comprensione o se sorgessero dubbi, prima di utilizzare il prodotto contattare l’azienda all’indirizzo scritto in ultima pagina. - Página 3 • Non infilare alcun utensile o le dita fra la maglie delle griglie di protezione della ventola. • Non utilizzare l’apparecchio con temperatura ambiente superiore a 40°C. • L’apparecchio può essere utilizzato da bambini di età non inferiore a 8 anni e da persone con ridotte capacità fisiche, sensoriali o mentali, o prive di esperienza o della necessaria conoscenza, purchè...
- Página 4 • Assicurarsi che la ventola funzioni correttamente: nel caso contrario spegnere l’apparecchio farlo controllare personale professionalmente qualificato. • Se l’apparecchio non è in funzione togliere la spina dalla presa di corrente. • Scollegare sempre l’apparecchio dalla presa di corrente prima di assemblare, smontare, riempire e svuotare il serbatoio, e prima di pulire i filtri e l’apparecchio.
- Página 5 - finestre - tessuti (tende, ecc.) o materiali volatili che possano ostruire la griglia di aspirazione; verificare che anche la parte anteriore sia sgombra da materiali volatili ( polvere, ecc.). • L’apparecchio non richiede opere di installazione, cioè pre-disposizione di attacchi elettrici/acqua/fissaggio/o altro, per il suo utilizzo.
- Página 6 -verificare che il cordone elettrico rimanga all’esterno del serbatoio e non subisca strozzature. -verificare che l’unità e il serbatoio siano correttamente connessi. -sistemato l’apparecchio nella posizione pressoché definitiva, verificare che sia ben stabile sul piano d’appoggio (che ovviamente deve essere orizzontale), e bloccare le ruote posteriori abbassando il fermo al fine di evitare che possa muoversi inavvertitamente.
-
Página 7: Pulizia E Manutenzione
Le funzioni del ventilatore possono essere azionate sia con la pulsantiera posta sul pannello comandi (1), che col telecomando (3). Il telecomando deve essere puntato nella direzione del pannello comandi. Inserire la spina nella presa di corrente. 1.Accendere l’interruttore principale (2) (pos.”I”) posto sul lato. 2. - Página 8 acqua, facendo attenzione a non danneggiarla; poi asciugarla perfettamente e riporlo nella propria sede. • Assicurarsi periodicamente che il filtro ad alveoli (20) non sia sporco. Nel caso lo fosse, toglierlo dalla propria sede e pulirlo con acqua con diluito un po’di detergente per uso domestico e tramite un pennello o una spazzola morbida pulire gli alveoli esterni.
-
Página 9: General Notices
necessary. Keep booklet Hndy for further use. If when reading this instructions manual certain parts should remain difficult to understand, or if there is any confusion, contact the company indicated on the last page before using the product. This symbol show: the appliance is class II equiment, for which the power cord plug is without of the pole to the ground. - Página 10 given supervision or instruction concerning use of the appliance in a safe way and if they understand the hazards involved. Children shall not play with the appliance. Cleaning and user maintenance shall not be made by children without supervision. • This appliance can be used by children aged 8 and older and by persons with reduced physical, sensory or mental capabilities or lack of experience and knowledge if they are properly supervised or if they have received instructions regarding the safe use of...
- Página 11 • If the electric cord is damaged, it has to be replaced by the supplier or an authorized service center or a professionally qualified, to avoid any risks. • Do not use the appliance with a timer or a programmer or with a system that can switch on the appliance automatically, to avoid risk of fire, since a fire risk exists if the heater is covered or positioned incorrectly.
- Página 12 - main unit (19) 1 piece, tank (4) 1 piece, castors with brake (6) 2 pieces and pivoting wheels (7) 2 pieces, remote control (3) 1 piece, gel ice "blocks" (18) 2 pieces. For assembly, refer to the pictures on pages 2 and 3 and proceed as follows: •...
- Página 13 the air picks up micro-droplets as it passes through it. The "cooler" function only works with water in the tank between the min and max values. These are the functions of the appliance: - 0/1 main switch (2), turns the appliance on and off - stand-by function (ON/OFF button) activates or stops the functions.
-
Página 14: Cleaning And Maintenance
4. When you press the MODE button (C) on the control panel or remote control, it changes to NATURE mode: the NATURE indicator light will turn on. 5. SLEEP mode is activated by pressing the MODE button on the control panel or remote control again: the SLEEP indicator light turns on. -
Página 15: Allgemeine Hinweise
• Clean the body with soft, slightly damp, cloth; do not use abrasive or corrosive products. • Do not immerse any part of the fan in water or other liquid: if this should happen, do not put your hand in the liquid, but first remove the plug from the socket. Carefully dry the appliance and make sure that all the electrical parts are dry: in the case of doubt, ask for professionally qualified help. - Página 16 • Dieses Gerät ist ausschließlich für den Gebrauch im Haushalt zum Ventilieren und Kühlen der Räume bestimmt und darf nur in der in dieser Bedienungsanleitung beschriebenen Weise gebraucht werden: Verwenden Sie es zu keinem anderen Zweck. • Das Gerät darf nicht in staubiger Umgebung oder mit besonders flüchtigen Substanzen (die die Luftzu- und -abfuhrgitter verstopfen könnten) noch in Bereichen mit hoher Luftfeuchtigkeit, entflammbaren Produkten oder im Außenbereich (unter freiem Himmel) eingesetzt...
- Página 17 • Das Gerät muss sich außerhalb der Reichweite von Kindern befinden. • Achtung! Beim Einsatz von Elektrogeräten sind immer die grundlegenden Sicherheitsvorkehrungen zu beachten, um Brandgefahr, Stromschlag und Verletzungen zu vermeiden. Noch mehr Vorsicht sollte man beim Einsatz von Elektrogeräten walten lassen, die einen Wasserbehälter enthalten: Sollte Wasser aus dem Behälter austreten, direkt den Netzstecker aus der Steckdose ziehen und sicherstellen, dass die elektrischen Bauteile des Geräts nicht nass sind.
- Página 18 • Schalten Sie das Gerät bei einem Defekt oder einer Störung ab und lassen Sie dasselbe von einer Fachkraft kontrollieren. INSTALLATION • Prüfen Sie nach dem Auspacken, ob das Gerät unversehrt ist; benutzen Sie im Zweifelsfall auf keinen Fall das Gerät und wenden Sie sich an eine Fachkraft. Lassen Sie das Verpackungsmaterial (Kunststoffbeutel, PS- Hartschaum, Nägel usw.) nicht in Reichweite von Kindern.
- Página 19 • Stellen Sie sicher, dass der Wasserabflussstutzen (10) korrekt befestigt bzw. in seine Aufnahme eingeschraubt ist. Füllen Sie den Wasserbehälter bis zum angegebenen maximalen Füllstand (Schriftzug MAX (16) auf dem Wasserbehälter) mit frischem, sauberem Wasser. Verwenden Sie ausschließlich Wasser, d.h. ohne Zusatz von Zusätzen (Aromastoffen, ätherischen Ölen oder Reinigern).
- Página 20 - 0/1 Hauptschalter (2), mit dem sich das Gerät ein- und ausschalten lässt - Standby/Betrieb (ON/OFF Taste), mit der sich die Funktionen zu- oder abschalten lassen - Normale/Sleep/Nature Lüftung (Mode-Taste): Normal= konstante Lüftung; Sleep= zu- bzw. abnehmende Lüftung, die im Wechsel auch ausgeschaltet wird; Nature= die Lüftung ändert ihre Intensität wie eine Brise.
- Página 21 5. Durch erneutes Drücken der "MODE" Taste auf der Bedienleiste oder der Fernbedienung wird die Betriebsart “SLEEP” aufgerufen: Die Kontrollleuchte “SLEEP” leuchtet. 6. Durch Drücken der “COOLER” Taste (G) auf der Bedienleiste oder der Fernbedienung wird die entsprechende Funktion aufgerufen: Die Kontrollleuchte “COOLER”...
-
Página 22: Avertissements Généraux
Erstes den Netzstecker aus der Netzsteckdose ziehen. Trocknen Sie das Gerät sorgfältig und vergewissern Sie sich, dass alle elektrischen Teile trocken sind: Wenden Sie sich im Zweifelsfall an einen Fachmann. • Die Lüftungsöffnungen des Motors müssen unbedingt frei von Staub und sonstigen Verunreinigungen gehalten werden. - Página 23 • L’appareil ne doit pas être utilisé dans les milieux poussiéreux ou avec des matériaux extrêmement volatils (ils pourraient obstruer les grilles), dans les milieux présentant une forte humidité, avec des produits inflammables ou à l’extérieur. Tout autre usage est considéré comme inopportun et dangereux.
- Página 24 • Attention : quand on utilise des appareils électrique il faut toujours respecter les consignes de sécurité de base afin d’éviter tout risque d’incendie, d’électrocution et de blessure. Il faut faire encore plus attention lorsqu’on utilise des appareils électriques munis d’un réservoir contenant de l’eau : si l’eau déborde, débrancher immédiatement l’appareil, vérifier que les parties électriques de l’appareil ne soient pas mouillées et si c’est le cas les sécher soigneusement et intégralement.
- Página 25 indispensable d'en utiliser, ils doivent être conformes aux normes de sécurité en vigueur et leur ampérage ne peut pas être inférieur au maximum de l'appareil. • Avant chaque utilisation, vérifier si l’appareil est en bon état, si le cordon électrique n’est pas endommagé : en cas de doute, il faut s’adresser au personnel qualifié...
- Página 26 -vérifier que l’unité et le réservoir soient raccordés correctement ; -après avoir placé l’appareil dans la position presque définitive, vérifier qu’il soit bien stable sur le plan d’appui (qui bien entendu doit être horizontal) et bloquer les roulettes arrière baissant frein afin d’éviter...
- Página 27 faut diriger la télécommande vers le tableau de commande. Brancher la fiche dans la prise de courant. 1. Allumer l’interrupteur principal (Pos. « I ») situé sur le côté. 2. Attention : pour fonctionnement de l’appareil, grille frontale doit être ouverte moins 45°) ;...
-
Página 28: Nettoyage Et Entretien
NETTOYAGE ET ENTRETIEN Attention : avant d'exécuter les opérations de nettoyage ordinaires, débrancher la fiche de la prise de courant. L’appareil fonctionne au mieux si les filtres et le réservoir sont propres. • Vérifier périodiquement que le filtre d’aspiration (11) à l’arrière ne soit pas obstrué... -
Página 29: Advertencias Generales
Este símbolo lo invita a leer atentamente las presentes instrucciones antes del uso del aparato, y eventualmente informar a terceros, si es necesario. Conservar el presente manual para ulteriores consultas. Si en la lectura del presente Manual de Instrucciones de Uso algunas partes resultasen difíciles de comprender o si surgieran dudas, antes de utilizar el producto contactar la empresa a la dirección indicada en la última página. - Página 30 - Personal de cocina en tiendas, oficinas y otros entornos de trabajo; - Casas rurales - Por los clientes en hoteles, moteles y otros entornos de tipo residencial - Cama y desayuno tipo ambientes • No introducir ningún utensilio ni los dedos entre las mallas de la red de protección del ventilador.
-
Página 31: Instalación
• No tirar del cable de alimentación o del propio aparato para sacar la clavija de la toma de corriente. • Si el cable de alimentación está estropeado, hacerlo cambiar por el fabricante, por su servicio de asistencia técnica o en todo caso por una persona con una calificación similar a fin de prevenir cualquier riesgo. - Página 32 Atención: desconectar siempre el artefacto de la toma de corriente antes de montarlo e introducir agua en el depósito. El embalaje contiene: -unidad principal (19) 1 pza. -deposito (4) 1 pza. -ruedas pivotantes con freno (6) 2 pzas. -ruedas pivotantes (7) 2 pzas.., -telecomando (3) 1 pza.
- Página 33 la bomba, y enfría el aire cuando lo atraviesa: la boquilla de drenaje del agua debe estar hacia abajo y se debe introducir en la ranura rectangular. • Introducir en el telecomando 2 baterías tipo AAA, respetando la polaridad. Abrir el compartimiento posterior, introducirlas, cerrar el compartimiento.
-
Página 34: Limpieza Y Mantenimiento
2. Atención: para el funcionamiento del artefacto, la rejilla frontal debe estar abierta menos 45°); levantar manualmente la rejilla hacia arriba como muestra la fotografía al lado: se escuchará un “clic” que indica que el artefacto se encuentra en stand-by. 3. - Página 35 presionando las 2 pestañas (12) , y debe ser limpiado con un cepillo o con agua , con cuidado de no dañarlo , y luego seque completamente y vuelva a colocarlo en su alojamiento. • Verifique periódicamente que el filtro de espuma (20) no está sucio . Si es así, sacarlo de su alojamiento y limpiarlo con un poco de detergente diluido con agua para el uso doméstico y el uso de un pincel o un cepillo suave para limpiar las cavidades externas.
- Página 36 36/41...
- Página 37 37/41...
- Página 38 1. Pannello comandi 1. Control panel 1. Bedienleiste oder 2. Interruttore 2. Main switch 2. 0/1 Hauptschalter generale 3. Remote control 3. Fernbedienung 3. Telecomando 4. Tank 4. Wasserbehälter 4. Serbatoio 5. Trasparent 5. Wasserstand 5. Livello acqua level 6. Laufrollen mit 6.
- Página 39 1) Tableau 1) Panel commande 2) Interruptor principal 2) 0/1 Interrupteur 3) Telecomando général 4) Deposito 3) Télécommande 5) Nivel 4) Réservoir 6) Ruedas pivotantes con freno 5) Niveau 7) Ruedas pivotantes 6) Roulettes 8) Rejilla frontal pivotantes avec 9) Rejilla frein 10) Drenaje del agua 7) Roulettes...
- Página 40 Prescrizioni relative alle informazioni/Information requirements/ Informations/Informationsanforderungen/ Disposiciones relativas a las informaciones Descrizione/Description/ Simbolo/Sy Valore/Value Unità/Unit/ Description/ Beschreibung/ mbol/ Valeur/ Unité/ Descripción Symbol/ Wert/Valor Einheit/ Símbolo Símbolo Portata massima d’aria/Maximum 8.40 m³/min flow rate/ Puissance ventilation maximale/ Maximaler Luftdurchsatz Lüfters/ Capacidad máxima de aire Potenza assorbita 59.81...
- Página 41 Via G.Amendola, 16/18 25019 Sirmione (BS) – ITALY www.bimar-spa.it e-mail: info@bimar-spa.it Servizio clienti Bimar: 8955895542 VR20&VR21.BI_I.B._151118_rev01 41/41...