Tabla de contenido
Publicidad
Enlaces rápidos
CLIHS60 3663602842705
NOTE: A4 and has been resized to A5
SEPARATIONS JOB INFO
PID #: 00001
Agency job #: 10293
Product Description: Chimney
Barcode: CLIHS60 3663602842705
PROCESS
BLACK
VERSION #
1
R
08/08/17
16/08/17
TjB
DLS
This le is the property of King sher Group Plc. No copying, alteration or amendment is permitted without
written authorisation from the King sher Brand Team.
Brand: Cooke & Lewis
Brand Contact: xxxxx@xxxxx.com
Vendor: Asian Global
No. of new line drawings: xx
Page size A5 / No. of printed pages 60
3
R
5
6
04/10/17
24/10/17
00/00/17
00/00/17
NH
TjB
INITIALS
INITIALS
7
8
00/00/17
00/00/17
INITIALS
INITIALS
V1.1
V40318
Publicidad
Tabla de contenido

Manuales relacionados para Cooke & Lewis CLIHS60


Resumen de contenidos para Cooke & Lewis CLIHS60
- Página 1 PID #: 00001 Brand: Cooke & Lewis Agency job #: 10293 Brand Contact: xxxxx@xxxxx.com Product Description: Chimney Vendor: Asian Global Barcode: CLIHS60 3663602842705 No. of new line drawings: xx Page size A5 / No. of printed pages 60 PROCESS BLACK VERSION #...
- Página 2 ÖNEMLI - [01] x1 [02] x1 [03] x1 [05] x2 [06] x2 [07] x4 [08] x8 [09] x2 [04] x4 (Do12 x Di3 x t4 mm) (3 x 12mm) (4 x 32mm) (4 x 12mm) (Do15 x Di6 x t1 mm)
- Página 3 Not included Non inclus Nu este inclus No incluido VENT PACK (Ø125mm) CARBFILT1 Não incluída 3663602843146 3663602843085 Preparation Préparation Przygotowanie Vorbereitung Preparación Preparação Installation Installation Installation Instalare Utilisation Benutzung Utilizare ș ț Cuidados y Mantenimiento...
- Página 4 Installation Installation Installation Instalare This appliance must be installed correctly by a qualifi ed person, strictly following the manufacturer’s instructions. Warning: Danger of electric shock! The power supply must be cut off before the appliance is installed completely. Only a qualifi ed person in compliance with the instructions provided can install the appliance. The manufacturer declines all responsibility for improper installation, which may harm persons and animals and cause damage.
- Página 5 Urządzenie może zamontować wyłącznie wykwalifi kowana osoba, postępując zgodnie z dostarczoną instrukcją. Producent nie ponosi żadnej odpowiedzialności za nieprawidłowy montaż, który może spowodować obrażenia u ludzi i zwierząt oraz uszkodzenia mienia. Sprawdzić zawartość opakowania i upewnić się, że zawiera części wymienione w specyfi kacji. Należy wybrać...
- Página 6 Проверьте комплект поставки и убедитесь в наличии всех указанных деталей. Выберите подходящее место для установки прибора. Во избежание травм и повреждения самого прибора соблюдайте необходимые меры предосторожности при установке и эксплуатации. Важно. Если в помещении установлен отопительный прибор без уравновешенной тяги, например...
- Página 7 Este dispositivo cuenta con una placa de especifi caciones que muestra toda la información de identifi cación necesaria para realizar pedidos de piezas de recambio. Si vende, regala o deja instalado el aparato al mudarse de casa, asegúrese de pasar también este manual, de modo que el nuevo propietario pueda familiarizarse con el aparato y las advertencias de seguridad.
- Página 8 VENT PACK CARBFILT1 (Ø125mm) CARBFILT1 CARBFILT1 VENT PACK (Ø125mm) Choose a type of installation: Ducted option A (extraction to the outside) or Recirculation option B (no extraction to the outside). This appliance is for installation on a wall only. Choisir un type d’installation : option de conduit A (évacuation vers l’extérieur). option de recyclage B (pas d’évacuation vers l’extérieur).
- Página 9 Mark the wall with the hole positions as shown in the diagram. The fi xings supplied are suitable for solid walls only. When fi xing to any other type of wall use suitable alternative fi xings. Warning: Caution! Before drilling it is extremely important to check the wall for hidden pipes, electrical cables etc using an appropriate detection device.
- Página 10 Markieren Sie die Bohrungspositionen gemäß Zeichnung an der Wand. Die mitgelieferten Befestigungsmittel eignen sich ausschließlich für solide Wände. Verwenden Sie bei der Montage an anderen Wandtypen alternative Befestigungsmittel. Warnung: Achtung! Vor dem Bohren muss die Wand unbedingt auf in der Wand verlaufende Rohre, Elektrokabel etc.
- Página 11 [07] [04] [07] x2 (4 x 32mm) [04] x4...
- Página 12 WARNING: Use only the same size of fi ttings and mounting screws as recommended in this instruction manual. Failure to follow these instructions may result in electrical hazards. AVERTISSEMENT : n’utiliser que des raccords et des vis de fi xation de même taille tels que recommandés dans ce manuel d’instructions.
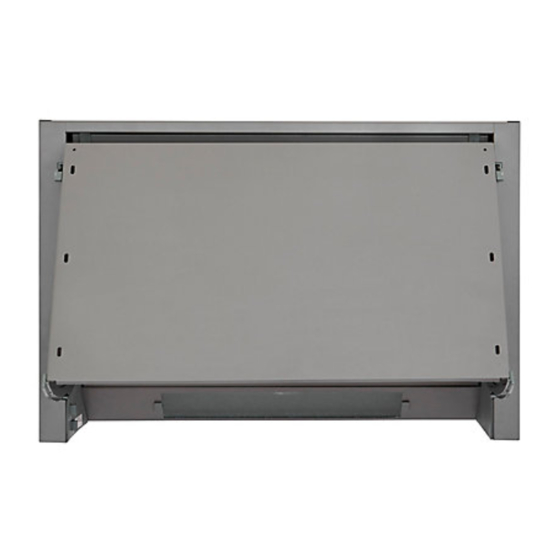
- Página 13 Open the front panel and push the two catches (A) upwards and remove the grease fi lter. Pull the locking pin B, on both sides of the front panel, until they stop, and pull the front panel forward until it is released from its guide rails and separated from the hood. Note: Do not pull out the side pins too far, to avoid damage to the mechanism.
- Página 14 Вытяните фиксирующие штифты (B) с обеих сторон передней панели до их остановки, а затем снимите переднюю панель с вытяжки, потянув ее вперед и сняв с направляющих. Примечание. Не вытягивайте боковые штифты слишком далеко, чтобы не повредить механизм. Deschideţi panoul frontal şi împingeţi cele două ancore (A) în sus şi îndepărtaţi fi ltrul de grăsime. Trageţi de ştiftul de blocare B pe ambele laturi ale panoului frontal până...
- Página 15 598mm 56mm 120mm [08] x6 (4 x 12mm) 120mm 505mm Remount the hood front panel onto the hood with the decorative board now attached. Remonter le panneau avant sur la hotte avec le panneau décoratif désormais fi xé. Zamontować ponownie panel przedni w okapie wraz z przymocowaną już płytą ozdobną. Bringen Sie die Frontplatte wieder an der Haube mit der nun befestigten Dekorplatte an.
- Página 16 Use the 2 adjustment screws on the top of the hood to adjust the hood - front to back - to line up the hood fl ush with your cabinet doors. Tighten the 2 screws in the desired position. Utiliser les 2 vis de réglage sur le dessus de la hotte pour régler la hotte (à l’avant et à l’arrière) et l’aligner avec les portes de vos éléments de cuisine.
- Página 17 [03] [03] x1 0 - 50mm [03] 55 - 85mm Take the hood off the wall and measure from the back of the hood to the end of the adjustable bracket. (A) If the space at the back of the hood is between 0 - 50mm, put the largest section of the bracket fi...
- Página 18 Quite la campana de la pared y mida desde la parte posterior de la campana hasta el fi nal del soporte ajustable. (A) Si el espacio en la parte posterior de la campana está entre 0 - 50 mm, fi je a la pared la sección más grande del soporte.
- Página 19 [07] x2 (4 x 32mm) [07] [05] x2 (Do12 x Di3 x t4 mm) [06] x2 (3 x 12mm)
- Página 20 [08] x2 (4 x 12mm) [09] x2 (Do1 5 x Di 6 x t1 mm) [08] x 2 + [09] x 2 (A) Remove the grill. (B) Fix the cabinet screws on the side. Make sure the screw length is compatible with the kitchen cabinet thickness.
- Página 21 Sólo para la opción con conducto. [02] [02] x1 VENT PACK (Ø125mm)
- Página 22 Only for recirculation option. Uniquement pour l'option de recyclage. Nur bei Option mit Umwälzung. Sólo para la opción de recirculación. Apenas para a opção de recirculação. CARBFILT1...
- Página 23 Installation All installation must be carried out by a competent person or qualifi ed electrician. Before connecting the mains supply ensure that the mains voltage corresponds to the voltage on the rating plate. Direct Connection The appliance must be connected directly to the mains using an omnipolar circuit breaker with a minimum opening of 3 mm between contacts.
- Página 24 Installation Toute l’installation doit être effectuée par une personne compétente ou un électricien qualifi é. Avant de raccorder le câble d’alimentation, s’assurer que la tension de secteur correspond à la tension indiquée sur la plaque signalétique. Raccordement direct L’appareil doit être raccordé directement au secteur à l’aide d’un disjoncteur omnipolaire avec une ouverture minimale de 3 mm entre les contacts.
- Página 25 Montaż musi zostać wykonany przez osobę kompetentną lub wykwalifi kowanego elektryka. Przed podłączeniem do sieci upewnić się, czy parametry zasilania odpowiada napięciu podanym na tabliczce znamionowej. Bezpośrednie podłączenie Urządzenie należy podłączyć bezpośrednio do sieci zasilającej, korzystając z wyłącznika wielobiegunowego z minimalnym rozwarciem między stykami wynoszącym 3 mm. Monter musi upewnić...
- Página 26 Installation Die gesamte Installation muss von einer fachkundigen Person oder einem ausgebildeten Elektriker durchgeführt werden. Stellen Sie vor dem Anschließen an die Stromversorgung sicher, dass die Netzspannung zur Spannungsangabe auf dem Typenschild passt. Direkter Anschluss Das Gerät muss mithilfe eines mehrpoligen Leistungsschalters mit einem Mindestabstand zwischen den Kontakten von 3 mm direkt an das Netz angeschlossen werden.
- Página 27 Установка должна выполняться компетентным лицом или квалифицированным электриком. Перед подключением прибора к сети удостоверьтесь, что напряжение сети соответствует напряжению, указанному в паспортной табличке прибора. Прямое подключение Прибор должен быть подключен напрямую к сети через многополюсный автоматический выключатель с минимальным расстоянием между контактами 3 мм. Правильность...
- Página 28 Instalarea Instalarea trebuie să fi e realizată de o persoană competentă sau un electrician califi cat. Înainte de conectarea la reţeaua electrică, asiguraţi-vă că tensiunea reţelei corespunde tensiunii specifi cate pe plăcuţă. Legătură directă Aparatul trebuie conectat direct la reţea cu ajutorul unui disjunctor monopolar cu o deschidere minimă între contacte de 3 mm.
-
Página 29: Instalación
Instalación Toda la instalación deberá ser realizada por una persona competente o un electricista cualifi cado. Antes de conectar la corriente eléctrica asegúrese de que la tensión de la red se corresponde con la de la placa de características técnicas. Conexión directa El aparato debe conectarse directamente a la red eléctrica mediante un disyuntor omnipolar con una apertura mínima de 3 mm entre contactos. - Página 30 Instalação A instalação tem de ser efetuada por uma pessoa competente ou por um eletricista qualifi cado. Antes de ligar a rede elétrica, certifi que-se de que a tensão da rede corresponde à tensão na placa de classifi cação. Ligação direta O aparelho tem de ser ligado diretamente à...
- Página 31 Montaj Montajın tamamı, yetkili bir kişi veya uzman bir elektrik tesisatçısı tarafından yapılmalıdır. Ana güç kaynağını bağlamadan önce ana voltajın, anma değeri plakasındaki voltajla uyumlu olduğundan emin olun. Doğrudan Bağlantı Cihaz, omnipolar devre kesici kullanılarak kontaklar arasında minimum 3 mm’lik bir açıklıkla doğrudan ana güç...
-
Página 32: Before You Start
Utilisation Benutzung Utilizare Before you start WARNING: Read the instructions before using the appliance. Switch on the appliance at the switched fused connection unit. The appliance is ready for use. Function & settings The light and the fan motor will not operate if the outer cover is in the closed position. Pull open the outer door and the control switches can be seen on the left side panel. -
Página 33: Lamp Replacement
ș ț Cuidados y Mantenimiento Lamp replacement FUSE 10’ WARNING: Allow ten minutes for the bulb to cool before handling. - Página 34 Carbon fi lter replacement Charcoal fi lters: Replace every 3 months. 3 MONTHS 1x Carbon fi lter, model number CARBFILT1, available via the customer helpline - see end of Care & maintenance section for details. Aluminium grease fi lter cleaning Aluminium fi...
-
Página 35: Avant De Commencer
Utilisation Benutzung Utilizare Avant de commencer AVERTISSEMENT : lire les instructions avant d’utiliser l’appareil. Mettre l’appareil en marche sur l’unité de raccordement avec fusible. L’appareil est prêt à l’emploi. Fonctionnement et réglages La lampe et le moteur du ventilateur ne fonctionnent pas si le capot extérieur est en position fermée. Ouvrir la porte extérieure pour accéder aux interrupteurs placés sur le panneau latéral gauche. -
Página 36: Remplacement De La Lampe
ș ț Cuidados y Mantenimiento Remplacement de la lampe FUSE 10’ AVERTISSEMENT : laisser l’ampoule refroidir pendant 10 minutes avant de la manipuler. -
Página 37: Remplacement Du Fi Ltre À Charbon
Remplacement du fi ltre à charbon Filtres à charbon : remplacer tous les 3 mois. 3 MOIS 1 fi ltre à charbon, numéro de modèle CARBFILT1, disponible via l’assistance téléphonique (voir la fi n de la section Entretien pour plus de détails). -
Página 38: Przed Rozpoczęciem Użytkowania
Utilisation Benutzung Utilizare Przed rozpoczęciem użytkowania OSTRZEŻENIE: Przed rozpoczęciem korzystania z urządzenia należy zapoznać się z instrukcją obsługi. Włączyć urządzenie za pomocą wyłącznika zabezpieczonego bezpiecznikiem. Urządzenie jest gotowe do użytku. Funkcje i ustawienia Oświetlenie i silnik wentylatora nie będą działać, jeśli zewnętrzna osłona pozostanie w położeniu zamknięcia. -
Página 39: Wymiana Oświetlenia
ș ț Cuidados y Mantenimiento Wymiana oświetlenia FUSE 10’ OSTRZEŻENIE: Przed rozpoczęciem pracy odczekać 10 minut na ostygnięcie żarówki. -
Página 40: Wymiana Fi Ltra Węglowego
Wymiana fi ltra węglowego Filtry węglowe: Należy wymieniać co 3 miesiące. 3 MIESIĄCE 1x fi ltr węglowy, numer modelu CARBFILT1, jest dostępny za pośrednictwem infolinii dla klientów – aby dowiedzieć się więcej patrz koniec rozdziału ‘Utrzymanie i konserwacja’. Czyszczenie aluminiowego fi ltra odtłuszczającego Filtry aluminiowe: Aby uniknąć... -
Página 41: Vor Dem Start
Utilisation Benutzung Utilizare Vor dem Start WARNUNG: Lesen Sie die Anleitung, bevor Sie das Gerät verwenden. Schalten Sie das Gerät an der geschalteten und abgesicherten Anschlusseinheit ein. Das Gerät ist betriebsbereit. Funktion und Einstellung Licht und Absauggebläse arbeiten nicht, solange die äußere Abdeckung geschlossen ist. Öffnen Sie die äußere Tür;... - Página 42 ș ș ț ț Cuidados y Mantenimiento Cuidados y Mantenimiento Leuchtmittel ersetzen FUSE 10’ WARNUNG: Lassen Sie das Leuchtmittel zehn Minuten lang abkühlen, bevor Sie es anfassen.
- Página 43 Kohlefi lter austauschen Holzkohlefi lter: Ersetzen Sie die Filter alle 3 Monate. 3 MONATE 1 Kohlefi lter, Modellnummer CARBFILT1, erhältlich über die Kunden-Hotline – nähere Informationen siehe das Ende des Abschnitts Pfl ege & Wartung. Aluminium-Fettfi lter reinigen Aluminium-Filter: Nehmen Sie einmal monatlich eine Reinigung vor, um einen Brand zu verhindern. Nehmen Sie die Filter und auf der Rückseite die Metallklammern heraus, mit denen die Filter befestigt sind.
-
Página 44: Перед Началом Эксплуатации
Utilisation Benutzung Utilizare Перед началом эксплуатации ПРЕДУПРЕЖДЕНИЕ. Перед использованием прибора ознакомьтесь с инструкцией. Чтобы включить прибор, нажмите на кнопку выключателя. Прибор готов к работе. Функциональность и настройки Подсветка и вентилятор не будут работать, если передняя панель находится в закрытом положении. Откройте... -
Página 45: Замена Лампочки
ș ț Cuidados y Mantenimiento Замена лампочки FUSE 10’ ПРЕДУПРЕЖДЕНИЕ. После выключения оставьте лампочку на 10 минут, чтобы она остыла. -
Página 46: Замена Угольного Фильтра
Замена угольного фильтра Угольные фильтры: меняйте каждые три месяца. 3 МЕСЯЦА 1x угольный фильтр с номером модели CARBFILT1 можно приобрести через Центр обслуживания клиентов (см. в конце раздела «Уход и обслуживание»). Очистка алюминиевого жироулавливающего фильтра Алюминиевые фильтры: во избежание возгораний тщательно очищайте фильтры раз в... - Página 47 Соответствует всем требуемым Техническим регламентам Таможенного союза . Производитель \ продавец товара не несет ответственности за причинение ущерба здоровью или имуществу вследствие эксплуатации товара по истечению срока службы. Дата изготовления (месяц.год) см. на упаковке. Данный прибор не предназначен для использования детьми, а так же лицами, имеющими физические, нервные...
-
Página 48: Înainte De A Începe
Utilisation Benutzung Utilizare Înainte de a începe AVERTISMENT: Citiţi instrucţiunile înainte de utilizarea aparatului. Porniţi aparatul de la unitatea de conectare cu siguranţă comutată. Aparatul este gata de utilizare. Funcţionare şi setări Porniţi aparatul de la unitatea de conectare cu comutator de siguranţă. Aparatul este gata de utilizare. Deschideţi uşa exterioară... -
Página 49: Înlocuirea Becului
ș ț Cuidados y Mantenimiento Înlocuirea becului FUSE 10’ AVERTISMENT: Lăsaţi becul să se răcească zece minute înainte de manipulare. -
Página 50: Înlocuirea Fi Ltrului De Carbon
Înlocuirea fi ltrului de carbon Filtre de carbon: Înlocuiţi la fi ecare 3 luni. 3 LUNI 1 x fi ltru de carbon, număr model CARBFILT1, disponibil prin linia de asistenţă clienţi - consultaţi sfârşitul secţiunii Îngrijire şi întreţinere pentru detalii. Curăţarea de grăsime fi... -
Página 51: Antes De Empezar
Utilisation Benutzung Utilizare Antes de empezar ADVERTENCIA: Lea las instrucciones antes de utilizar el aparato. Encienda el aparato en la unidad de conexión conmutada con fusible. El aparato está listo para su uso. Funcionamiento y ajustes La luz y el motor del ventilador no funcionarán si la tapa exterior está en la posición cerrada. Tire para abrir la puerta exterior y los interruptores de control pueden verse en el panel lateral izquierdo. -
Página 52: Sustitución De La Lámpara
ș ț Cuidados y Mantenimiento Sustitución de la lámpara FUSE 10’ ADVERTENCIA: Espere diez minutos hasta que la bombilla se enfríe antes de manipularla. -
Página 53: Sustitución Del Fi Ltro De Carbono
Sustitución del fi ltro de carbono Filtros de carbón: Sustituir cada tres meses. 3 MESES Un fi ltro de carbono, número de modelo CARBFILT1, disponible a través de la línea de atención al cliente - consulte los detalles al fi nal de la sección Cuidados y mantenimiento. -
Página 54: Antes De Começar
Utilisation Benutzung Utilizare Antes de começar AVISO: Leia as instruções antes de utilizar o aparelho. Ligue o aparelho na unidade de ligação com fusível e interruptor. O aparelho está pronto para ser utilizado. Função e confi gurações A luz e o motor do ventilador não funcionam se a tampa exterior estiver na posição fechada. Abra a porta exterior e poderá... - Página 55 ș ț Cuidados y Mantenimiento Substituição de lâmpada FUSE 10’ AVISO: Aguarde dez minutos até que a lâmpada arrefeça antes de a manusear.
-
Página 56: Substituição Do Fi Ltro De Carbono
Substituição do fi ltro de carbono Filtros de carvão: Substituir de 3 em 3 meses. 3 MESES 1 fi ltro de carbono, número de modelo CARBFILT1, disponível através da linha de atendimento ao cliente; consulte a parte fi nal da secção Cuidados e manutenção para obter mais detalhes. -
Página 57: Çalıştırmadan Önce
Utilisation Benutzung Utilizare Çalıştırmadan önce UYARI: Cihazı kullanmadan önce talimatları okuyun. Anahtarlamalı sigortalı bağlantı ünitesinden cihazı açın. Cihaz kullanıma hazırdır. Fonksiyon ve Ayarlar Lamba ve aspiratör motoru, dış kapak kapalı konumdayken çalışmaz. Kontrol tuşları, dış kapak çekerek açıldığında sol yan panelde görülebilir. Üstteki sürgülü... - Página 58 ș ț Cuidados y Mantenimiento Lamba değiştirme FUSE 10’ UYARI: Ampulü çıkarmadan önce soğuması için on dakika bekleyin.
- Página 59 Karbon fi ltre değiştirme Kömür fi ltreleri: Her 3 ayda bir değiştirin. 3 AY CARBFILT1 model numaralı 1 adet Karbon fi ltre, müşteri yardım hattı aracılığıyla temin edilebilir. Ayrıntılar için Bakım ve Muhafaza bölümünün sonuna bakın. Alüminyum yağ fi ltresi temizliği Alüminyum fi...
- Página 60 Distribuidor: Distributor: Distribuidor: Manufacturer, Fabricant, Hersteller, Producator, Fabricante: Distributeur: Dystrybutor: Distribuitor:...